Active Directory Sync Page
The Active Directory Sync page within the Integrations interface lists the domains that are synced to theNetwrix Threat Manager Reporting Module database. The sync operation gets all information about an Active Directory environment (users, groups, hosts, etc).
Use the gear icon in the upper right corner of the console to open the Configuration menu. Then select Integrations to open the Integrations interface.
Click Active Directory Sync in the navigation pane to view a list of the already added Active Directory domains, if any. Each added domain represents a sync policy.
A service named StealthDEFEND Active Directory Service continuously runs to collect data for the specified domain(s). It evaluates the USN value of an object and syncs when the object changes. The table provides the following information:
-
Name – Name of the domain. This may be either the domain DNS name or domain controller hostname.
-
Enabled – The icon indicates the enabled state:
- Checkmark icon – Enabled
- X icon – Disabled
-
Profile – Name of the Credential Profile assigned to the policy. As mentioned earlier, each added domain represents a sync policy.
-
Last Sync Start – Date timestamp when the task started for the most recent sync
-
Last Sync Status – Event status for the most recent sync task
To view policy details or make modifications, select a domain from the table or under Active Directory Sync in the navigation pane.
Add an Active Directory Sync Policy
NOTE: Prior to adding an Active Directory Sync policy, you must first configure a Credential Profile with credentials properly provisioned for running the sync operation for the domain. See the Reporting Module Server Requirements topic for the permissions. See the Credential Profile Page topic for additional information on creating a profile.
Follow the steps to add a domain/Active Directory sync policy.
Step 1 – Use the gear icon in the upper right corner of the console to open the Configuration menu. Then select Integrations to open the Integrations interface.
Step 2 – On the Integrations interface, click Add New Integration in the navigation pane. The Add New Integration window opens.
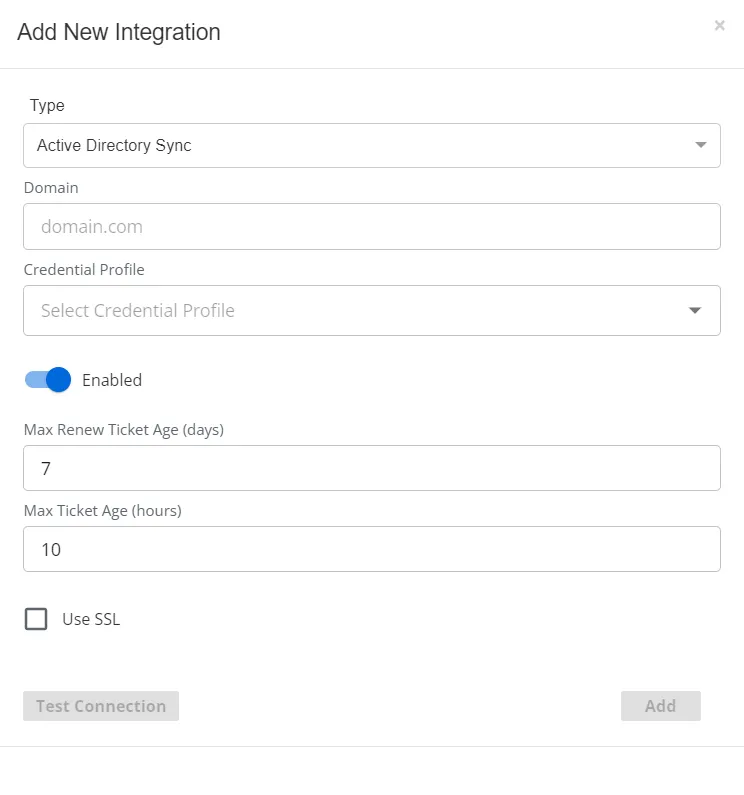
Step 3 – In the Type drop-down menu, select Active Directory Sync.
Step 4 – Enter the following information:
- Domain – Enter the domain DNS name or domain controller hostname in the required format of [DOMAIN.COM], e.g. NT-DC03.NWXTech.com
- Credential Profile – Select the Credential Profile by name from the drop-down menu. This was pre-created in the Credential Profiles page.
- Enabled / Disabled – Toggle indicates if the policy is enabled to run the sync service. By default it is set to Enabled.
- Max Renew Ticket Age (days) – The value indicates the maximum number of days of the Renew Ticket Age for the domain. This value must match the domain configuration. See the Microsoft Max-Renew-Age attribute article for additional information. The default value is 7 days; modify the value by typing in the textbox.
- Max Ticket Age (hours) – The value indicates the maximum number of hours of the Ticket Age for the domain. This value must match the domain configuration. See the Microsoft Max-Ticket-Age attribute article for additional information. The default value is 10 hours; modify the value by typing in the textbox.
- Use SSL – Check the box to enable SSL for secure communication with the domain. See the Microsoft 5.1.1.2 Using SSL/TLS article for additional information.
Step 5 – Click Test Connection to ensure connection to the domain. This will take a moment. Then a message will appear in the upper right corner of the console indicating a successful or failed connection.If successful, move on to the next step. If failed, recheck your entries for error and repeat this step until a successful connection is established.
Step 6 – Click Add. The Add New Integration window closes.
The domain or domain controller (the Domain value supplied in Step 4) is listed in the Integrations navigation pane. Repeat the process to add additional domains.
Active Directory Sync Policy Details
Follow the steps to view the details of an Active Directory sync policy.
Step 7 – Use the gear icon in the upper right corner of the console to open the Configuration menu. Then select Integrations to open the Integrations interface.
Step 8 – On the Integrations interface, click Active Directory Sync in the navigation pane to view a list of the already created Active Directory Sync policies, if any. A policy is represented by the domain for which it is created.
Step 9 – Select a domain from the table or the navigation pane to view the details of the Active Directory Sync policy created for that domain.
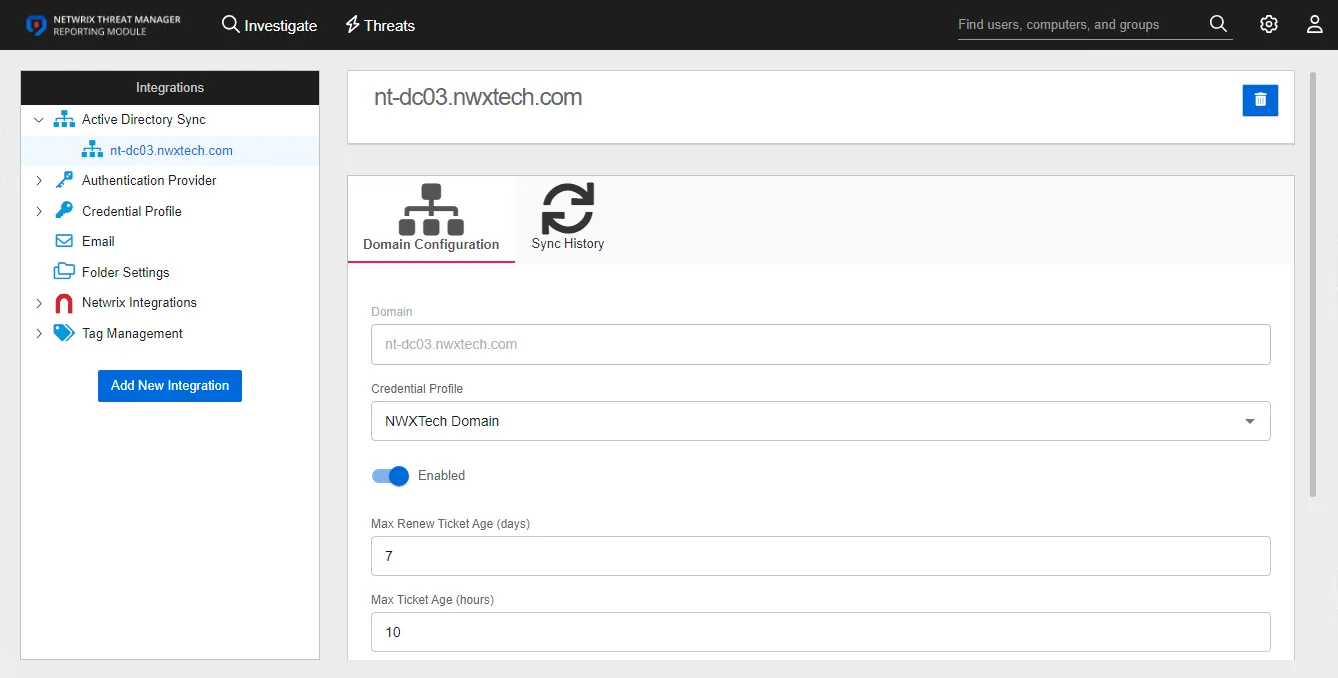
The following information is displayed for a sync policy:
-
Name – The box at the top displays the name of the domain
- Delete – The delete button in the upper right corner of the box opens the Delete Domain window to confirm the action
-
Domain Configuration – Displays the sync policy settings entered for the selected domain. These settings can be modified on this tab. See the Domain Configuration Tab topic for additional information.
-
Sync History – Displays the information on each synchronization event. See the Sync History Tab topic for additional information.
Domain Configuration Tab
The Domain Configuration tab displays the sync policy settings entered for the selected domain. With the exception of the domain itself, these settings can be updated as needed.
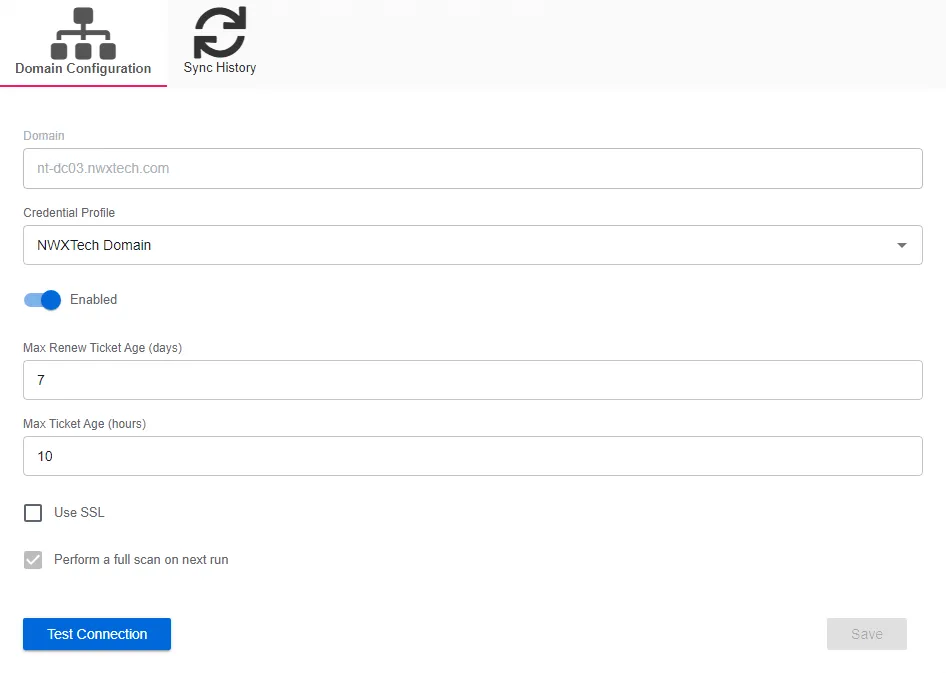
The Domain Configuration tab displays the following settings:
- Domain – Displays the domain DNS name or domain controller hostname in the required format of [DOMAIN.COM], e.g. NT-DC03.NWXTech.com
- Credential Profile – Displays the Credential Profile by name
- Enabled / Disabled – Toggle indicates if the policy is enabled to run the sync service
- Max Renew Ticket Age (days) – Displays the value indicates the maximum number of days of the Renew Ticket Age for the domain. This value must match the domain configuration. See the Microsoft Max-Renew-Age attribute article for additional information.
- Max Ticket Age (hours) – Displays the value indicates the maximum number of hours of the Ticket Age for the domain. This value must match the domain configuration. See the Microsoft Max-Ticket-Age attribute article for additional information.
- Use SSL – Indicates whether you have enabled SSL for secure communication with the domain. See the Microsoft 5.1.1.2 Using SSL/TLS article for additional information.
- Perform a full scan on next run – Indicates whether the next sync will only look for domain changes or run a full scan of the domain. This option is always enabled.
- Test Connection – Click Test Connection to ensure connection to the domain. This will take a moment. Then a message will appear in the upper right corner of the console indicating a successful or failed connection.
The Save button is enabled when any settings are modified. Click it to commit the changes before leaving the page.
Sync History Tab
The Sync History tab displays the information on each synchronization event. This includes general information about user, group, and computer objects within the selected domain.
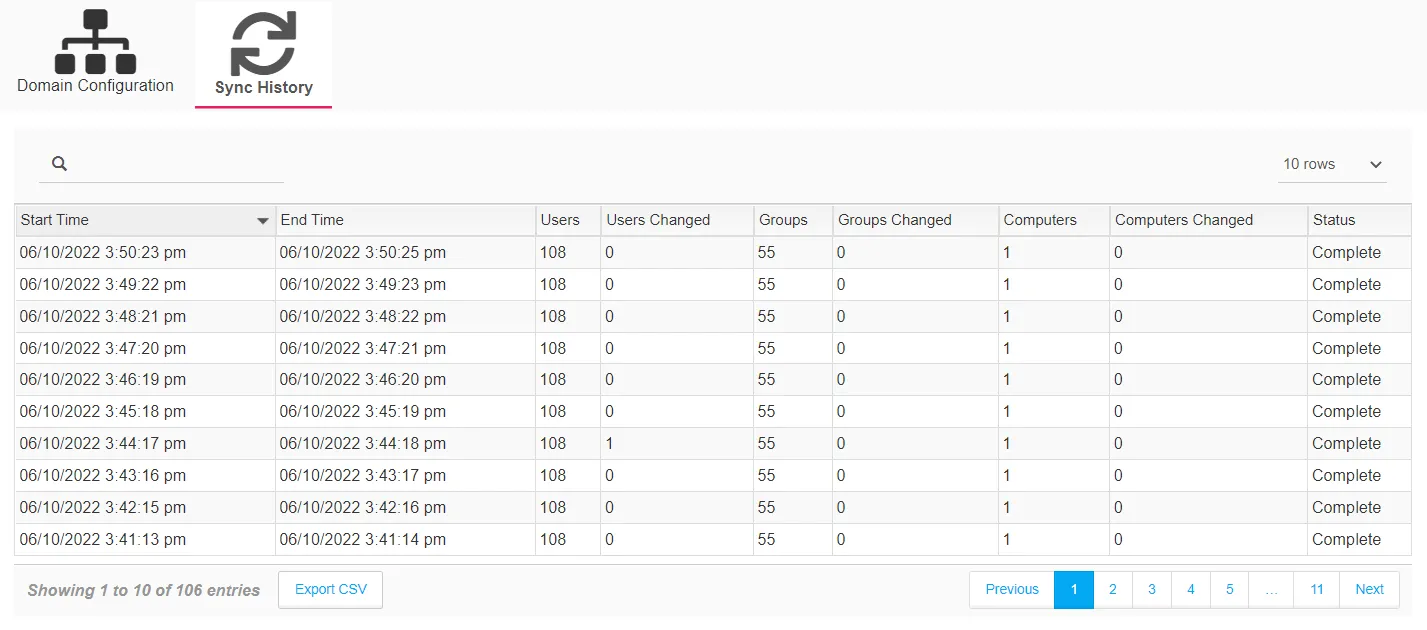
The table provides the following information:
- Start Time – Date timestamp when the task started
- End Time – Date timestamp when the task completed
- Users – Number of user objects in the domain
- Users Changed – Number of user objects with changes detected since the last sync
- Groups – Number of group objects in the domain
- Groups Changed – Number of group objects with changes detected since the last sync
- Computers – Number of computer objects in the domain
- Computers Changed – Number of computer objects with changes detected since the last sync
- Status – Event status for the sync task
The table is designed to display 10 records at a time, by default. However, you can set this to 50, 100, or 1,000 rows with the drop-down menu above the right corner of the table. There is a search box above the left corner of the table. Page navigation buttons are below the table. You can also export the data from the current page using the Export CSV button.
Modify Active Directory Sync Policy
Follow the steps to modify the Active Directory Sync policy for the selected Active Directory domain.
Step 1 – On the Integrations interface, click Active Directory Sync in the navigation pane to view a list of the already created Active Directory Sync policies, if any. A policy is represented by the domain for which it is created. Select a domain.
Step 2 – The Domain Configuration tab opens, where you can make the desired modification.
Remember, the domain cannot be modified.
Step 3 – To change the Credential Profile, select the Credential Profile by name from the drop-down menu. This was pre-created in the Credential Profiles page.
NOTE: If you change the Credential Profile for a domain, click Test Connection to ensure connection to the domain. This will take a moment. Then a message will appear in the upper right corner of the console indicating a successful or failed connection.
Step 4 – Click the toggle to change the Enabled/Disabled state of the policy.
Step 5 – For the Max Renew Ticket Age (days) value, modify the value by typing in the textbox.
Step 6 – For the Max Ticket Age (hours) value, modify the value by typing in the textbox.
Step 7 – Select or deselect the Use SSL box for the desired security state for communication with the domain.
Step 8 – The Save button is enabled when any settings are modified. Click it to commit the changes before leaving the page.
Changes to the Domain Configuration have been saved.