Configure Auto Deploy Window
You can automatically deploy Agents to discovered domain controllers in a domain, provided that the Agent has already been deployed on at least one domain controller in the domain.
Follow the steps to auto deploy the Agent.
Step 1 – Click Agents in the left pane to launch the Agents interface. Then click Configure Auto Deploy to launch the Configure Auto Deploy window.
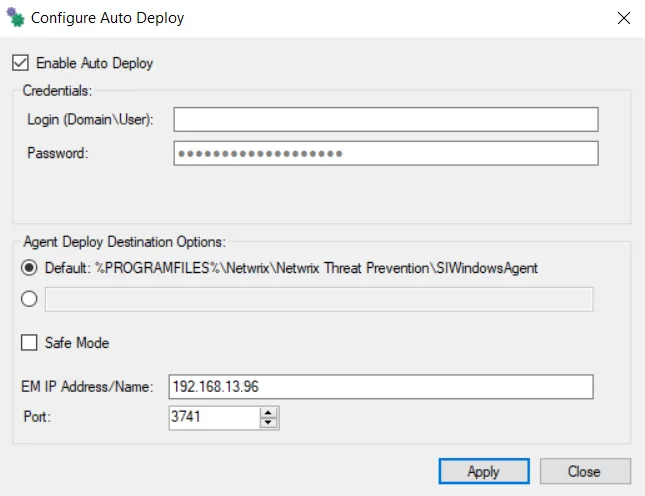
Step 2 – Select the Enable Auto Deploy checkbox to enable the following configuration options:
- Credentials – Provide the credentials to use for deploying the Agent on all discovered domain
controllers
- Login – Must be in Domain\User format
- Password
- Agent Deploy Destination Options – Configure the following settings:
- Installation Location – Select the radio button to indicate the installation directory on the
target domain controllers
- Default – Uses the default installation directory
- Textbox – Enter the desired installation location, e.g. d:\myagent
- Safe Mode – If selected, the Agent checks LSASS versions on start up. Any changes in LSASS since the previous start prevents the Windows AD Events monitoring module from loading. See the Agent Safe Mode topic for additional information.
- EM IP Address/Name – Displays the IP address of the machine where Enterprise Manager is installed
- Port – Displays the port the Enterprise Manager uses to communicate with the Agent
- Installation Location – Select the radio button to indicate the installation directory on the
target domain controllers
Step 3 – Click Apply to enable the auto deploy feature. When domain controllers are discovered where the Agent is not already installed, Threat Prevention automatically deploys the Agent with all applicable modules to those domain controllers.