First Launch
The installer places the following icon on the desktop, which opens the Threat Manager console:

Step 1 – Double-click the Netwrix Threat Manager Dashboard icon to open the console for the first time.

There is a built-in ADMIN account used for the initial configuration steps and granting user access. The User Name is "admin". You will set the password and optionally enable MFA for this account during first launch. Follow the steps to setup this account.
Step 2 – Specify a password in the New Password and Confirm Password fields. It must meet the following minimum requirements:
- At least one uppercase letter
- At least one lowercase letter
- At least one number
- At least one special character (symbol)
- Have a minimum length of 10 characters
Step 3 – By default, MFA is enabled. Toggle this option off or on as desired. If the Enable MFA option is set to ON, the application will provide an internally-generated one-time password (OTP) option for the Administrator account. If the Enable MFA option is set to OFF, only a username and password will be required to sign in.
Step 4 – Click Set Password.
The built-in ADMIN account password is now set.
If the Enable MFA option is set to OFF, no additional configuration is required and the Threat Manager Console opens. See the Getting Started with Threat Manager topic for next steps.
If the Enable MFA option is set to ON, registration of an MFA authenticator is required. Proceed to the Configure MFA for the Bultin Administrator Account topic.
Configure MFA for the Bultin Administrator Account
If MFA was enabled for the buildtin Administrator account during first launch, follow the steps to configure MFA for the account.
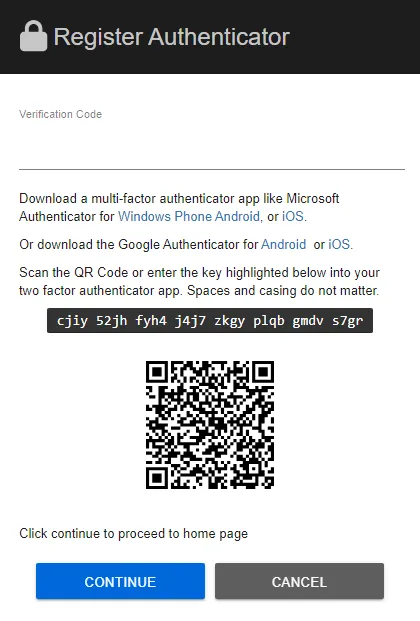
Step 1 – Register the MFA authenticator. The Register Authenticator prompt will provide instructions to configure multi-factor authentication with an external or third-party application.
Step 2 – On successful registration with an authenticator, enter the verification code and click Continue.
Step 3 – A list of recovery codes will be presented in order to restore access to the application in the event of lost access to the authenticator application or device. Save this list of codes to access for account recovery, if needed.
Step 4 – Click Continue.
Once MFA is configured for this account, the Threat Manager Console opens. See the Getting Started with Threat Manager topic for next steps.