Troubleshooting
The purpose of this section is to detail solutions to common problems when using the Netwrix Privilege Secure Console.
Enablement Toolkit
The Enablement Toolkit is a utility that offers a GUI for common testing scenarios used when troubleshooting the application.
The Toolkit is available to download as a .zip file from the Privilege Secure installer's Extras folder. See the Install Components & Methods topic for additional information.
Prerequisites
- Successful download of the Privilege Secure Installer Package
Install the Enablement Toolkit
Follow the steps to install the Enablement Toolkit.
Step 1 – Once the Privilege Secure Installer file has been downloaded, unzip and open the Enablement Toolkit.exe from the Privilege Secure Installer Package > Extras Folder.
NOTE: The Enablement Toolkit application should be run as a local Administrator. If the user account running the toolkit is not a local administrator, Windows will request administrator credentials.
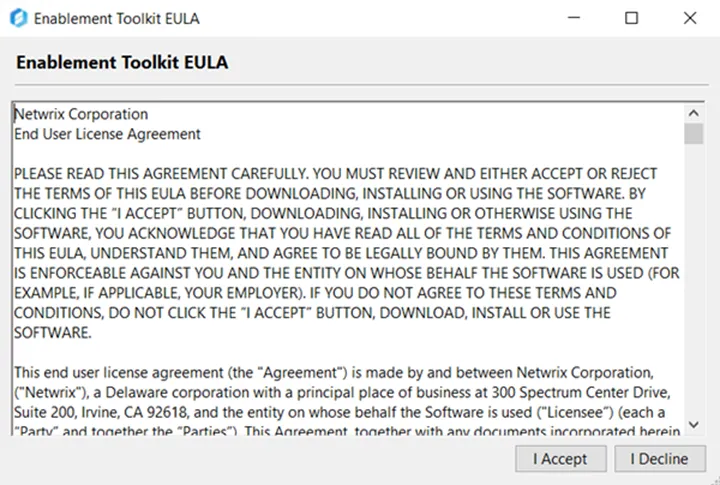
Step 2 – Click I Accept on the Enablement Toolkit EULA window. The Enablement Toolkit window opens.
Enablement Toolkit Window
The Enablement Toolkit window fields vary depending on the selected operation. The window has the following fields for all operations:

-
File Menu Options:
- Save Results – Saves the results of the operation after a successful execution of the operation
- Exit – Closes the Enablement Toolkit window
-
Help Menu Options:
-
About – Displays information about the Enablement Toolkit.
-
Help (Selected Operation) – Displays the following key information about the selected operation:
- Selected Operation – The current operation selected
- Required Fields – Any fields which must be populated to execute the selected operation
- Notes – Suggested actions or features to use within the selected operation interface
- Description – A brief summary of the selected action
-
-
Operation Menu – The operation menu drop-down list contains the following operations:
NOTE: See the Enablement Toolkit Operations topic for additional information about each operation.
- Enumerate Active Directory Objects
- Verify Domain Group Membership for Credential
- Verify Local Windows Group Membership for User Account
- Verify WinRM Status for Host
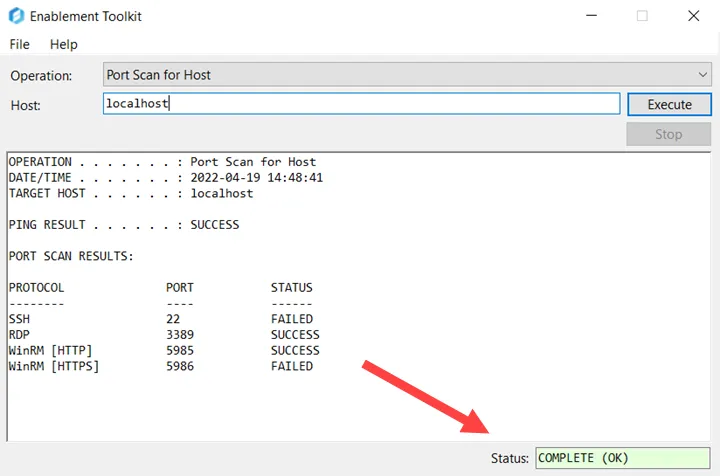
- Port Scan for Host
- Verify SSH Connectivity for Host
- Set Privilege Secure AppSettingUser Config Files
- Export Privilege Secure Diagnostics
-
Execute – Click this button to initiate the selected operation
-
Stop – Click this button to stop the selected operation
-
Use TLS – Check this box to force the operation to use LDAPS lookups instead of LDAP.
-
Status – The status of the current job
Configure and Execute an Operation
Follow the steps to execute an operation.
Step 1 – Select an Operation from the dropdown menu.
Step 2 – Optional: Open the Help menu for the selected operation by clicking Help > Help (Selected Operation) or pressing F1. Click Close to close the Help menu.
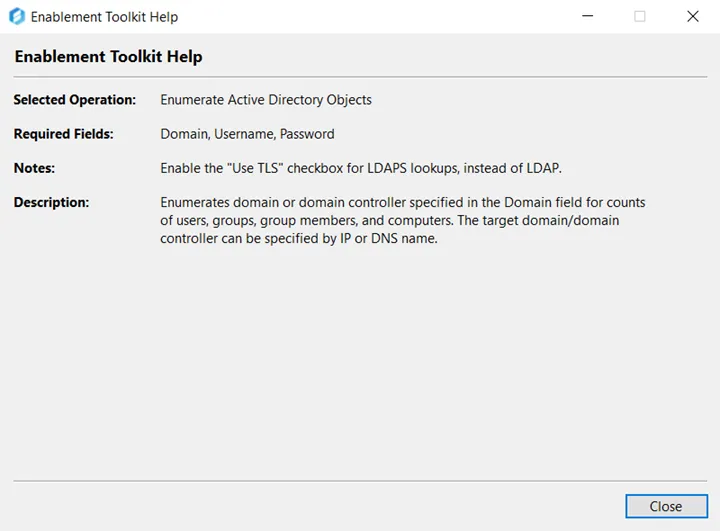
NOTE: The Help menu displays key information regarding the selected operation. The Help menu for the Enumerate Active Directory Objects operation displays the operation name, required fields, notes, and a brief description of the selected operation. It is recommended to view the Help menu for each operation you intend to execute.
Step 3 – Configure the fields for the selected operation.
Step 4 – Click Execute. The interface will display the results of the selected operation.
Enablement Toolkit Operations
This table lists available in the Enablement Toolkit with descriptions, notes, and required fields of operations. This menu can be accessed by clicking Help > Help (Selected Operation) or by pressing F1.
| Operation | Description | Required Fields | Notes |
|---|---|---|---|
| Enumerate Active Directory Objects | Enumerates domain or domain controller specified in the Domain field for counts of users, group members, and computers. The target domain / domain controller can be specified by IP or DNS Name | - Domain - Username - Password | Enable the Use TLS checkbox for LDAPS lookups instead of LDAP. |
| Verify Domain Group Membership for Credential | Verifies that a domain group exists and that the user specified in the Domain / User field is a member of that group. The Domain / User field is the <domain>\\<user> to be queried for the domain group in the Group field. The Username and Password fields are used for authentication to the domain, which can be any domain user. The target domain / domain controller can be specified by either IP, DNS Name, or domain name. | - Domain / User - Group - Username - Password | Enable the Use TLS checkbox for LDAPS lookups instead of LDAP. |
| Verify Local Windows Group Membership for User Account | Verifies that a local Windows group exists and that the user specified in the User / Host field is a member of that group. The User / Host field is the <user>@<hostname> to be queried for the local Windows group in the Group field. This needs to be in the format: <user@hostname> The Username (ex. domain\user) and Password fields are used for authe ntication to the Windows host as a local administrator. Both Domain and local accounts can be used for authentication as long as the account is a local administrator. | - User / Host - Group - Username - Password | A domain user must be used for authentication if verifying domain user group membership. |
| Verify WinRM Status for Host | Checks the following criteria related to WinRM (PSRemoting) connectivity to the Host: - Port scan for port 5985 - Verify WinRM is enabled - Verify supplied credentials can authenticate - Verify Invoke-Command runs with supplied credentials The Host field is the host to be tested. The Username and Password fields are used for authentication. If only the Host field is used, the only the port scan and WinRM are tested. If Host, Username, and Password fields are used, then all tests will run. | - Host | Only port 5985 is used for testing WinRM (PSRemoting). Port 5986 is not tested. |
| Port Scan for Host | Scans the Host for will-known ports: - SSH (Port 22) - RDP (Port 3389) - WinRM (Port 5985) - WinRM (Port 5986) | - Host | A ping test is also performed and is reported in the output's heading. |
| Verify SSH Connectivity for Host | Verifies SSH connectivity and authentication to the target Host. The well-known SSH port (port 22) is used by default but can be customized. The Username and Password fields are used to authenticate the SSH session. The ability to run sudo commands, specify which sudo commands the user has access to, and whether or not the user's sudo commands use the "NOPASSWD" directive are also checked. | - Host - Port - Username - Password | N/A |
| Set Privilege Secure AppSettingUser Config Files | Sets the hostname in each Privilege Secure appsetting.user.json configuration file. This hostname should match the CN of the server's IIS-bound certificate for the Privilege Secure web application. The syntax used in the filed should be the full URL, for example: https://hostname.domain.com:6500 | - Host | Should be run on each Privilege Secure server with an IIS-bound certificate installed. |
| Export Privilege Secure Diagnostics | Exports logs, various configuration files, and version information for the Privilege Secure server. A date range can be selected for the logs to reduce operation runtime. Upon execution, the user will be prompted to pick a location where the diagnostics will be zipped and saved. | - Date Range | Only exports diagnostics for the Privilege Secure server running this application. |
Sign RDP Files to Prevent Publisher Warning
RDP Files downloaded from Netwrix Privilege Secure will show as coming from an untrusted publisher. To avoid this warning you can set the certificate thumbprint value to identify an RDP signing certificate for Netwrix Privilege Secure. Signing the RDP file with this trusted certificate will resolve the trust problem with RDP files.
Obtain a Certificate Thumbprint
To obtain the certificate thumbprint, open the Certificates snap-in. From there, the certificate thumbprint can be found in the local computer's certificates store on the Netwrix Privilege Secure server. This certificate thumbprint can be used to certify the Privilege Secure Web Service as well. Follow the steps below to obtain a certificate thumbprint.
Step 1 – Open the Windows Certificate Manager Tool (certmgr.exe).
Step 2 – Select an existing certificate and expand the folder.
Step 3 – Right-click a certificate to sign RDP with > click Open.
Step 4 – Click the Details tab.
Step 5 – Locate and copy the hexadecimal thumbprint.
Step 6 – Navigate to Configuration > System Settings > Global Settings.
Step 7 – Paste the thumbprint in the Certificate Thumbprint field of the Netwrix Privilege Secure console. See the Global Settings Page topic for additional information.
Step 8 – Click Save.
The Netwrix Privilege Secure session has been authenticated. Update the GPO to include the SHA1 thumbprint of the signed certificate to ensure the unknown publisher warning disappears completely.
Update Group Policy settings in Windows
Follow the steps below to update the GPO to include the SHA1 thumbprint of the signed certificate to ensure the unknown publisher warning disappears completely.
Step 1 – Open the Windows Local Group Policy Editor.
Step 2 – Navigate to Computer Configuration > Administrative Templates > Windows Components > Remote Desktop Services > Remote Desktop Connection Client.
NOTE: Do not expand the Remote Desktop Connection Client folder.
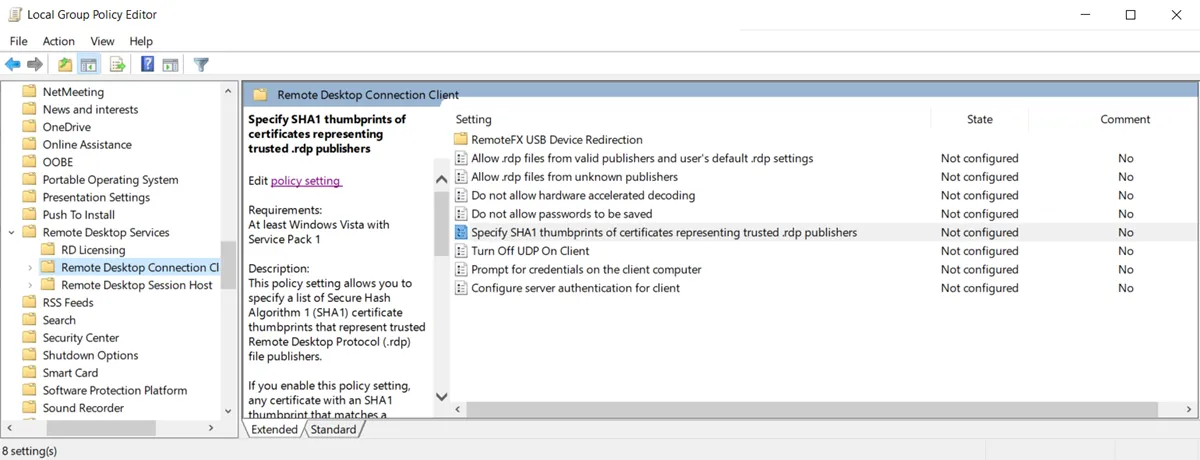
Step 3 – Click Specify SHA1 thumbprints of certificates representing trusted .rdp publishers.
Step 4 – Click Policy Settings in the upper left-hand corner.
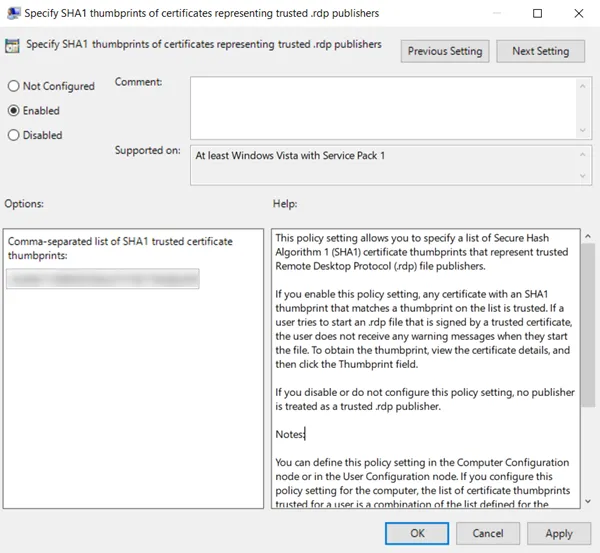
Step 5 – Click the Enabled radio button.
Step 6 – Paste the certificate thumbprint in the Comma-separated list of SHA1 trusted certificate thumbprints field.
Step 7 – Click Apply > OK.
The RDP file has been certified and will be trusted by Windows computers that are part of this policy.
NOTE: IIS_IUSRS account must have read permissions to the certificate used by Privilege Secure in certlm.msc. Otherwise, in the PAM-WebService log the "Could not sign RDP file with certificate for RDP Session: Keyset does not exist" error will appear and the RDP file won't be signed.
Update InsecureSkipVerify and RestURL
- Rest URL - This setting determines the Rest API URL that is used to send REST calls to the Netwrix Privilege Secure Web service.