Okta SSO and MFA Integration
Okta SSO and MFA Integration
Okta SSO and MFA Integration
This articles covers integrating Privilege Secure with Okta SSO.
Prerequisites
-
Admin access to Privilege Secure and Okta
-
Okta Active Directory Agent Installed
-
https://help.okta.com/en/prod/Content/Topics/Directory/ad-agent-new-integration.htm
Okta: Add distinguishedName Attribute to Okta Users
If distinguishedName attribute is already configured for Okta users, skip this section.
-
Login to the Okta Admin page
-
Go to Directory > Profile Editor
- Click on Okta > User (default)

Click on +Add Attribute on the Profile Editor
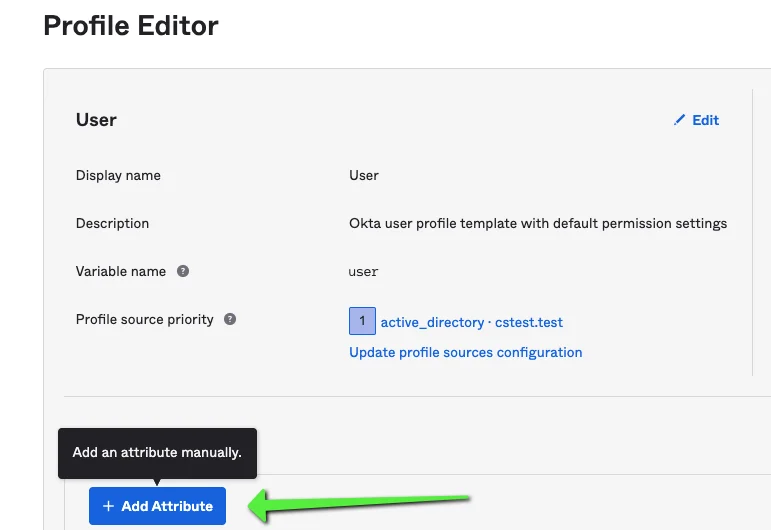
Click on +Add Attribute on the Profile Editor.
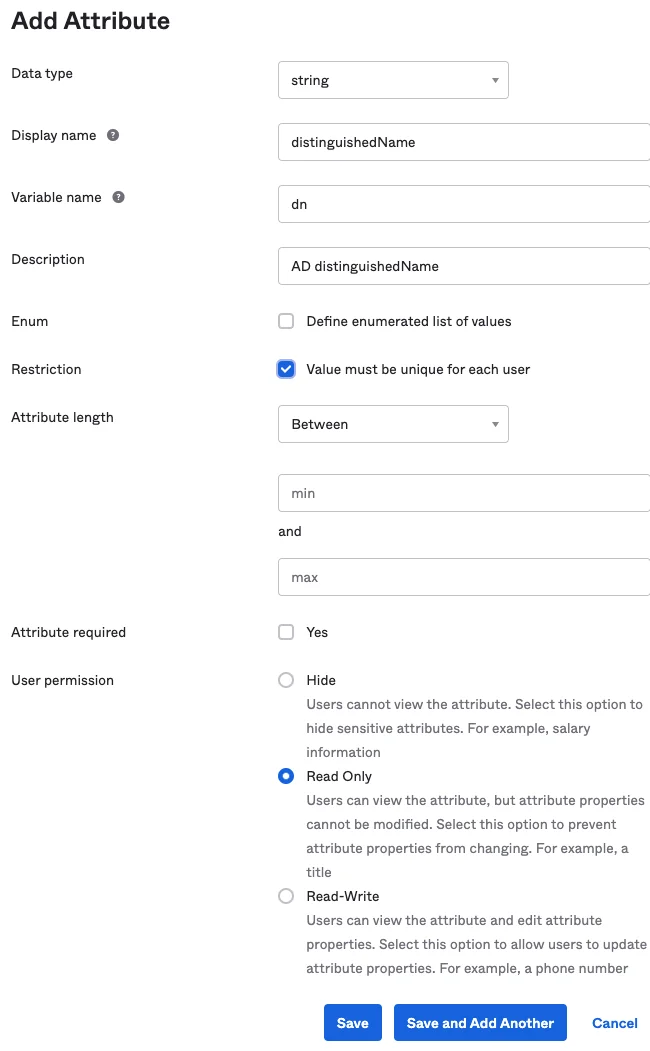
Example settings, adjust as required for environment:
Okta: Active Directory (AD) Mappings
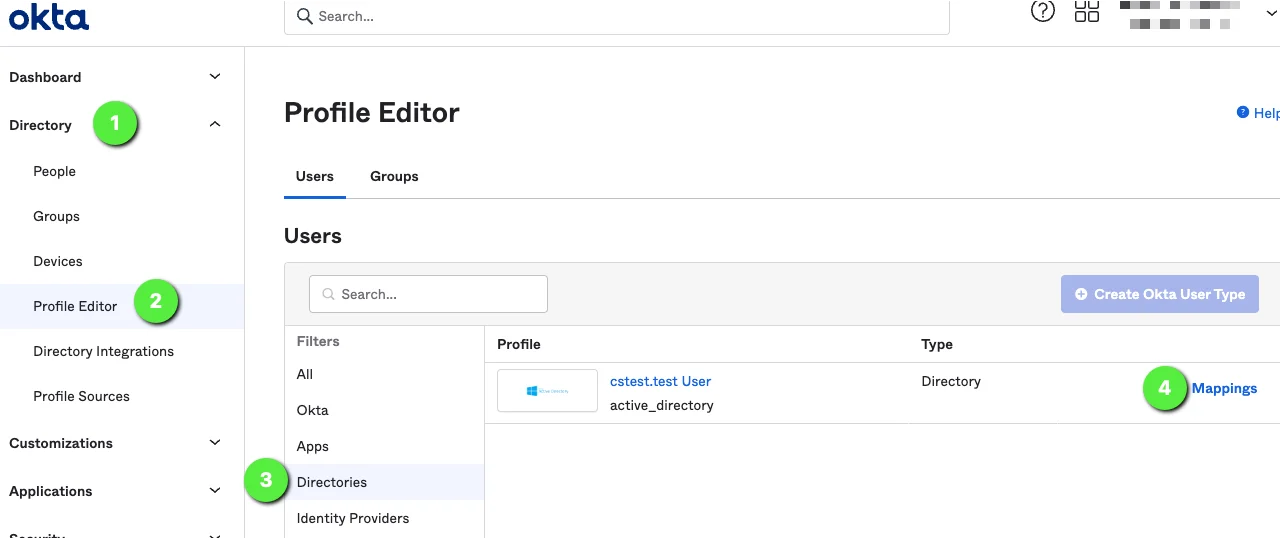
Directory > Profile Editor
On the desired domain, click Mappings
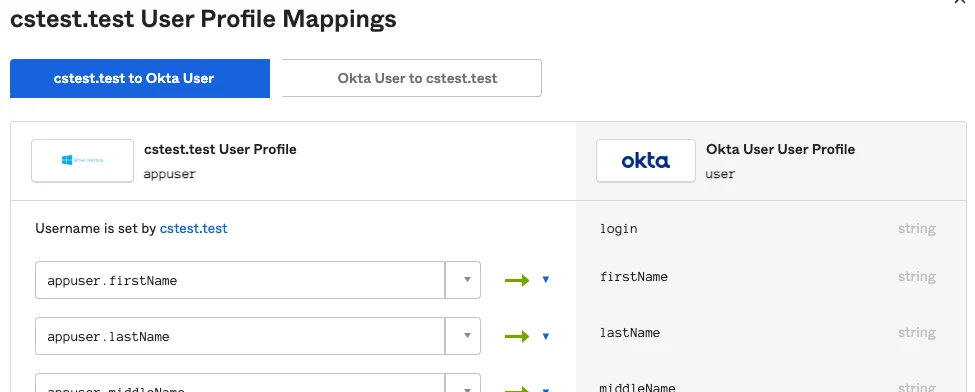
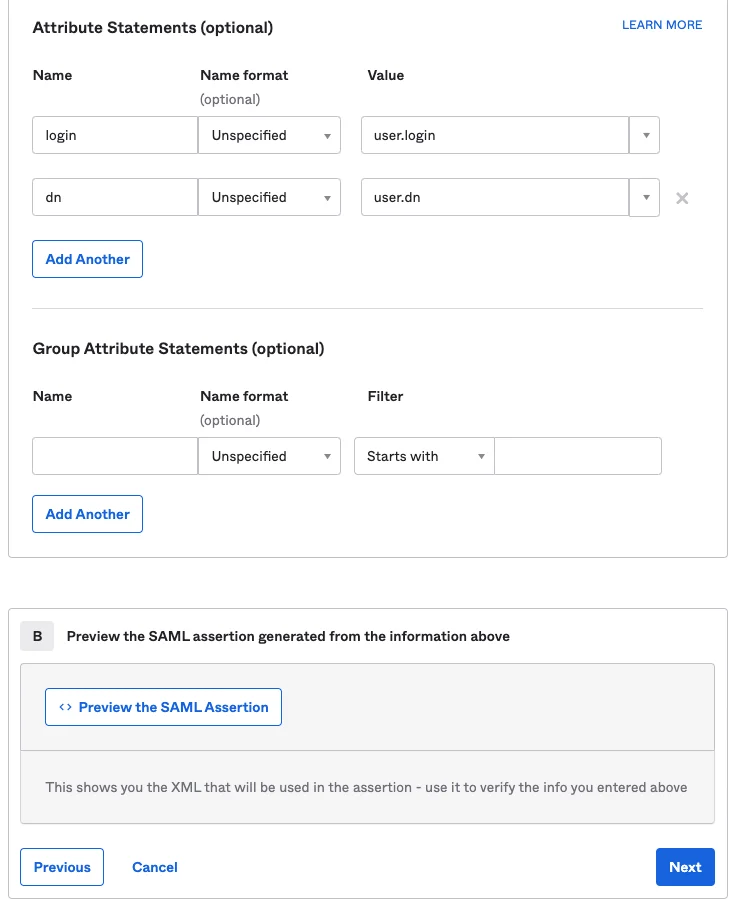
Under ‘<domain> to Okta User’ scroll down and set “appuser.dn” for “dn”
(removed section to compact this image for display)

Save and apply mappings.
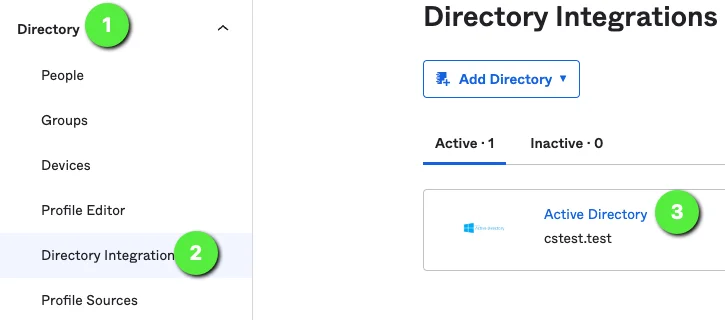
Okta: Import AD Users to Retrieve distinguishedName Attribute
Navigate to directory to import .
Click the Import Now button.
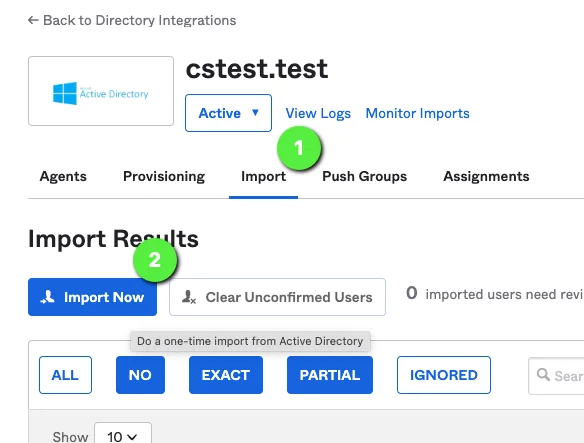
Full Import.

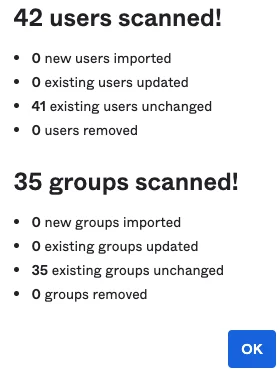
This can take a few minutes to complete, do not refresh page. Example status and results:

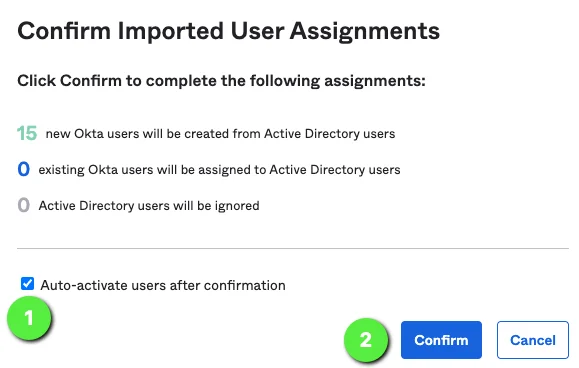
Assign any new users appropriately and confirm, example:
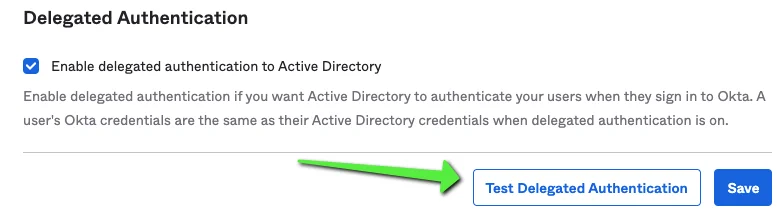
Okta (Optional): Test Authentication with AD Credentials

Scroll down to bottom

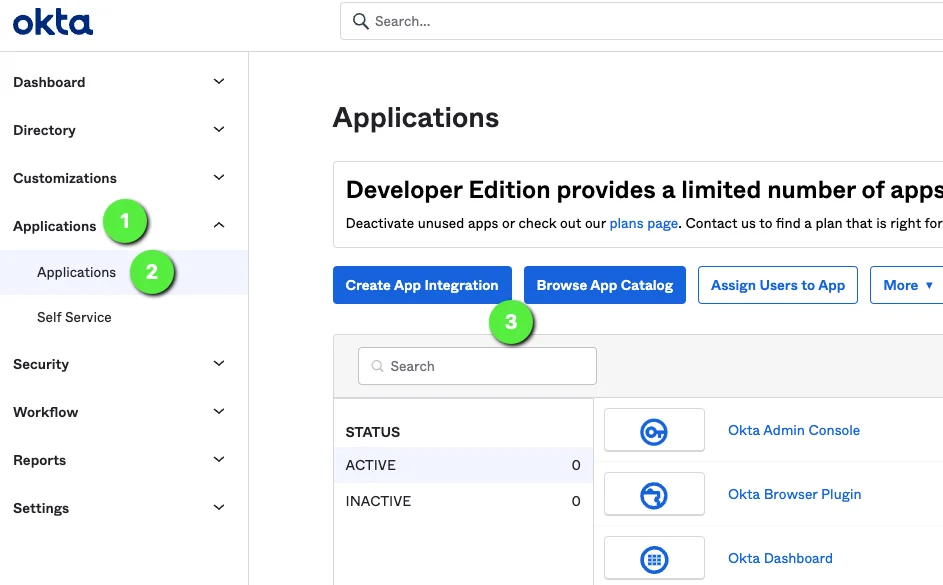
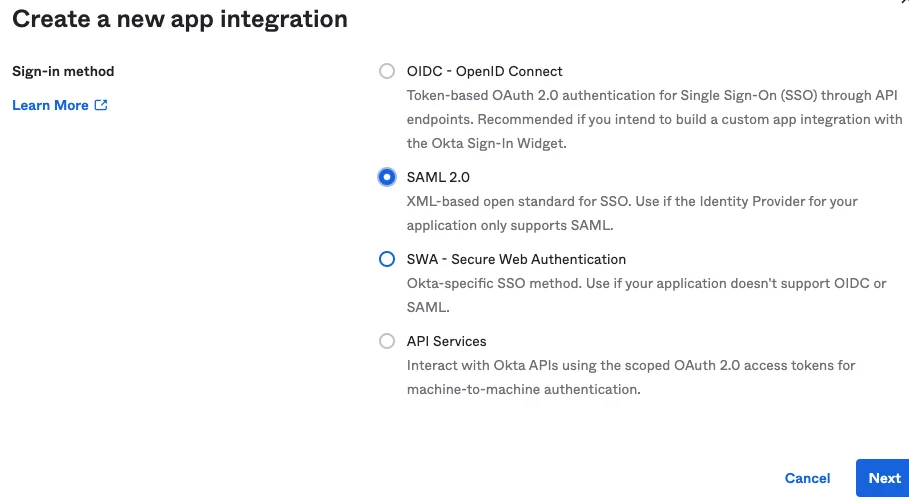
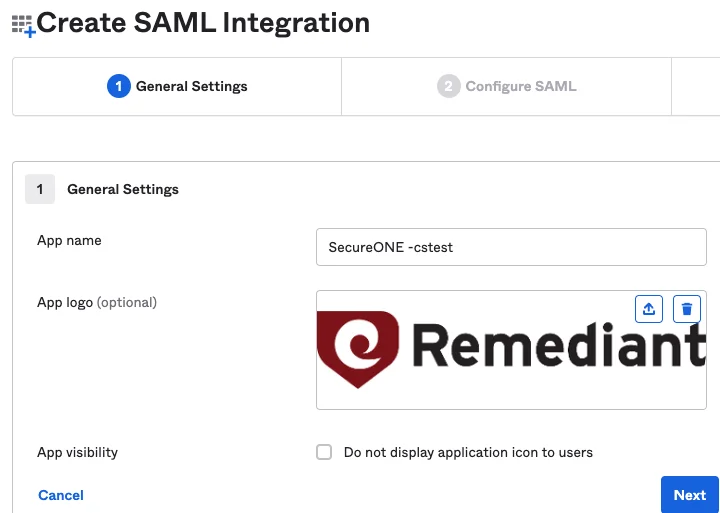
Okta: Add Privilege Secure Application
Note in the example below
- The URL format is:
https://<Privilege Secure URL>/api/login/ - The "Audience URI" should be the base URL only, leave off "/api/login/"
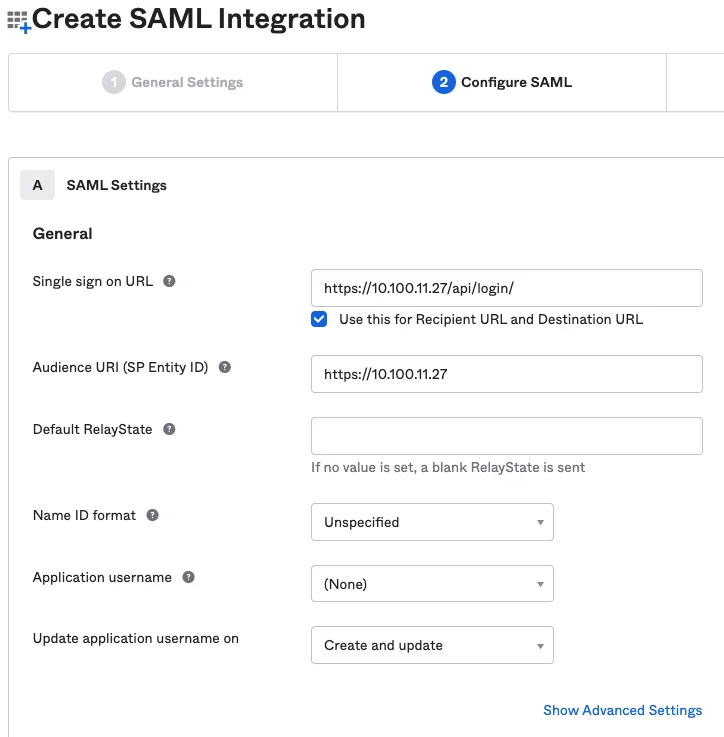
NOTE: An ‘Application username’ may be required by the Okta environment.
NOTE: user.dn may not appear in drop down list, it can be manually entered.
- Click Next button to continue.
- Provide answer to Feedback question and Finish.
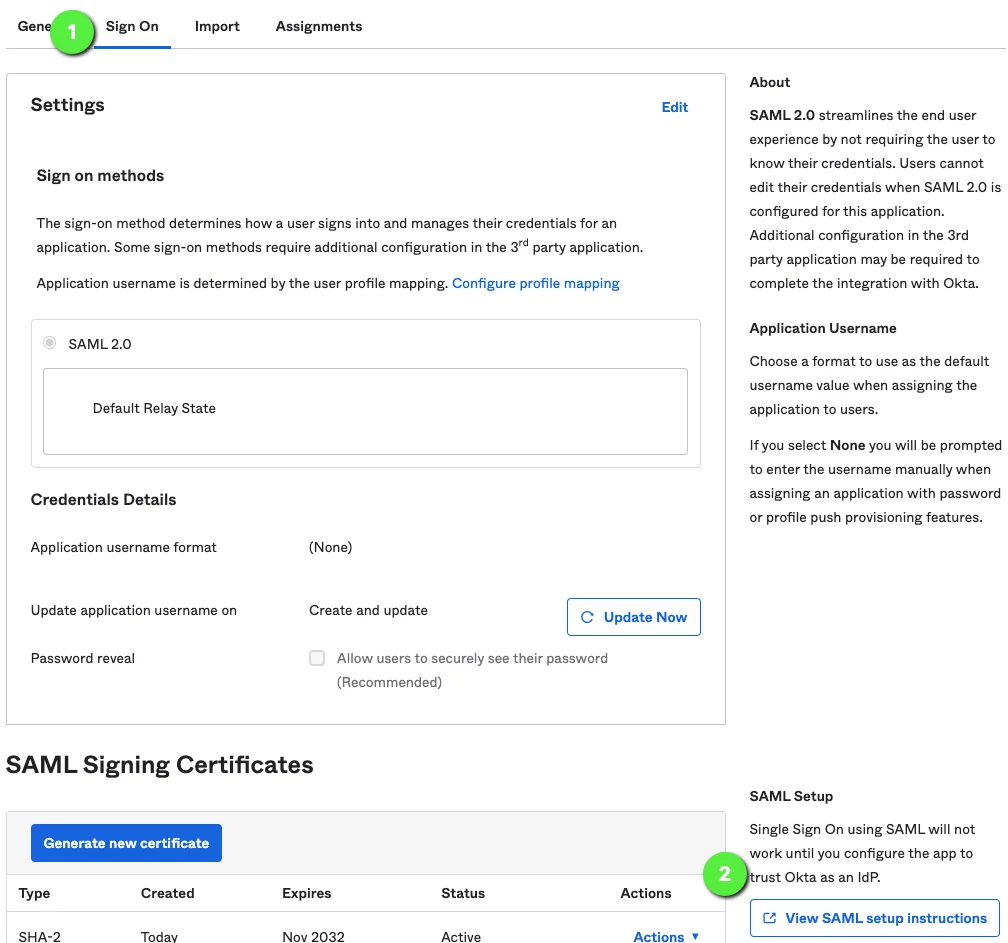
- Configure Sign On

Settings
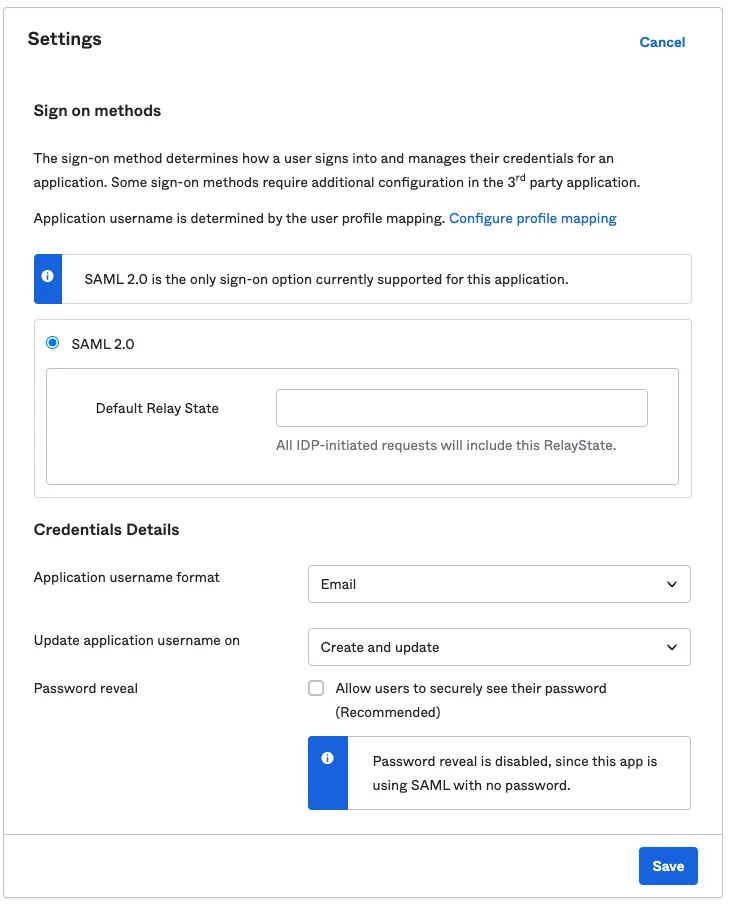
User authentication policy Examples uses "Any two factors" ploicy.

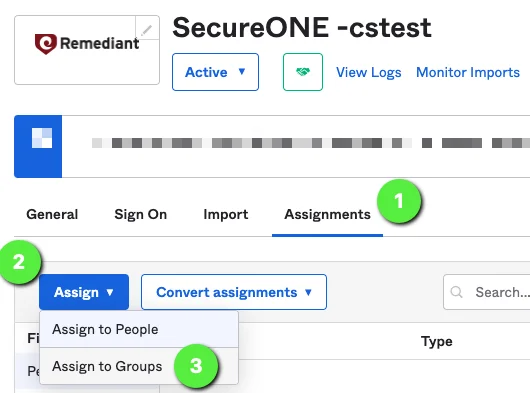
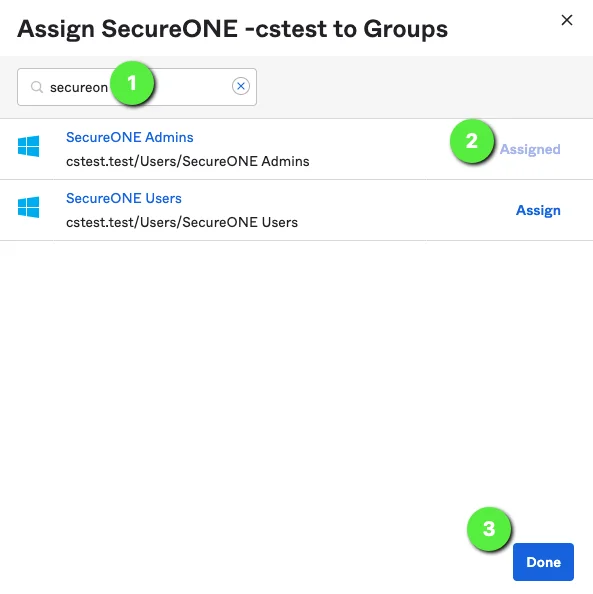
Okta: Assign Okta People/Groups to Privilege Secure Application
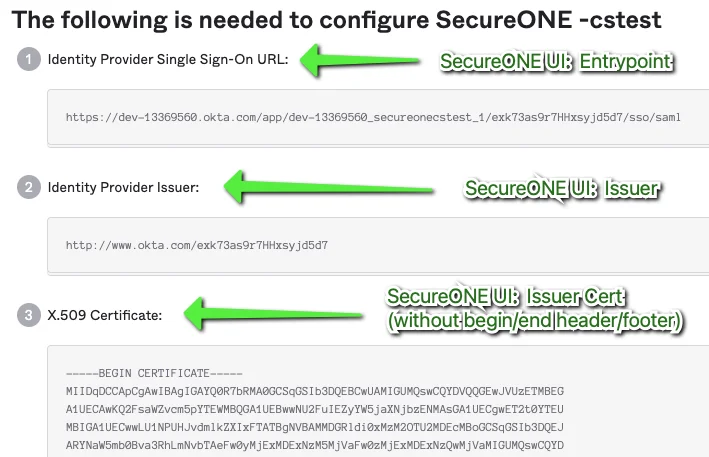
Okta: Retrieve SAML/SSO Information for Privilege Secure
Privilege Secure: Enter SAML/SSO Information

Enable SSO in Privilege Secure and Login Example
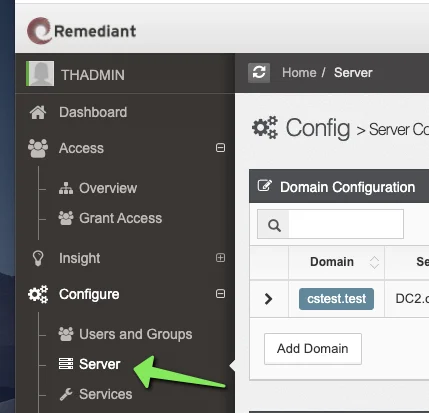
At the bottom of the Configure → Server -> SAML Configuration Panel, enable or disable SSO when appropriate:
- When logging into Privilege Secure, you will either be automatically directed to Okta for authentication, or presented with a Privilege Secure SSO Login Screen Example:

- Click [SSO Login] button to log in via Okta.