Create My Activity Session
Follow the steps to create an activity session.
Step 1 – Select an Activity to expand the session ribbon.
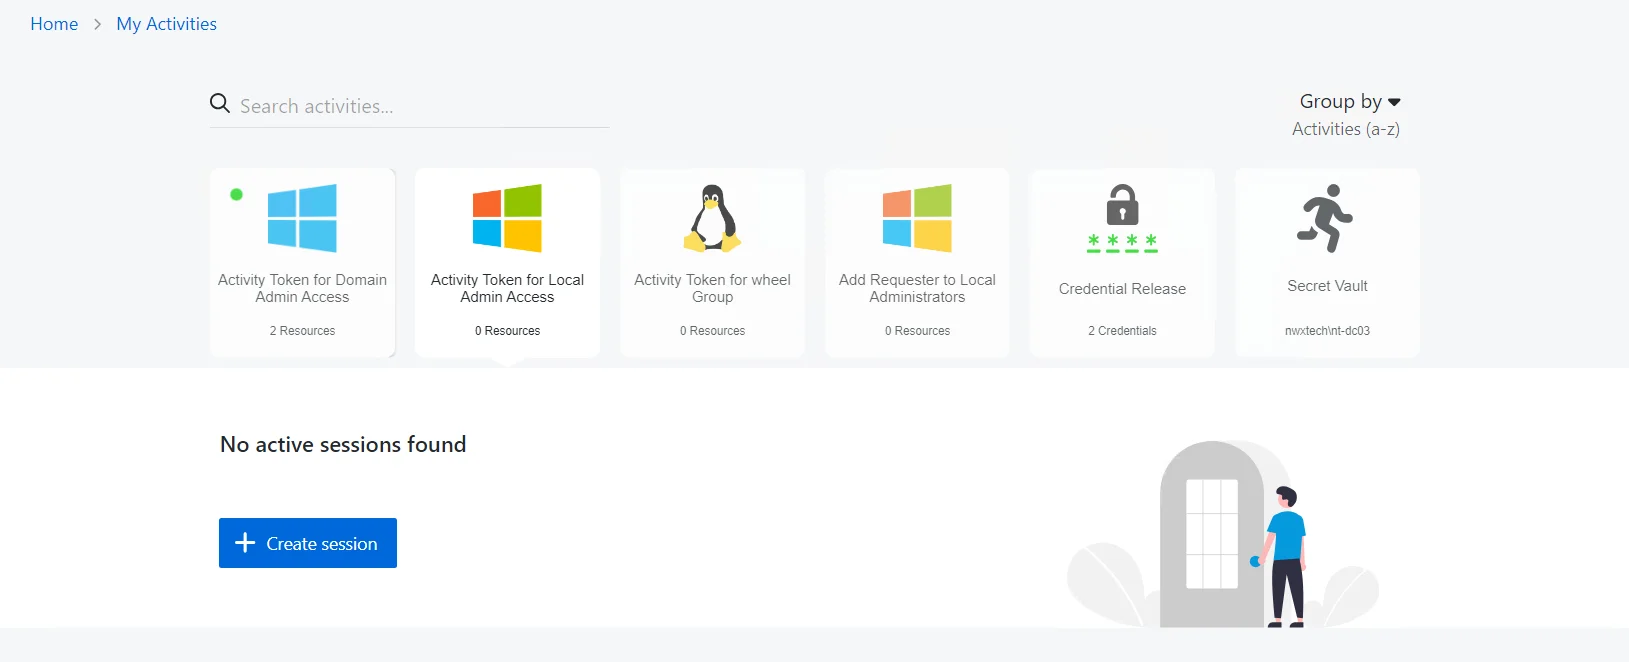
Step 2 – Click Create Session to start a new activity session.
- If an Activity is assigned to a single resource, the Activity card will display the name of the resource; selecting Create Session from the session ribbon will immediately start the Activity.
- If the Activity is assigned to more than one resource, the Activity card will display the number of resources; selecting Create Session from the session ribbon will open the Configure Session window.
- CAUTION: If your license is expired and you can still log in, you will not be able to create activity sessions.
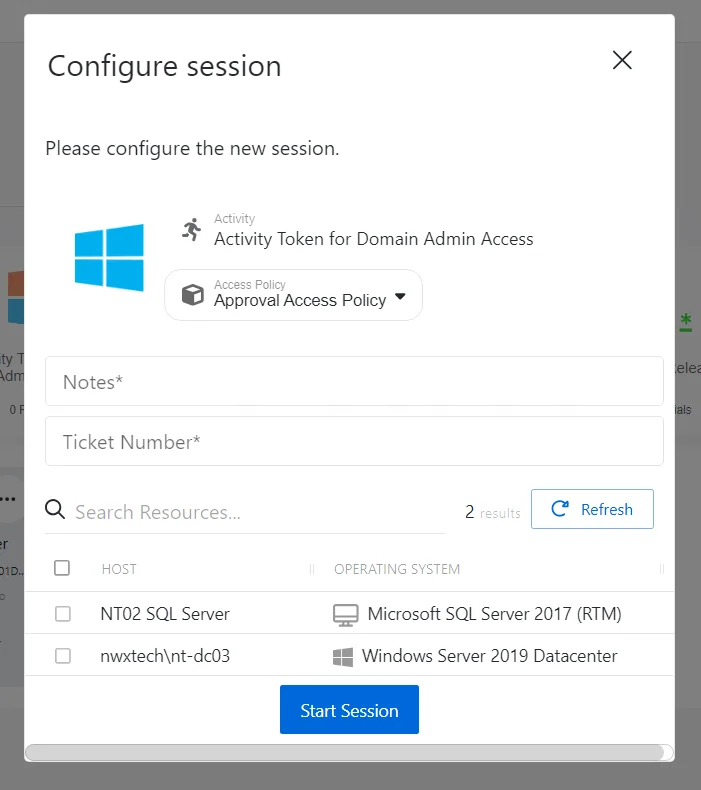
Step 3 – Enter the following information:
- If the Activity is a member of more than one Access Policy, the Access Policy field will change to a drop-down selection. Based the resources assigned to the selected access policy, the list of resources will change in the table.
- Enter notes or a ticket number in the applicable field (Set whether notes or ticket numbers should be optional or mandatory for the session in the related Connection Profile)
- Select the resources required for the Activity session. Use the Search field to filter the resource list.
- Click Start Session to start the provisioning process.
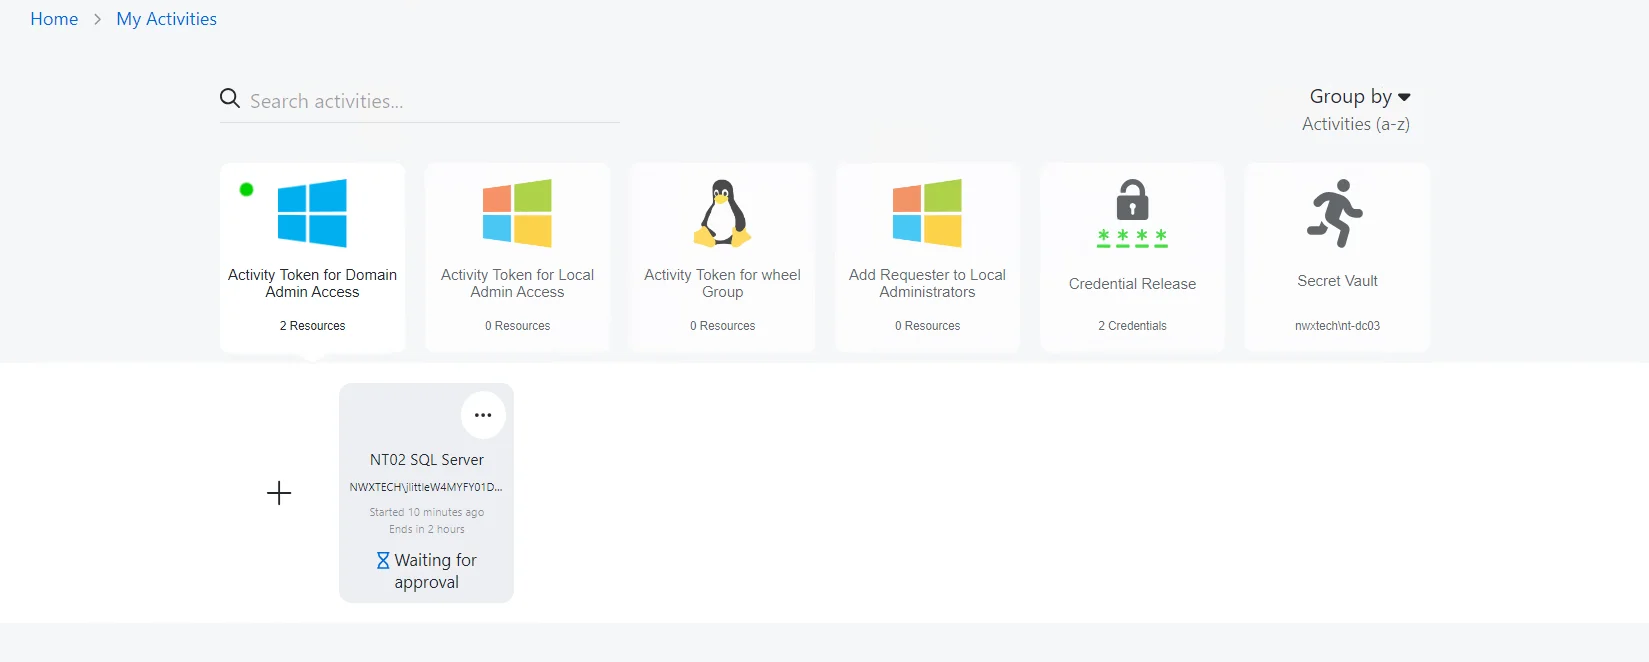
NOTE: If an approval is required, the Waiting for approval message will display until it has been granted.

Step 4 – When provisioned, an activity session will display an Available status with a green icon. Click Available to launch the session.
- The contextual menu (…) to the top right of the active session card contains options to stop an active session and to copy/view the login account password, if enabled in the related Connection Profile.
- All sessions may be managed via the Dashboard interface, and the My Activities interface interchangeably.
Provisioning and active sessions are displayed in the session ribbon, newest sessions to the left.
Create Activity Session
Follow the steps to create an activity session.
Step 1 – Navigate to the Dashboard > Active page.
Step 2 – In the Active Session table, click Create Session to open the Activity Request window.
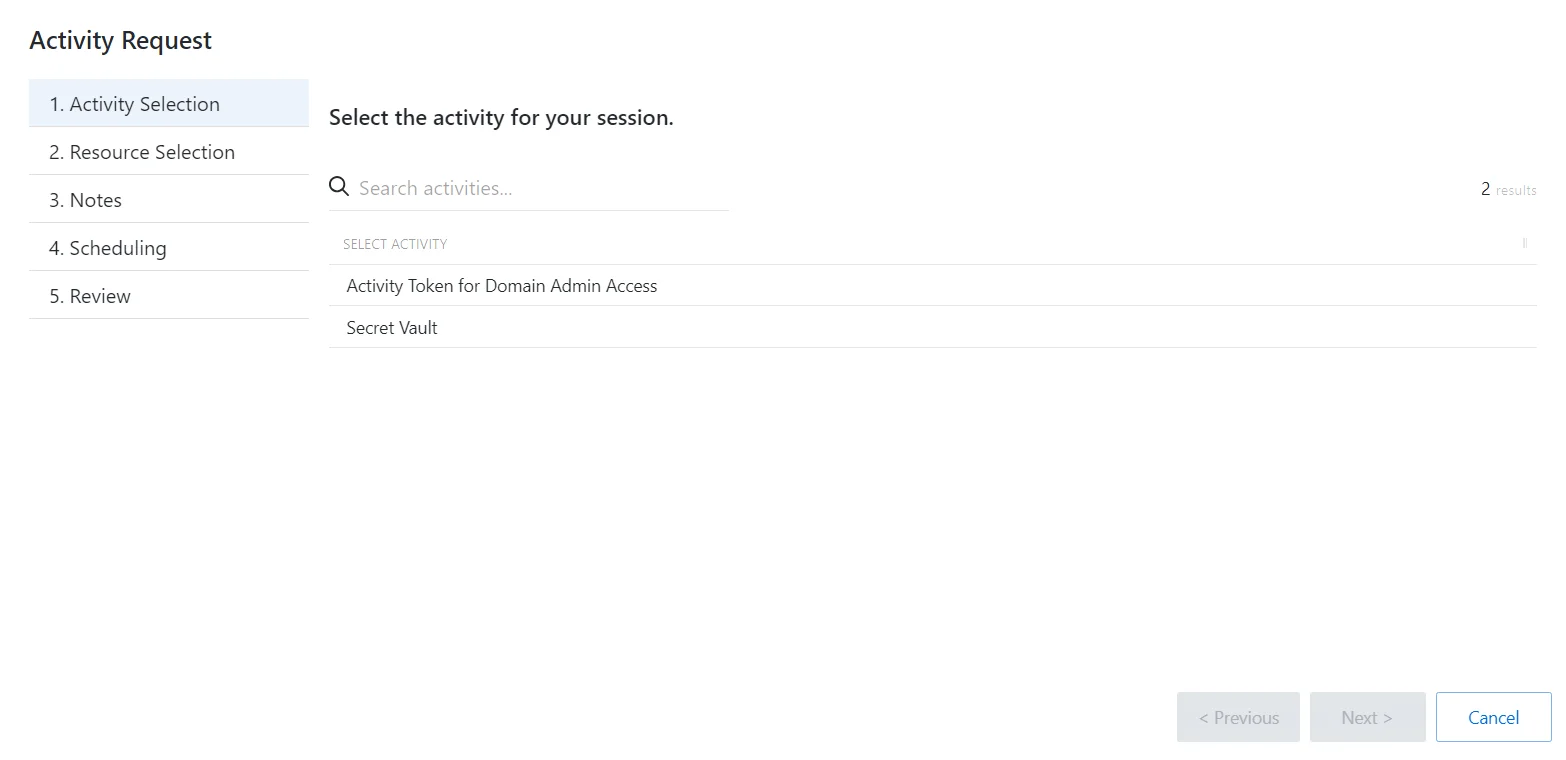
Step 3 – On the Request Type page, enter the following information:
- Select Activity – Search for and select an activity from the drop-down list
Step 4 – Click Next to go to the Resource Selection page.
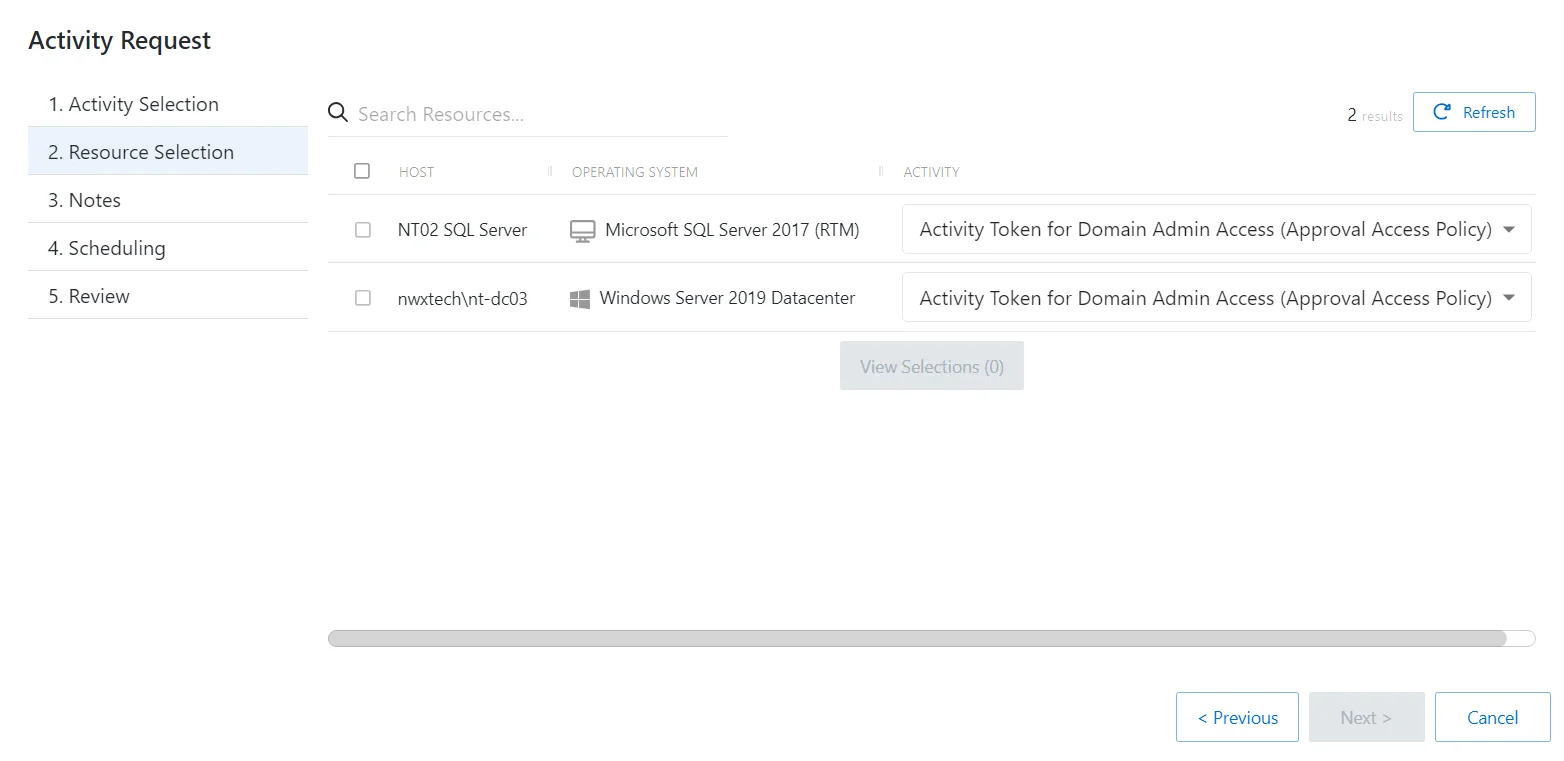
Step 5 – On the Resource Selection page, enter the following information:
- Select the resource(s) from the table
- (Optional) Click View Selections to view all selected resources
Step 6 – Click Next to go to the Notes page.
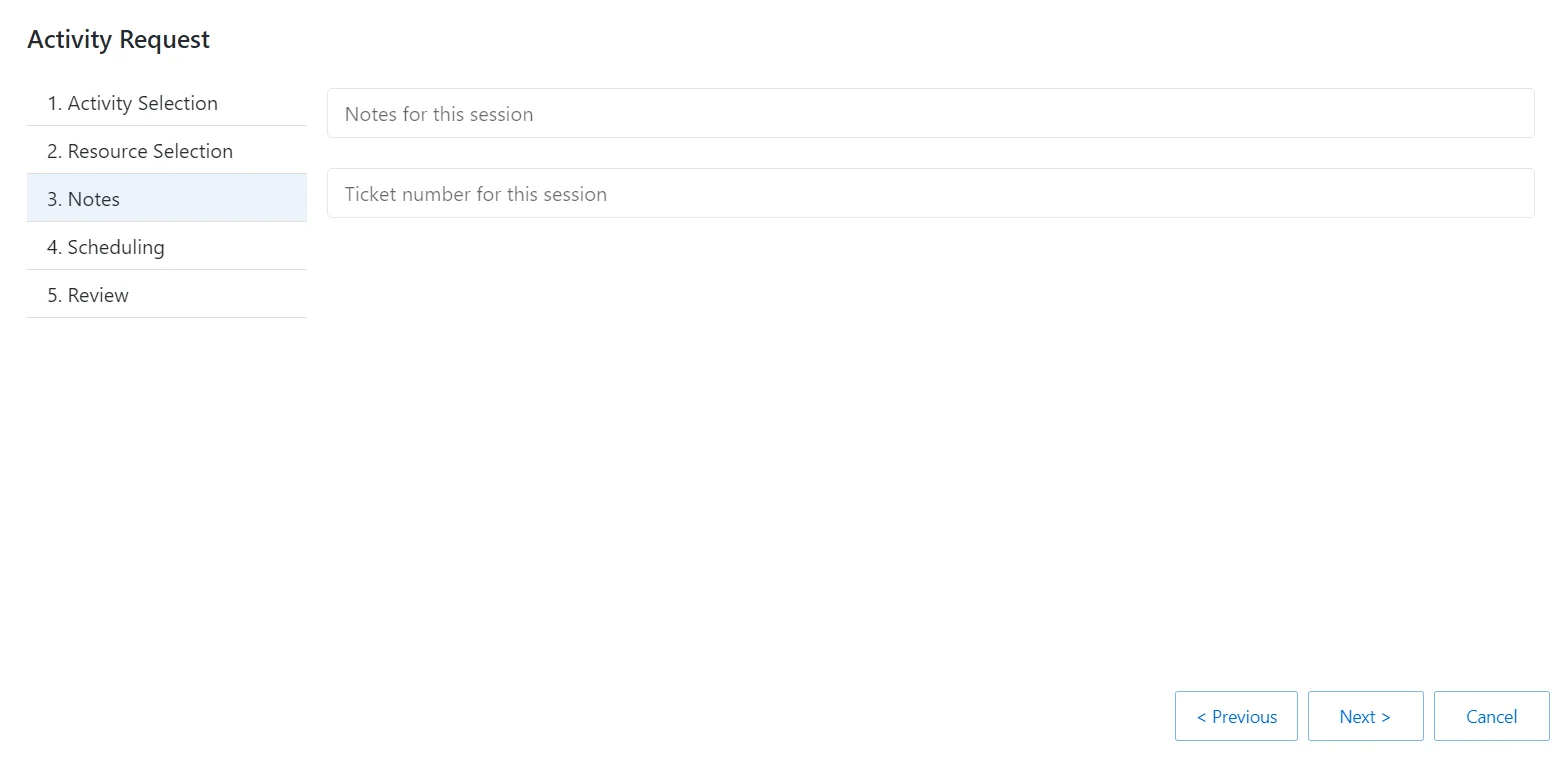
Step 7 – On the Notes page, enter the following information:
- Notes for this session
- Ticket number for this session
Step 8 – Click Next to go to the Scheduling page.
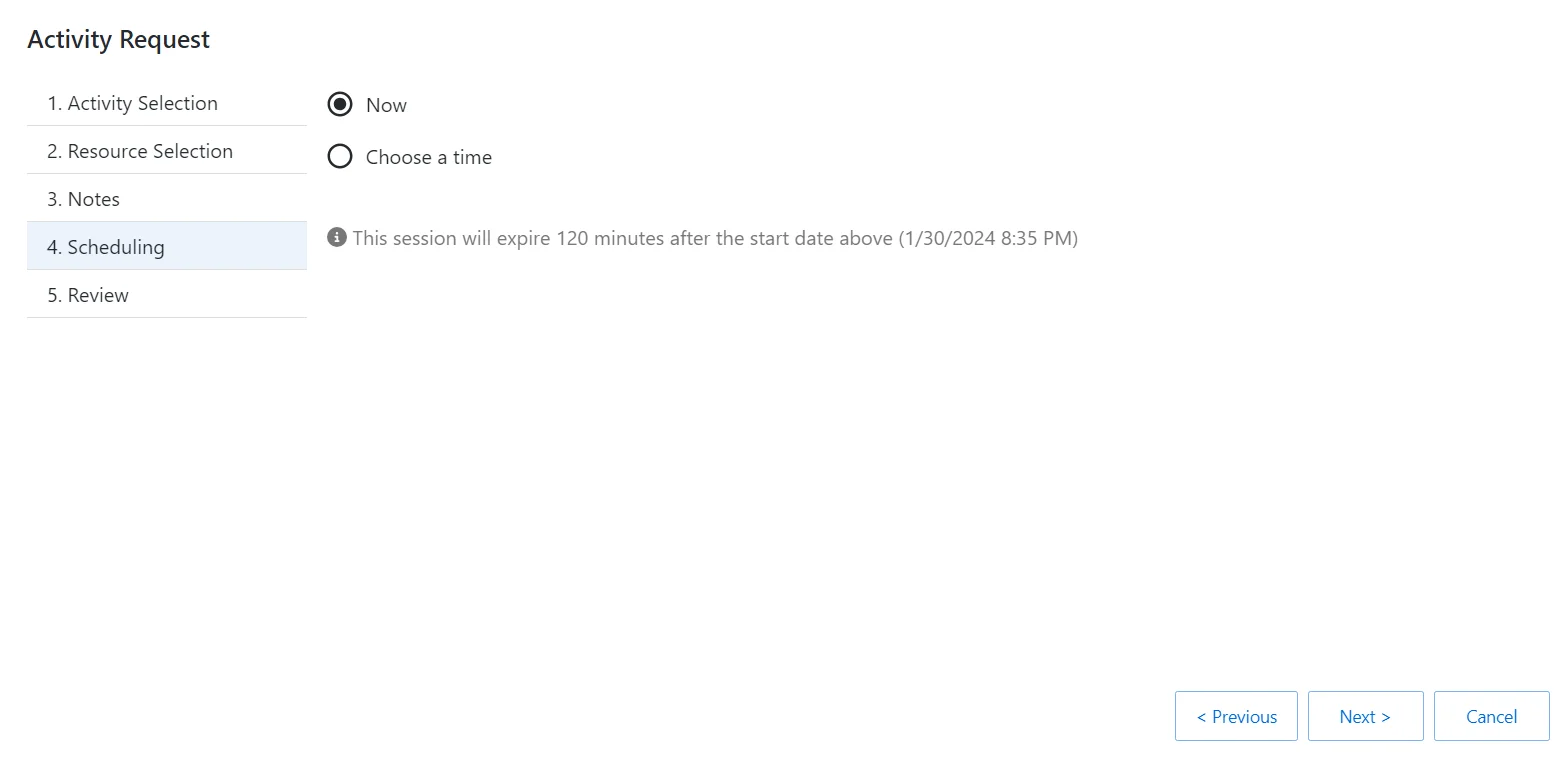
Step 9 – On the Scheduling page, enter the following information:
- Select Now or enter a desired date and time to begin the session
Step 10 – Click Next to go to the Review page.
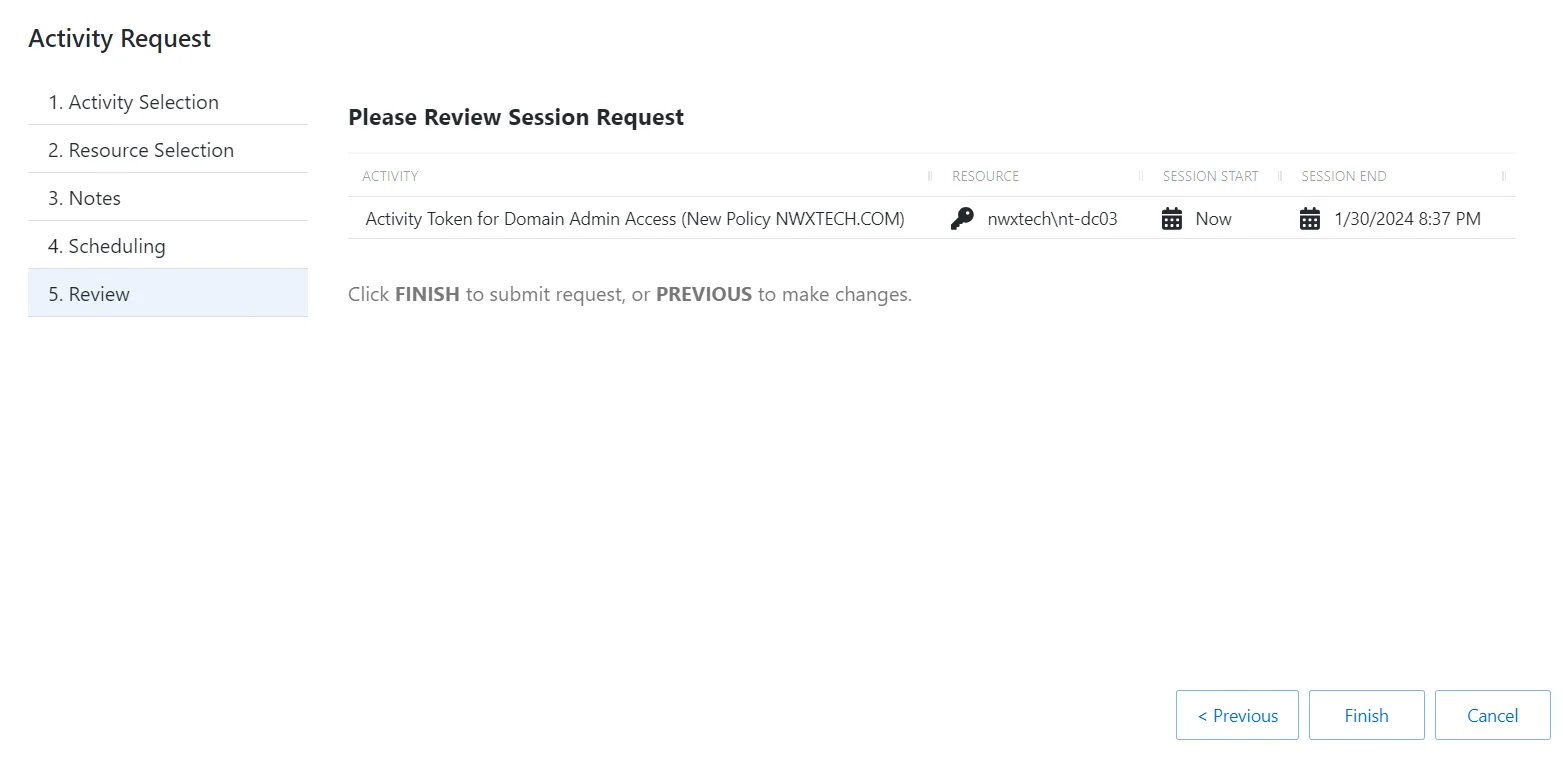
Step 11 – On the Review page, review the summary of the new session.
Step 12 – Click Finish to create the session.
The new session is created and is shown in the applicable dashboard in the Dashboard interface. If approval is required, the status Waiting for Approval is shown. The requester cannot log in to the session until the request is approved and the status changes to Available.
When the status Available is shown, the remote session is ready. Click the Connection icon to begin the session, or log in through a client.
See the Start Activity Session topic for additional information.