Group Roles Tab
The Group Roles tab shows whether the current group has been assigned an application role.
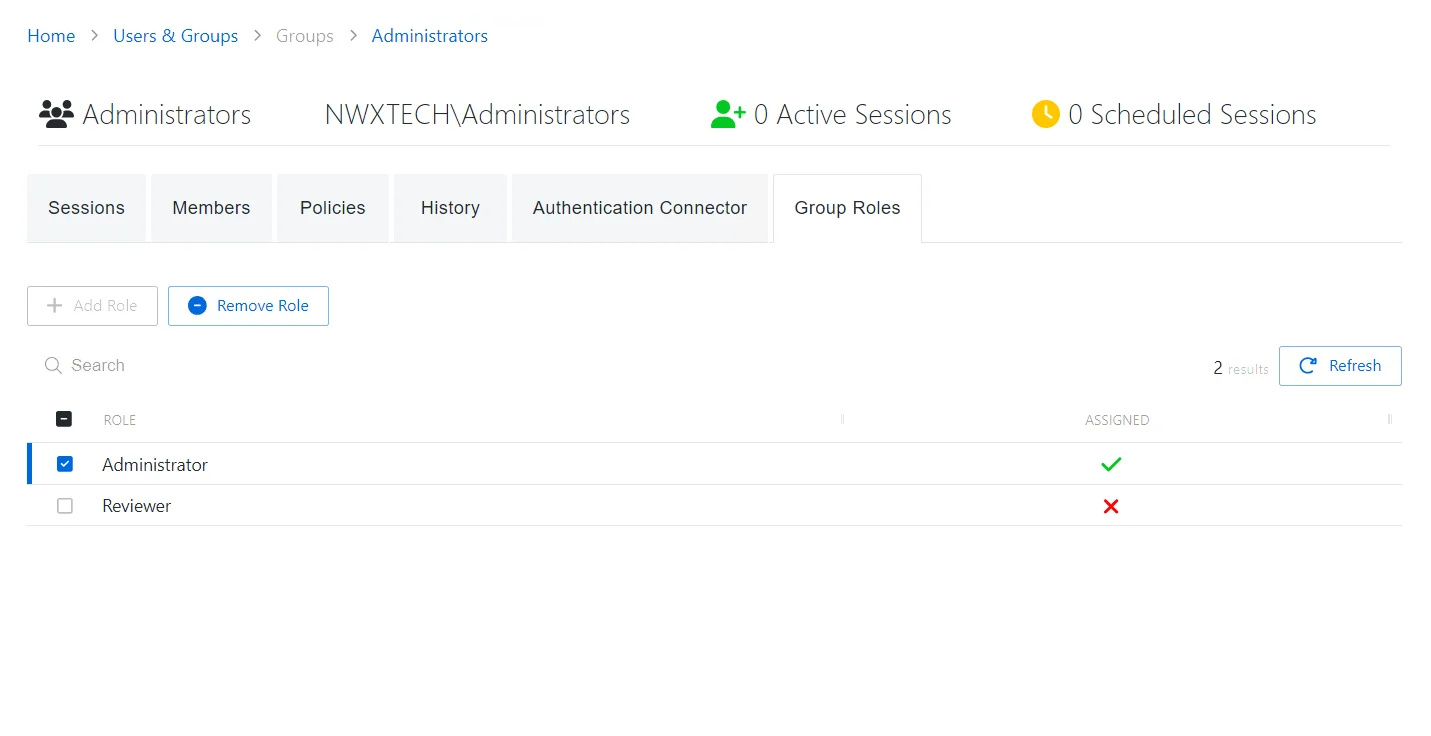
The Group Roles tab has the following features:
- Search — Searches the table or list for matches to the search string. When matches are found, the table or list is filtered to the matching results.
- Add Role — Enables the selected role
- Remove Role — Removes the selected role assignment
- Refresh — Reload the information displayed
The table has the following columns:
- Checkbox — Check to select one or more items
- Role — List of available roles. See the Role Management Page topic for additional details.
- Assigned — Indicates whether the role has been assigned
The table columns can be resized and sorted in ascending or descending order.
Members Tab
The Members tab shows information about the members for the selected group.
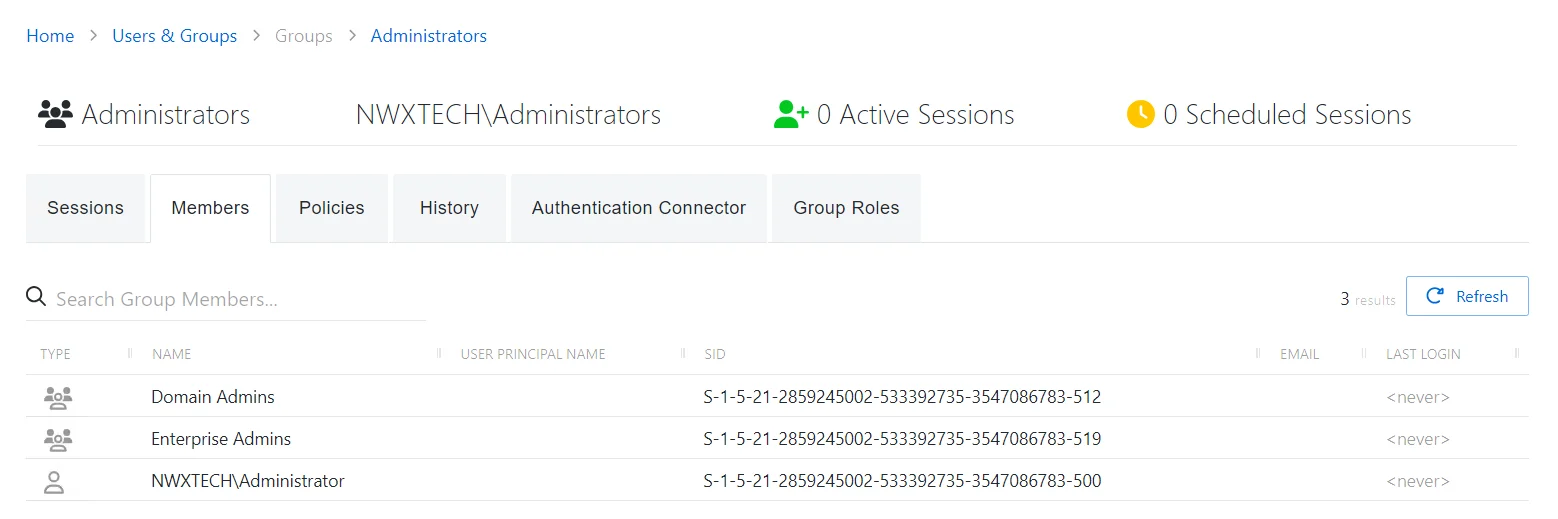
The Members tab has the following features:
- Search Group Members— Searches the table or list for matches to the search string. When matches are found, the table or list is filtered to the matching results.
- Refresh — Reload the information displayed
The table has the following columns:
- Type — Icon indicates the type of object
- Name — Displays the name of the account. See the User, Group, & Application Details Page topic for additional information.
- User Principal Name — Displays the UPN value for the account
- SID — Security identifier for the user or group
- Email — Displays the associated email address, if available
- Last Login — Date timestamp for the last time the user logged into the application
The table columns can be resized and sorted in ascending or descending order.
Add Users & Groups Window
The Add Users & Groups window allows you to select users. From the Users & Groups Page, this window is used to onboard users. From other interfaces, this window is used to select onboarded users.
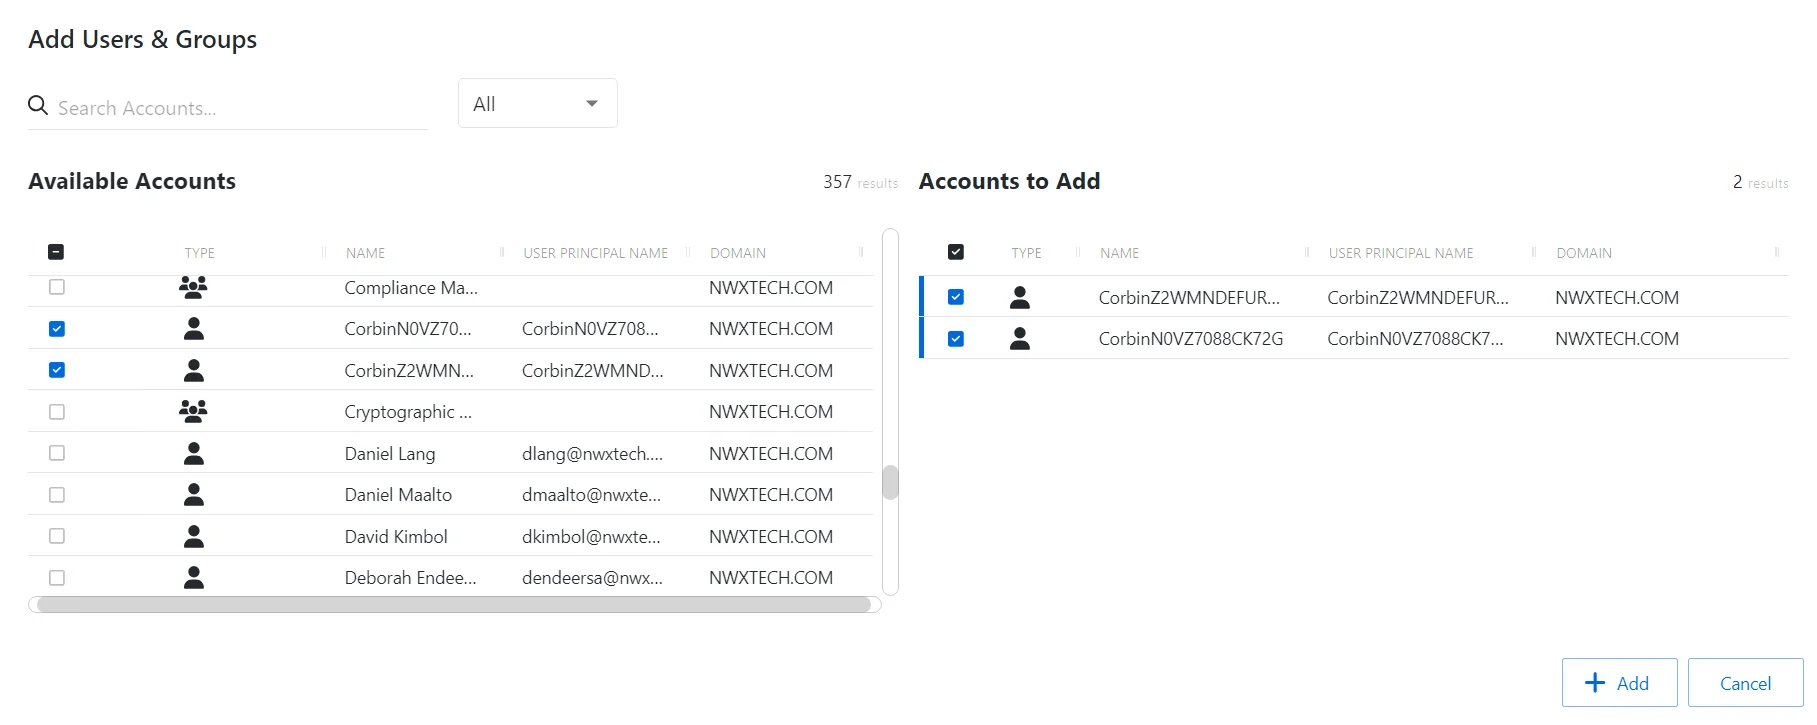
The window has the following features:
-
Search — Searches the table or list for matches to the search string. When matches are found, the table or list is filtered to the matching results.
-
Filter — Provides options to filter results based on a chosen criterion:
- For Onboarding — User and Group,
- For All Other Reasons — User, Group, Application, Collection, and Local User
-
Available Accounts:
- For Onboarding — Shows all available users and groups from the Active Directory sync
- For All Other Reasons — Shows all available users, groups, applications, collections, and local users that have been onboarded
-
Accounts to Add:
- For Onboarding — Shows selected users and groups
- For All Other Reasons — Shows selected users, groups, applications, collections, and local users
-
Add button — Adds modifications and closes window
-
Cancel — Closes the window
The tables in both sections have the following columns:
- Checkbox — Check to select one or more items
- Type — Icon indicates the type of object
- Name — Displays the name of the account
- User Name — Not included for onboarding Displays the sAMAccountName for the account
- User Principal Name — Only included for onboarding Displays the UPN value for the account
- Email — Not included for onboarding Displays the associated email address, if available
- Domain — Displays the domain name for the account
Add Users and Groups
Follow the steps to add users and groups to the console from AD.
Step 1 – Navigate to the Policy > Users and Groups page.
Step 2 – Click Add to open the Add Users and Groups window.
Step 3 – Filter by Users or Groups, or use the Search feature.
Step 4 – Select the checkbox for the desired users in the Available Accounts table.
Step 5 – Click Add to add one or more accounts.
The selected accounts are now added to the Privilege Secure console.