Set Up the Initial Scan
The Metadata Scanner form is displayed.
Sandbox Options
If you are installing in a sandbox, there is an option for Change Log Creation. If Enabled, change logs are created in the sandbox. Due to Salesforce space limits on different sandbox accounts, you may want to disable change logs to save space. This option can also be accessed on the Configuration and Stats page for the sandbox.
Here are the options for a Sandbox installation. Be sure to Save each setting you change. Scroll down to find the Scanner options.

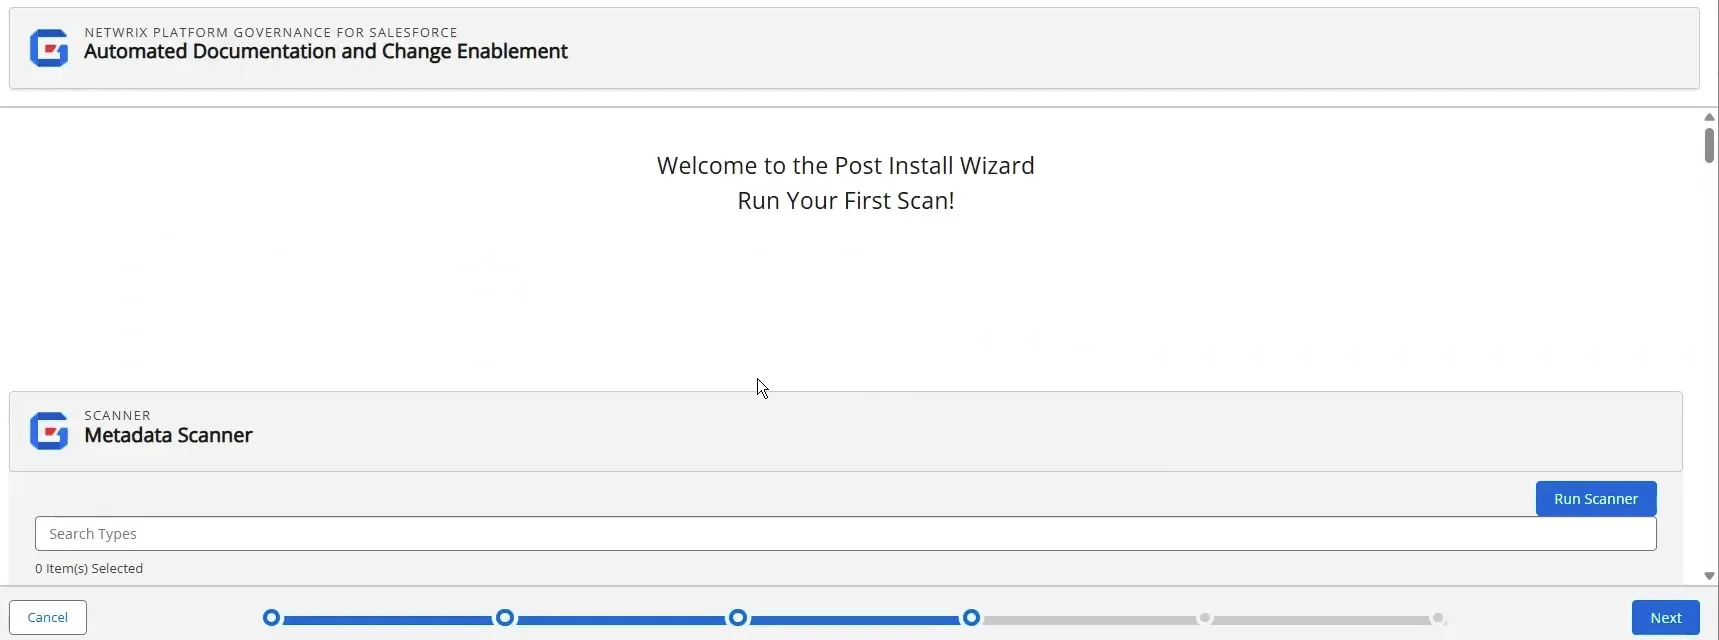
Start Initial Scan
Scroll down to the Metadata Scanner section.
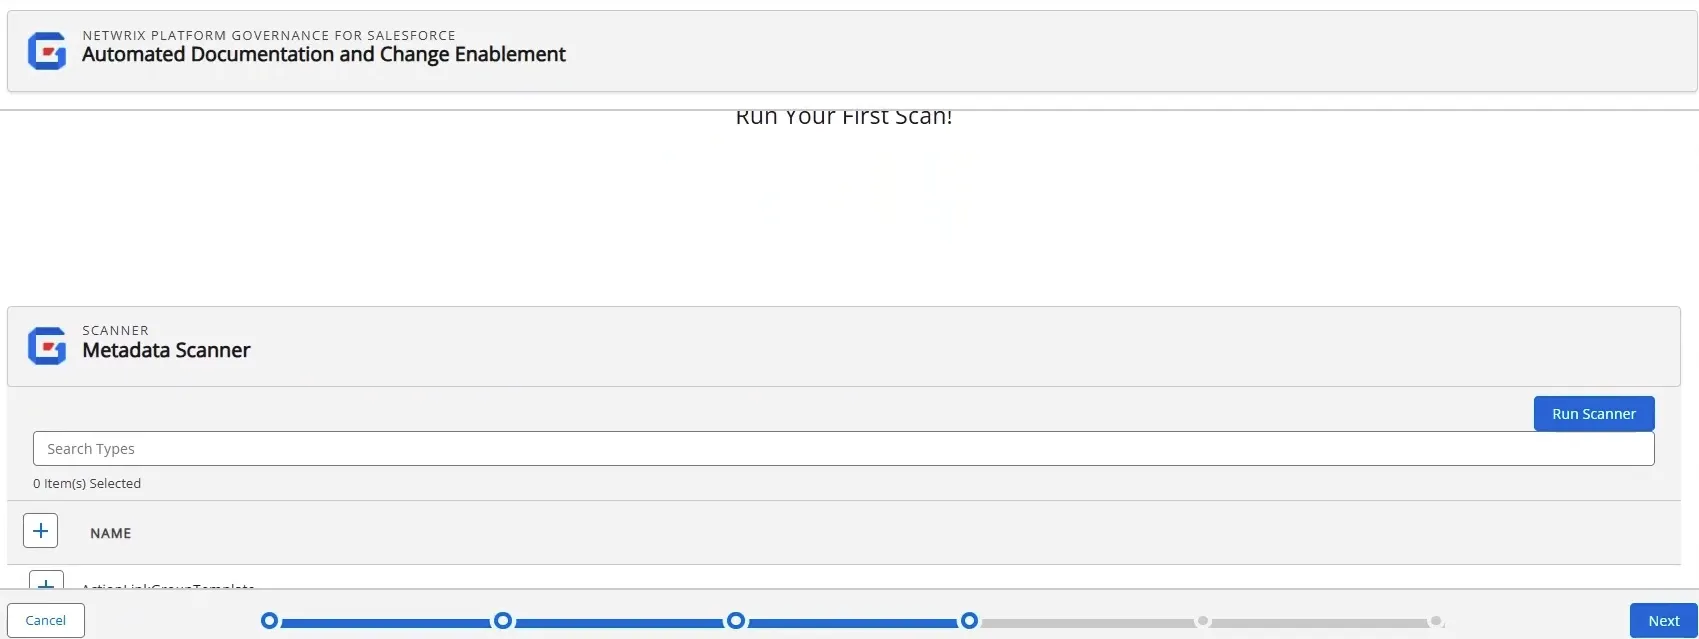
- Click the + by Name to select all types for the initial scan.
- Click Run Scanner. A notification message displays when the scan starts.
- Click Next.
Schedule Automatic Scans
You can schedule the scanners to auto-scan your environment:
-
Toggle Enabled to activate a scan. Hover over the ? for details on the scan.
-
Select the Frequency and Day. If you do not specify a time Platform Governance for Salesforce rescans at midnight.
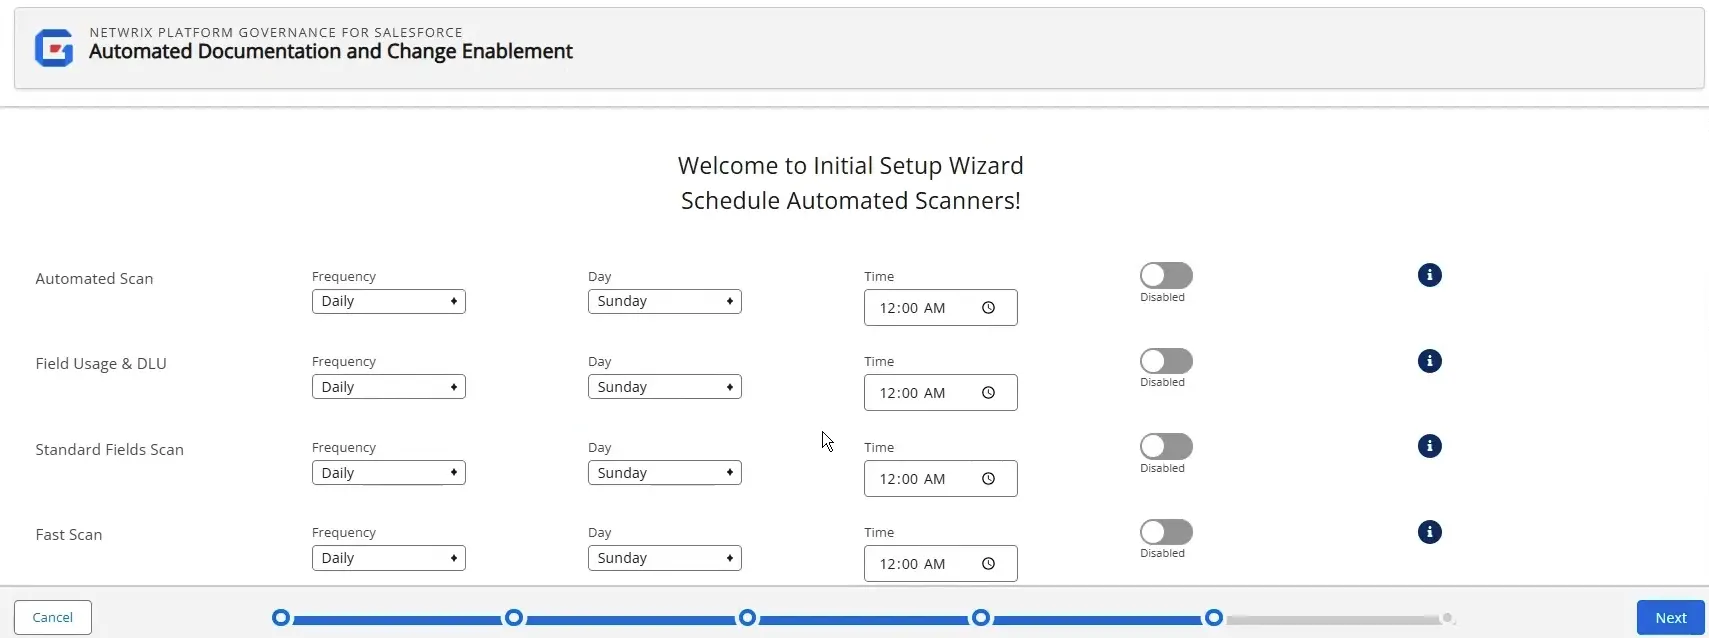
Netwrix recommends you schedule at least the following items:
- Automated Scan: Daily
- Field Usage & DLU: Weekly
- Standard Fields Scan: Weekly
- PermissionSet Assignment: Weekly (Production orgs)
- Subscriber Users Scan: Weekly (Production orgs)
-
Click Next.
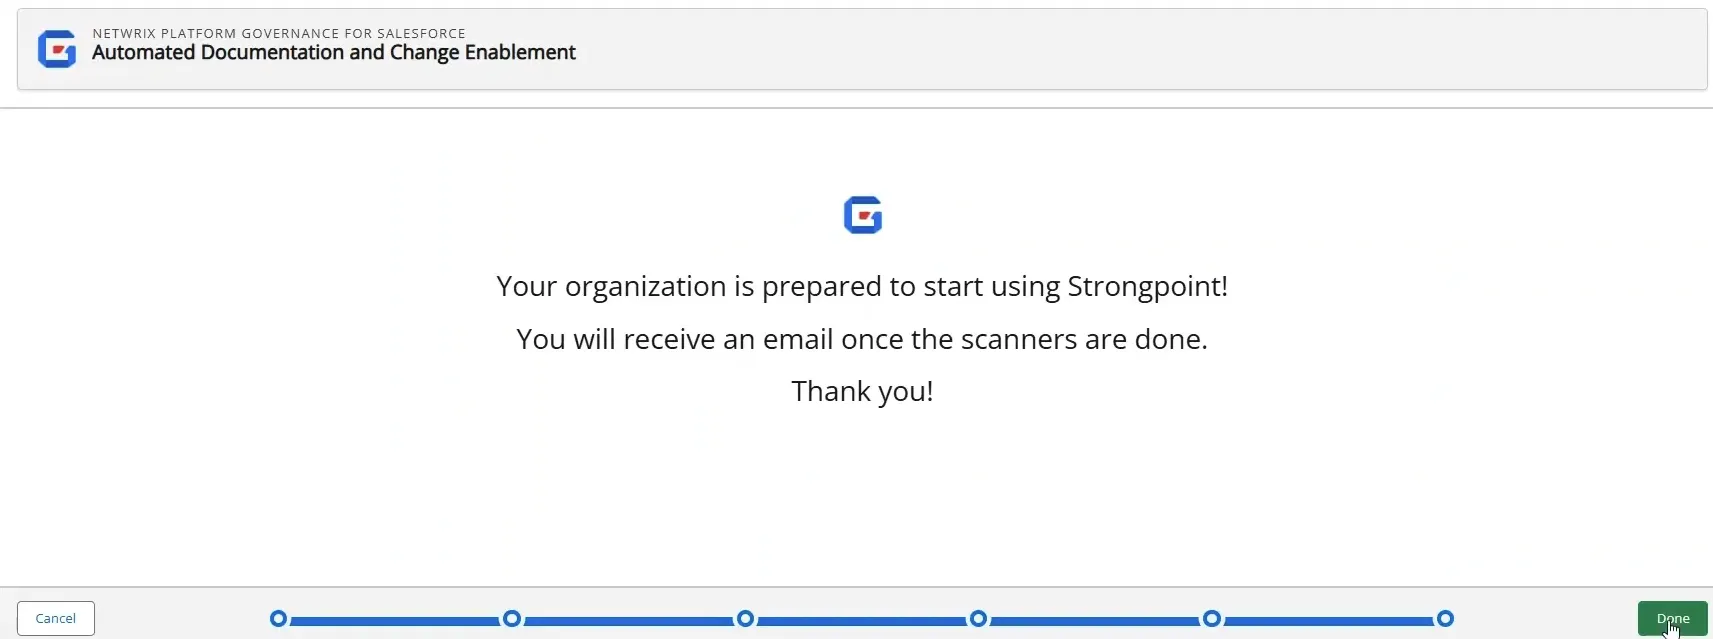
The final screen is displayed. Click Done to close the wizard.
If you open the home page, you see the Scanner Status is In Progress.

Next Step: Run the Scanner
Run the Getting Started Wizard
The Getting Started Wizard helps you set up Platform Governance for Salesforce after you have done the basic installation and configuration.
To use the Getting Started Wizard:
- Open Netwrix Dashboard.
- Open Settings> Getting Started Wizard
The Getting Started Wizard opens to help you finish the configuration and set up.
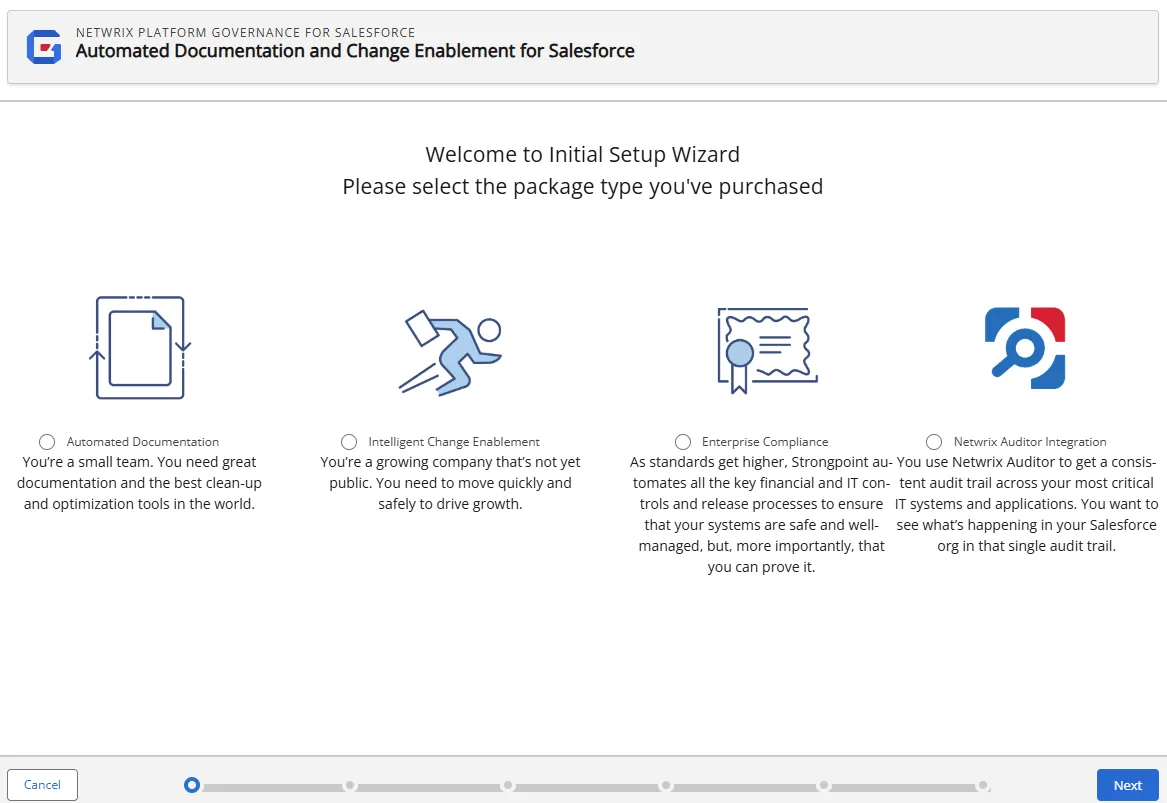
Choose Your License Type
On the Initial Setup Wizard page, choose the package type you have purchased. If you have an Intelligent Change Management or Enterprise Compliance License, enter the Input Authorization Token sent to you. Click Next.
Add your Credentials
Once you have chosen your license type, you need to add your credentials. If your credentials change, an alert is sent to update the saved credentials. Expired credentials can cause auto scanners to fail. Use Netwrix Dashboard > Settings> SP Credentials to update your credentials.
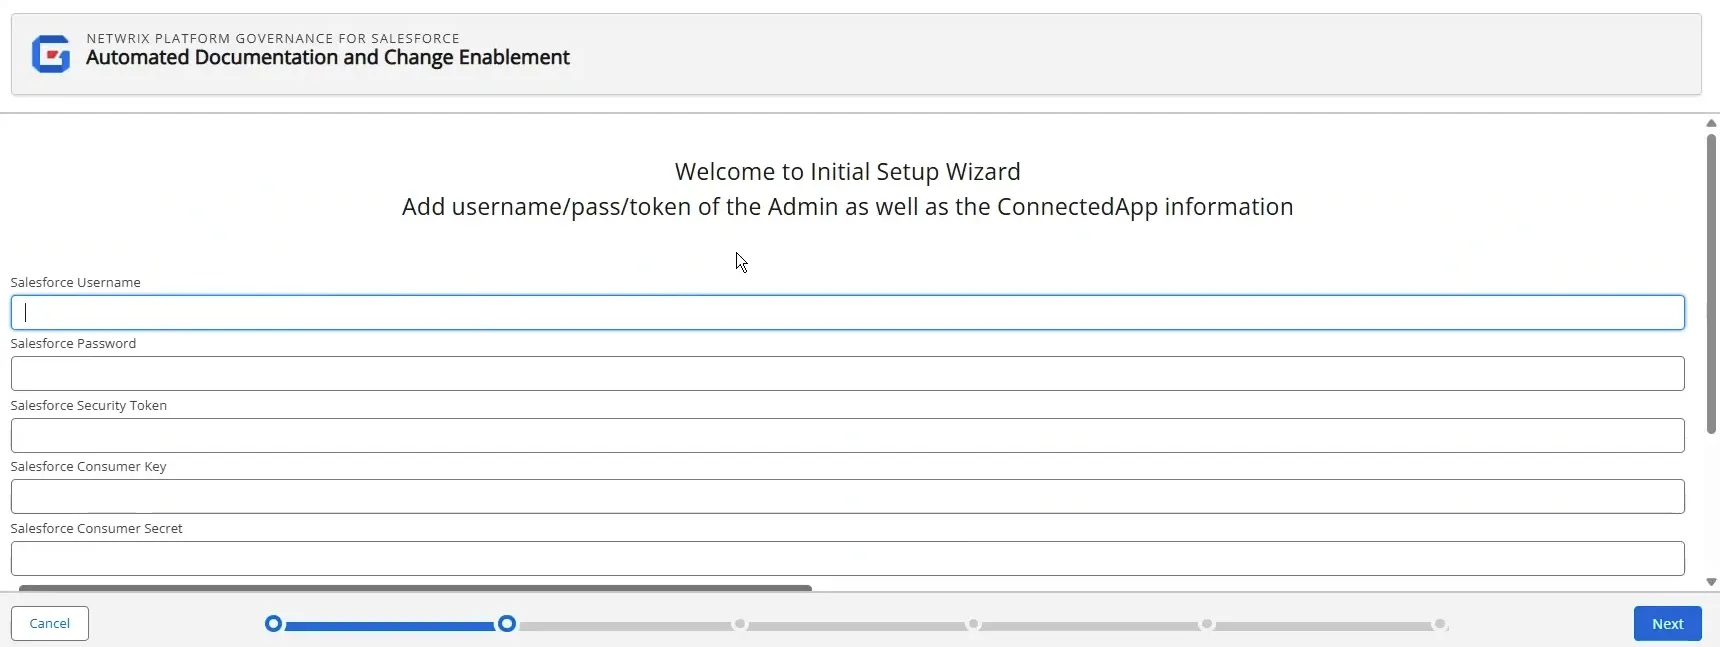
- On the Credentials page, add the following values:
- Salesforce Username
- Salesforce Password
- Salesforce Security Token
- Salesforce Consumer Key Extracted when you created the Strongpoint Connected App
- Salesforce Consumer Secret Extracted when you created the Strongpoint Connected App
- Click Next
Test Your Connection
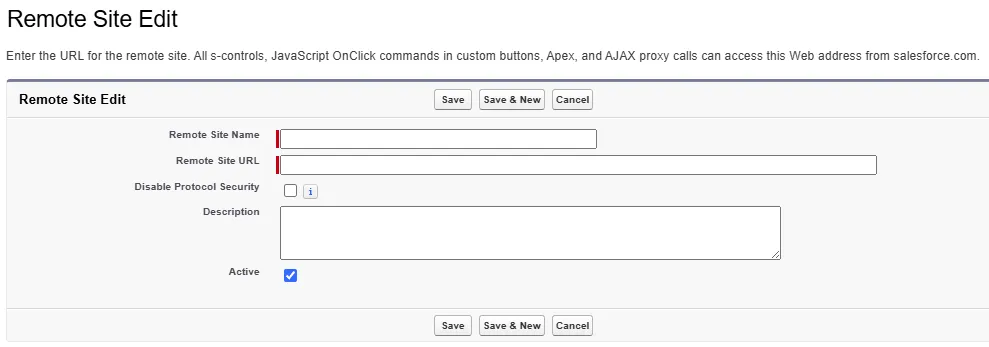
Once you have set up your credentials, you need to configure the remote site settings.
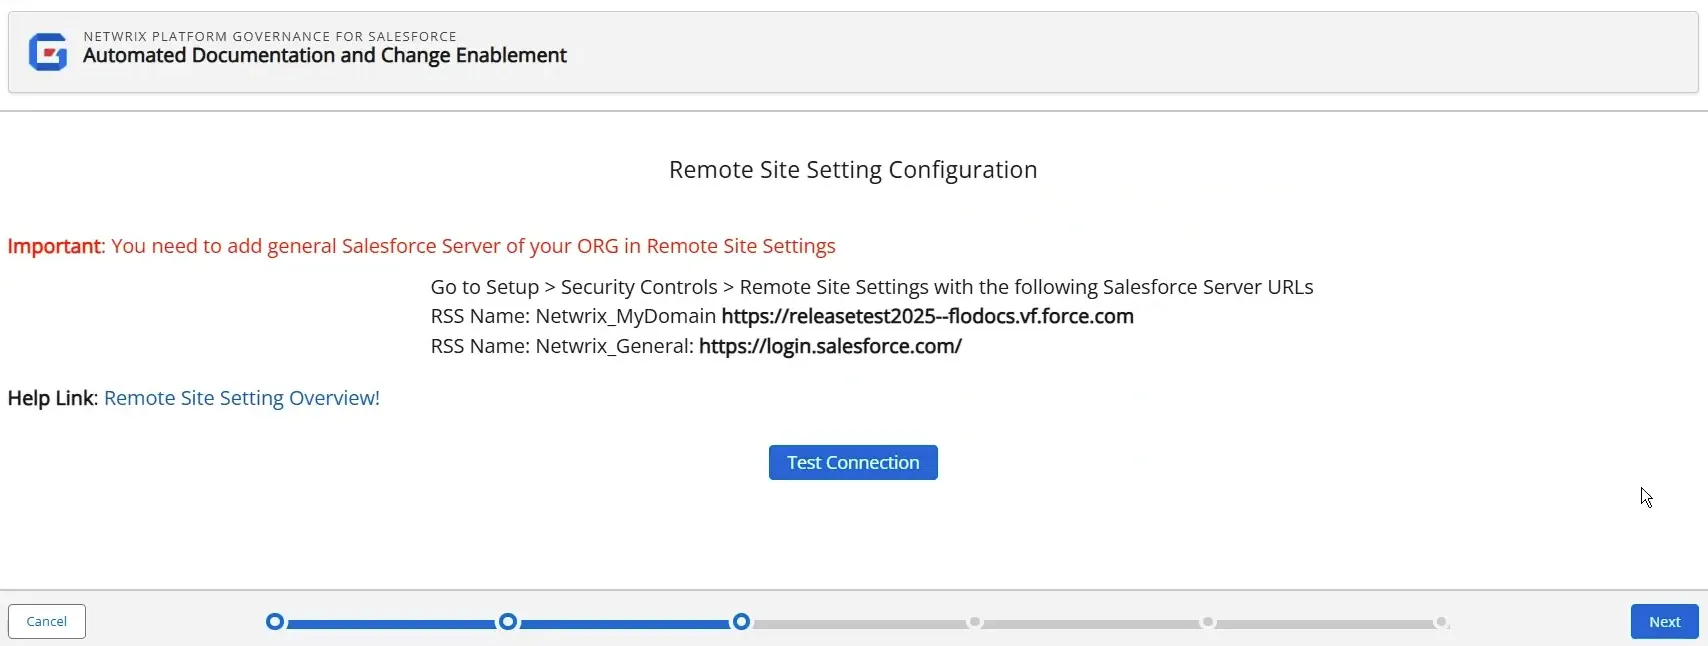
-
Open Salesforce Setup > Security > Remote Site Settings.
-
Click New Remote Site.
-
Copy/paste the information from the wizard to create the remote sites.
-
Click on Test Connection. Test connection was Successful is displayed if the connection succeeds. If the connection fails, the wizard suggests troubleshooting steps to resolve the issue.
-
Click Next.
Next Step: Set Up the Initial Scan
Validate the Data
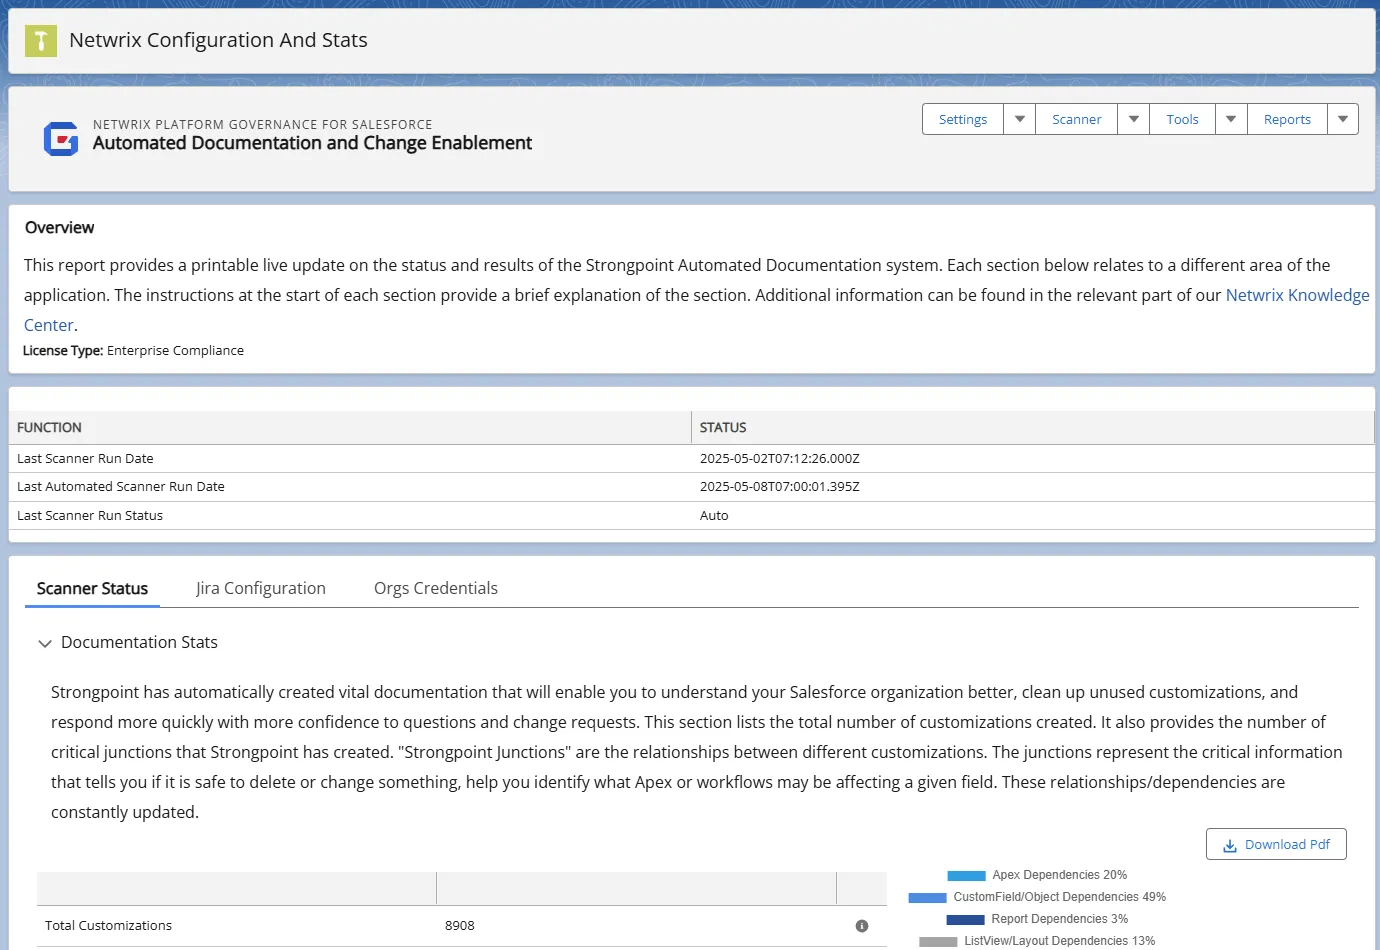
Accurate documentation is critical to support your change management and clean up processes. Platform Governance for Salesforce has automated tools to enable you to ensure that your customizations are documented properly.
Status Report
You can validate data by checking the status report. The status report is available to download as a PDF.
From the Netwrix Dashboard: click Configuration and Stats in the Resources section, or open Settings > Configuration and Stats.
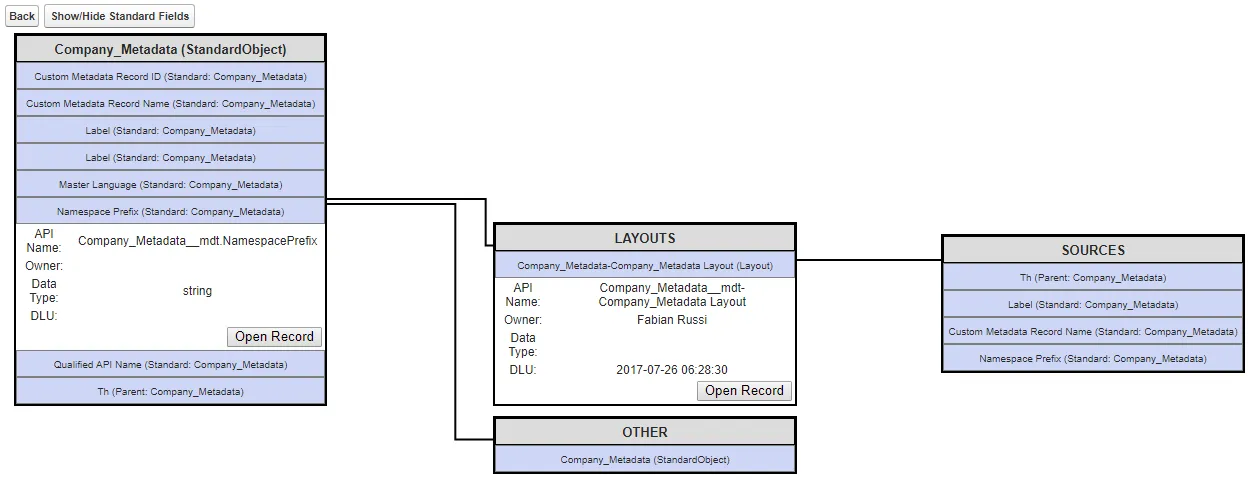
Dependency Relationship Diagram
You can check data by navigating through the Dependency Relationship Diagram (DRD) and selecting object(s) types.
To validate data with the DRD:
- Open Netwrix Dashboard > Tools > Dependency Relationship Diagram.
- Select an Object(s) Type from the pull-down menu.
- Click on a field and validate the data.
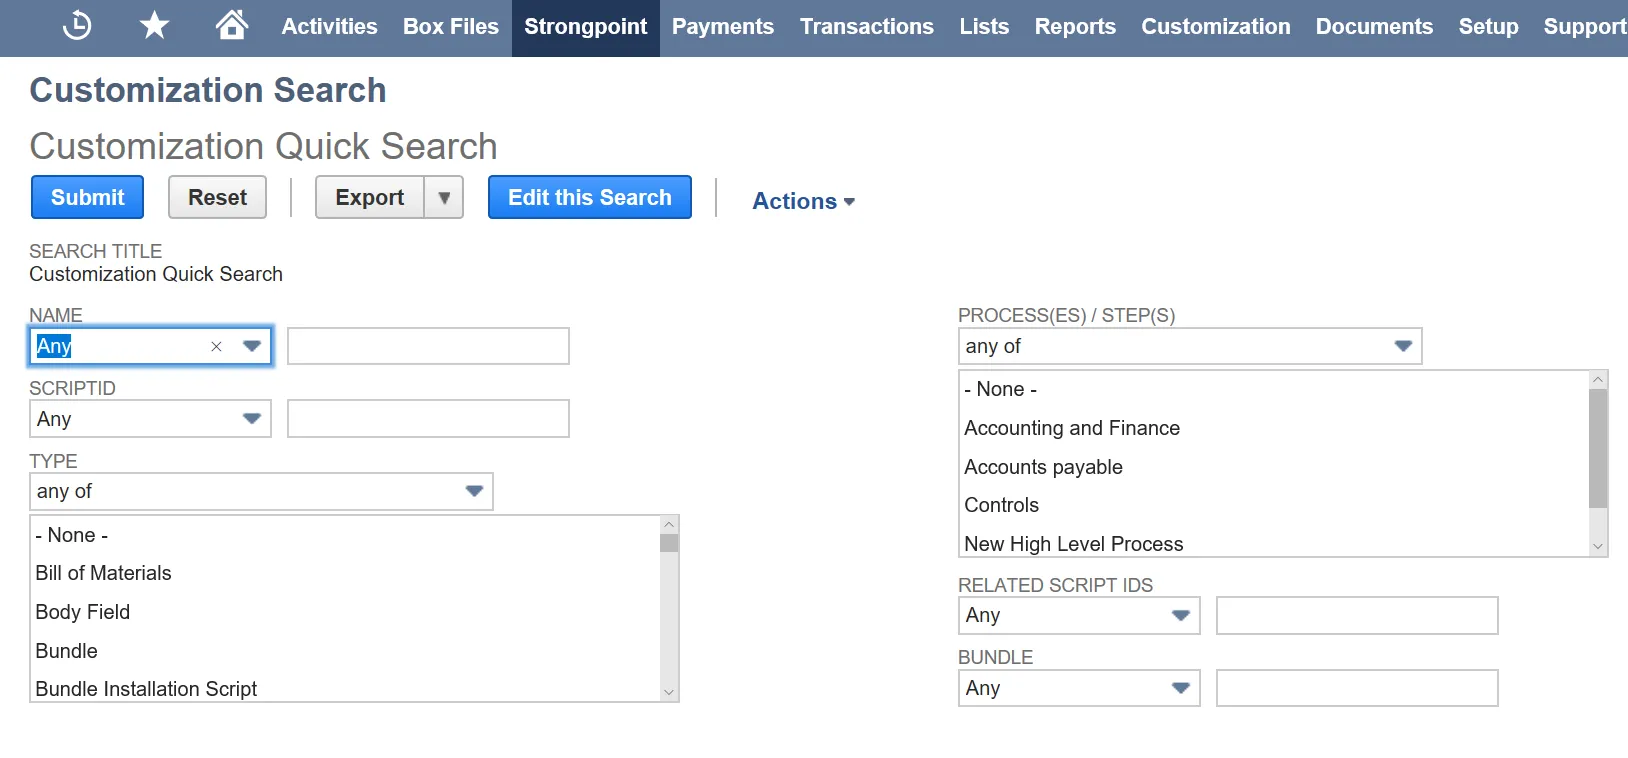
Customization Quick Search
The Customization Quick Search opens a report with all customizations. From this report, you can add filters to find specific customizations that you need to validate the data.
To validate data with the Customization Quick Search:
- Open Netwrix Dashboard > Reports > Customizations > All Customizations
- Scroll, Search or add Filter(s) to locate the customization.
- Click on the Customization and validate the data.