Integration Mapping
The Integration Mapping tool maps customizations between External Systems and NetSuite.
Here is the basic process. You can click on any of the steps to jump to the section.
Step 1: Create the External System Customization record. (optional)
Step 2: Create a .csv file.
Step 3: Open Integration Mapping tool.
Step 4: Select or Enter the External System.
Step 5: Upload your .csv file.
Step 6: Review and Finish.
Step 7: View the Summary and ERD.
Step 1: Create the External System Customization Record
You can create the External System before using the mapping tool. If you do not create the External System, it can be automatically created by the tool.
- Open Strongpoint > Customizations > Customization > New
- Enter a Name for the External System, for example: Salesforce. (External System) is appended to the Name. For example, Salesforce (External System).
- Enter a Description.
- Select External System from the Type list.
- Click Save.
Step 2: Create a .csv file
The .csv file is where you specify the customization mapping between the External System and NetSuite. The file is uploaded when you run the tool. You can create a file with the specified headings, or download the template with the link on the first page of the Integration Mapping tool. Do not change the specified headings. Here is the template:

- External Name is the Object’s Name in the external system.
- External Script ID is the Object’s Identifier in the external system.
- External Type is the Object’s Customization Type in the external system.
- Relationship(DataSource or Dependent Object) specifies where the object originates. DataSource indicates an object from the external system translates into NetSuite. Dependent indicates the object translates from NetSuite to the external system.
- Target Object Name or ScriptID is the Object’s Name or ScriptID in NetSuite.
- NS Parent is the Parent of the Target Object in NetSuite.
Step 3: Open Integration Mapping tool
The Mapping Tool menu item is hidden by default. If you do not see the option in your menu, refer to the Managing Menus topic for information on making it available.
Open Strongpoint > Integrations > Mapping Tool

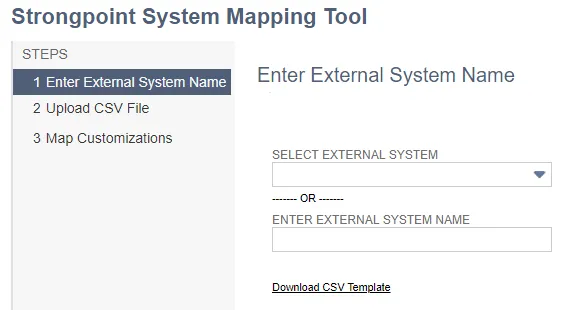
Step 4: Select or Enter the External System
-
Select an existing External System from the list if you created it during Step 1, or Enter a new name to have the tool automatically create a new External System, for example: Salesforce. Strongpoint appends (External System) to the Name. For example, Salesforce (External System).
-
You can use the link to download the .csv template if you have not already created the file.
-
Click Next to continue.
Step 5: Upload your .csv file
-
Click Choose File.

-
Navigate to the**.csv file** containing your mappings.
-
Click Next to continue.
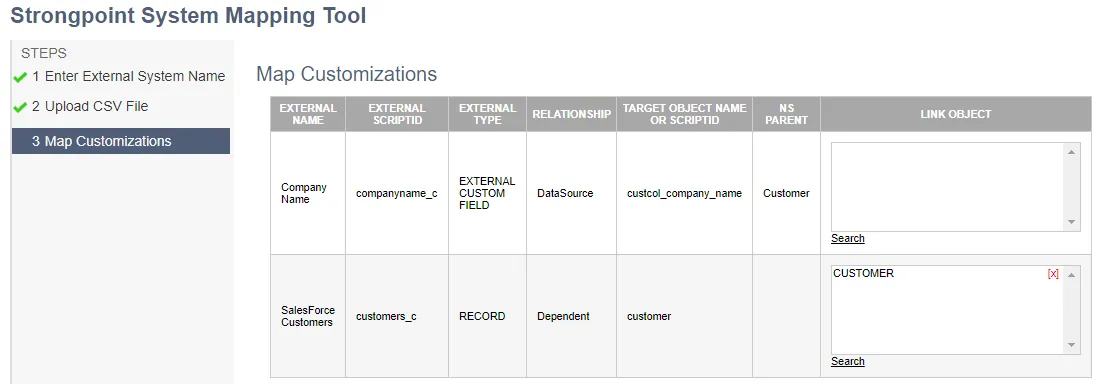
Step 6: Review and Finish
-
Review customization mappings. If you entered a ScriptID in your .csv, the associated Link Object is shown.
-
Click Search to open the search form and select or research additional Link Objects.

-
Search by all or part of a Name, Type or all or part of a ScriptID. For example, enter cust for Name and click Search to find all customizations containing the search term:
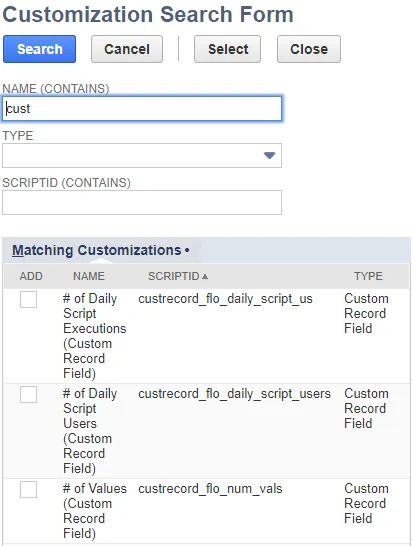
- Click in the Add column to select one or more objects.
- Click Select.
- Close the form when complete.
-
Click [X] to remove a Link Object.
-
Click Finish to begin the mapping.
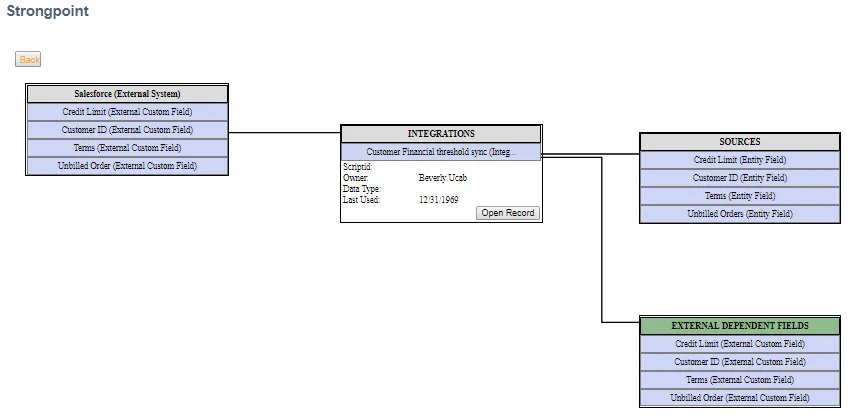
Step 7: View the Summary and ERD
-
Check the Summary for any Import Errors.

-
Click the linked Internal ID to display the ERD for each mapped customization.
Here is an example of an expanded ERD showing Integrations, Sources, and External Dependent Fields. Note the External Dependent Fields is highlighted with a green header.