Resolving Non-Compliant Changes
To access the Open Non-Compliant Changes Report:
-
Open Strongpoint > Change Management Reports > Open NonCompliant Changes
The Non-Compliant Changes Report gives you a list of the Change Logs. You can filter the report or sort by the column heads.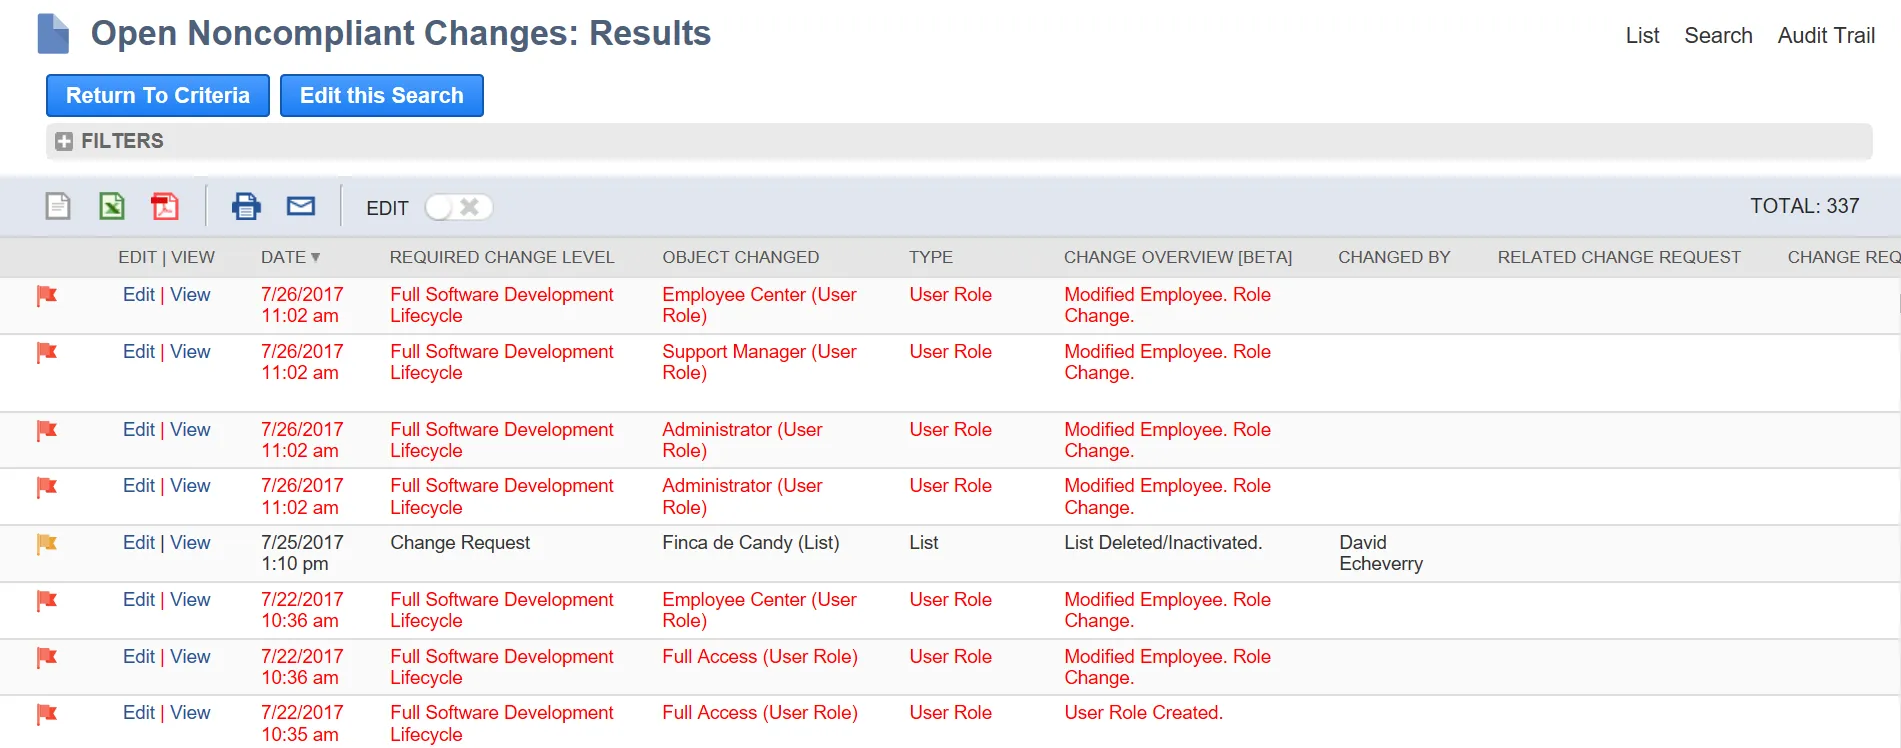

-
A noncompliant change means something got changed without the required approvals. View each change log record to investigate the change, or use the Mass Update procedure. You can retroactively attach a change request to a noncompliant change and get the necessary approvals for the change to be compliant.
- Create a New Change Request or open an existing one.
- Set it to Pending Approval.
- Once it is approved and complete, set the Status of the Change Request to Complete.
- Edit the Change Log from the report.
- Enter the Related Change Request.
- Enter the Related Process Issue if applicable.
- Enter the Resolution Description.
- Once all changes are made, select Closed for the Status.
- Save the Change Log.
Resolving Open Non-Compliant Changes Using Mass Update
There are occasions where you want to resolve Open Non-Compliant Change Logs without going through each one manually. For example, if your Change and Approval Policy was incorrectly set-up or if it was in place before your Go-Live. For these scenarios Netwrix recommends you create a Mass Update to resolve all applicable incidents.
-
Open Lists > Mass Update > Mass Updates
-
Expand General Updates
-
Select Change Log from the Custom Records category.
-
Assign a meaningful Title of Action.
-
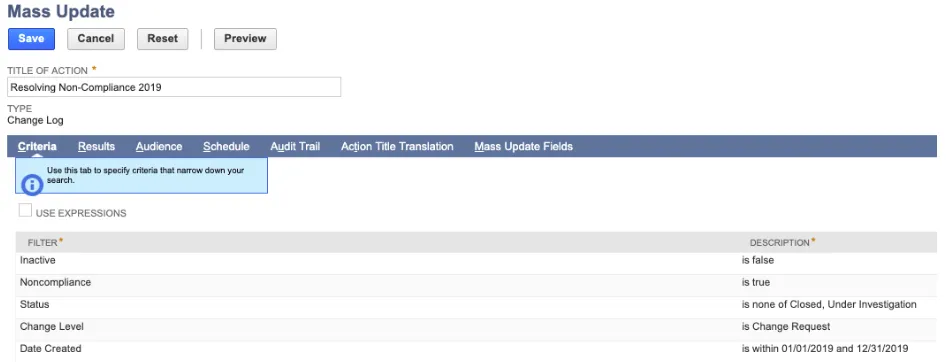
Set these filters on the Criteria tab:
-
Inactive is False
-
Noncompliance is True
-
Status is None of Closed, Under Investigation
-
Change Level is Change Request
-
Date Created is [applicable range]
-
-
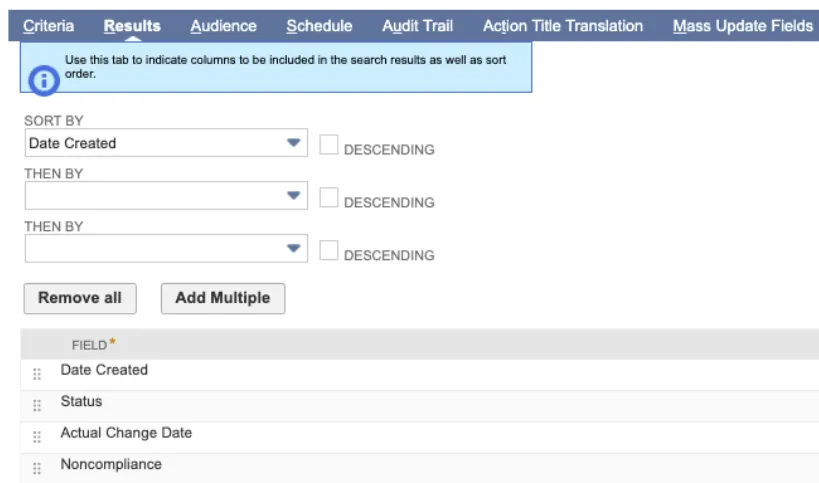
Open the Results tab.
-
Set Sort By to Date Created
-
Set these Fields:
-
Date Created
-
Status
-
Actual Change Date
-
Noncompliance
-
-
Open the Mass Update Fields tab.
-
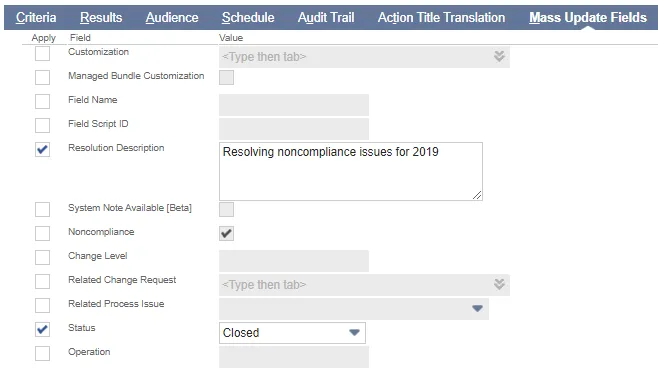
Check these Fields:
-
Resolution Description and add a meaningful description of the Mass Update for Value.
-
Status and select Closed for the Value.
-
-
Save the Mass Update.
-
Open Lists > Mass Update > Saved Mass Updates
-
Select the Mass Update you created.
-
Click Preview and verify the correct reports are included. Modify the Mass Update if needed.
-
Click Perform Update to run the update and resolve the applicable noncompliance issues.