Example: Deployment or Library Script Changes related to an Approved Script Change
Use Case
A developer plans to make changes to a Suitelet, including the Suitelet library file and depoyment.
-
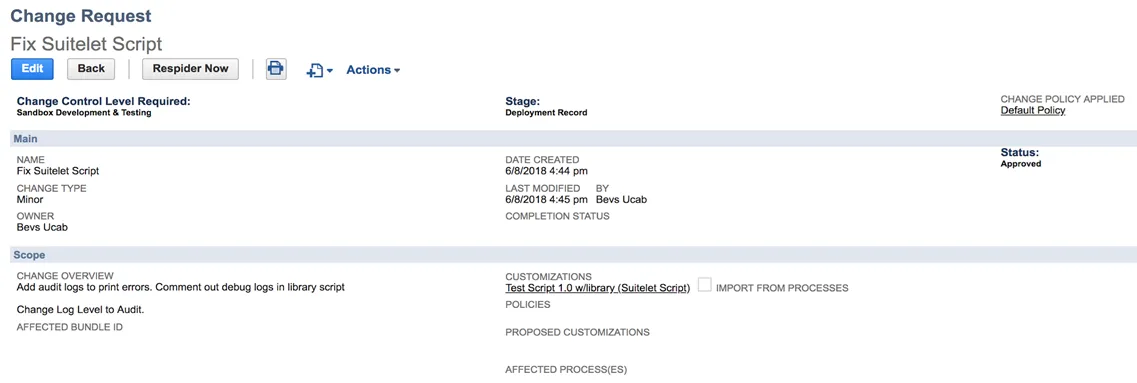
Developer creates a Change Request and attaches the Suitelet:
-
IT Approvers approve the change.
-
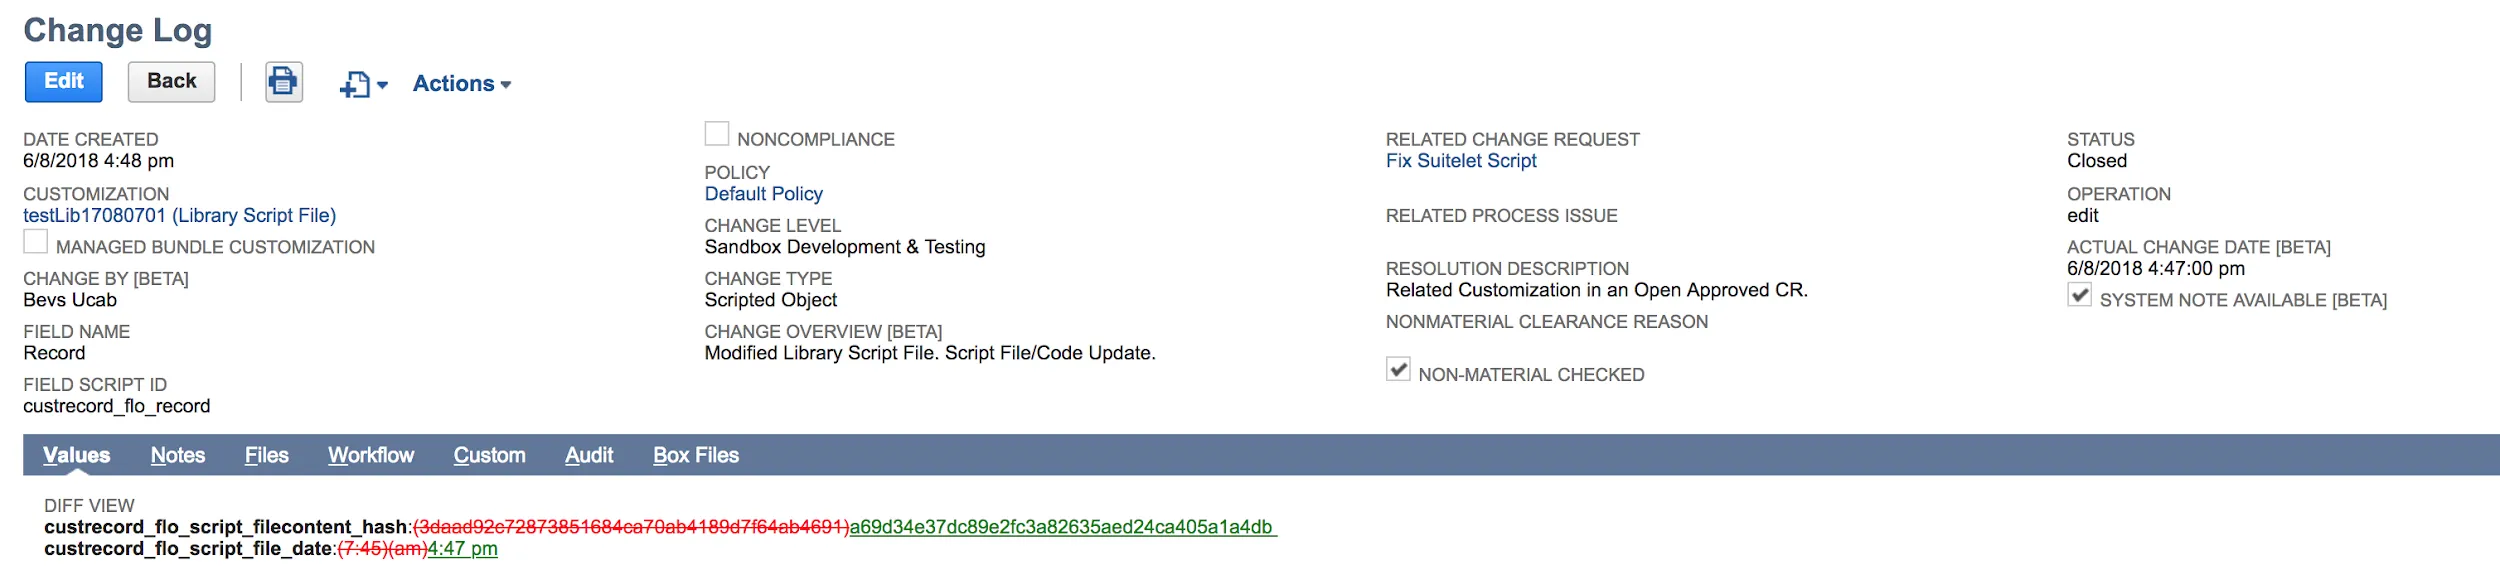
Developer makes necessary changes to the script.
Expected Result
-
The change logs for the Suitelet, the Suitelet library script and deployment are attached to the related script approved Change Request.

-
The logs are compliant.
Example: Walkthrough Sample Changes
New Object Compliant Change with a Change Request
-
Open Strongpoint > Change Management Tools > Change Request > New
-
Enter a Name and Change Overview.
-
Click Lookup Customization. Enter a sample Name and set Type to Entity Field.
-
Click Add Selected Customization to add the field as a proposed customization.
-
Click In Progress in the status bar.
-
Click Save. The Change Level Required, Current Stage and Change Policy are displayed.
-
For this example, if you are not an Approver:
- Click Edit.
- Select yourself as an Additional Approver.
- Set Approval Status to Approved.
- Select yourself as Approved By.
- Click Save. The status bar indicates Approved (Override).
If you are an Approver:
- Click Pending Approval in the status bar.
- Approve and Reject buttons appear for approvers. Click Approve.
- The status bar indicates Approved.
Create the Entity Field
- Open Strongpoint > Customizations > Customization > New
- Add the Name of your proposed entity field customization.
- Select Entity Field for Type.
- Click Save.
- Open the Change Log tab to view the change.
- Check Customer on the Applies To tab.
- Open Strongpoint > Change Management Tools > Change Request
- Select your Change Request from the list.
- Click Respider Now.
Create a Compliant Change with a Change Request
- Change the __Entity Field__ (for example, apply it to Vendor) and click Save.
- Open the Customization Record.
- Click ReSpider Now.
- Open the Change Log tab to see the changes.
- Open the Change Request and click Complete in the status bar.
Create a Non-Compliant Change
This change will be flagged as non-compliant and appear on the report as Non-Compliant.
- Change the Entity Field (for example, apply it to Project) and click Save.
- Open the Customization Record.
- Click ReSpider Now.
- Open the Change Log tab to see the changes.
- Refresh the Changes Without Bundle Search to see that it is marked as Non-Compliant Yes and the Reason is Change Request.
- View the Change Log.
Open the Non-Compliant Changes Report
- Open Strongpoint > Change Management Reports > Open Non-Compliant Changes
- Set the Date Created to Today
- Resolve and close non-compliant change.