Learning the applications
Which applications need to be learned?
As already indicated in the previous section, RDP and SSH applications are completely embedded in Netwrix Password Secure. These applications thus do not need to be specially learned. All other applications in Windows need to be learned once.
What does learning mean?
The record contains the user name and password. Learning involves defining the steps required. The result is equivalent to a script that defines where precisely the login data should be entered. In Netwrix Password Secure, the completed instructions themselves are also known as an "application".
Relevant rights
The following options are required.
User right
- Can add new RDP applications
- Can add new SSH applications
- Can add new SSO applications
- Can add new web applications
Configuration
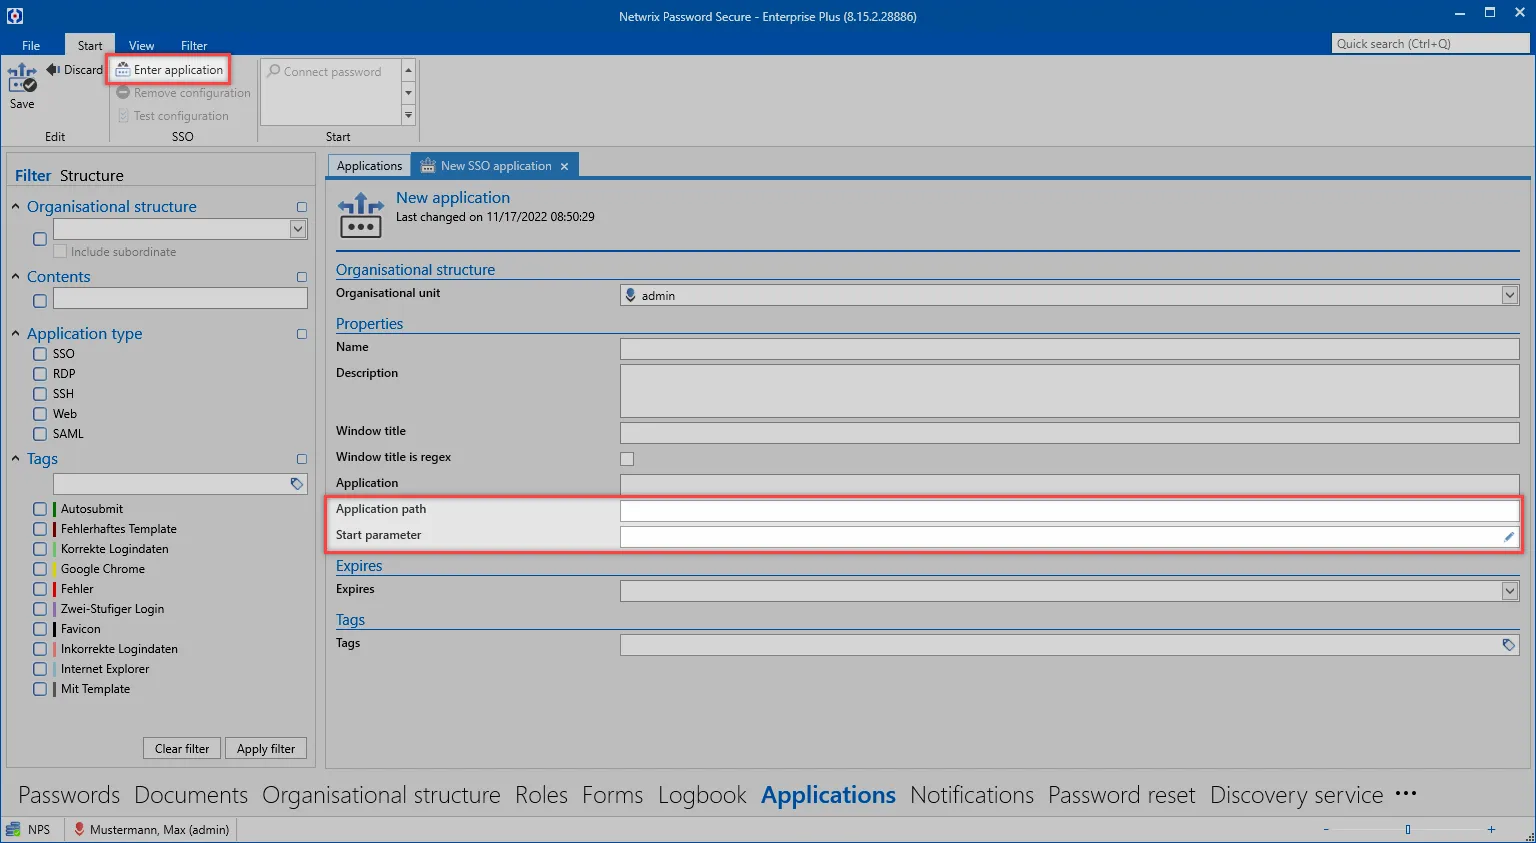
First, a new SSO application is created via the ribbon.

Various properties for the application can now be defined in the tab that opens. The fields Window title, Application and Application path are not manually filled. This is done via the Create application button in the ribbon:
A crosshair cursor now appears. It enables the actual "mapping" or assignment of the target fields. You can see the field assignment for the user name below using a login to an SQL server as an example. All of the other fields that should be automatically entered are assigned in the same way. The process is always the same. You select the field that needs to be automatically filled and then decide which information should be used to fill it.
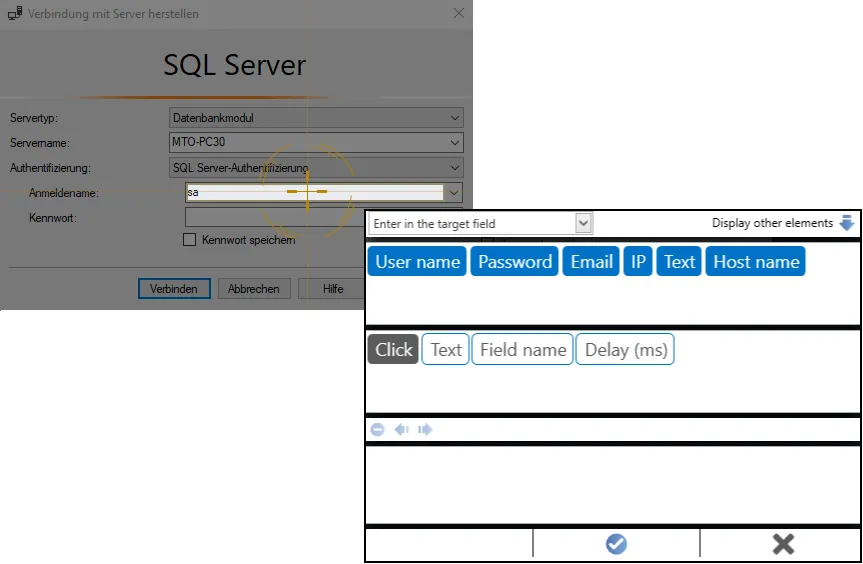
In parallel to the previous step, all of the already assigned fields will be displayed on the right edge of the screen. In this example, the VMware vSphere Client has a total of 4 assigned fields: IP, user name, password and clicking the button to subsequently confirm the login.

NOTE: "Graphical recognition:" The graphical recognition function provides additional protection. It can be used to define other factors for the SSO. An area is defined that then serves as the output for the comparison (e.g. for login masks with an image). In order to activate the graphical recognition function, click on the eye at the top right after assigning the fields! The area that will serve as the output point is then marked.
Once you have assigned all of the fields, you can exit the application process using the enter button. The fields "Window title", "Application" and "Application path" mentioned at the beginning are now automatically filled.

As you can see, the .exe file is directly referenced. If the application is saved to the same storage location for all users, it can then also be accessed by all other users.
Linking records with applications
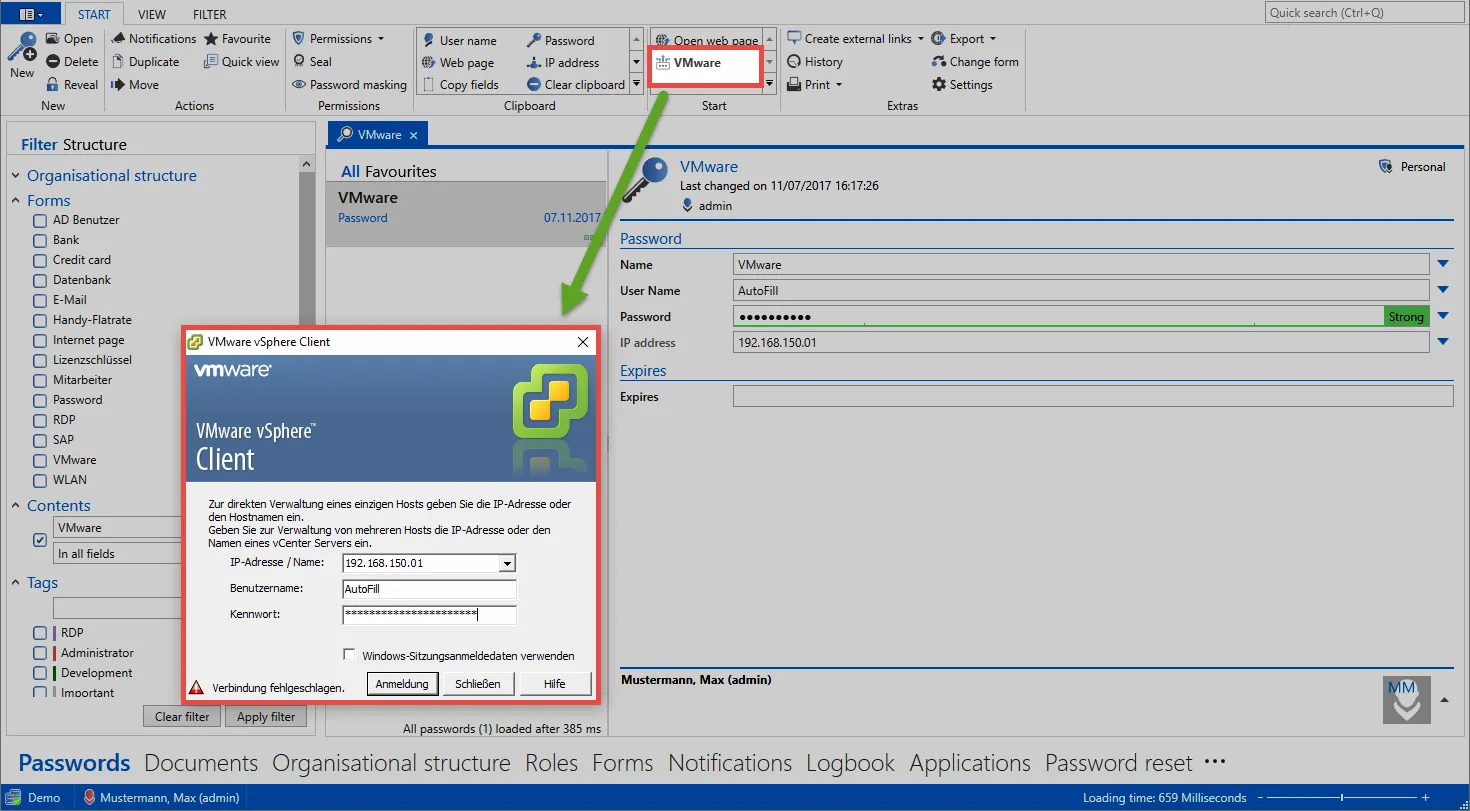
In the Passwords, the newly created application can now be directly linked. To do this, mark the record to be linked and open the "Connect application" menu in the "Start" tab via the ribbon. This will open a list of all the available applications. It is now possible here to link to the previously created application "VMware".

When the link has been established, this application can then be directly started via the ribbon in future. Pressing the button directly opens the linked application.
CAUTION: With respect to permissions, applications are subject to the same rules as for passwords, roles or documents. It is possible to separately define which group of users is permitted to use each application.
Start Parameter
Start parameters for SSO applications⚓︎
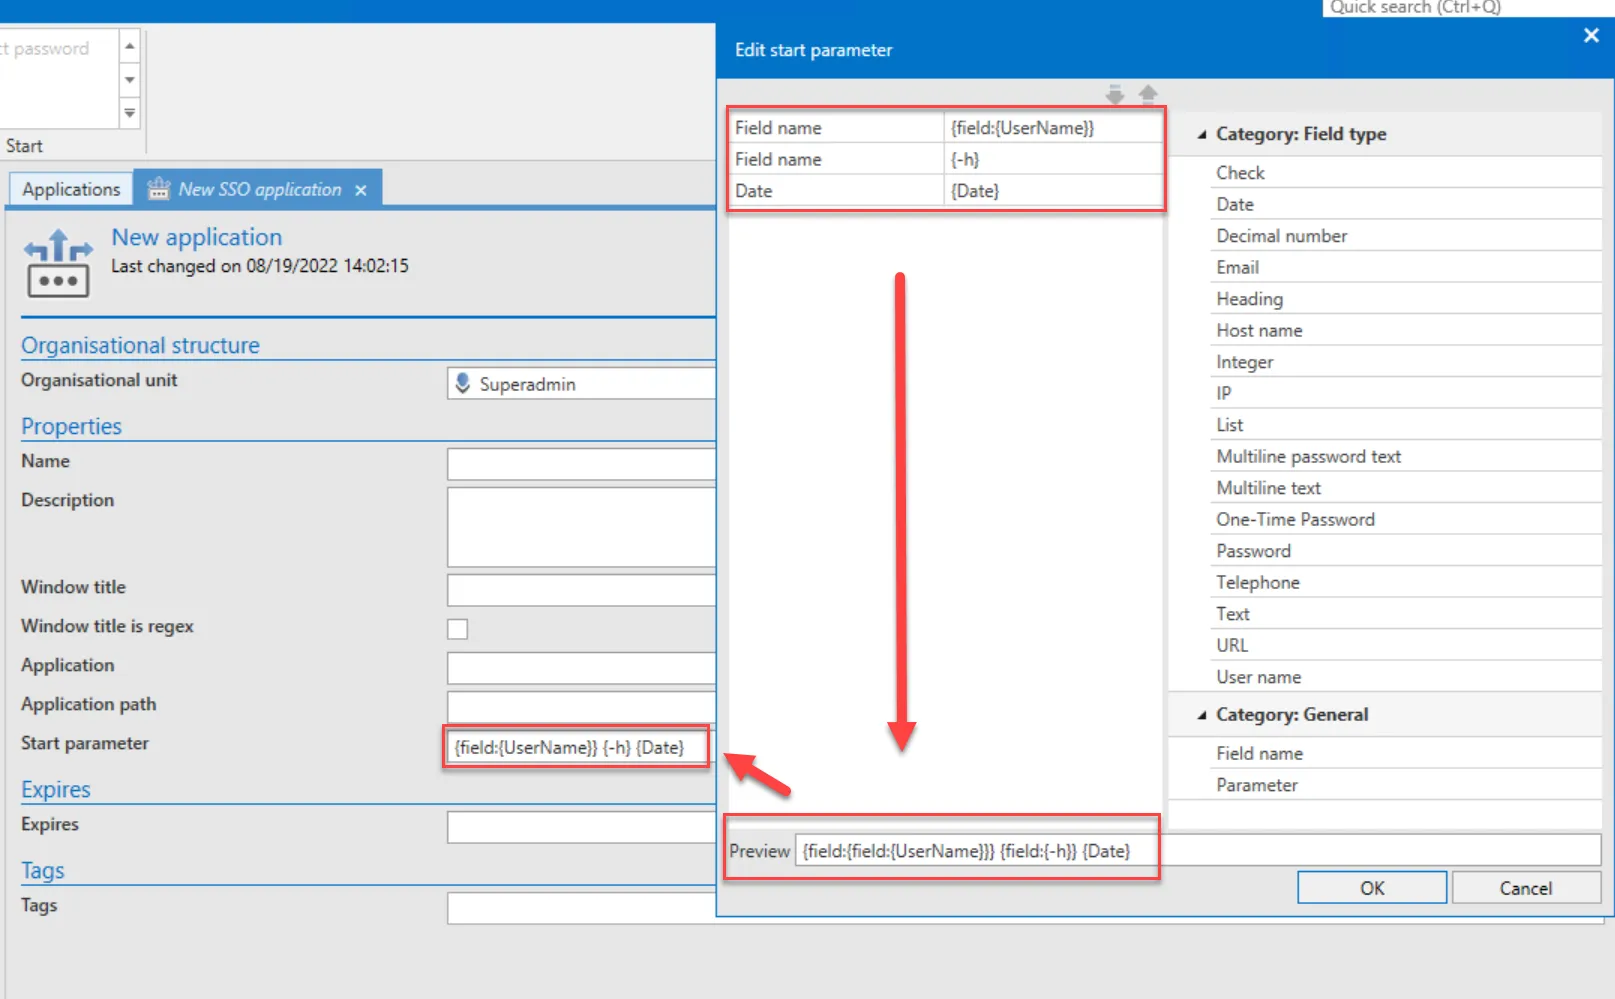
Start parameters can be defined when creating or editing an SSO application. These parameters are immediately transferred when starting the application. This is done, for example, to directly start the program with various basic settings. The corresponding parameters should be requested from the manufacturer of the software or taken from the documentation.
Configuration of the parameters⚓︎
The parameters can be directly entered in the application in the corresponding field. Alternatively, a configuration window is also available for this purpose.
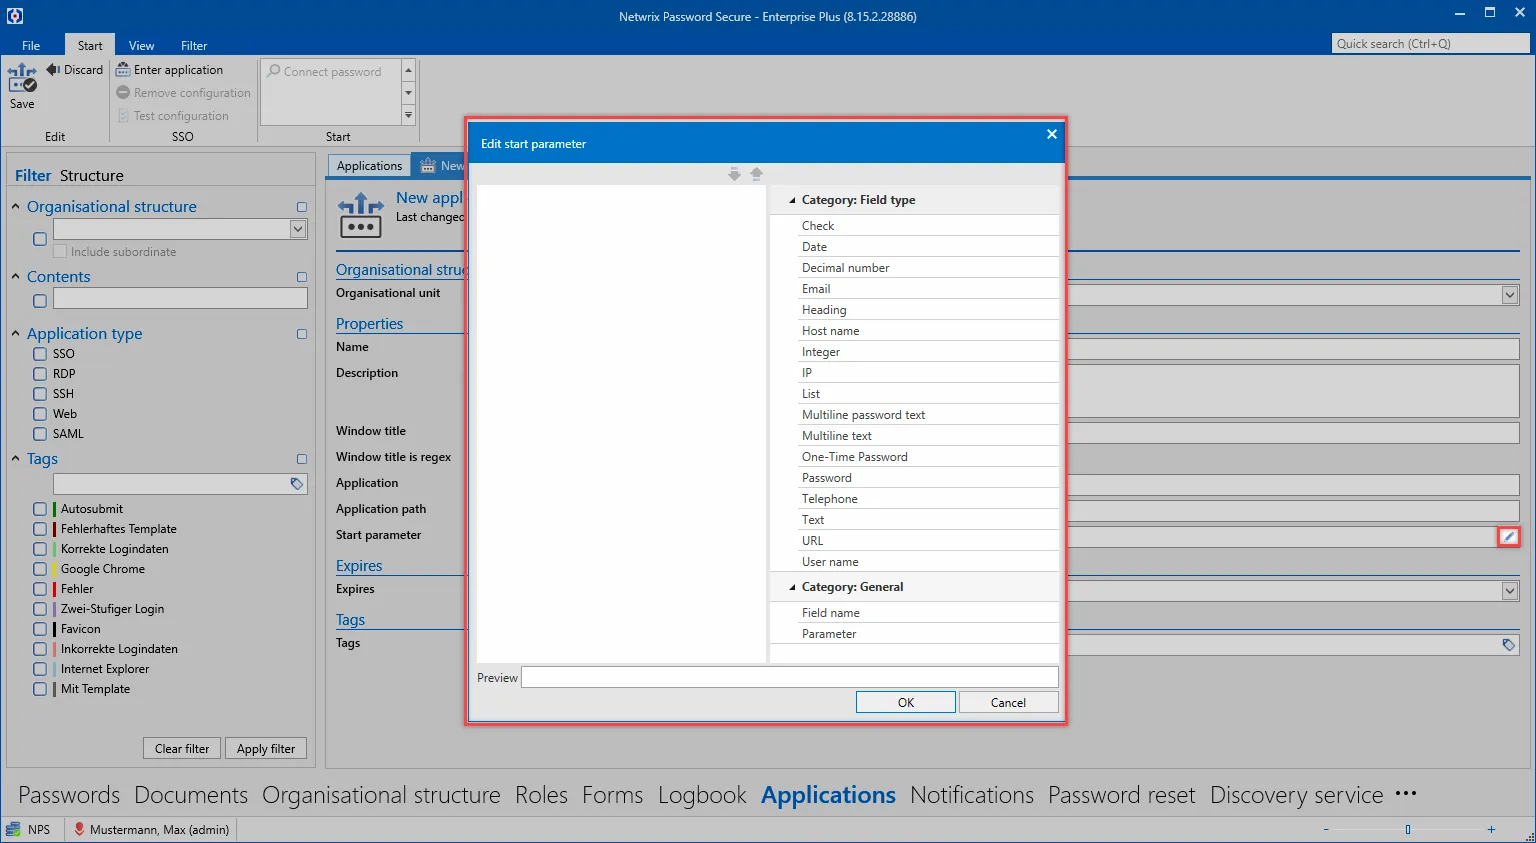
The required elements can be moved here from the right side to the left side by drag & drop.
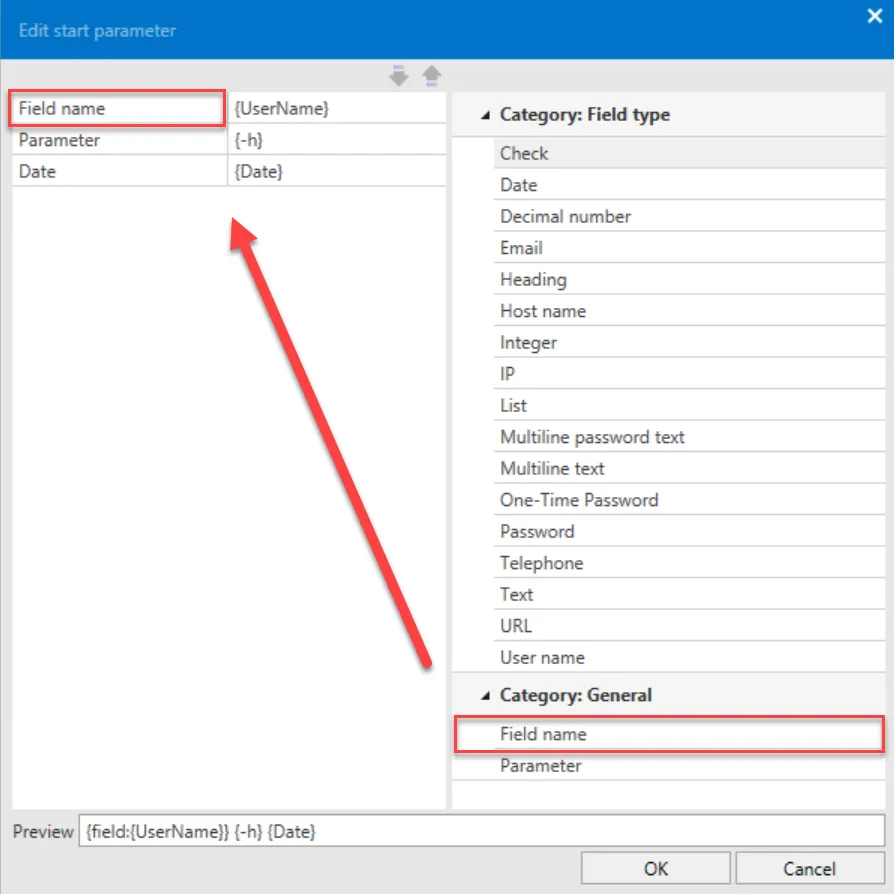
Different categories are available here:
In the Parameter category, only the parameter descriptions Field name or Parameter are available. These then need to be manually supplemented. The parameters in the Field name category can directly address the fields, meaning directly transfer the field names. Example In this example, the following start parameter have been defined for the Salamander application:
- L (for folder path in the left column)
- R (for folder path in the right column)
For both parameters, the password fields with the names "Left Path" and "Right Path" are then transferred in each case.
The application is then linked with the following password:

When the Salamander application is started, the placeholder is replaced by the field names. Therefore, instead of
-L {field:Left Path} -R {field:Right Path}
the following start parameters are transferred:
-L "C:\Projekte" -R "C:\Ablage\Projekte"
Placeholder for fields⚓︎
Fields can be added via certain placeholders based on their type or their name. The easiest way to do this is using the configuration window described above.
| Field type | Placeholder |
|---|---|
| Text | {Text} |
| Password | {Password} |
| Date | {Date} |
| Check | {Check} |
| URL | {Url} |
{Email} | |
| Phone | {Phone} |
| List | {List} |
| Header | {Header} |
| Multiline text | {Memo} |
| Multiline password text | {PasswordMemo} |
| Integer | {Int} |
| Floating-point number | {Decimal} |
| User name | {UserName} |
| IP address | {Ip} |
| Enter field name | {field:name} |