Installation
Netwrix Password Policy Enforcer V9.12 is compatible with Windows 2008, 2012, 2016, and 2019 servers. It can also be installed on Windows Vista, 7, 8, and 10 workstations to enforce local polices. See the Domain and Local Policies topic for additional information. If you need to install Password Policy Enforcer on Windows 2003 domain controllers, then install V8.03 instead of V9.12. Password Policy Enforcer V8.03 is available from the Netwrix website.
SysWindows 2008, 2008 R2, 2012, 2012 R2, 2016, or 2019.
- Windows Vista, 7, 8, 8.1, or 10.
- Fifteen megabytes free disk space.
- Eight megabytes free RAM (72 megabytes if using Argon2 hashes).
NOTE: Users do not have to change their password immediately after Password Policy Enforcer is installed. They can continue using their current password until it expires, even if their current password does not comply with the password policy. Installing Password Policy Enforcer does not extend the Active Directory schema.
Installation Types
Password Policy Enforcer should be installed onto every domain controller to enforce the password policy for domain user accounts, or onto individual servers and workstations to enforce the password policy for local user accounts.
If your domain contains some read-only domain controllers, then installation of Password Policy Enforcer on these servers is only necessary if you are using the following features:
You can install Password Policy Enforcer manually if you only need to install it on a few computers. See the Manual Installation (Express Setup) topic for additional information.
It is recommended to perform an automated installation with Group Policy if you need to install it on many computers in a domain. See the Automated Installation (Advanced Setup) topic for additional information.
Manual Installation (Express Setup)
Manual installation is recommended for small to medium networks. You need to repeat the installation procedure below on every computer that should enforce the password policy. To install Password Policy Enforcer onto a computer:
Step 1 – Start the Password Policy Enforcer installer (PPE912.exe).
Step 2 – Read the license agreement, and then click Yes if you accept all the license terms and conditions.
Step 3 – Select the Express option, and then click Next.
Step 4 – Select the Password Policy Server check box if it is not selected.
Step 5 – Click Next to install Password Policy Enforcer.
Step 6 – Click Yes when asked to restart the computer.
Password Policy Enforcer has its own password rules, so you may want to disable the Windows password policy rules before configuring Password Policy Enforcer. See the Disable the Windows Password Policy Rules topic for additional information.
Automated Installation (Advanced Setup)
An automated installation uses Group Policy to distribute Password Policy Enforcer. This type of installation is recommended when you need to install Password Policy Enforcer on many computers. This section shows you how to install Password Policy Enforcer on domain controllers to enforce domain policies, but you can also use Group Policy to target member servers and workstations if you need to enforce local policies. See the Domain and Local Policies topic for additional information.
Create a Distribution Point
A distribution point can either be a UNC path to a server share, or a DFS (Distributed File System) path. To create a Password Policy Enforcer distribution point:
Step 1 – Log on to a server as an administrator.
Step 2 – Create a shared network folder to distribute the files from.
Step 3 – Give the Domain Controllers security group read access to the share, and limit write access to authorized personnel only.
Copy PPE912.msi into the Distribution Point
Step 1 – Start the Password Policy Enforcer installer (PPE912.exe).
Step 2 – Read the license agreement, and then click Yes if you accept all the license terms and conditions.
Step 3 – Select the Advanced option, and then click Next.
Step 4 – Right-click the PPE912.msi icon, click Copy, and then paste the file into the distribution point.
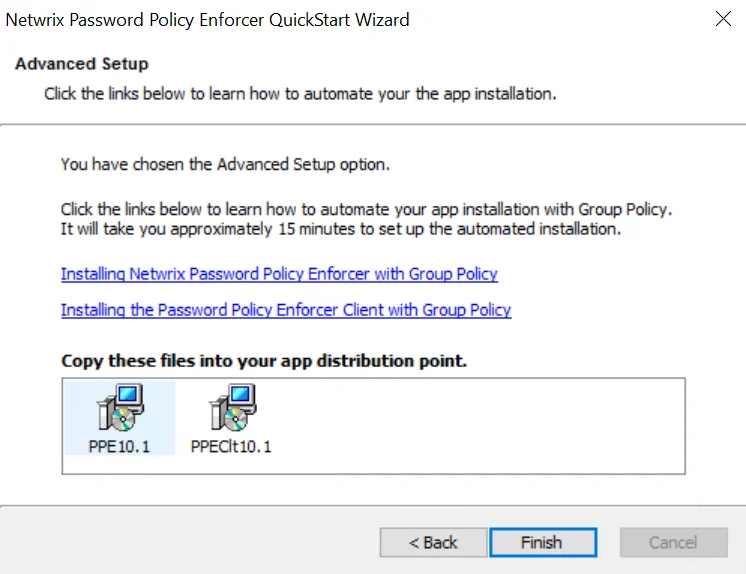
Step 5 – Give the Domain Controllers security group read access to the PPE912.msi file in the distribution point.
Step 6 – Click Finish.
Create a Group Policy Object
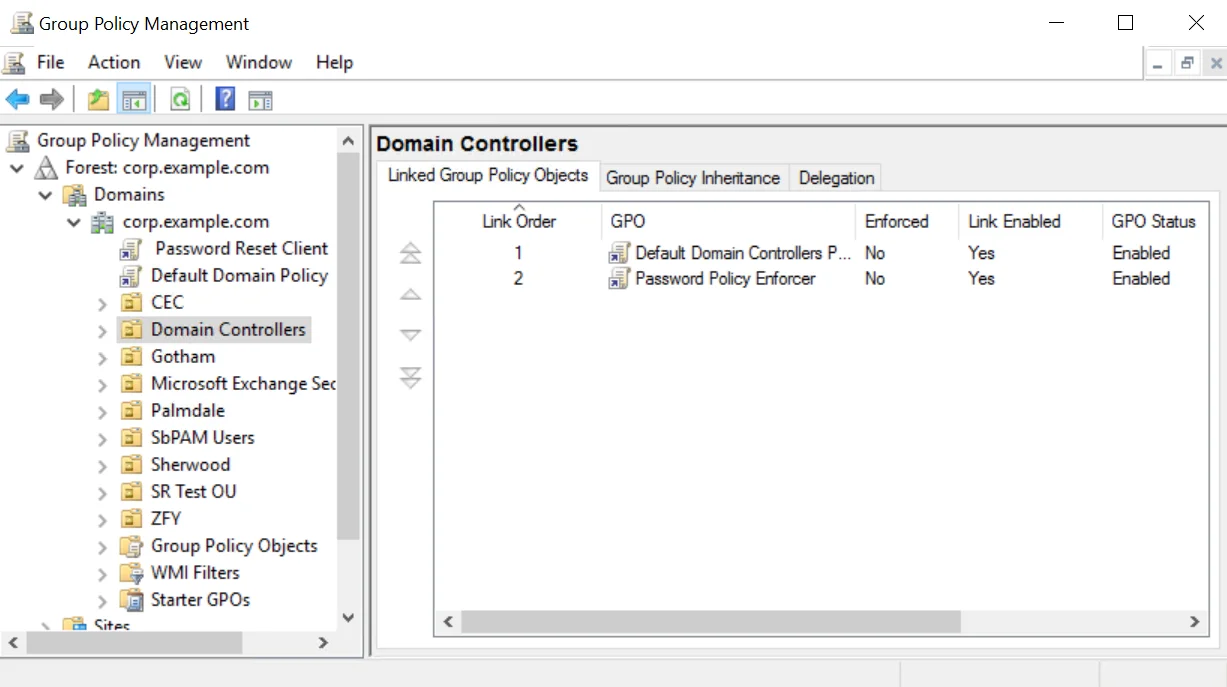
Step 1 – Start the Group Policy Management Console (gpmc.msc).
Step 2 – Expand the forest and domain items in the left pane.
Step 3 – Right-click the Domain Controllers OU in the left pane, and then click Create a GPO in this domain, and Link it here...
Step 4 – Enter Password Policy Enforcer in the provided field, and then press Enter.
Edit the Group Policy Object
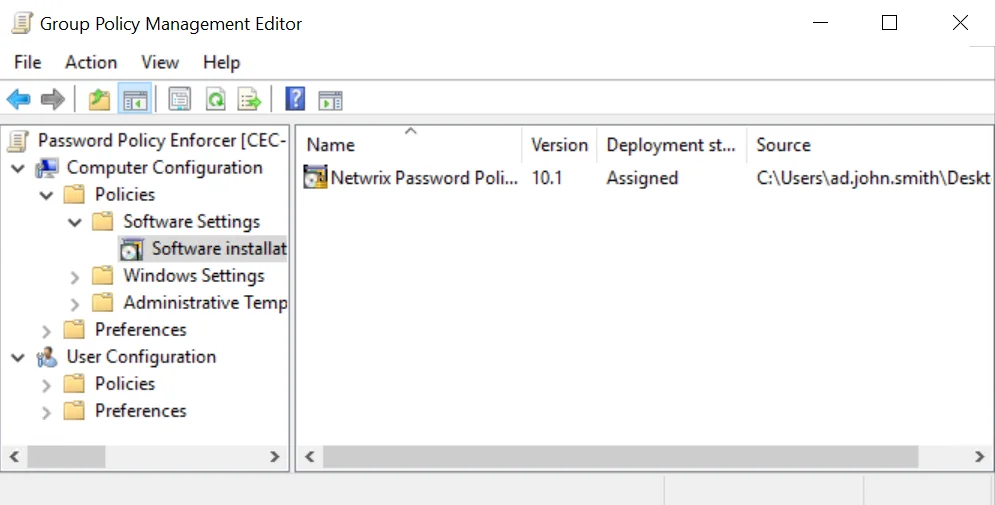
Step 1 – Right-click the Password Policy Enforcer GPO, and then click the Edit... button.
Step 2 – Expand the Computer Configuration, Policies, and Software Settings items.
Step 3 – Right-click the Software installation item, and then select New > Package...
Step 4 – Enter the full UNC path to PPE912.msi in the Open dialog box.
NOTE: You must enter a UNC path so that other computers can access this file over the network. For example: \file server\distribution point share\PPE912.msi
Step 5 – Click Open.
Step 6 – Select the Assigned deployment method, and then click OK.
Step 7 – Close the Group Policy Management Editor.
Complete the Installation
Restart each domain controller to complete the installation. Windows installs Password Policy Enforcer during startup, and then immediately restarts the computer a second time to complete the installation.
Password Policy Enforcer will not enforce a password policy at this time because no policies are defined. Users can still change their password, and will only need to comply with the Windows password policy rules (if enabled).
Disable the Windows Password Policy Rules
The Windows password policy rules can place restrictions on password history, age, length, and complexity. If you enable the Password Policy Enforcer rules and the Windows rules, then users will have to comply with both sets of rules.
Password Policy Enforcer has its own history, minimum and maximum age, length, and complexity rules. See the Rules topic for additional information. You can use the Password Policy Enforcer and Windows rules together. A password is only accepted if it complies with the Windows and Password Policy Enforcer password policies.
Follow the steps below to disable the Windows password policy rules:
Step 1 – Start the Group Policy Management Console (gpmc.msc).
Step 2 – Expand the forest and domain items in the left pane.
Step 3 – Right-click the Default Domain Policy GPO (or whichever GPO you use to set your domain password policy), then click Edit...
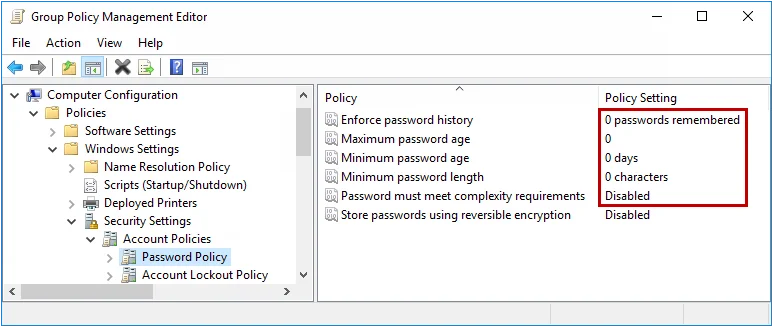
Step 4 – Expand the Computer Configuration, Policies, Windows Settings, Security Settings, Account Policies, and Password Policy items.
Step 5 – Double-click Enforce password history in the right pane of the GPO Editor.
Step 6 – Enter 0 in the text box, then click OK.
Step 7 – Repeat the step above for the Maximum password age, Minimum password age, and Minimum password length policies.
Step 8 – Double-click Password must meet complexity requirements in the right pane.
Step 9 – Select the Disabled option, and then click OK.
Step 10 – Close the Group Policy Management Editor.
NOTE: You do not have to disable all the Windows password policy rules to use Password Policy Enforcer. You can use a combination of Password Policy Enforcer and Windows rules together if you like. Just remember that a password is only accepted if it complies with the rules enforced by both Windows and Password Policy Enforcer.
Upgrading from v9.x
The Password Policy Enforcer V9.12 Password Policy Server is backwards compatible with the V9.x Password Policy Client. You do not have to upgrade existing V9.x Password Policy Clients to use the V9.12 Password Policy Server.
Upgrading the Password Policy Server
The Password Policy Enforcer installer detects existing V9.x installations and upgrades them to V9.12. See the installation topic for additional information. If you are performing an automated installation with Group Policy, then add PPE912.msi to the same Group Policy Object used to install the older version. See the Automated Installation (Advanced Setup) topic for additional information.
Upgrading the Password Policy Client
The Password Policy Client installer detects existing V9.x installations and upgrades them to V9.12. See the Installing the PPC topic for additional information. If you are distributing the PPC with Group Policy, then add PPEClt912.msi to the same Group Policy Object used to install the older version. Upgrade and reboot the Password Policy Servers before upgrading the clients.
Upgrading the Mailer
The Password Policy Enforcer installer detects existing V9.x installations of the Password Policy Enforcer Mailer and upgrades them to V9.12. See the Installing the Mailer topic for additional information.
Upgrading from v8.x
The Password Policy Enforcer V9.12 Password Policy Server is backwards compatible with the V8.x Password Policy Client. You can benefit from most of the new features by upgrading the Password Policy Server on the domain controllers. Do this before deploying the V9.12 Password Policy Client. See the What's New topic for additional information.
Upgrading the Password Policy Server
The Password Policy Enforcer installer detects existing V8.x installations and upgrades them to V9.12. See the installation topic for additional information. If you are performing an automated installation with Group Policy, then add PPE912.msi to the same Group Policy Object used to install the older version. See the Automated Installation (Advanced Setup) topic for additional information.
Open the Password Policy Enforcer V9.12 management console immediately after upgrading to automatically import the V8.x configuration settings into the new version.
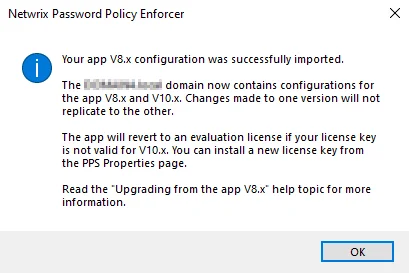
The management console imports valid subscription license keys, but it will not import V8.x perpetual license keys as they cannot be used with Password Policy Enforcer V9.12. Password Policy Enforcer will revert to a 30-day evaluation license if it cannot import the license key. Open the PPS Properties page page after an upgrade to check your license details. See the Configuration topic for additional information.
You can run a combination of V8.x and V9.x Password Policy Servers, but extended use of both versions is not recommended as it adds administrative overhead. Maintain both versions only for a short time while you roll out Password Policy Enforcer V9.x.
NOTE: Any configuration changes made from the V9.12 management console will only affect V9.x domain controllers. Likewise, any changes made from the V8.x management console will only affect V8.x domain controllers. You must make configuration changes in both management consoles until all domain controllers are upgraded to V9.x. Failure to do so may lead to inconsistent enforcement of the password policy.
Older versions of the Password Policy Enforcer Client (prior to V6.0) cannot detect passphrases. Users must comply with the policy's compliance level when these older clients are installed. See the Managing Policies topic for additional information.
Password Policy Enforcer V9.x accepts passphrases that comply with all enabled rules, irrespective of the compliance level. Password Policy Enforcer V6.x did not do this, so it was possible to configure Password Policy Enforcer in a way that would reject all passphrases because they could not meet the compliance level after some rules were disabled. Password Policy Enforcer V6.x clients will continue to use the old compliance level calculation until they are upgraded to V9.x. Take this into consideration when setting the compliance level while Password Policy Enforcer V6.x clients are still in use. This includes Netwrix Password Reset v2.x and PPE/Web v6.x. See the Netwrix Password Reset and Web topics for additional information.
Password Policy Enforcer V9.x allows the use of longer rule insert in PPC messages. Older versions of the Password Policy Enforcer Client (prior to V7.0), including PPE/Web V6.x and Netwrix Password Reset V2.x may truncate messages with long inserts. See the Password Policy Client topic for additional information.
PPE/Web V3.x and Netwrix Password Reset V1.x use the Password Policy Enforcer V3.x communication protocol. These clients are not compatible with the V9.x server.
CAUTION: Do not use the automatic tolerance option with Password Policy Enforcer V4.x clients. These clients will enforce an extremely restrictive password policy if this option is enabled. They will reject any password that contains a character found in the comparison parameter. See the Rules topic for additional information.
Upgrading the Password Policy Client
The Password Policy Client installer detects existing V8.x installations and upgrades them to V9.12. If you are distributing the PPC with Group Policy, then add PPEClt912.msi to the same Group Policy Object used to install the older version. Upgrade and reboot the Password Policy Servers before upgrading the clients.
Upgrading the Mailer
The Password Policy Enforcer installer detects existing V8.x installations of the Password Policy Enforcer Mailer and upgrades them to V9.12. See the Installing the Mailer topic for additional information.
Upgrading from v7.x
The Password Policy Enforcer V9.12 Password Policy Server is backwards compatible with the V7.x Password Policy Client. You can benefit from most of the new features by upgrading the Password Policy Server on the domain controllers. Do this before deploying the V9.12 Password Policy Client. See the What's New topic for additional information.
Upgrading the Password Policy Server
Upgrading from v6.x
The Password Policy Enforcer V9.12 Password Policy Server is backwards compatible with the V6.x Password Policy Client. You can benefit from most of the new features by upgrading the Password Policy Server on the domain controllers. Do this before deploying the V9.12 Password Policy Client. See the What's New topic for additional information.
Upgrading the Password Policy Server
The Password Policy Enforcer installer detects existing V6.x installations and upgrades them to V9.12. See the installation topic for additional information. If you are performing an automated installation with Group Policy, then add PPE912.msi to the same Group Policy Object used to install the older version. See the Automated Installation (Advanced Setup) topic for additional information.
Open the Password Policy Enforcer V9.12 management console immediately after upgrading to automatically import the V6.x configuration settings into the new version.
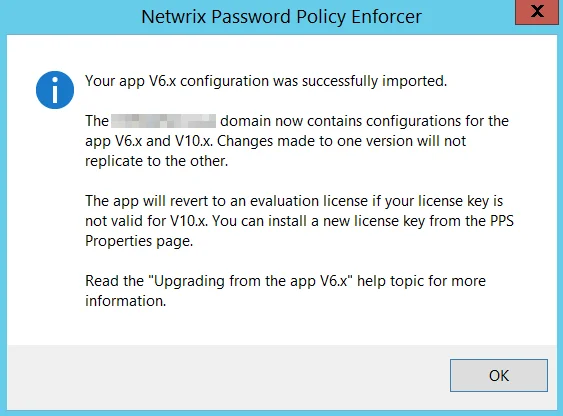
The management console imports valid subscription license keys, but it will not import V6.x perpetual license keys as they cannot be used with Password Policy Enforcer V9.12. Password Policy Enforcer will revert to a 30-day evaluation license if it cannot import the license key. Open the PPS Properties page after an upgrade to check your license details. See the Configuration topic for additional information.
You can run a combination of V6.x and V9.x Password Policy Servers, but extended use of both versions is not recommended as it adds administrative overhead. Maintain both versions only for a short time while you roll out Password Policy Enforcer V9.x. If you are using Password Policy Enforcer's Maximum Age rule and would like to enable the new extended maximum age feature for long passwords, then you must first upgrade the domain controller holding the PDC emulator operations master role to Password Policy Enforcer V9.x. See the Rules topic for additional information.
NOTE: Any configuration changes made from the V9.12 management console will only affect V9.x domain controllers. Likewise, any changes made from the V6.x management console will only affect V6.x domain controllers. You must make configuration changes in both management consoles until all domain controllers are upgraded to V9.x. Failure to do so may lead to inconsistent enforcement of the password policy.
The Do not check admin/helpdesk password resets property in the PPS Properties page was renamed to Enforce policy when password is reset. The check box value changes after upgrading, but Password Policy Enforcer enforces the same policy. See the Configuration topic for additional information.
Password Policy Enforcer V6.x included two dictionary files. DICT.TXT, and an optimized version called DICT_O.TXT. The two files had identical coverage when the tolerance was set below five, but DICT_O.TXT offered better performance due to its smaller file size. The performance difference is insignificant on modern servers, so Password Policy Enforcer V9.x includes only DICT.TXT. If you are using DICT_O.TXT with the Dictionary rules, then you should reconfigure it to use DICT.TXT after upgrading. See the Rules topic for additional information.
Older versions of the Password Policy Enforcer Client (prior to V6.0) cannot detect passphrases. Users must comply with the policy's compliance level when these older clients are installed. PE V9.x accepts passphrases that comply with all enabled rules, irrespective of the compliance level. See the Managing Policies topic for additional information. Password Policy Enforcer V6.x did not do this, so it was possible to configure Password Policy Enforcer in a way that would reject all passphrases because they could not meet the compliance level after some rules were disabled. Password Policy Enforcer V6.x clients will continue to use the old compliance level calculation until they are upgraded to V9.x. Take this into consideration when setting the compliance level while Password Policy Enforcer V6.x clients are still in use. This includes Netwrix Password Reset v2.x and PPE/Web v6.x. See the Netwrix Password Reset and Web topics for additional information.
Password Policy Enforcer V9.x allows the use of longer rule inserts in PPC messages. See the Rules topic for additional information. Older versions of the Password Policy Enforcer Client (prior to V7.0), including PPE/Web V6.x and Netwrix Password Reset V2.x may truncate messages with long inserts.
PPE/Web V3.x and Netwrix Password Reset V1.x use the Password Policy Enforcer V3.x communication protocol. These clients are not compatible with the V9.x server.
CAUTION: Do not use the automatic tolerance option with Password Policy Enforcer V4.x clients. These clients will enforce an extremely restrictive password policy if this option is enabled. They will reject any password that contains a character found in the comparison parameter. See the Rules topic for additional information.
The Password Policy Enforcer Client for Windows 8, 10, Server 2012, Server 2016, and Server 2019 displays messages in a smaller area than previous versions of Windows. Some of the default message components were shortened to fit the available space. See the Password Policy Client topic for additional information. Your existing templates and macros will not change, but some of the default inserts may be different to the ones your users are familiar with. Any new policies you create after upgrading to Password Policy Enforcer V9.x will use the new templates and macros.
If you would like to use the new templates and macros for your existing policies, create a new policy and copy the templates from the new policy to your existing policies. Templates are in the tab of the Policy Properties page. See Password Policy Client and Managing Policies topics for additional information.
Upgrading the Password Policy Client
The Password Policy Client installer detects existing V6.x installations and upgrades them to V9.12. See the Installing the PPC topic for additional information. If you are distributing the PPC with Group Policy, then add PPEClt912.msi to the same Group Policy Object used to install the older version. Upgrade and reboot the Password Policy Servers before upgrading the clients.
Upgrading the Mailer
The Password Policy Enforcer installer detects existing V6.x installations of the Password Policy Enforcer Mailer and upgrades them to V9.12. See the Installing the Mailer topic for additional information.
Upgrading from v5.x
The Password Policy Enforcer V9.12 Password Policy Server is backwards compatible with the V5.x Password Policy Client. You can benefit from most of the new features by upgrading the Password Policy Server on the domain controllers. Do this before deploying the V9.12 Password Policy Client. See the What's New topic for additional information.
Upgrading the Password Policy Server
The Password Policy Enforcer installer detects existing V5.x installations and upgrades them to V9.12. See the installation topic for additional information. If you are performing an automated installation with Group Policy, then add PPE912.msi to the same Group Policy Object used to install the older version. See the Automated Installation (Advanced Setup) topic for additional information.
Open the Password Policy Enforcer V9.12 management console immediately after upgrading to automatically import the V5.x configuration settings into the new version.
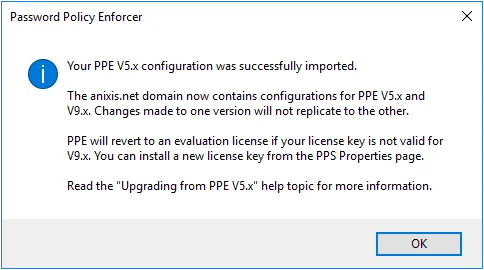
The management console imports valid subscription license keys, but it will not import V5.x perpetual license keys as they cannot be used with Password Policy Enforcer V9.12. Password Policy Enforcer will revert to a 30-day evaluation license if it cannot import the license key. Open the PPS Properties page after an upgrade to check your license details. See the Configuration topic for additional information.
You can run a combination of V5.x and V9.x Password Policy Servers, but extended use of both versions is not recommended as it adds administrative overhead. Maintain both versions only for a short time while you roll out Password Policy Enforcer V9.x. If you are using Password Policy Enforcer's Maximum Age rule and would like to enable the new extended maximum age feature for long passwords, then you must first upgrade the domain controller holding the PDC emulator operations master role to Password Policy Enforcer V9.x.
NOTE: The Maximum Age rule in Password Policy Enforcer V5.x granted users one grace logon after their password expired. Password Policy Enforcer V9.x does not allow grace logons, but some grace logons may occur until all domain controllers are upgraded. See the Rules topic for additional information.
If you have deployed the Password Policy Client and will be using the passphases feature, then update your existing Password Policy message templates to let users know that they may not have to comply with all the rules. See the Managing Policies and Configuration topics for additional information. You can use the new [PASSPHRASE_NOTICE] macro instead of hard-coding the message text into the template. Password Policy Enforcer replaces the macro with this text "You may not have to comply with all these rules if your password contains [n] or more characters."
NOTE: Any configuration changes made from the V9.12 management console will only affect V9.x domain controllers. Likewise, any changes made from the V5.x management console will only affect V5.x domain controllers. You must make configuration changes in both management consoles until all domain controllers are upgraded to V9.x. Failure to do so may lead to inconsistent enforcement of the password policy.
The Do not check admin/helpdesk password resets property in the PPS Properties page was renamed to Enforce policy when password is reset. The check box value changes after upgrading, but Password Policy Enforcer enforces the same policy. See the Configuration topic for additional information.
Password Policy Enforcer V5.x included two dictionary files. DICT.TXT, and an optimized version called DICT_O.TXT. The two files had identical coverage when the tolerance was set below five, but DICT_O.TXT offered better performance due to its smaller file size. The performance difference is insignificant on modern servers, so Password Policy Enforcer V9.x includes only DICT.TXT. If you are using DICT_O.TXT with the Dictionary rule, then you should reconfigure it to use DICT.TXT after upgrading. See the Rules topic for additional information.
Older versions of the Password Policy Enforcer Client (prior to V6.0) cannot detect passphrases. Users must comply with the policy's compliance when these older clients are installed. See the Managing Policies topic for additional information.
Password Policy Enforcer V9.x allows the use of longer rule inserts in PPC messages. Older versions of the Password Policy Enforcer Client (prior to V7.0), including PPE/Web V6.x and Netwrix Password Reset V2.x may truncate messages with long inserts. See the Password Policy Client topic for additional information.
PPE/Web V3.x and Netwrix Password Reset V1.x use the Password Policy Enforcer V3.x communication protocol. These clients are not compatible with the V9.x server.
CAUTION: Do not use the automatic tolerance option with Password Policy Enforcer V4.x clients. These clients will enforce an extremely restrictive password policy if this option is enabled. They will reject any password that contains a character found in the comparison parameter. See the Rules topic for additional information.
The Password Policy Enforcer Client for Windows 8, 10, Server 2012, Server 2016, and Server 2019 displays messages in a smaller area than previous versions of Windows. Some of the default message components were shortened to fit the available space. Your existing templates and macros will not change, but some of the default inserts may be different to the ones your users are familiar with. Any new policies you create after upgrading to Password Policy Enforcer V9.x will use the new templates and macros. See Password Policy Client topic for additional information.
If you would like to use the new templates and macros for your existing policies, create a new policy and copy the templates from the new policy to your existing policies. Templates are in the Messages tab of the Policy Properties page. See Password Policy Client and the Managing Policies topics for additional information.
Upgrading the Password Policy Client
The Password Policy Client installer detects existing V5.x installations and upgrades them to V9.12. See the Installing the PPC topic for additional information. If you are distributing the PPC with Group Policy, then add PPEClt912.msi to the same Group Policy Object used to install the older version. Upgrade and reboot the Password Policy Servers before upgrading the clients.
Upgrading from v4.x
The Password Policy Enforcer V9.12 Password Policy Server is backwards compatible with the V4.x Password Policy Client. You can benefit from most of the new features by upgrading the Password Policy Server on the domain controllers. Do this before deploying the V9.12 Password Policy Client. See the What's New topic for additional information.
Upgrading the Password Policy Server
The Password Policy Enforcer installer detects existing V4.x installations and upgrades them to V9.12. See the installation topic for additional information. If you are performing an automated installation with Group Policy, then add PPE912.msi to the same Group Policy Object used to install the older version. See the Automated Installation (Advanced Setup) topic for additional information.
Open the Password Policy Enforcer V9.12 management console immediately after upgrading to automatically import the V4.x configuration settings into the new version.
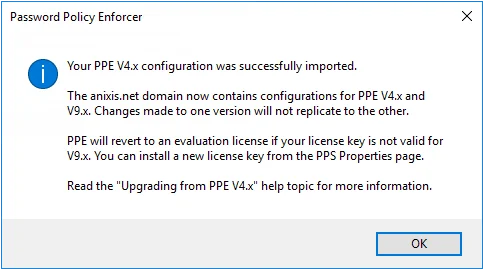
The management console imports valid subscription license keys, but it will not import V4.x perpetual license keys as they cannot be used with Password Policy Enforcer V9.12. Password Policy Enforcer will revert to a 30-day evaluation license if it cannot import the license key. Open the PPS Properties page after an upgrade to check your license details. See the Configuration topic for additional information.
You can run a combination of V4.x and V9.x Password Policy Servers, but extended use of both versions is not recommended as it adds administrative overhead. Maintain both versions only for a short time while you roll out Password Policy Enforcer V9.x.
If you have deployed the Password Policy Client and will be using the passphases feature, then update your existing Password Policy message templates to let users know that they may not have to comply with all the rules. See the Managing Policies and Configuration topics for additional information. You can use the new [PASSPHRASE_NOTICE] macro instead of hard-coding the message text into the template. Password Policy Enforcer replaces the macro with this text "You may not have to comply with all these rules if your password contains [n] or more characters."
NOTE: Any configuration changes made from the V9.12 management console will only affect V9.x domain controllers. Likewise, any changes made from the V4.x management console will only affect V4.x domain controllers. You must make configuration changes in both management consoles until all domain controllers are upgraded to V9.x. Failure to do so may lead to inconsistent enforcement of the password policy.
The Do not check admin/helpdesk password resets property in the PPS Properties page was renamed to Enforce policy when password is reset. The check box value changes after upgrading, but Password Policy Enforcer enforces the same policy. See the Configuration topic for additional information.
Password Policy Enforcer V4.x included two dictionary files. DICT.TXT, and an optimized version called DICT_O.TXT. The two files had identical coverage when the tolerance was set below five, but DICT_O.TXT offered better performance due to its smaller file size. The performance difference is insignificant on modern servers, so Password Policy Enforcer V9.x includes only DICT.TXT. If you are using DICT_O.TXT with the Dictionary rule, then you should reconfigure it to use DICT.TXT after upgrading. See the Rules topic for additional information.
Older V4.x clients will work with the new server, but you should upgrade to the V9.x client as it has many improvements.
Older versions of the Password Policy Enforcer Client (prior to V6.0) cannot detect passphrases. Users must comply with the policy's compliance level when these older clients are installed. See the Managing Policies topic for additional information.
Password Policy Enforcer V9.x allows the use of longer rule inserts in PPC messages. Older versions of the Password Policy Enforcer Client (prior to V7.0), including PPE/Web V6.x and Netwrix Password Reset V2.x may truncate messages with long inserts. See Password Policy Client topic for additional information.
PPE/Web V3.x and Netwrix Password Reset V1.x use the Password Policy Enforcer V3.x communication protocol. These clients are not compatible with the V9.x server.
CAUTION: Do not use the automatic tolerance option with Password Policy Enforcer V4.x clients. These clients will enforce an extremely restrictive password policy if this option is enabled. They will reject any password that contains a character found in the comparison parameter. See the Rules topic for additional information.
The Password Policy Enforcer Client for Windows 8, 10, Server 2012, Server 2016, and Server 2019 displays messages in a smaller area than previous versions of Windows. Some of the default message components were shortened to fit the available space. See Password Policy Client topic for additional information. Your existing templates and macros will not change, but some of the default inserts may be different to the ones your users are familiar with. Any new policies you create after upgrading to Password Policy Enforcer V9.x will use the new templates and macros.
If you would like to use the new templates and macros for your existing policies, create a new policy and copy the templates from the new policy to your existing policies. Templates are in the Messages tab of the Policy Properties page. See Password Policy Client and the Managing Policies topics for additional information.
Upgrading the Password Policy Client
The Password Policy Client installer detects existing V4.x installations and upgrades them to V9.12. See the Installing the PPC topic for additional information. If you are distributing the PPC with Group Policy, then add PPEClt912.msi to the same Group Policy Object used to install the older version. Upgrade and reboot the Password Policy Servers before upgrading the clients.
Installation
Netwrix Password Reset V3.23 is designed to run on Windows 2008 to 2019. Users access Password Reset from a web browser, or from the Password Reset console.
System Requirements
-
Windows 2008*, 2008 R2, 2012, 2012 R2, 2016, or 2019.
*x64 only for APR Server and Web Interface.
-
20 Megabytes free disk space.
-
20 Megabytes free RAM.
System Components
Password Reset has two server components, and an optional client. Both server components can be installed on one server, or they may be installed on separate servers if your web server is in a DMZ.
The Web Interface
The Web Interface is the component that users interact with. It accepts user requests, encrypts them, and sends them to the Password Reset Server. The Web Interface must be installed on a server running IIS 7 or later.
The Netwrix Password Reset Server
The Password Reset Server is the component that performs requests on behalf of users. It receives requests from the Web Interface, checks the user's credentials, and performs the requested task if the credentials are valid.

NOTE: Microsoft SQL Server Compact is installed with the Password Reset Server. SQL Server Compact is free to use, and should only be removed if you move the database to SQL Server. SQL Server Compact is an embedded database. Unlike SQL Server, you do not need to configure or manage it. See the Working with the Database topic for additional information.
Installation Types
A single server installation is recommended where users will only access Password Reset from a trusted network, including a VPN. In this installation type, the Web Interface and Password Reset Server are both installed on the same server. The server must have access to a domain controller in each managed domain.
If Password Reset will be accessible from the Internet without a VPN, then it is likely that you will want to run the Web Interface in a DMZ. A multiple server installation is recommended for this scenario. In this installation type, the Web Interface is installed on an server in the DMZ and the Password Reset Server is installed on another server in the internal network. A firewall rule allows the two servers to communicate.
You choose the installation type when installing Password Reset, but you can change it later.
NOTE: An Password Reset Server can accept requests from more than one Web Interface. Having multiple Web Interfaces allows for load balancing and failover, but you should only consider this option if you already have redundant web servers. Most organizations only need one Web Interface.
Password Reset can share server resources with other applications. It is normally not necessary to dedicate a server exclusively to Password Reset. The Web Interface can be installed on an existing web server as long as it is well secured and not overloaded. The Password Reset Server can run on an existing member server or domain controller.
Single Server Installation
Follow the steps below to install the Web Interface and Password Reset Server on a single server.
Step 1 – Start the Password Reset Setup wizard (APR323.exe).
Step 2 – The Setup wizard may ask you to backup some files if an older version of Password Reset is detected. Backup the files, and then click Next.
Step 3 – Click Next.
Step 4 – Read the License Agreement. Click I accept the terms of the license agreement, and then click Next if you accept all the terms.
Step 5 – Select the All Components option, and then click Next.
Step 6 – The Setup wizard may offer to install IIS. Click OK to install IIS.
Step 7 – Enter a User Name, Domain, and Password for the Password Reset service account. The account will be created and added to the Domain Admins group if it does not exist.
NOTE: You can remove the account from the Domain Admins group later. If using an existing account, make sure it has the required permissions. See the Securing Password Reset topic for additional information.
Step 8 – Click Next.
Step 9 – Select an IIS Web Site from the drop-down list, and optionally change the default Virtual Directory for the Web Interface.
NOTE: The Web Interface should be installed in its own virtual directory.
Step 10 – Click Next twice.
Step 11 – Wait for Password Reset to install, and then click Finish.
NOTE: The Password Reset Setup wizard installs the Password Reset Server and associated files
into the \Program Files\ANIXIS Password Reset\ folder by default. Use the SERVERDIR parameter to
install the Password Reset Server to a different folder. For example, APR323.exe
SERVERDIR="D:\Programs\APR"
Multiple Server Installation
Create firewall rules to allow the Web Interface and Password Reset Server to communicate if there is a DMZ firewall between them. The Web Interface initiates a request by sending a datagram with the following properties:
| Web Interface Datagram | |
|---|---|
| Protocol | UDP |
| Source Address | Web Interface server's IP address |
| Source Port | Any |
| Destination address | Password Reset Server's IP address |
| Destination Port | 5100 |
The Password Reset Server responds with a datagram that has the following properties:
| APR Server Datagram | |
|---|---|
| Protocol | UDP |
| Source Address | Password Reset Server's IP address |
| Source Port | 5100 |
| Destination address | Web Interface server's IP address |
| Destination Port | Any |
Install Password Reset Server on an Internal Network
Follow the steps below to install the Password Reset Server on a server in the internal network.
Step 1 – Start the Password Reset Setup wizard (APR323.exe).
Step 2 – The Setup wizard may ask you to backup some files if an older version of Password Reset is detected. Backup the files, and then click Next.
Step 3 – Click Next.
Step 4 – Read the License Agreement. Click I accept the terms of the license agreement, and then click Next if you accept all the terms.
Step 5 – Select the Server Only option, and then click Next.
Step 6 – Type a User Name, Domain, and Password for the Password Reset service account. The account will be created and added to the Domain Admins group if it does not exist.
NOTE: You can remove the account from the Domain Admins group later. If using an existing account, make sure it has the required permissions. See the Securing Password Reset topic for additional information.
Step 7 – Make sure the Create Windows Firewall Exception for the APR Server service check box is selected, and then click Next twice.
Step 8 – Wait for the Password Reset Server to install, and then click Finish.
NOTE: Open UDP port 5100 on the Password Reset Server computer if a host-based firewall other
than the Windows Firewall is installed. This is needed in addition to the DMZ firewall rules
above.
The Password Reset Setup wizard installs the Password Reset Server and associated files into the
\Program Files\ANIXIS Password Reset\ folder by default. Use the SERVERDIR parameter to install
the Password Reset Server to a different folder. For example, APR323.exe
SERVERDIR="D:\Programs\APR"
Install Web Interface Server in DMZ
Follow the steps below to install the Web Interface on a server in the DMZ.
Step 1 – Start the Password Reset Setup wizard (APR323.exe).
Step 2 – The Setup wizard may ask you to backup some files if an older version of Password Reset is detected. Backup the files, and then click Next.
Step 3 – Click Next.
Step 4 – Read the License Agreement. Click I accept the terms of the license agreement, and then click Next if you accept all the terms.
Step 5 – Select the Web Interface Only option, and then click Next.
Step 6 – The Setup wizard may offer to install IIS. Click OK to install IIS.
Step 7 – Select an IIS Web Site from the drop-down list, and optionally change the default Virtual Directory for the Web Interface. The Web Interface should be installed in its own virtual directory.
Step 8 – Click Next twice.
Step 9 – Wait for the Web Interface to install, and then click Finish.
Step 10 – Start the Registry Editor (regedit.exe).
Step 11 – Expand the HKEY_LOCAL_MACHINE, SOFTWARE, ANIXIS, ANIXIS Password Reset, and 3.0 registry keys.
Step 12 – Set the ServerIP registry value to the IP address of the computer that you installed the Password Reset Server onto.
The Password Reset Setup wizard only installs one Web Interface on each server, but you can copy the files to another directory and publish several Web Interfaces from one server. This allows you to present different user interfaces from each directory. The Web Interfaces all communicate with the same APR Server because there is only one ServerIP value.
Follow the steps below to configure the Web Interfaces to communicate with different Password Reset Servers.
Step 1 – Start the Registry Editor (regedit.exe).
Step 2 – Expand the HKEY_LOCAL_MACHINE, SOFTWARE, ANIXIS, ANIXIS Password Reset, and 3.0 registry keys.
Step 3 – Clear the data in the ServerIP registry value.
Step 4 – Create a REG_SZ value for each Web Interface called ServerIP_VDIR where VDIR is the name of the virtual directory.
For example, if the virtual directory is called Finance, then the registry value should be called ServerIP_Finance.
Step 5 – Set each ServerIP_VDIR value to the IP address of the Password Reset Server.
Upgrading From APR V3.x
Some planning is needed to ensure a smooth upgrade from APR V3.x. A trial run on a lab network is recommended if you have not installed APR before.
Before You Begin
The database files are not overwritten during an upgrade, but you should still create a backup before upgrading. See the Backing up the Database topic for additional information.
The Web Interface files are overwritten during an upgrade. You must backup any customized Web
Interface files before upgrading. The Web Interface files are installed in the
\Inetpub\wwwroot\pwreset\ folder by default.
NOTE: A full backup of the APR server(s) is recommended. This allows you to roll back to the
previous version if the upgrade cannot be completed.
You may need to restart Windows after upgrading.
If Password Reset was originally installed by someone else and you do not have their installation notes, then read this Installation topic before you begin. Also make sure you know the password for the Password Reset Server service account as you will need it during the upgrade.
Upgrading to V3.23
Start the Password Reset Setup wizard (APR323.exe) and follow the prompts. The Setup wizard uninstalls the previous version, so there is no need to manually uninstall it.
If the Password Reset Server and Web Interface are installed on different servers, then upgrade all servers before using the new version. The Password Reset Server and Web Interface are only tested with matching versions.
Restore any customized Web Interface files after upgrading. Do not restore APR.dll from the backup as it belongs to the previous version. You should keep a copy of the original Web Interface files and compare them with the files from the previous version using a file comparison tool. Any changes between versions should be merged into your customized files.
The Password Reset V3.23 data console does not read the VerificationCode or EnrollRecord columns from the User table on SQL Server. Access to these columns can be denied for Data Console users after upgrading all instances of the Data Console. See the Using the Data Console topic for additional information.
Upgrading From APR V2.x
As this is a major upgrade with many changes, some planning is needed to ensure a smooth upgrade. A trial run on a lab network is recommended, especially if you are customizing the user interface. See the Editing the HTML Templates topic for additional information.
CAUTION: APR V3.23 is only compatible with Password Policy Enforcer V7.0 and later. Upgrade PPE
to a compatible version if you have enabled Password Policy Enforcer integration. See the
Configuring Password Reset
topic for additional information.
APR V3.23 does not include a 32-bit APR Server or Web Interface. The computer(s) running the APR
server components must be running Windows 64-bit. This does not apply to the client computers.
APR V3.23 uses HTML5 and CSS3 features that are not supported by Internet Explorer 8 and earlier.
The
Password Reset Client
uses Internet Explorer for page rendering, so the default HTML templates do not display correctly in
the Password Reset Client on Windows XP and Server 2003. Send an e-mail to
support@netwrix.com before upgrading if you still have computers
running Internet Explorer 8.
APR V3.23 server components have not been tested on, and are not supported on Windows 2003.
Before You Begin
Step 1 – Backup the APR V2.x server(s).
Step 2 – Close the Data Console if it is open.
Step 3 – Stop the Netwrix Password Reset service and backing up the database. See the Backing up the Database topic for additional information.
Upgrading to V3.23
Step 1 – Follow the steps for either Single Server Installation or Multiple Server Installation. If the Web Interface is on a different server, then upgrade it as well.
Step 2 – Open the Data Console, and check the Audit Log and User tabs to make sure the data was imported.
Step 3 – Open APR in a web browser and test the Enroll, Reset, and Change features.
Step 4 – Install your new license key if you have a perpetual license.
Step 5 – Update the Client license key if you have a perpetual license.
Other Tasks
Move Database files
The database files are created in the installation folder when APR is first installed. The default installation folder for APR V2.x was below the Program Files (x86) folder, but in APR V3.23 it is below the Program Files folder. The database files are not moved automatically during an upgrade, so you should move them to the new installation folder (or a different folder) after upgrading.
Follow the steps below to move the database files to the \Program Files\ANIXIS Password Reset\
folder.
Step 1 – Close the Data Console if it is open.
Step 2 – Stop the Netwrix Password Reset service.
Step 3 – Move apr.sdf and aprlog.sdf from the \Program Files (x86)\ANIXIS Password Reset\ folder to the \Program Files\ANIXIS Password Reset\ folder.
Step 4 – Open the Configuration Console.
Step 5 – Click the General tab.
Step 6 – Click Change...
Step 7 – Click Browse... and then browse to the \Program Files\ANIXIS Password Reset
folder.
Step 8 – Click OK twice, and then click Apply.
Step 9 – Start the Netwrix Password Reset service.
Step 10 – Update the backup script to copy from the new folder. See the Backing up the Database topic for additional information.
Configure Password Reset Client to use IE7 emulation mode
Older versions of the Password Reset Client display pages in Internet Explorer 7 emulation mode. This mode cannot display the new HTML templates correctly. You can upgrade the Password Reset Client to the latest version, or configure existing installations to use IE 11 mode. This only works on Windows Vista and later with IE 9 or later.
Follow the steps below to configure the Password Reset Client to use IE 11 mode.
Step 1 – Start the Registry Editor (regedit.exe).
Step 2 – Expand the HKEY_LOCAL_MACHINE, SOFTWARE, Microsoft, Internet Explorer, MAIN, FeatureControl, and FEATURE_BROWSER_EMULATION registry keys.
Step 3 – Create a new DWORD value called LogonUI.exe, and set it to 2AF8 (hex).
Create this registry value on all the Password Reset Client computers. IE 11 mode can be requested even if the computer is running an older version of IE.