Microsoft Intune
This guide describes the steps needed to deploy Netwrix Endpoint Protector to multiple endpoints using the MSI application in Microsoft Intune. Microsoft Intune is a cloud-based service focusing on mobile device management (MDM) and mobile application management (MAM).
NOTE: This document serves as an optional reference for Microsoft Intune (currently known as Microsoft Endpoint Manager). It is not regularly updated and may not align with the current version of the product. Please refer to the official resources for the most up-to-date information.
macOS Deployment
To deploy the Endpoint Protector package for macOS using Intune, follow these steps:
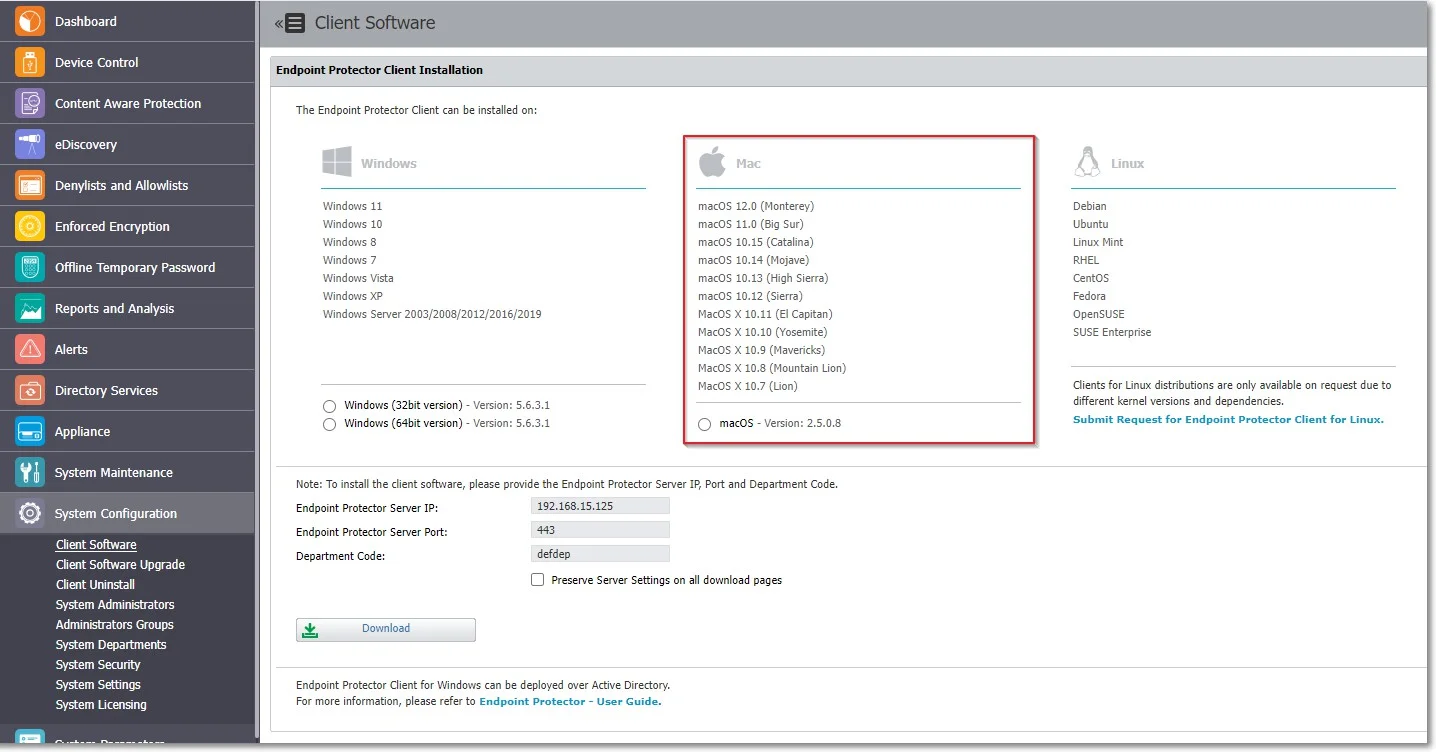
Step 1 – Open and log in to Endpoint Protector.
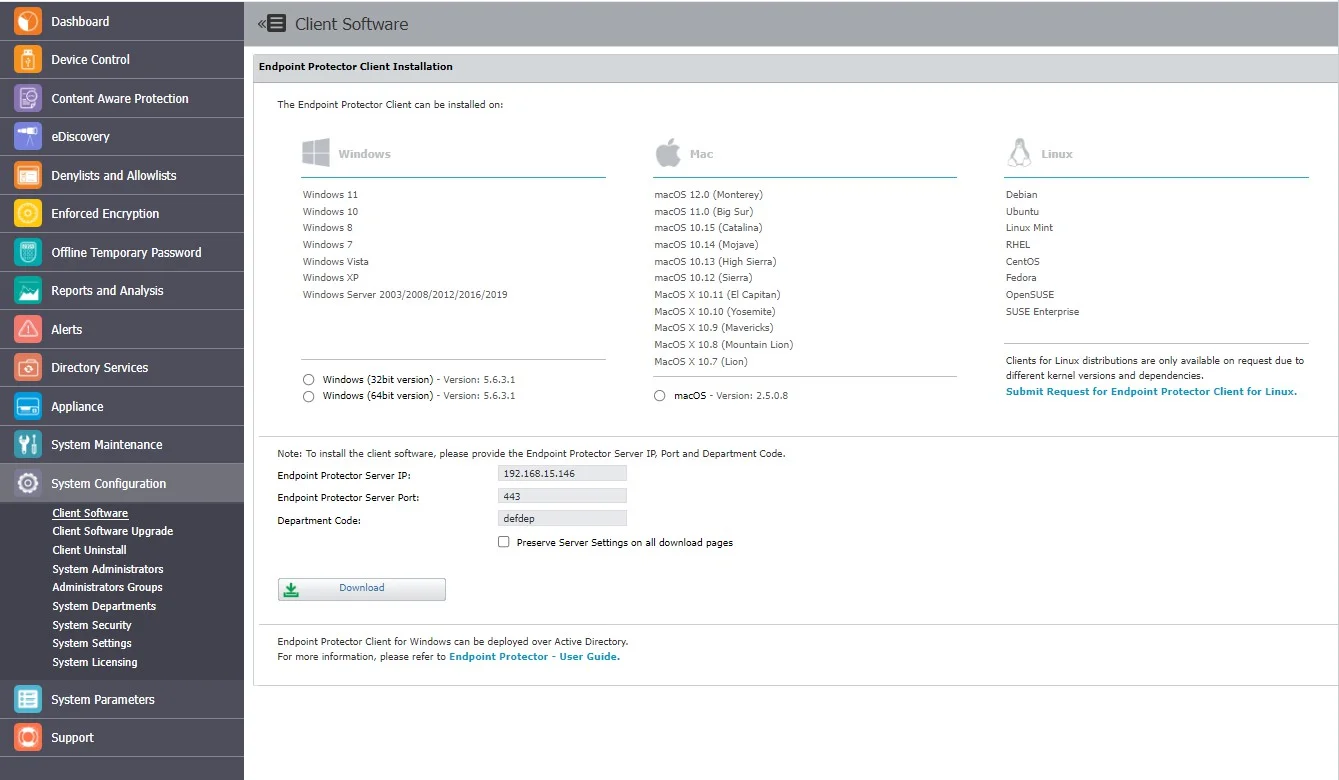
Step 2 – Go to the System Configuration, Client Software and download the macOS Endpoint Protector package.
Step 3 – Convert the Endpoint Protector client to an .intunemac file – for more information and procedure, visit the Microsoft Docs portal;
Step 4 – Go to the Microsoft Endpoint Manager admin center and sign in
Step 5 – Go to Apps from the left-hand side menu, and on the Apps Overview page, select the macOS platform;
Step 6 – On the macOS apps page, click Add, select the Line of business app type, and then click Select.

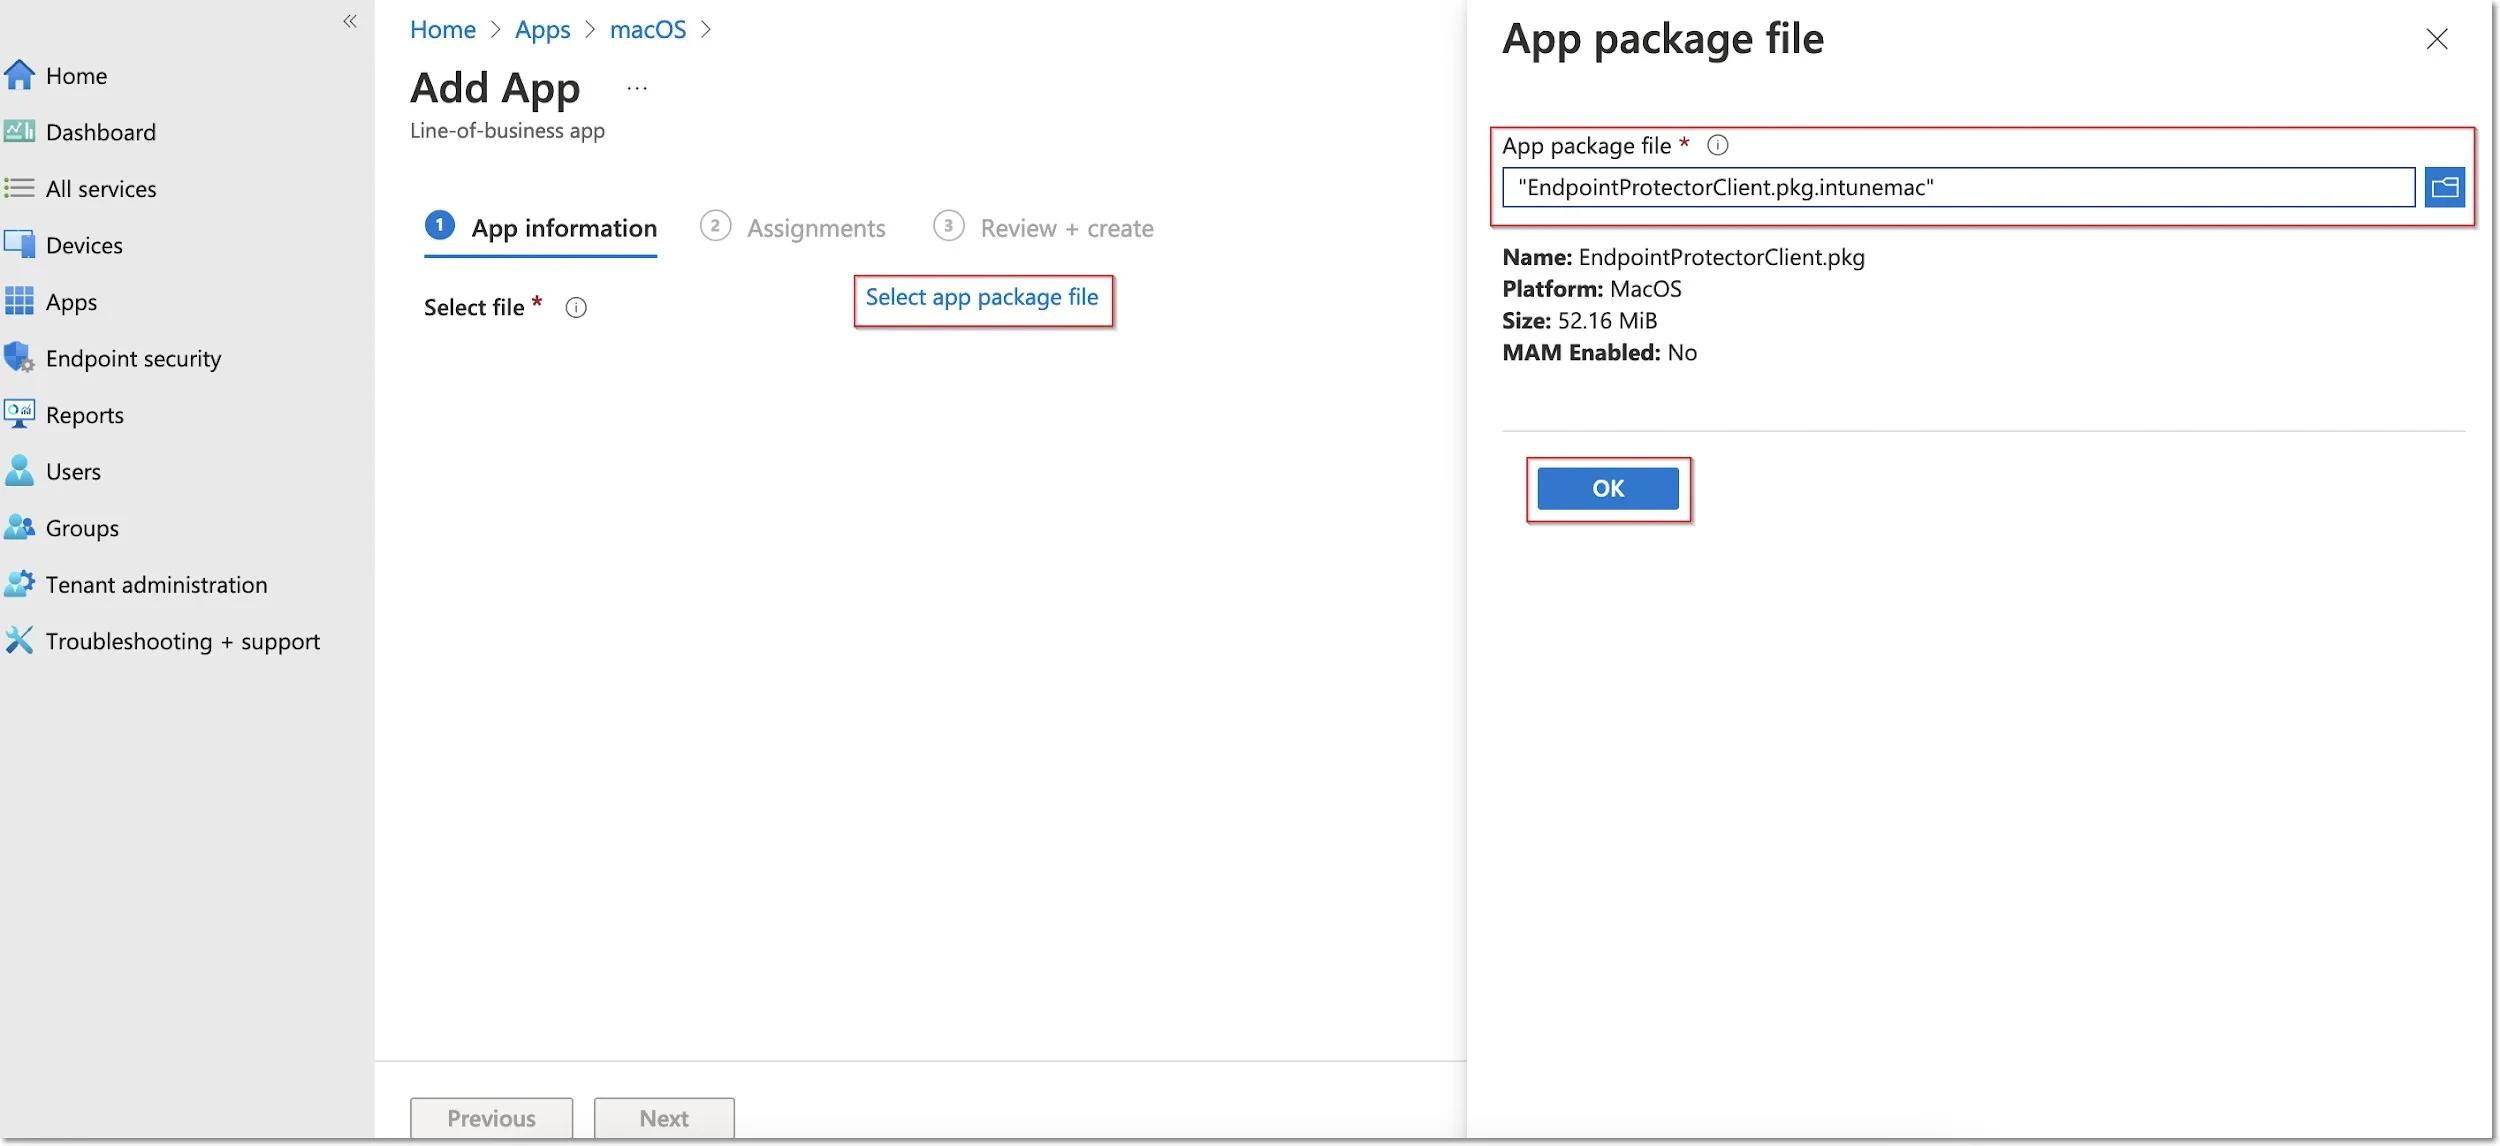
Step 7 – Click Select app package file and from the right-hand side, select the Endpoint Protector intunemac file, Upload and click OK.
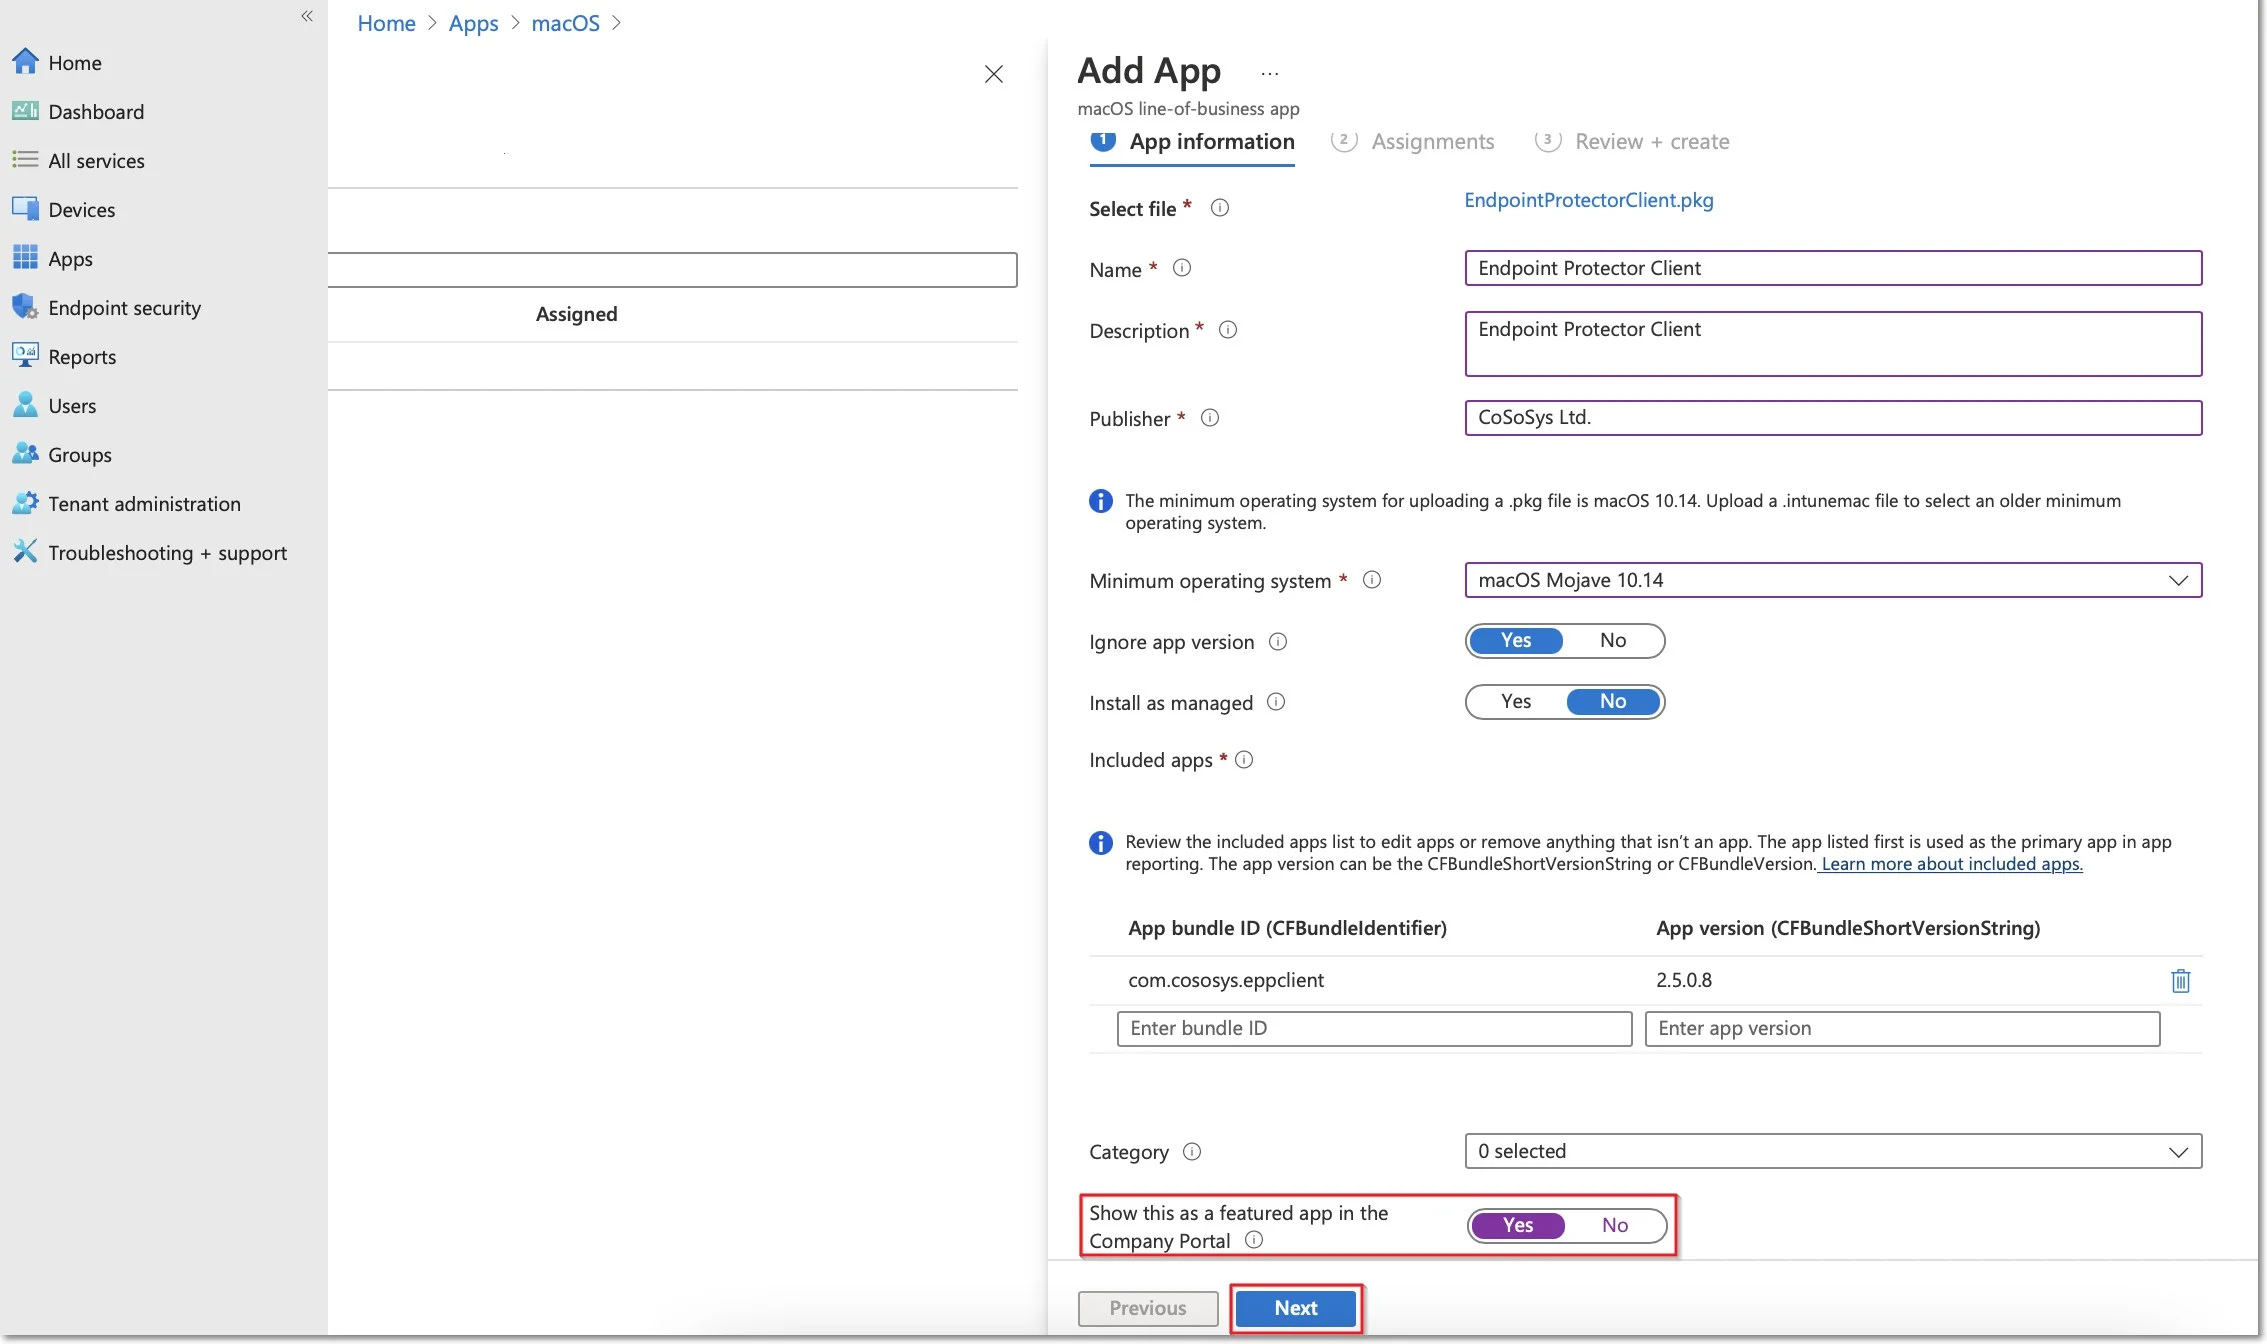
Step 8 – On the App information page, fill in the mandatory fields and then click Next.
- Name – add Endpoint Protector Client
- Description – add Endpoint Protector Client
- Publisher – add Netwrix Ltd.
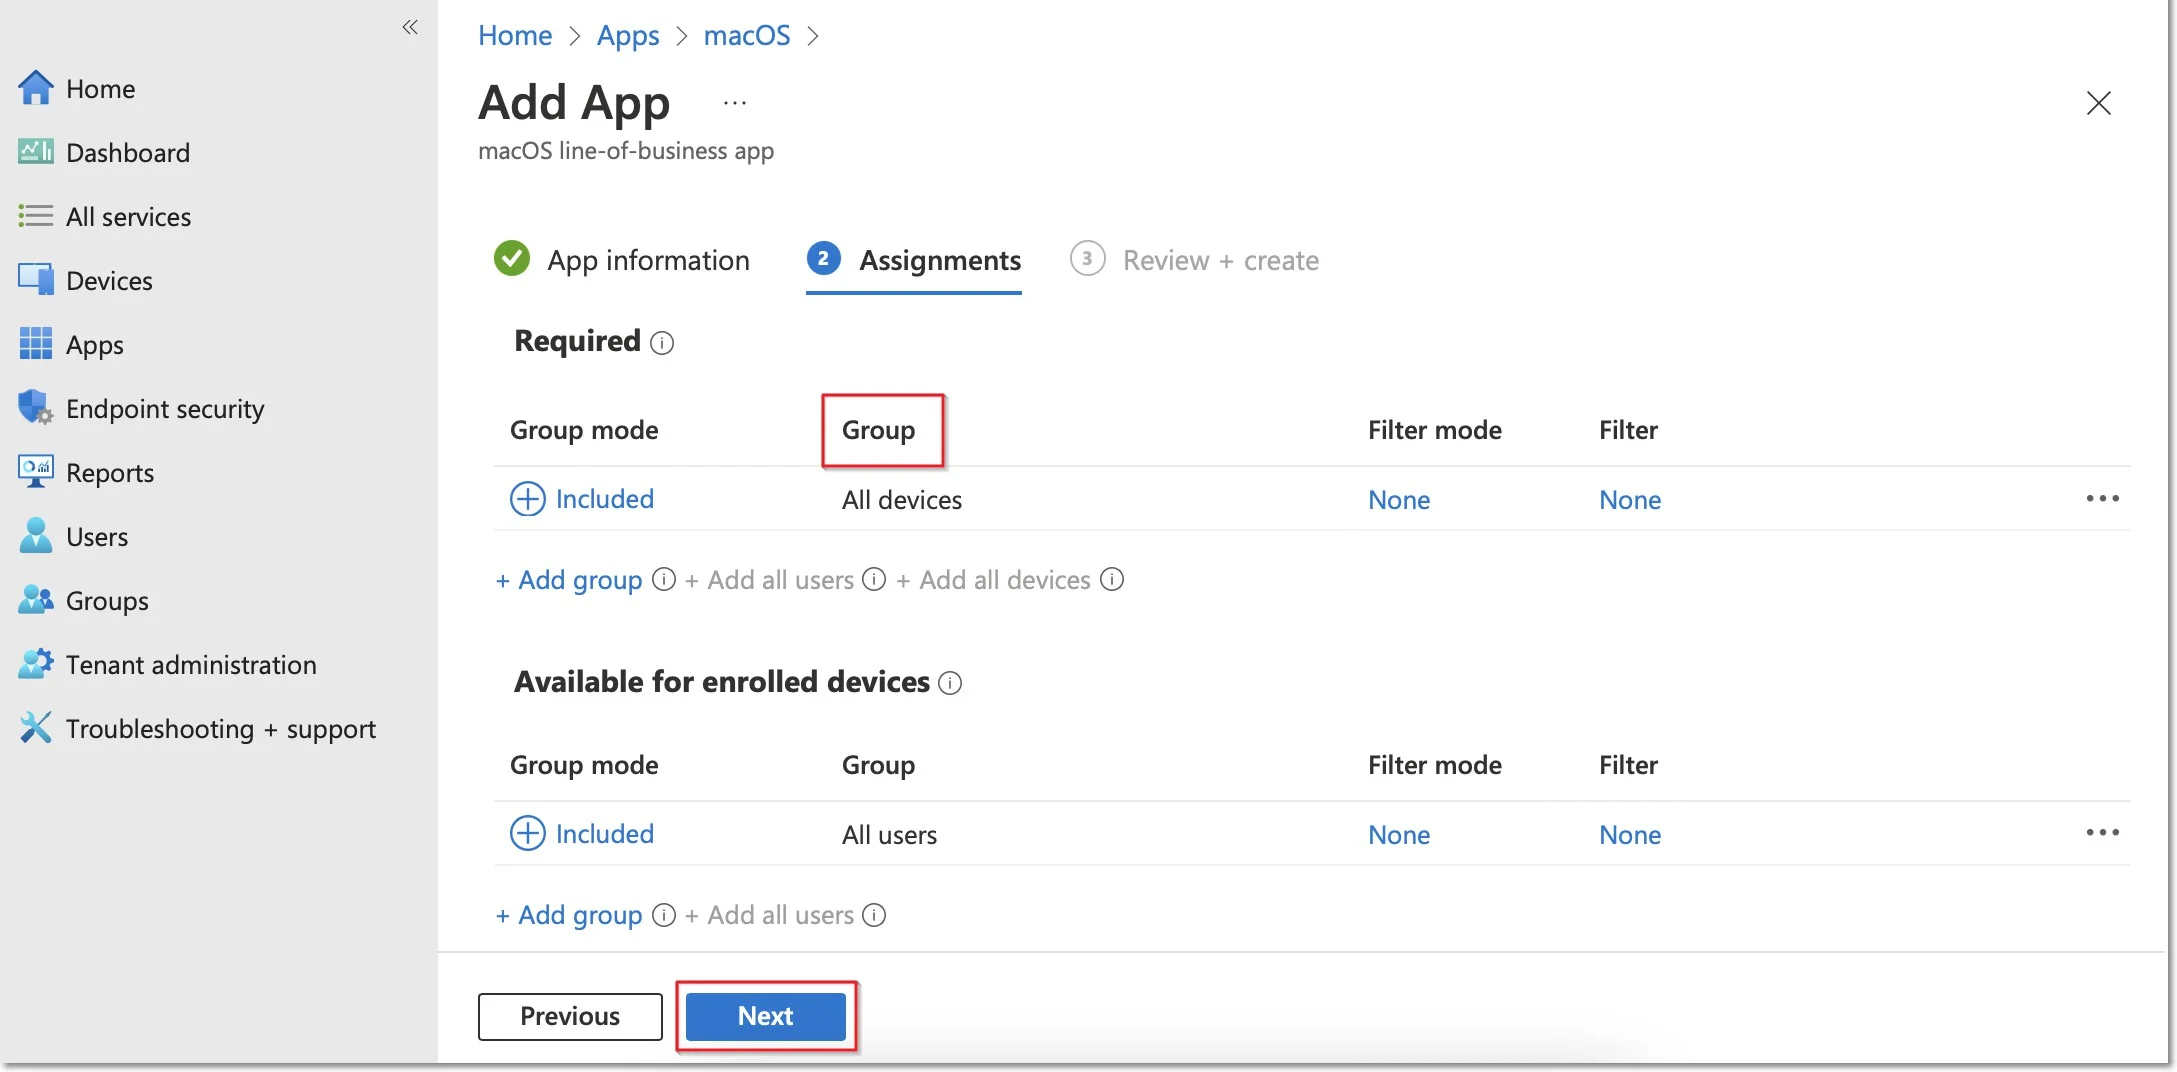
Step 9 – On the Assignments page, in the Required section, select the group for which you want to deploy the Endpoint Protector client and then click Next.
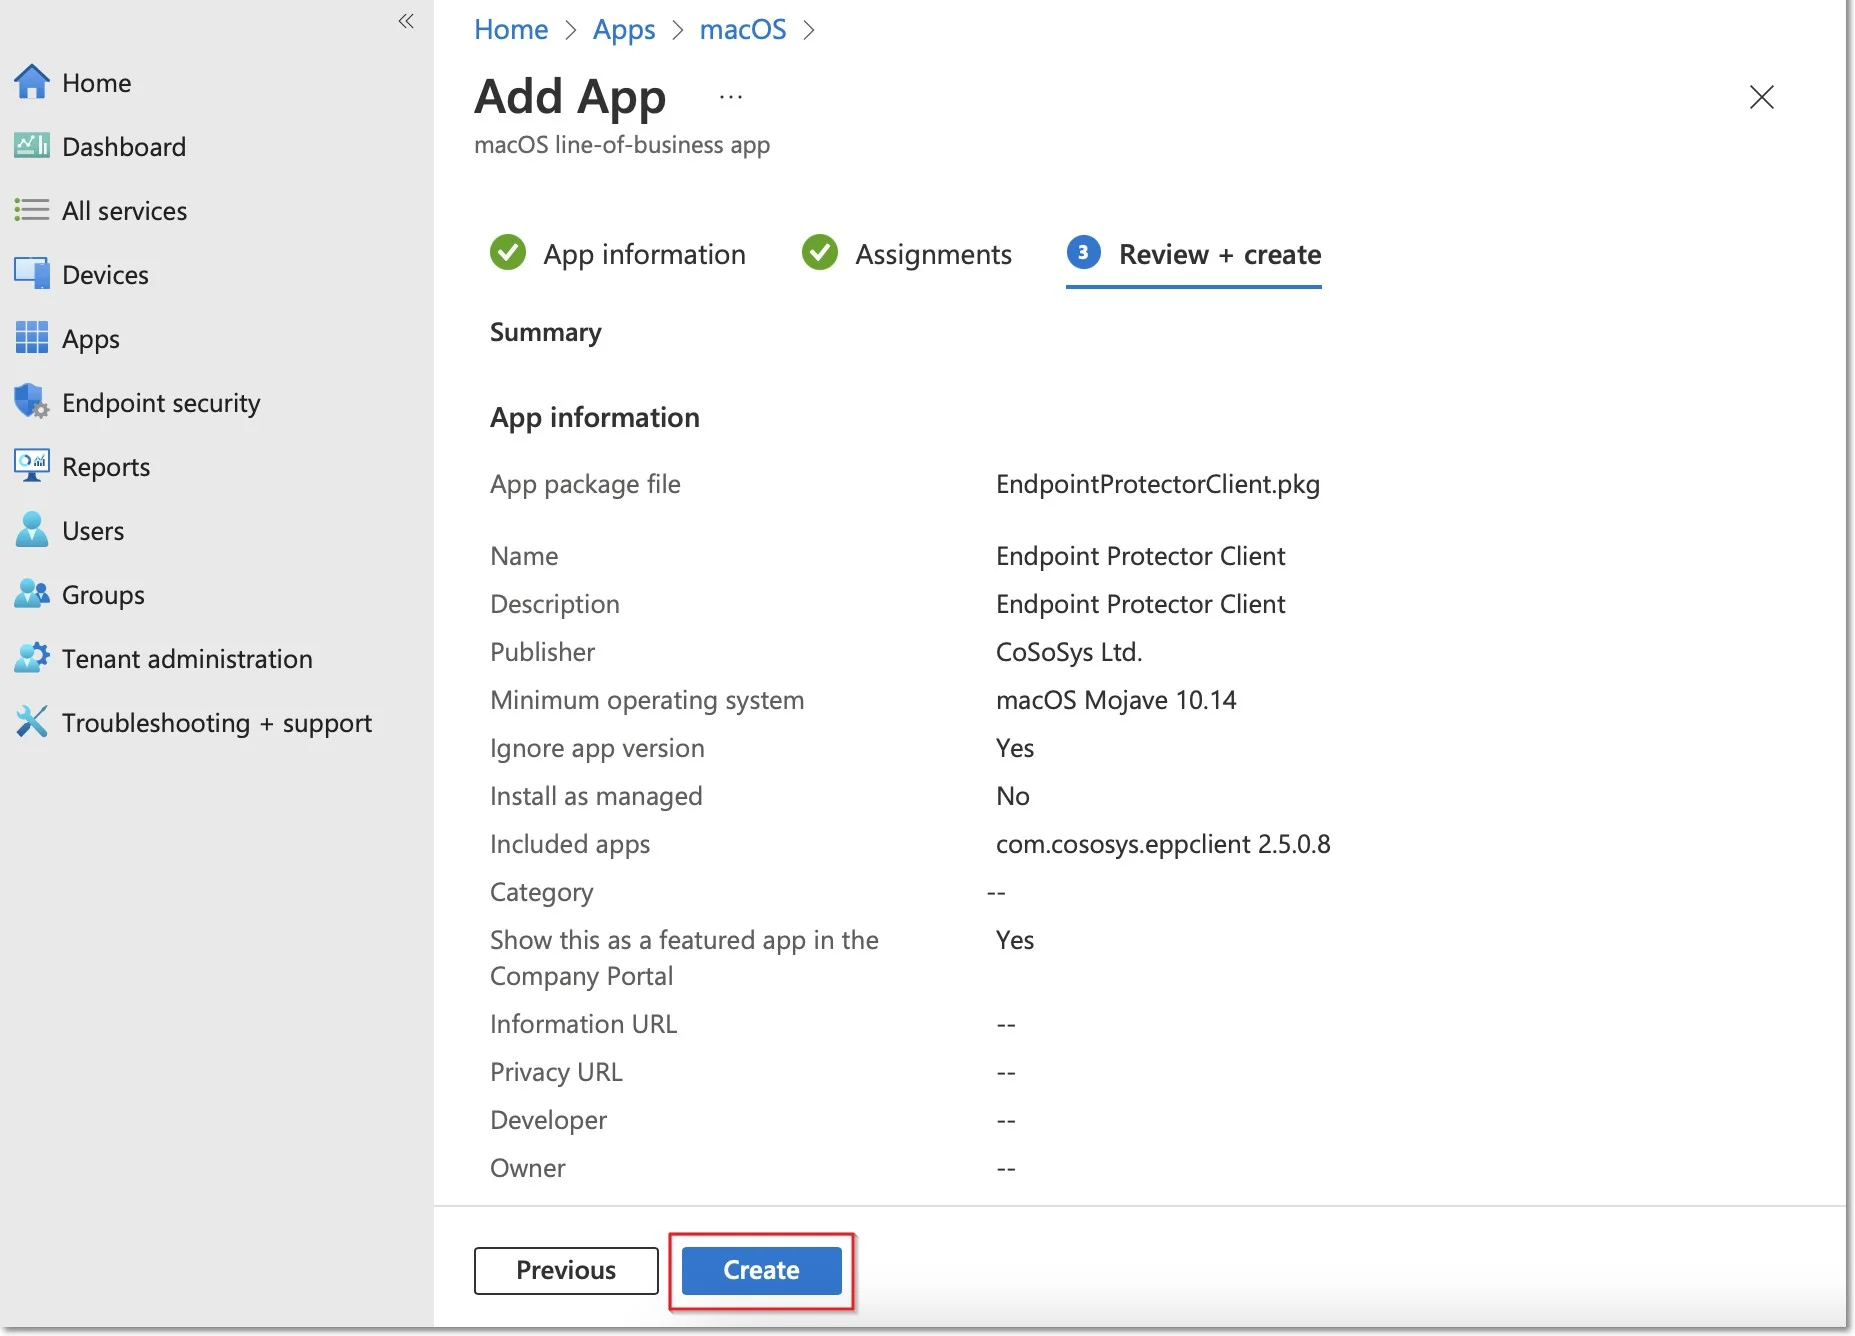
Step 10 – On the Review + create page, click Create - this will start the Endpoint Protector package upload.
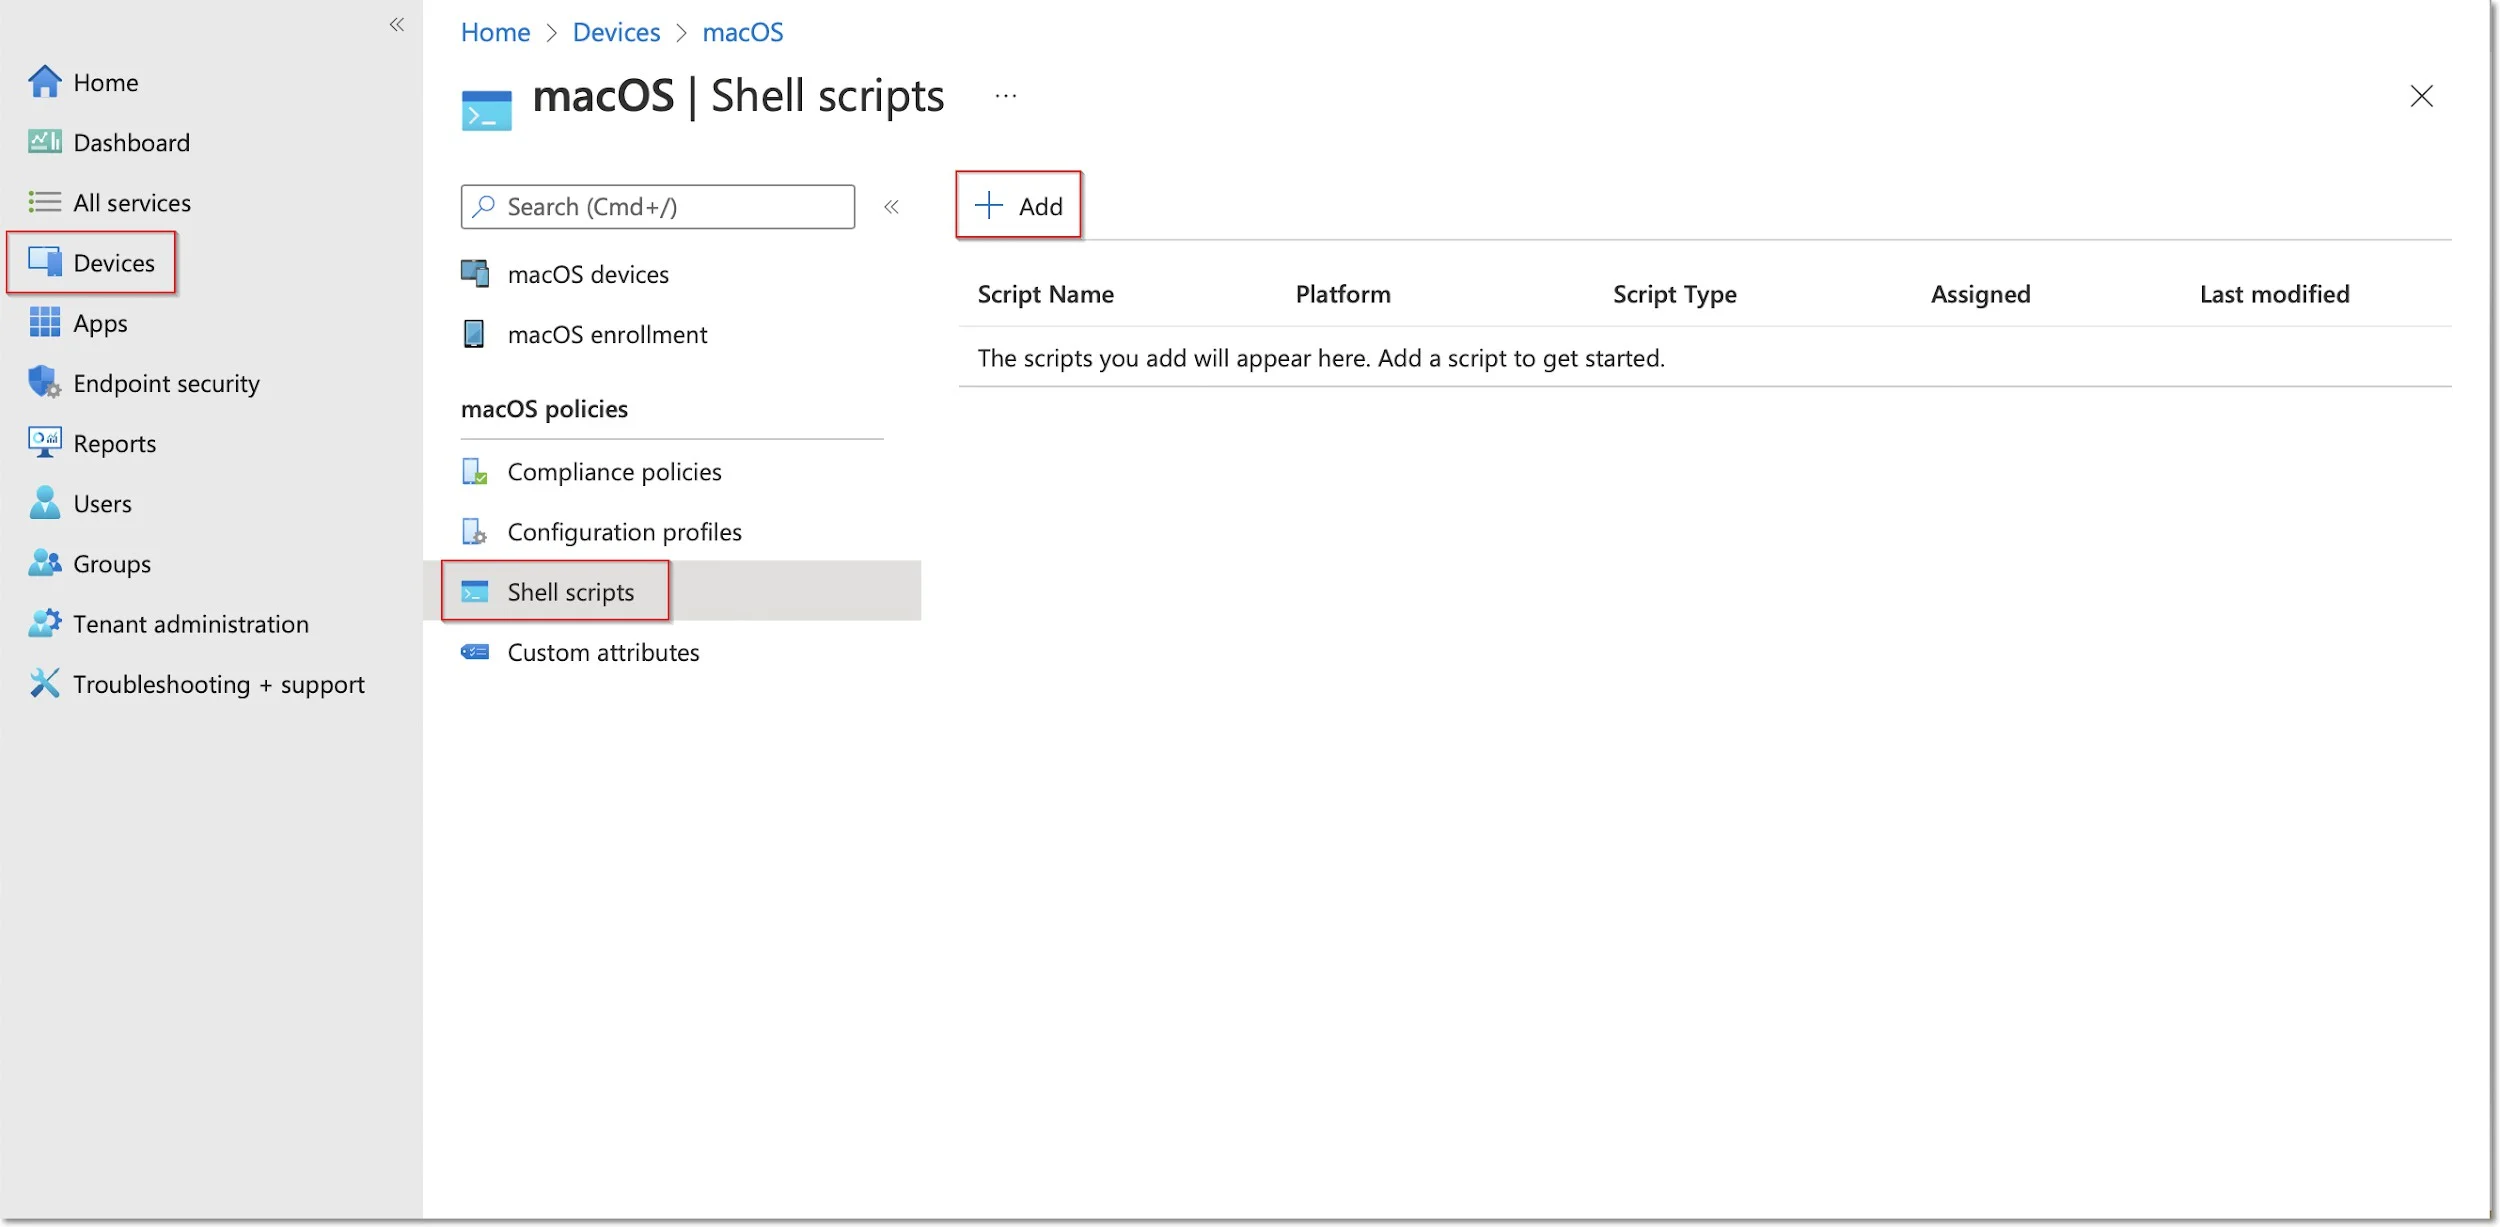
Step 11 – Go to Devices from the left-hand menu, select macOS, Shell scripts and then click Add.
NOTE: Please contact the Customer Support department to provide the script.
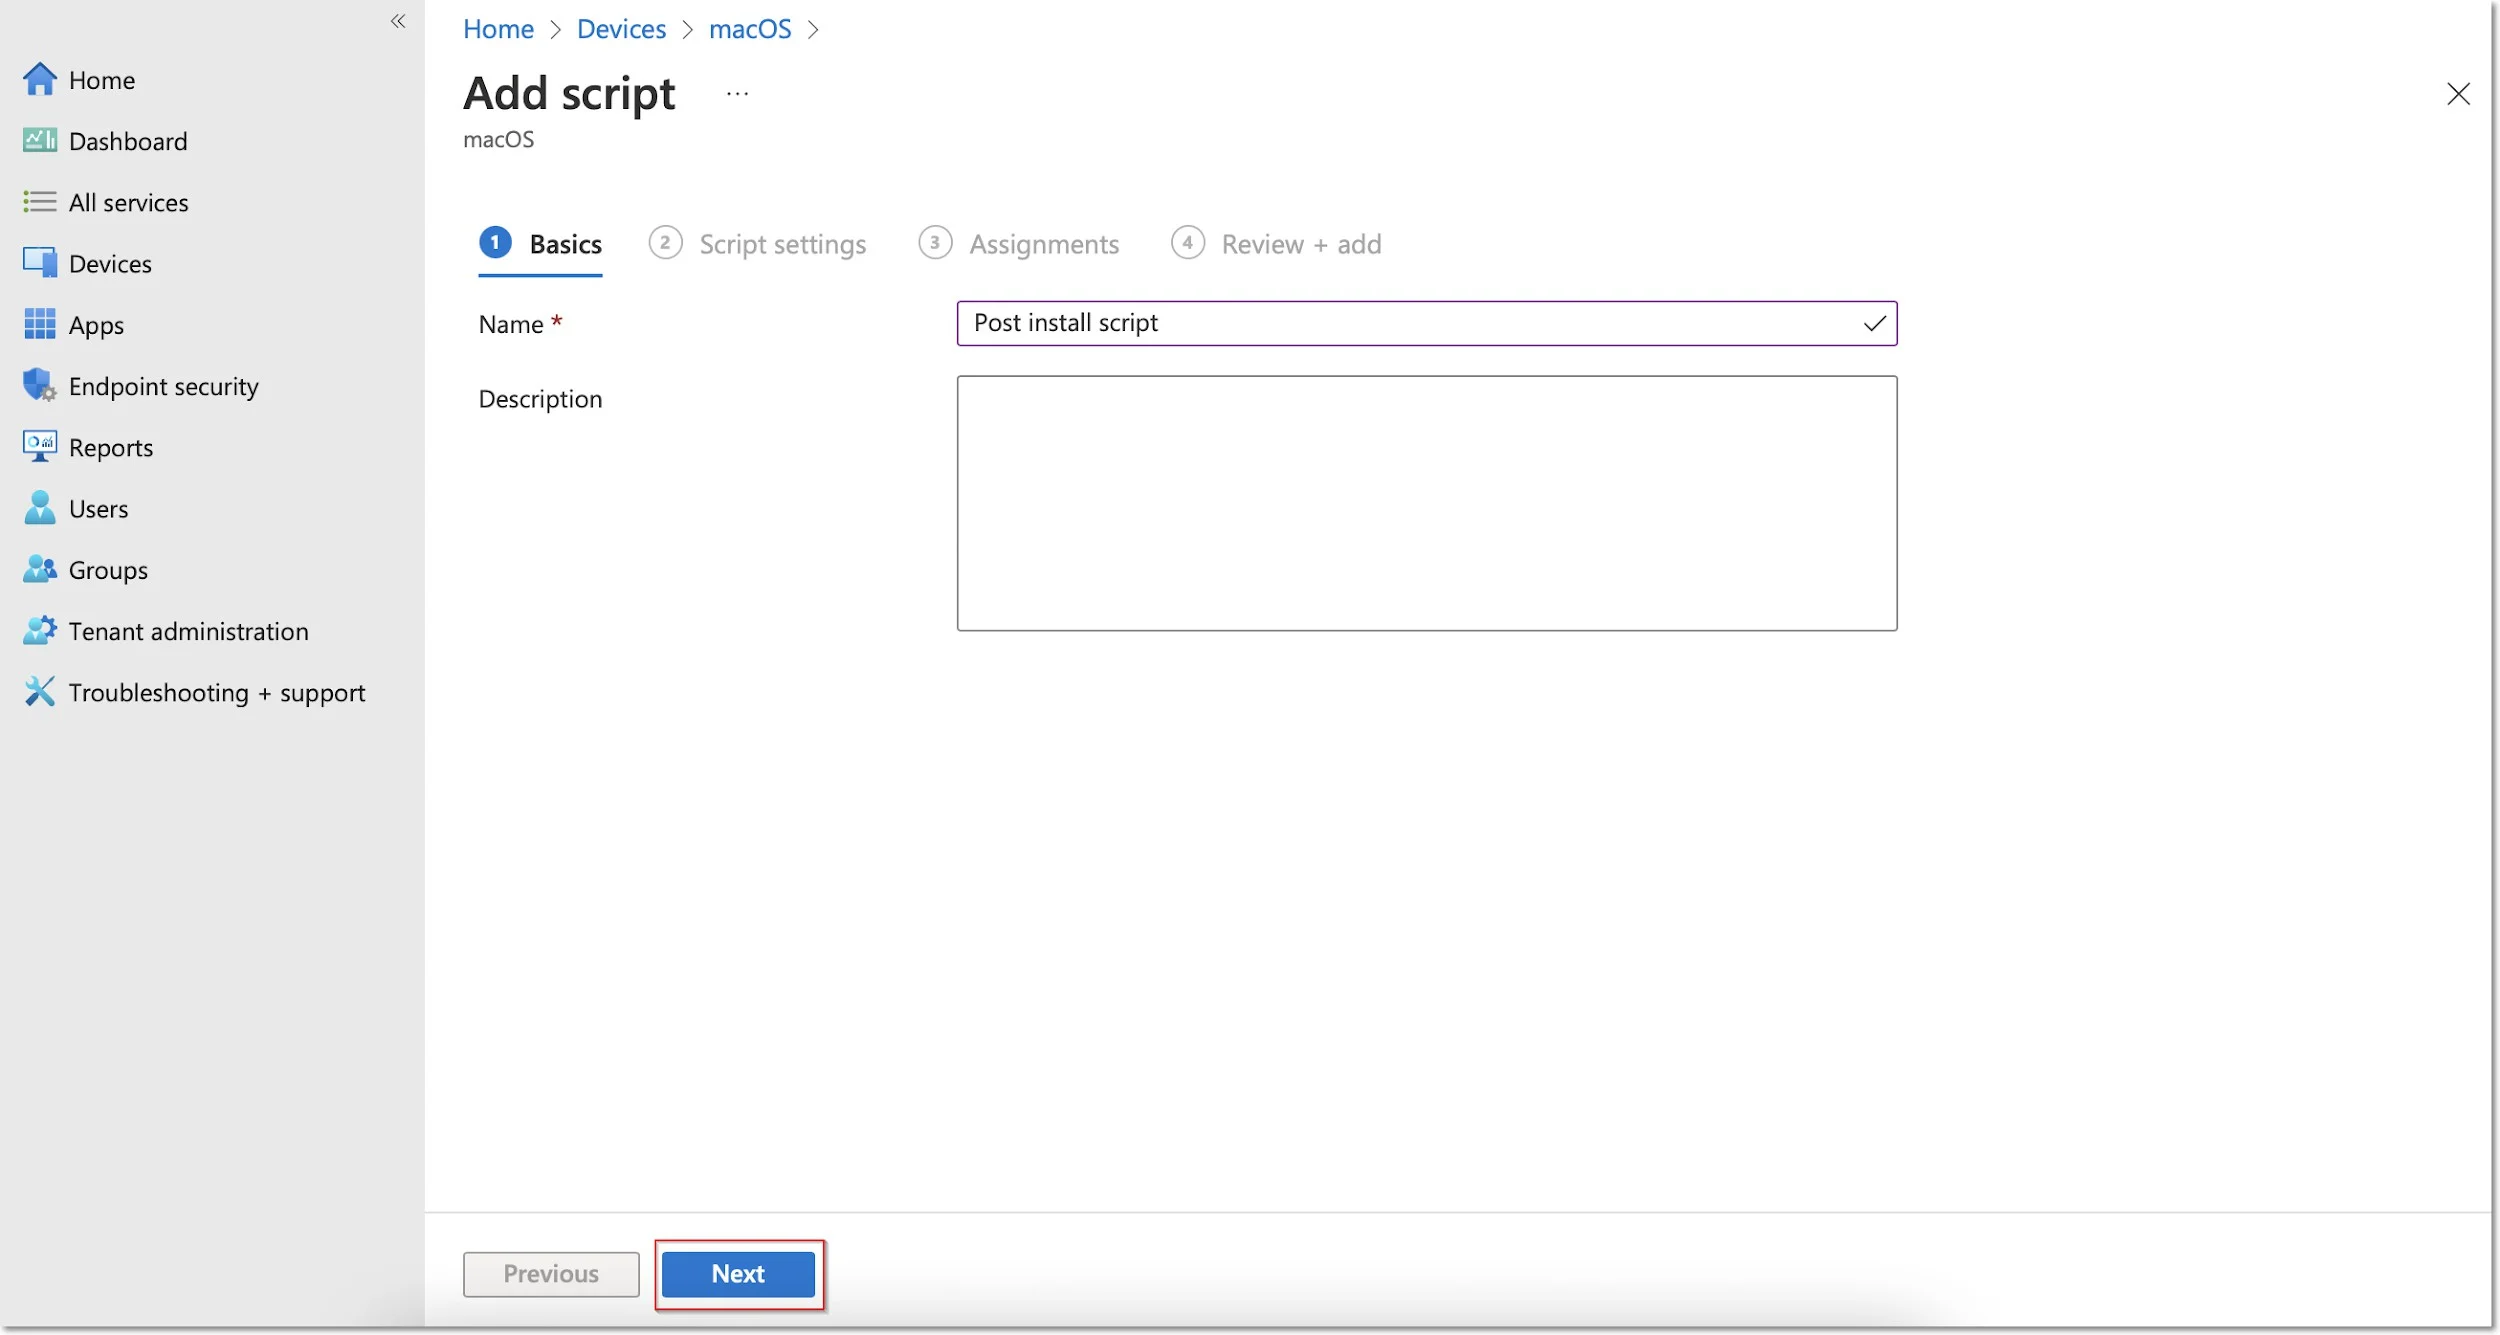
Step 12 – On the Add script page, fill in the mandatory information and then click Next.
- Name (mandatory) – add a name for the script (Post install script)
- Description – add a description for the script
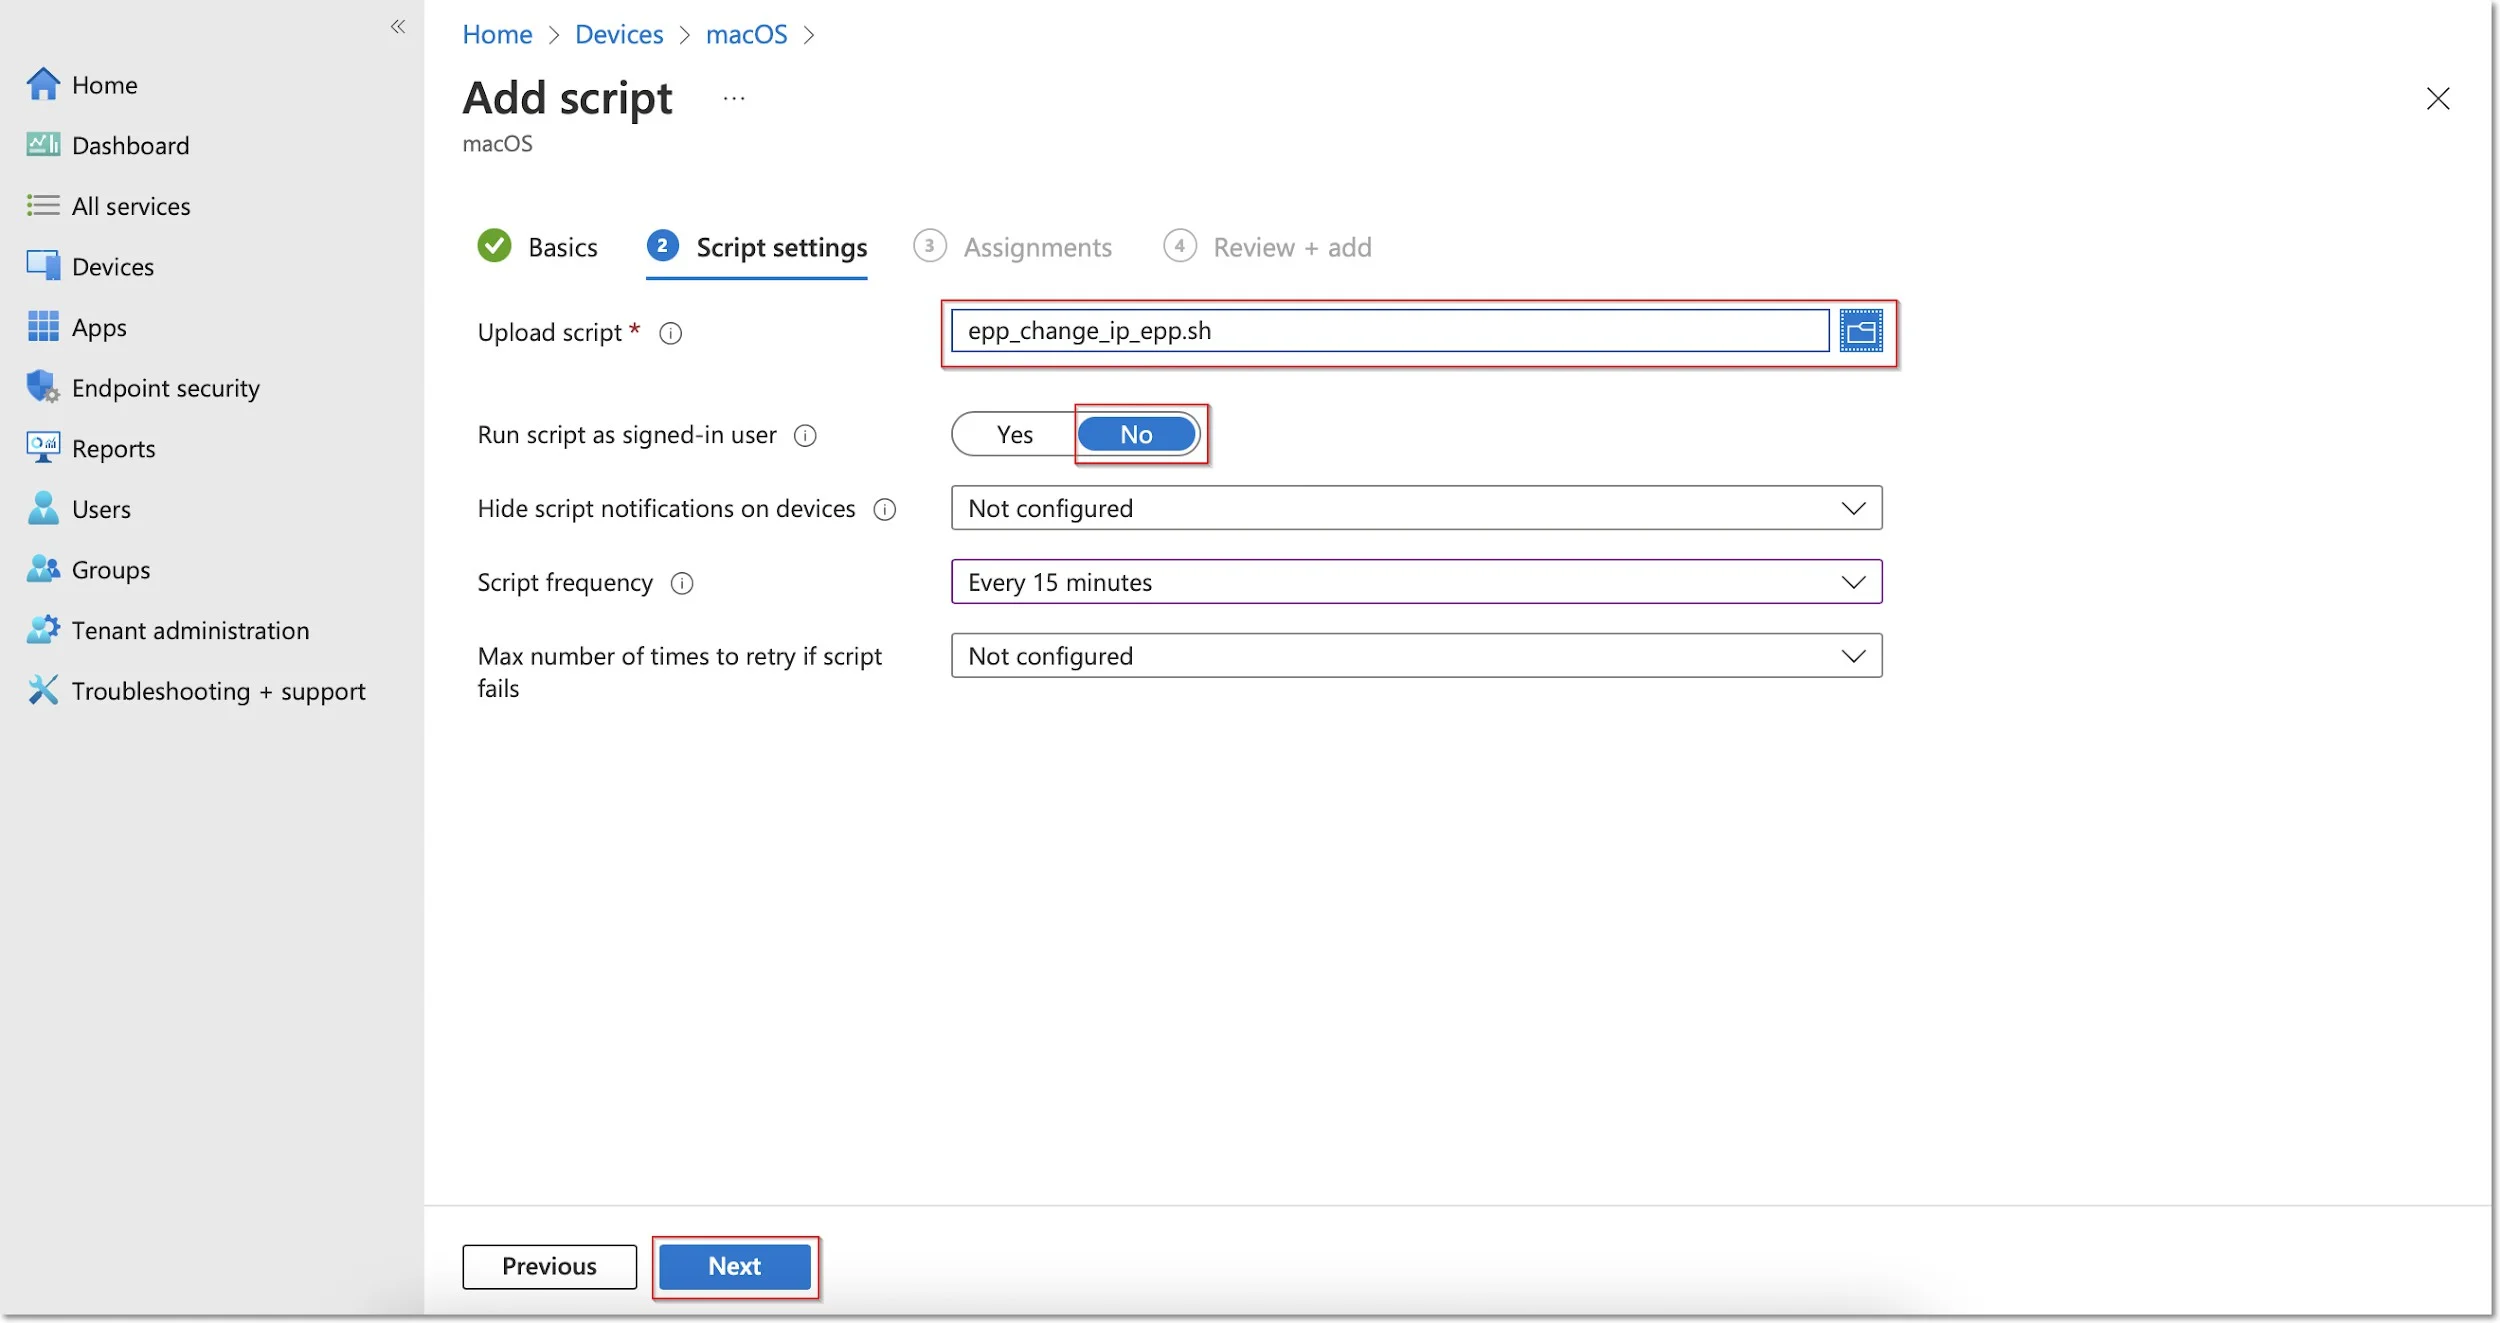
Step 13 – On the Script settings tab, add the following information and then click Next:
- Upload and select the New Jamf PostInstall script from your computer
- Set the Run script as sign-in user setting to No
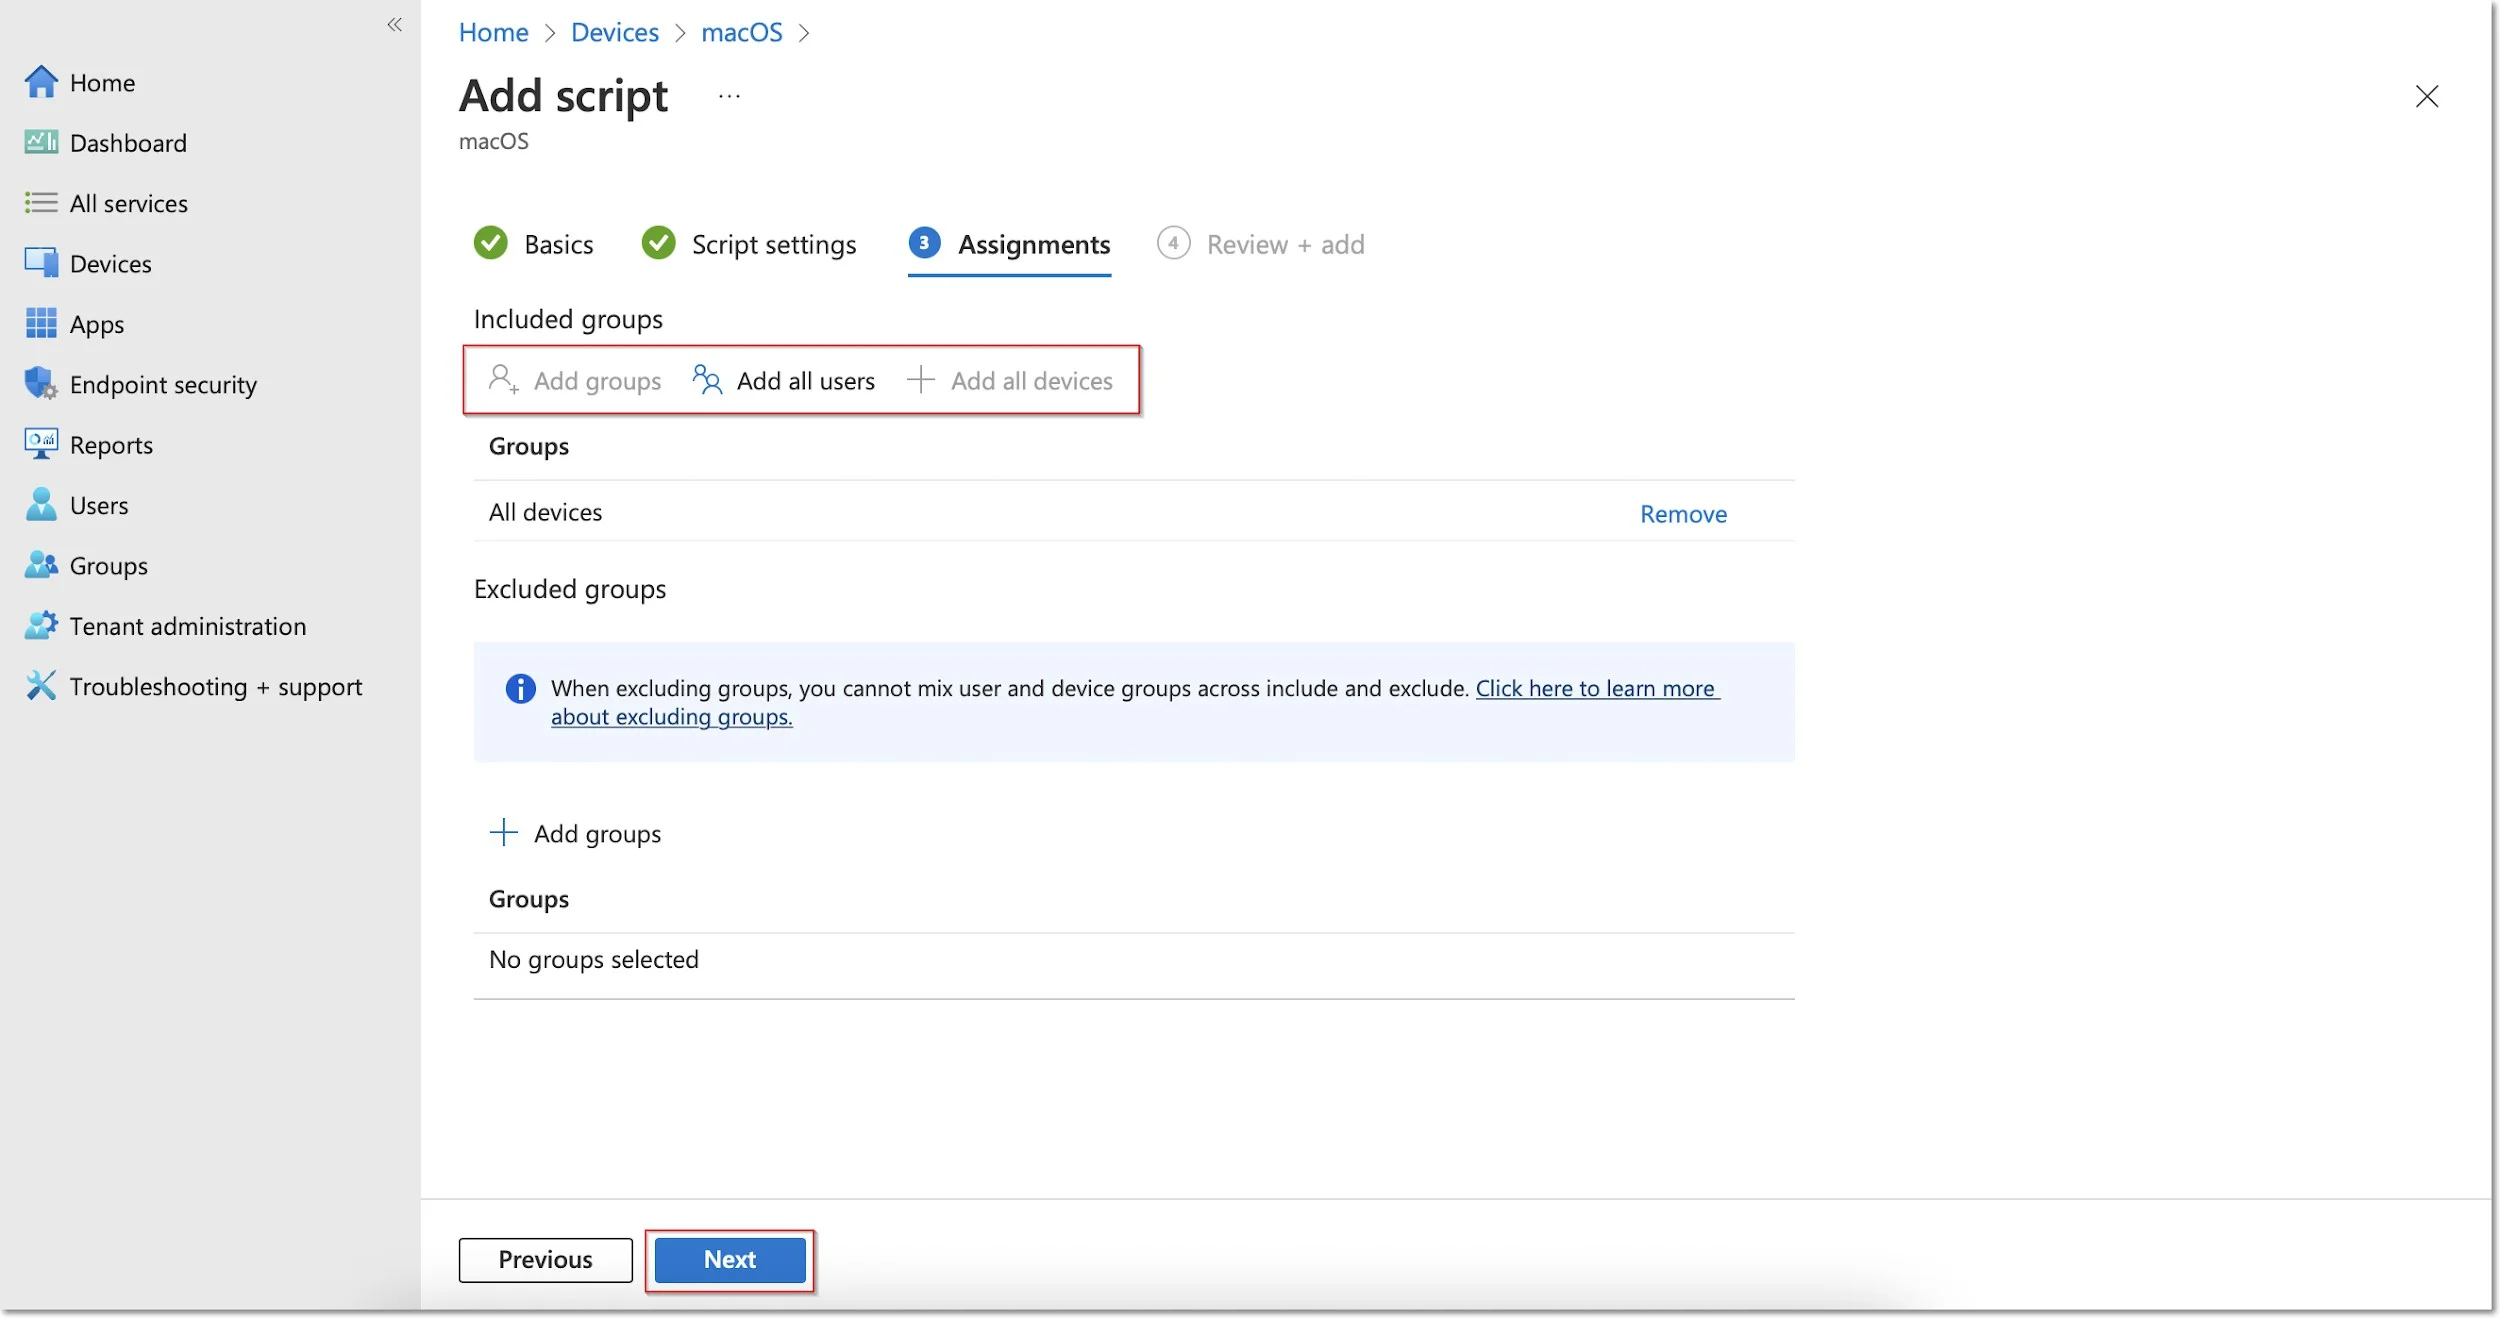
Step 14 – On the Assignments tab, include the groups you prefer (Add groups, all users, or all devices) and then click Next.
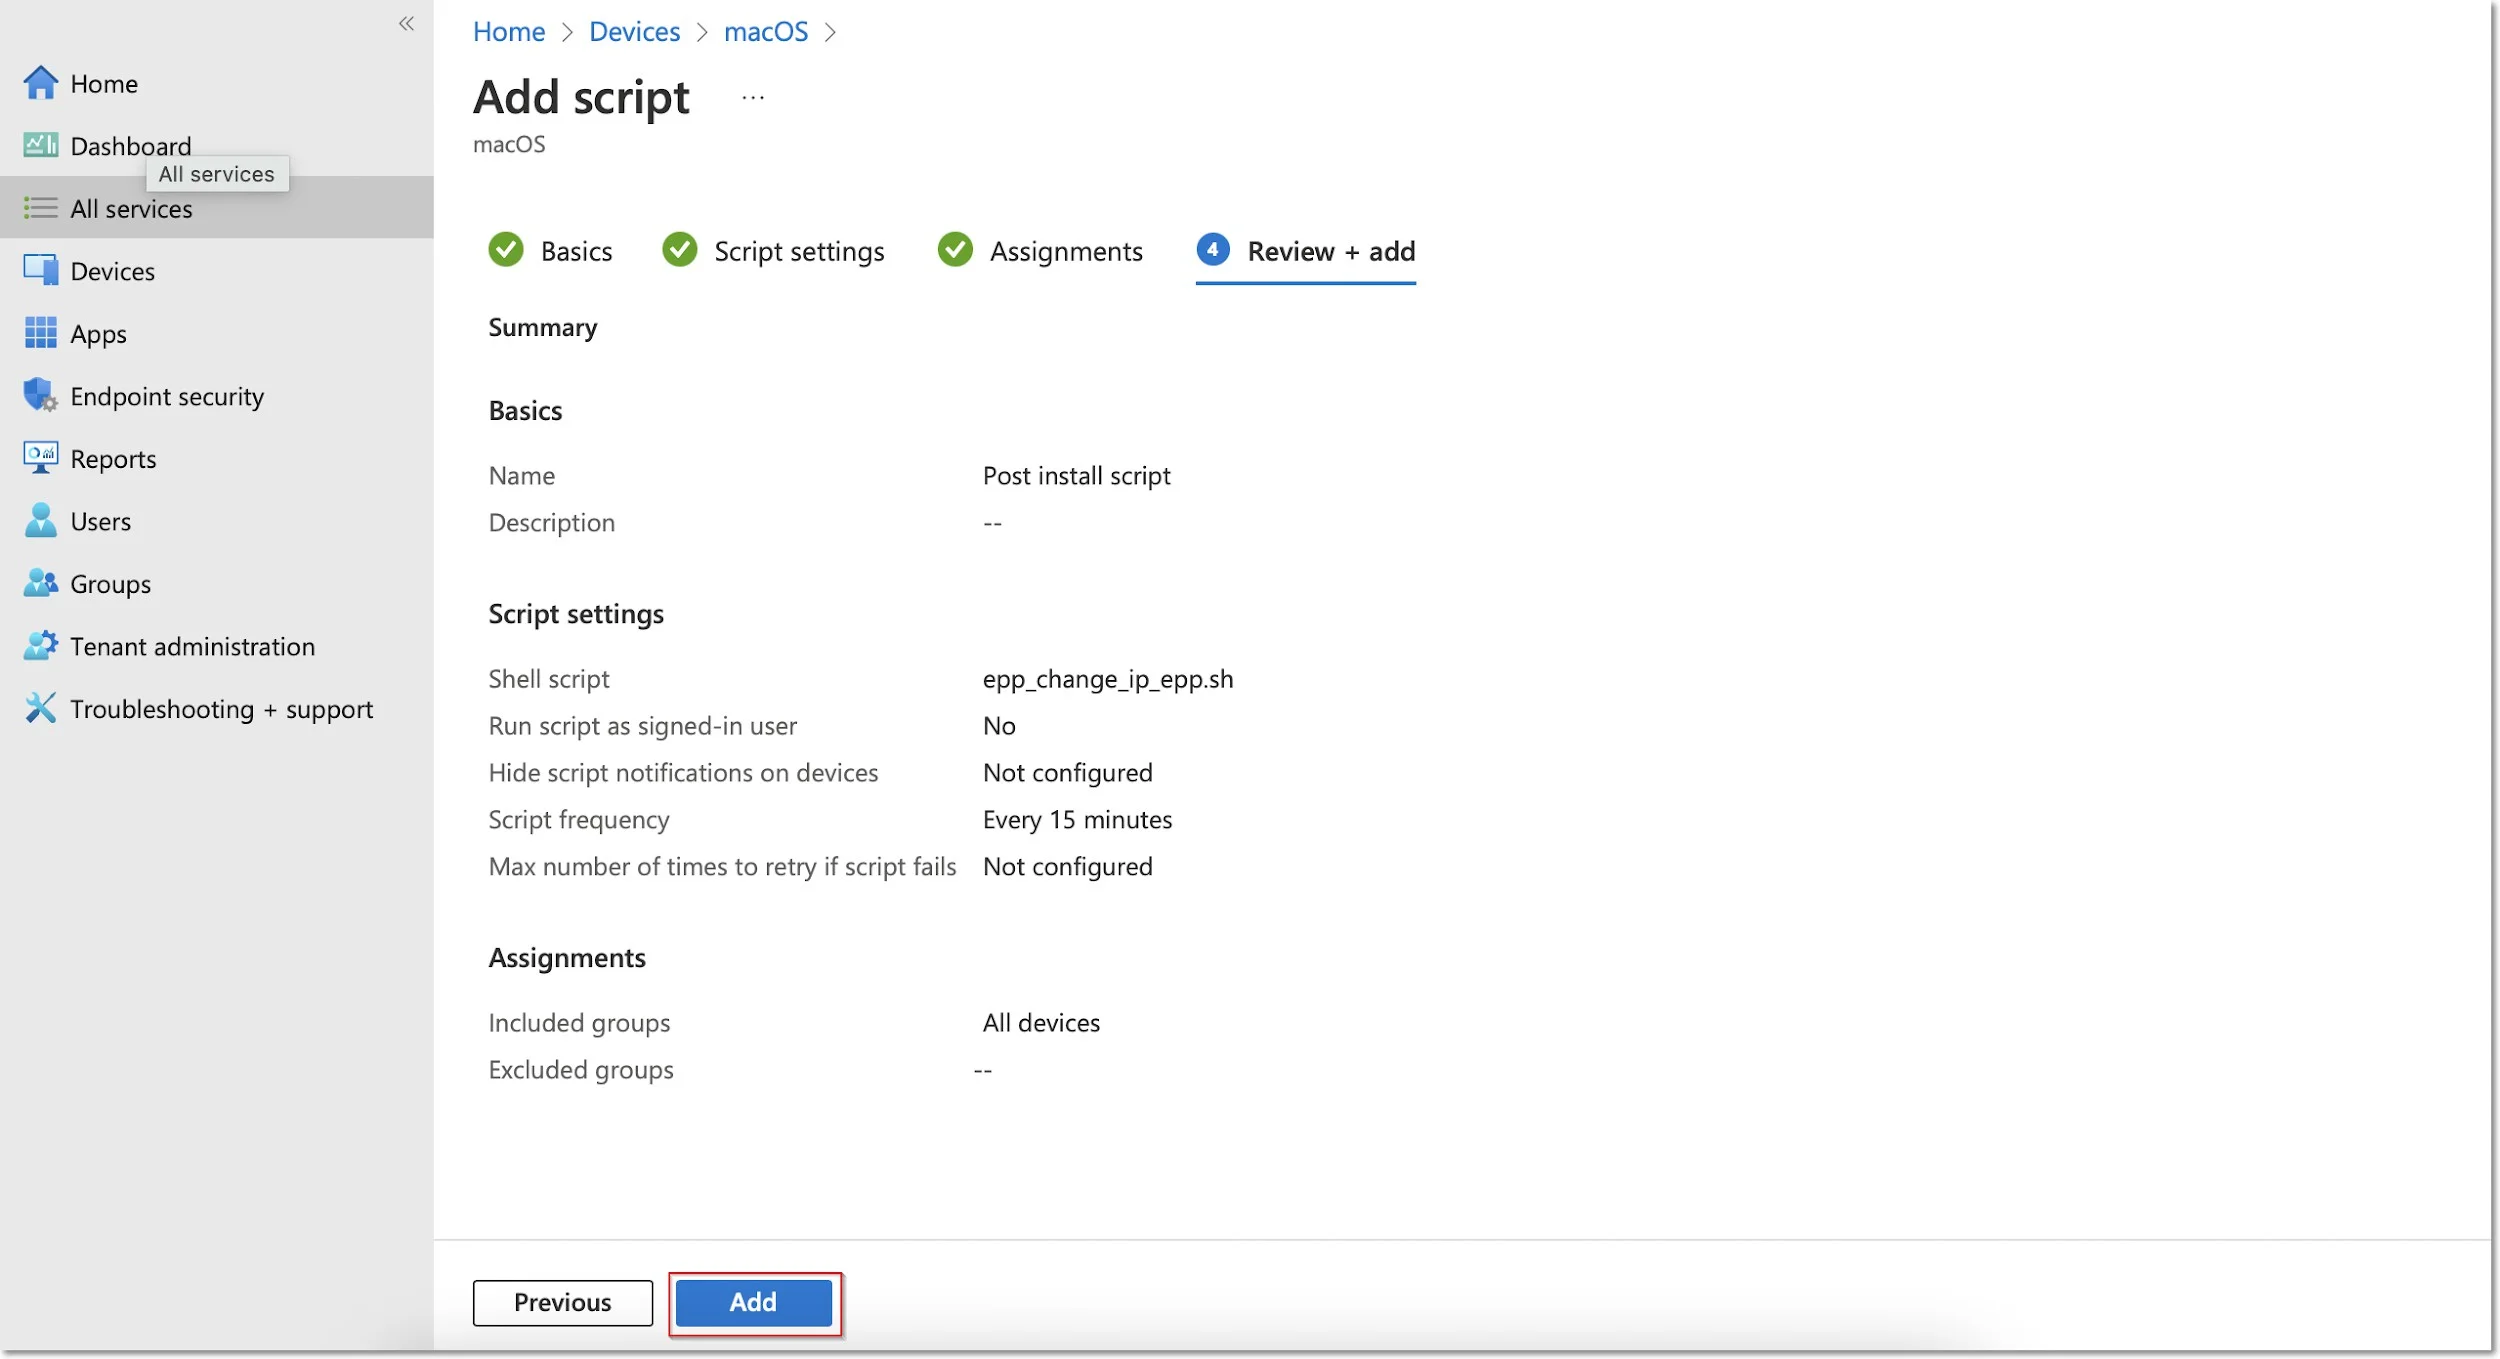
Step 15 – On the Review + add tab, you can view the script information and click Add.
Windows Deployment
To deploy the Endpoint Protector MSI package for Windows using Intune, follow these steps:
Step 1 – Open and log in to Endpoint Protector;
Step 2 – Go to the System Configuration, Client Software and download the Windows Endpoint Protector MSI package;
CAUTION: When deploying the .msi package, delete the information contained in the brackets as well as the underscore that precedes it - EPPClientSetup.5.6.3.1_x86_64.msi

Step 3 – Go to the Microsoft Endpoint Manager admin center and sign in;
Step 4 – Go to Apps from the left-hand side menu, and on the Apps Overview page, select the Windows platform;
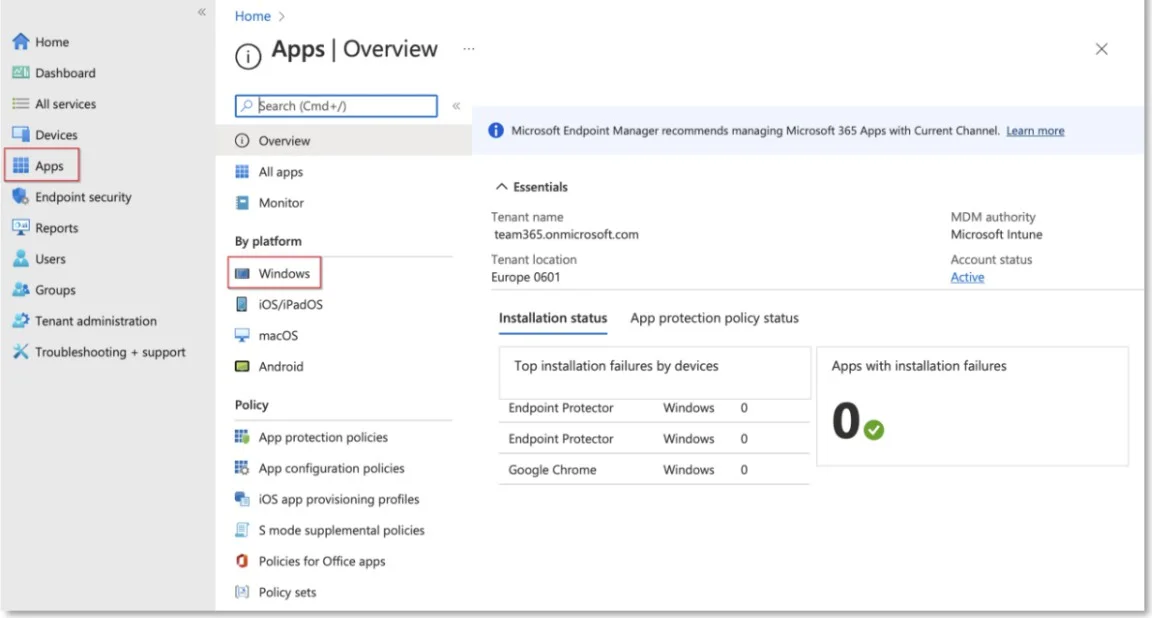
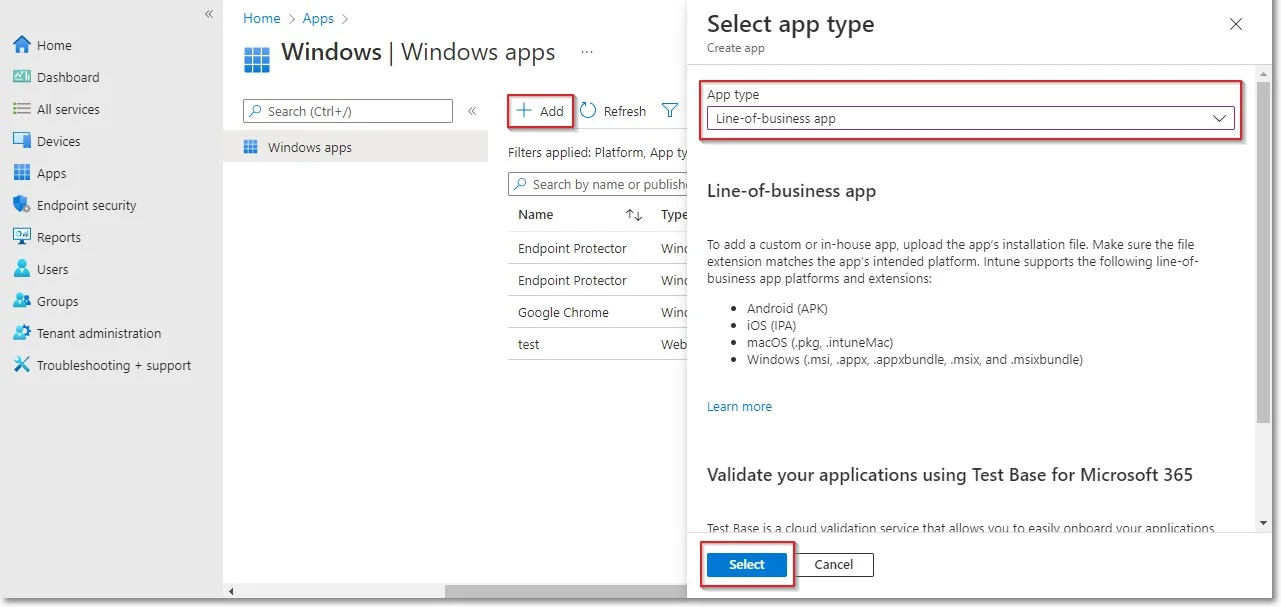
Step 5 – On the Windows App page, click Add, select the Line of business app type, and then click Select;
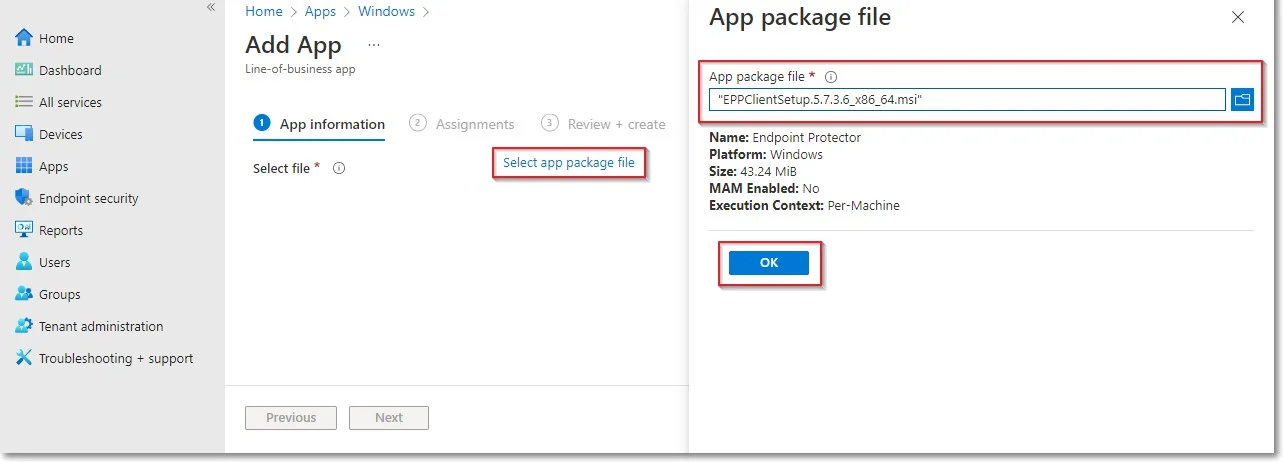
Step 6 – Click Select app package file and from the right-hand side, select the Endpoint Protector MSI file and click OK;
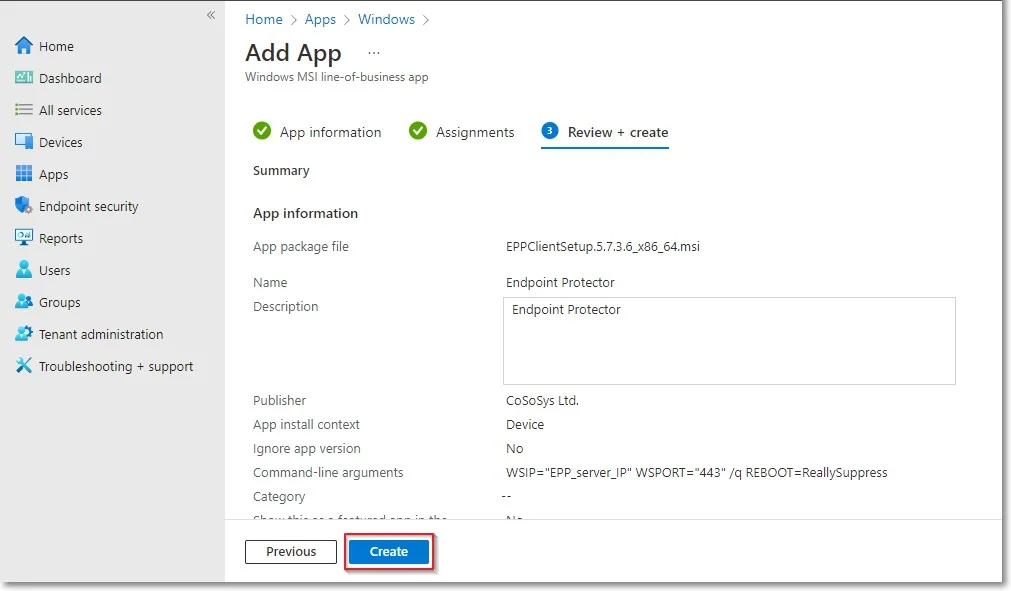
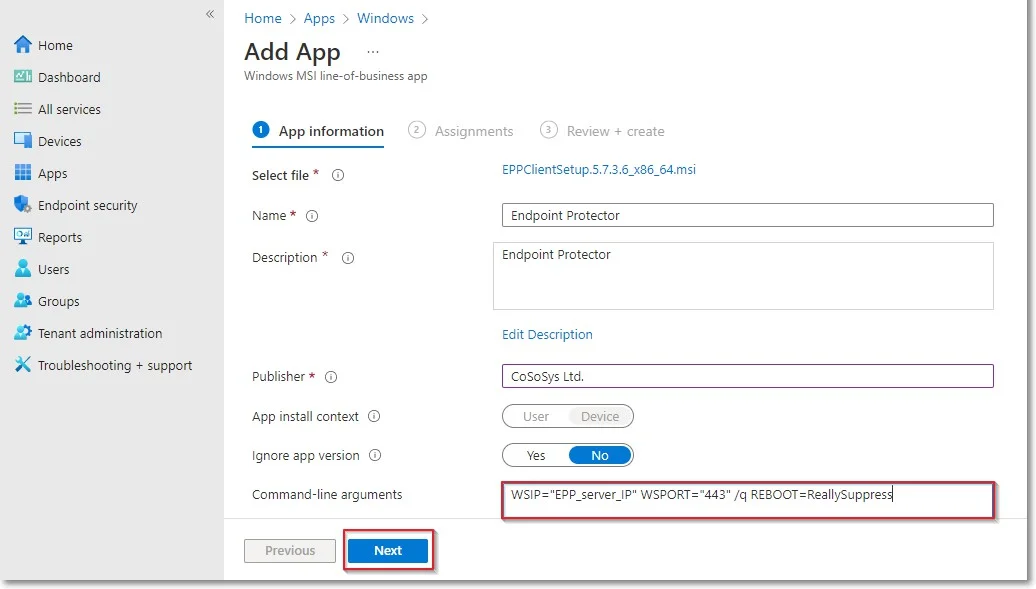
Step 7 – On the App information page, fill in the mandatory fields and then click Next:
-
Name – add Endpoint Protector and optional, the package version (Endpoint Protector 5.7.3.6)
-
Description – click Edit Description and add installation details
-
Publisher – add NetwrixLtd.
-
Command-line argument – add the following command line in the text box
- WSIP="EPP_server_IP" WSPORT="443" /q REBOOT=ReallySuppress
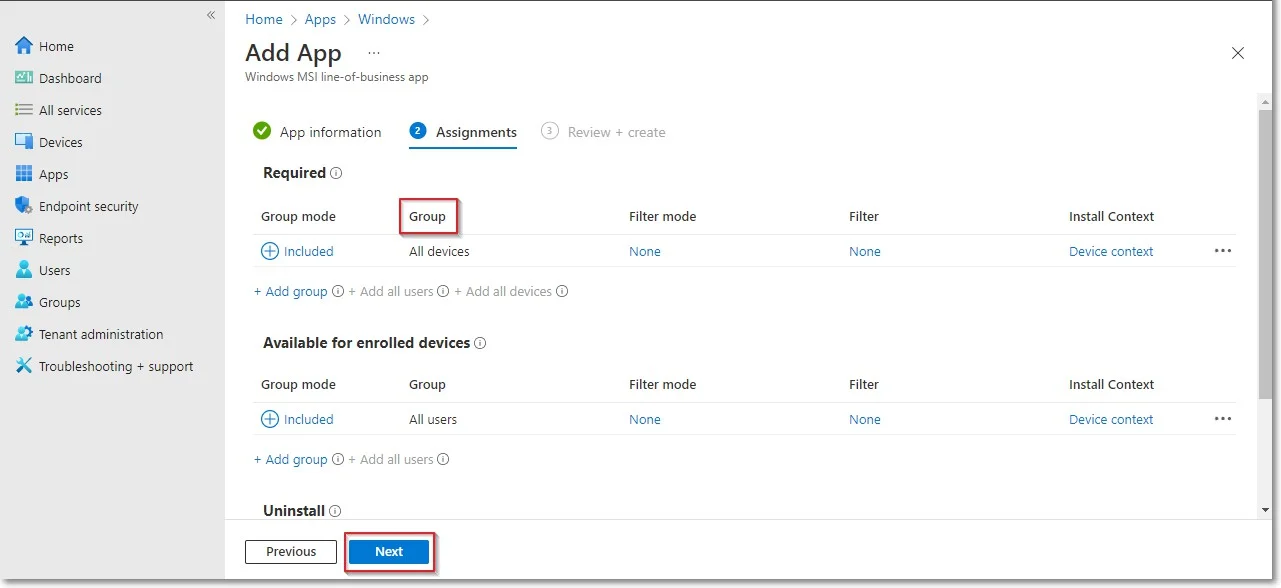
Step 8 – On the Assignments page, in the Requirement section, select the group for which you want to deploy the Endpoint Protector client and then click Next;
Step 9 – On the Review + create page, click Create - this will start the Endpoint Protector MSI package upload.