System Configuration
This section includes essential elements such as Endpoint Protector Clients, System Licensing, and advanced configurations. These settings are critical for maintaining the system's performance, stability, and compliance, as they directly influence both the operational efficiency and reliability of the Endpoint Protector solution.
Client Software
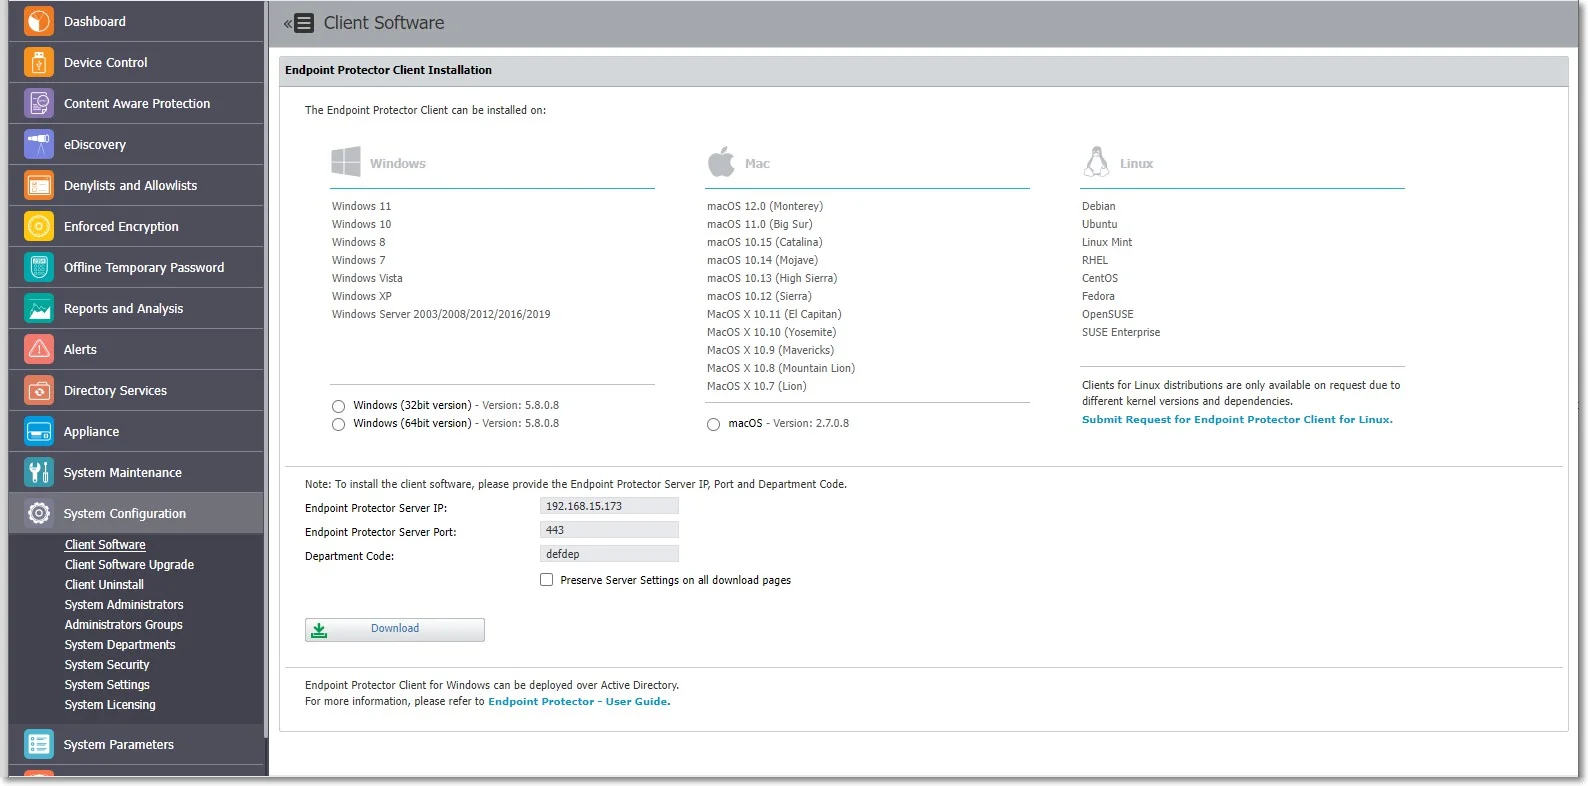
From this section, you can download and install the Endpoint Protector Client corresponding to your operating system.
NOTE: The Server and Client communicate through port 443.
When using a custom WebUI port, please contact Netwrix Support to assist in configuring the Nginx configuration file.
The Windows Client installers allow the option to download the package with or without add-ons. This option fixes any incompatibility that may arise between Endpoint Protector and the specific solutions.
CAUTION: Only the latest Endpoint Protector Clients are available for download. You cannot set another default Endpoint Protector Client version from the Client Software Upgrade section.
To improve the Endpoint Protector installation process, use the Endpoint Protector tool that allows you to run installation-related actions, identify your current Linux distribution, and view Endpoint Protector Release Notes.
Use the following commands:
- i - install
- u - uninstall
- rn - release notes
- l - distribution list
NOTE: Contact Customer Support to provide the tool as well as assistance.
NOTE: Endpoint Protector Client versions are displayed in the format X.X.X.XXXX on endpoints. This version will be saved in the Endpoint Protector Server database, although the web console will truncate the last 3 digits.
Bypass Proxy Settings
You have the ability to bypass proxy settings for all operating systems.
Windows and macOS
Endpoint Protector Wizard Installer
Select the option to Use Manual Proxy Settings from the Endpoint Protector Wizard installer and then provide the following information:
- Proxy IP – IP of the proxy server
- Proxy Port – Port of the proxy
- Select the Use authentication checkbox
- Username – add proxy server username
- Password – add proxy server password
CLI commands
You can also apply manual proxy settings using CLI commands:
Example:
msiexec.exe /i "C:\Work\Tools\EPPClientSetup.5.7.1.5_x86_64.msi" /q REBOOT=ReallySuppress RUNNOTIFIER=0 /log "C:\Windows\TEMP\epp-upgrade.log" WSIP="192.168.18.125" WSPORT="8080" DEPT_CODE="defdep" PROXYIP="127.0.0.1" PROXYPORT="80" AUTHUSR="user_name" AUTHPASS="password"
Where:
- PROXY_IP – IP of the proxy
- PROXY_PORT – Port of the proxy
- AUTHUSR – Username (if authentication for proxy is needed)
- AUTHPASS – Password (if authentication for proxy is needed)
You can also use CLI Commands below to install Endpoint Protector Client in specific mode of working.
- WSIP – server address
- WSPORT – server port number
- DEPT_CODE – department code
- IPV6MAPPING – IPV6 Mapping IPv4 addresses
- SUPPRESSRD – suppress FileRead/FileDelete events for NS and Removable devices
- DISABLECAP – disabling loading of CAP drivers (CAP will not work)
NOTE: For macOS, please contact the Netwrix Support team to obtain the latest version of the installer script, which allows customization of installation parameters.
Linux
For Linux, you can only use CLI arguments in the options to bypass proxy settings.sh file. To do so, follow these steps:
Step 1 – Access the installation folder, open a Terminal, and run the following command:
cd pathToLinuxClientFolder
Step 2 – To run commands as root, run the following command and type your password.
sudo su
Step 3 – Open the options.sh configuration file with the following command:
gedit options.sh
Step 4 – In the configuration file, you will view the following fields for the proxy setup:
EPPCLIENT_HTTPS_PROXY=
#export EPPCLIENT_HTTPS_PROXY
Step 5 – Remove the # before each entry to apply the proxy setups.
Step 6 – For the first proxy setup, EPPCLIENT_HTTPS_PROXY, add the proxy server information in the address:port:user:password format.
Example: EPPCLIENT_HTTPS_PROXY=address:port:user:password
Step 7 – Save the changes, and then run the installation without having a VPN connection:
bash install.sh
Additional CLI commands for Linux in specific mode:
- #EPPCLIENT_SUPRESSRW - suppress FileRead/FileDelete events for NS and Removable devices
- #EPPCLIENT_DISABLECAP - disabling loading of CAP drivers (CAP will not work)
Client Software Upgrade
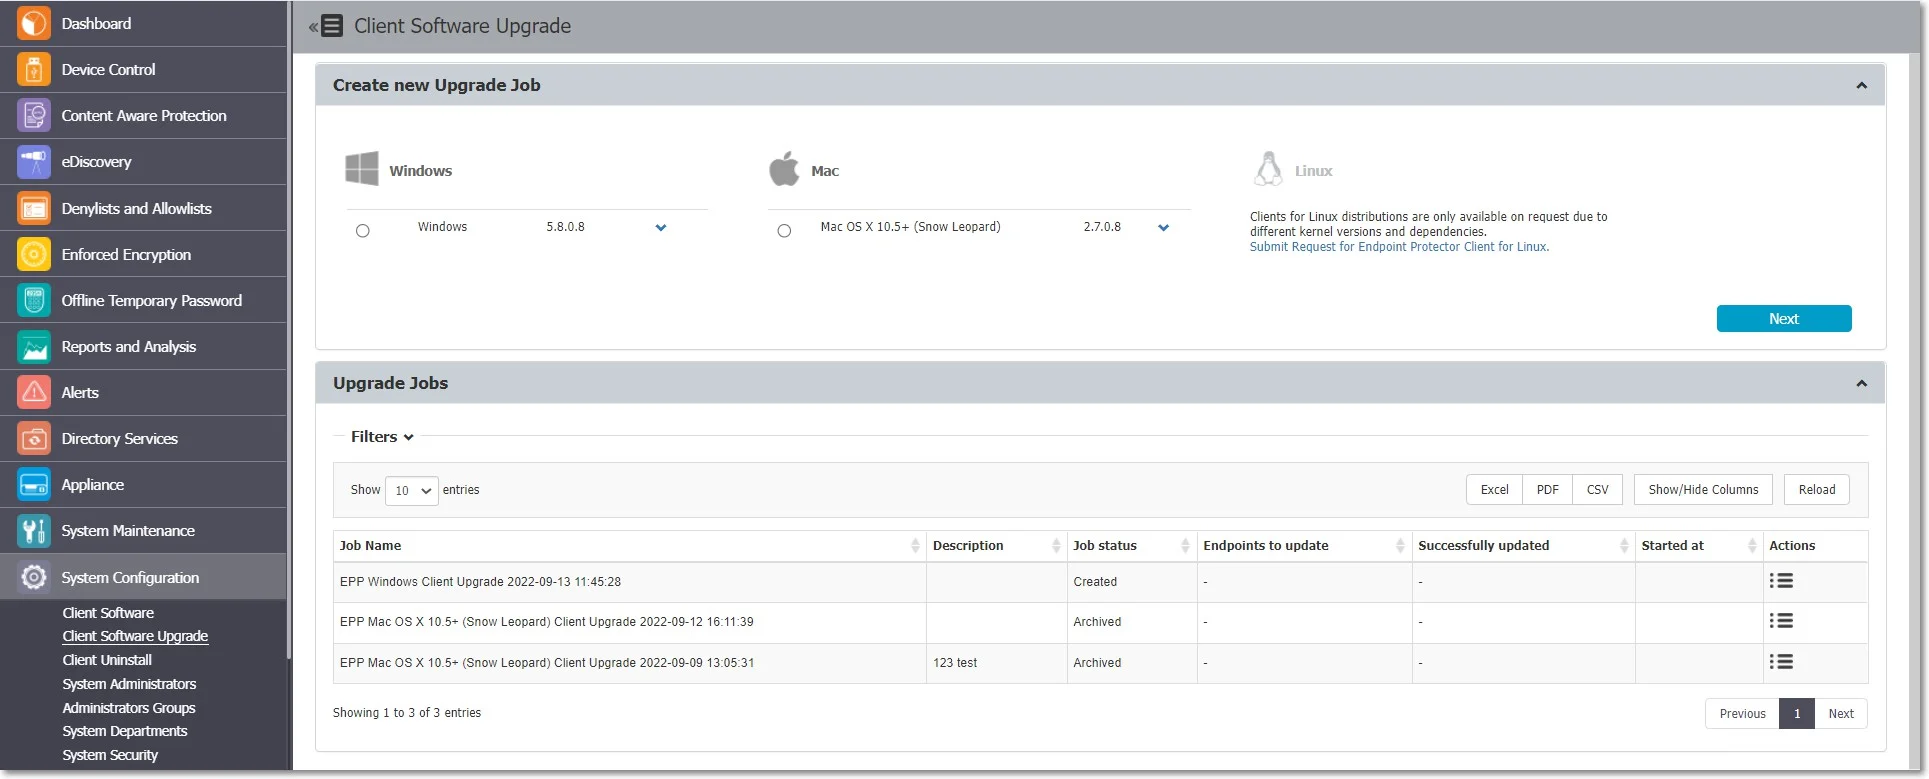
From this section, you can upgrade the Endpoint Protector Client and manage the upgraded jobs. The Client Software Upgrade feature is only available for Windows and macOS Clients. To upgrade your Linux Clients, submit a request using theonline form.
NOTE: When updating your operating system to the latest macOS Ventura, eppclient.log and eppsslsplit.log will be deleted from private/var/log.
CAUTION: The feature is not compatible for Endpoint Protector instances that are running on 32-bit versions of Windows.
NOTE: Endpoint Protector Client versions are displayed in the format X.X.X.XXXX on endpoints. This version will be saved in the Endpoint Protector Server database, although the web console will truncate the last 3 digits. In case Endpoint Protector Client versions are identical (first 4-digits), Endpoint Protector Server will still compare the full version number against each other, identifying the most recent version.
Create New Upgrade Job
To upgrade your Endpoint Protector Client, you need to create a new upgrade job, following these steps:
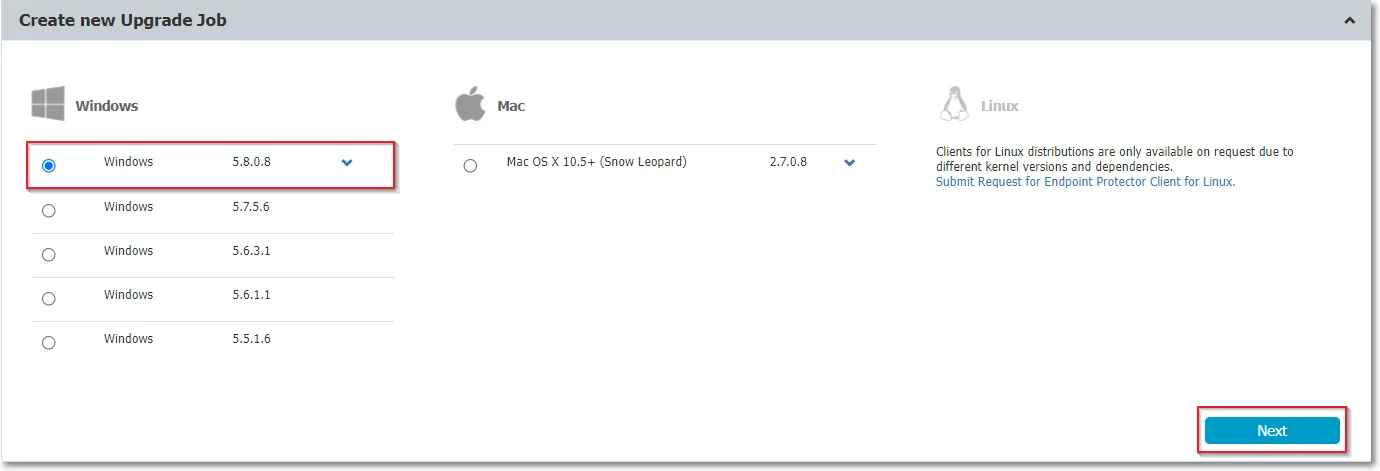
Step 1 – Select the OS version from the drop-down list and then click Next.
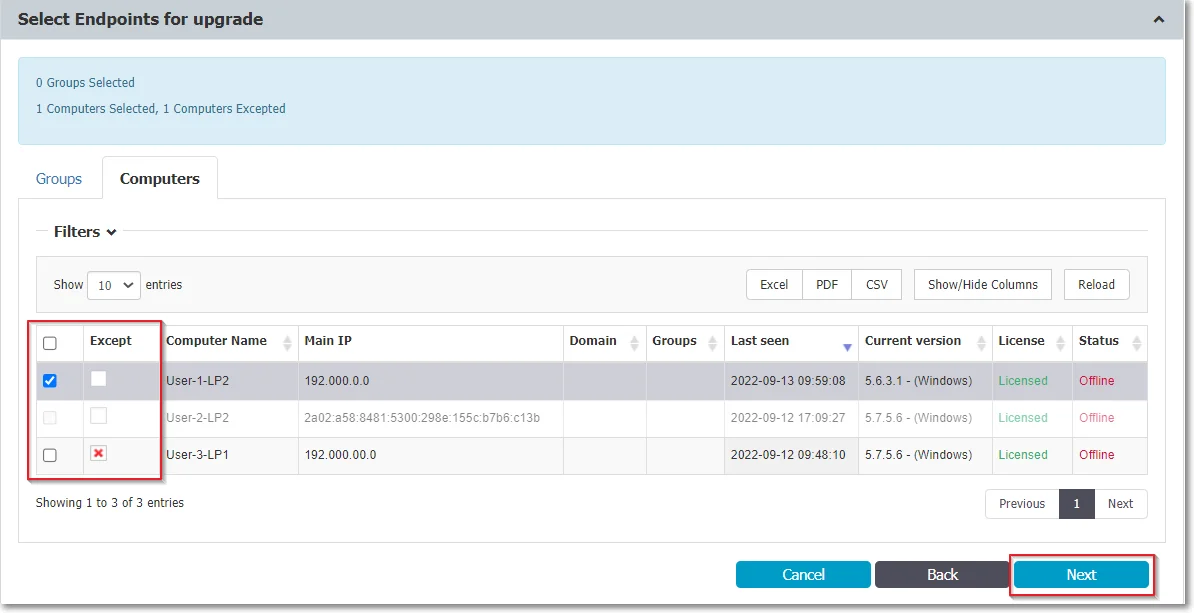
Step 2 – Select the groups and/or computers to perform or exclude from the upgrade and then click Next. You will view a summary of your selection above the table with endpoints.
NOTE: Only computers that use the operating system you previously selected will be upgraded. If you selected a group that has an endpoint using a different operating system, it will not be upgraded. If you selected a mixed group, with both computers and users, only the computers will be upgraded.
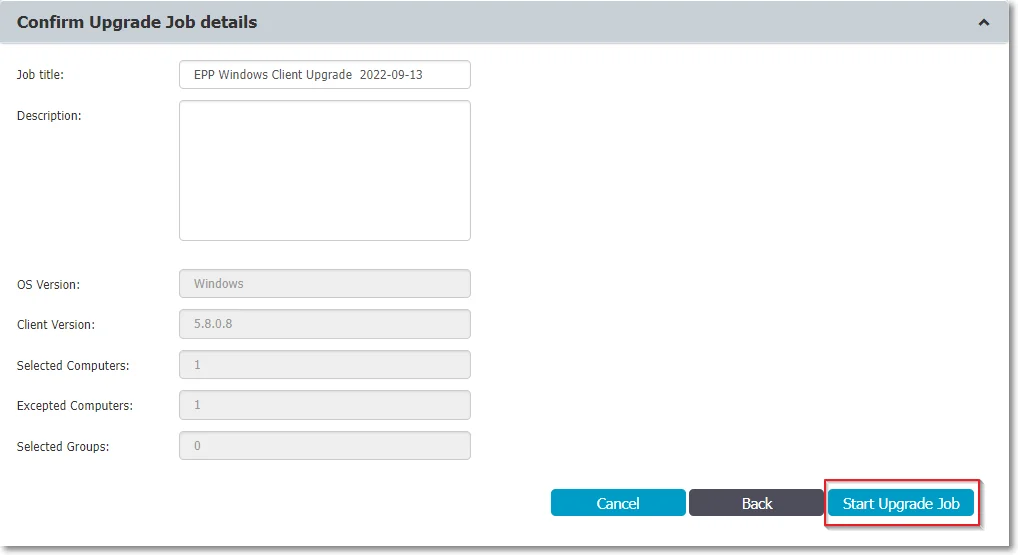
Step 3 – Edit the default job title, add a description and confirm the upgrade job details by clicking Start Upgrade job. You will view the upgrade as an entry on the Upgrade jobs section.
NOTE: The upgrade process for the Endpoint Protector Client is impacted by a dedicated cron. Running every 5 minutes, the cron sets the upgrade process status to Pending and every 15 minutes checks and updates process status to Completed or Completed with failures.
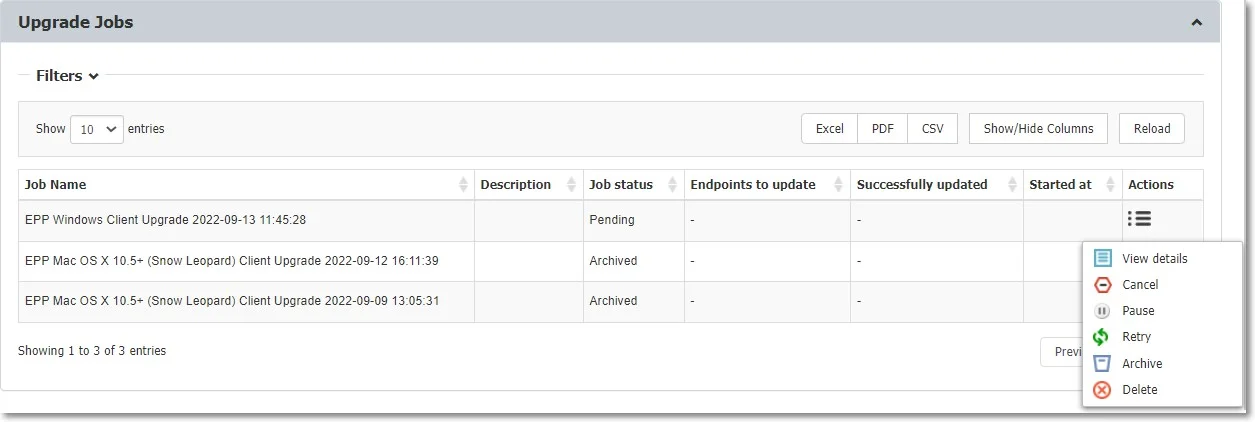
Manage Upgrade Jobs
From this section you can view the upgraded jobs and use the Actions column to view job details, cancel, pause, retry, archive or delete an entry on the list.
To continue upgrading canceled Client Upgrade jobs, use the Retry option from the Actions column.
NOTE: If you deleted or archived a Client Upgrade job, then the endpoints become available for selection in other jobs.
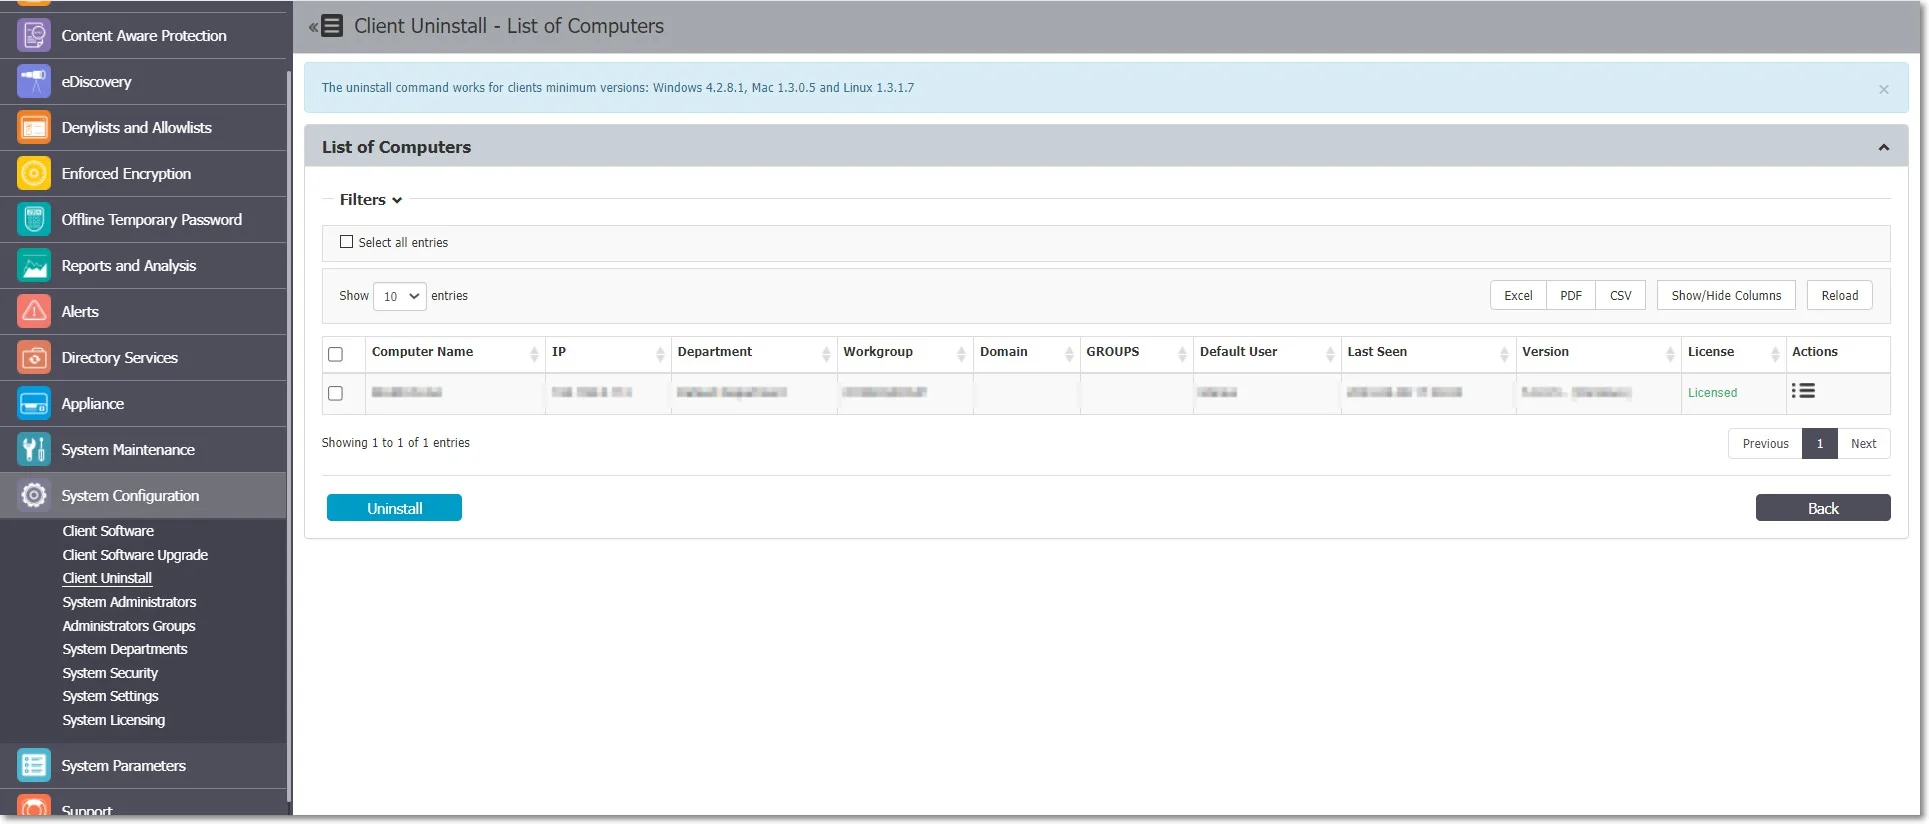
Client Uninstall
From this section, you can perform a remote uninstall of the Endpoint Protector Client. The computers will receive the uninstall command at the same time they receive the next set of commands from the server.
If the computer is offline, it will receive the uninstall command the first time it will come online. When the uninstall button is pressed the computer(s) will be grayed out until the action will be performed.
The uninstall command can be canceled if it was not already executed.
NOTE: If the server and Endpoint Protector client can't communicate due to missing server certification validation (when the certification validation setting is enabled), uninstall commands can't be executed from the Endpoint Protector Server. In such cases, if you're unable to manually install the certificate on the Endpoint Protector Client computer, you can temporarily disable the certification validation setting on the Endpoint Protector Server and synchronize the Endpoint Protector Client to retrieve an uninstall command.