Amazon Web Services
In this section of our user guide, you will find comprehensive instructions for leveraging Endpoint Protector within your AWS environment. Whether you are seeking to safeguard sensitive data, enhance compliance measures, or ensure secure communication channels, Endpoint Protector offers robust protection. Below, you will find step-by-step guidance on obtaining the Endpoint Protector AMI, launching your EC2 instance, configuring network settings, requesting an Elastic IP, and implementing additional security measures to fortify your instance.
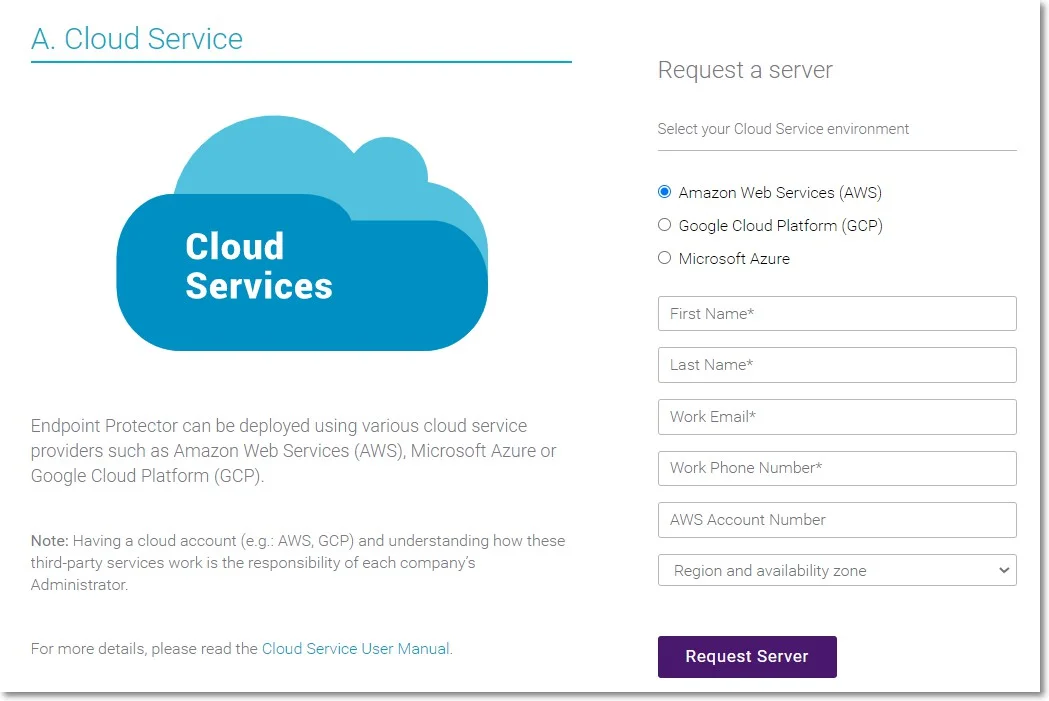
Obtaining the AMI
Endpoint Protector is not generally available in the AWS Marketplace. To access the Amazon Machine Image (AMI), you need to contact your Endpoint Protector sales representative directly or submit a request to your Customer Management lead. Please provide information such as your AWS account number, region, and availability zone. You will receive a reply from an Endpoint Protector representative, notifying you when the Endpoint Protector Amazon Machine Image has been shared with your account.
Launching the EC2 Image
As the Endpoint Protector image has already been shared with you, this process is similar to any other EC2 launch.
Follow the steps to launch the EC2 image.
Step 1 – Go to Services: EC2 and select your region.
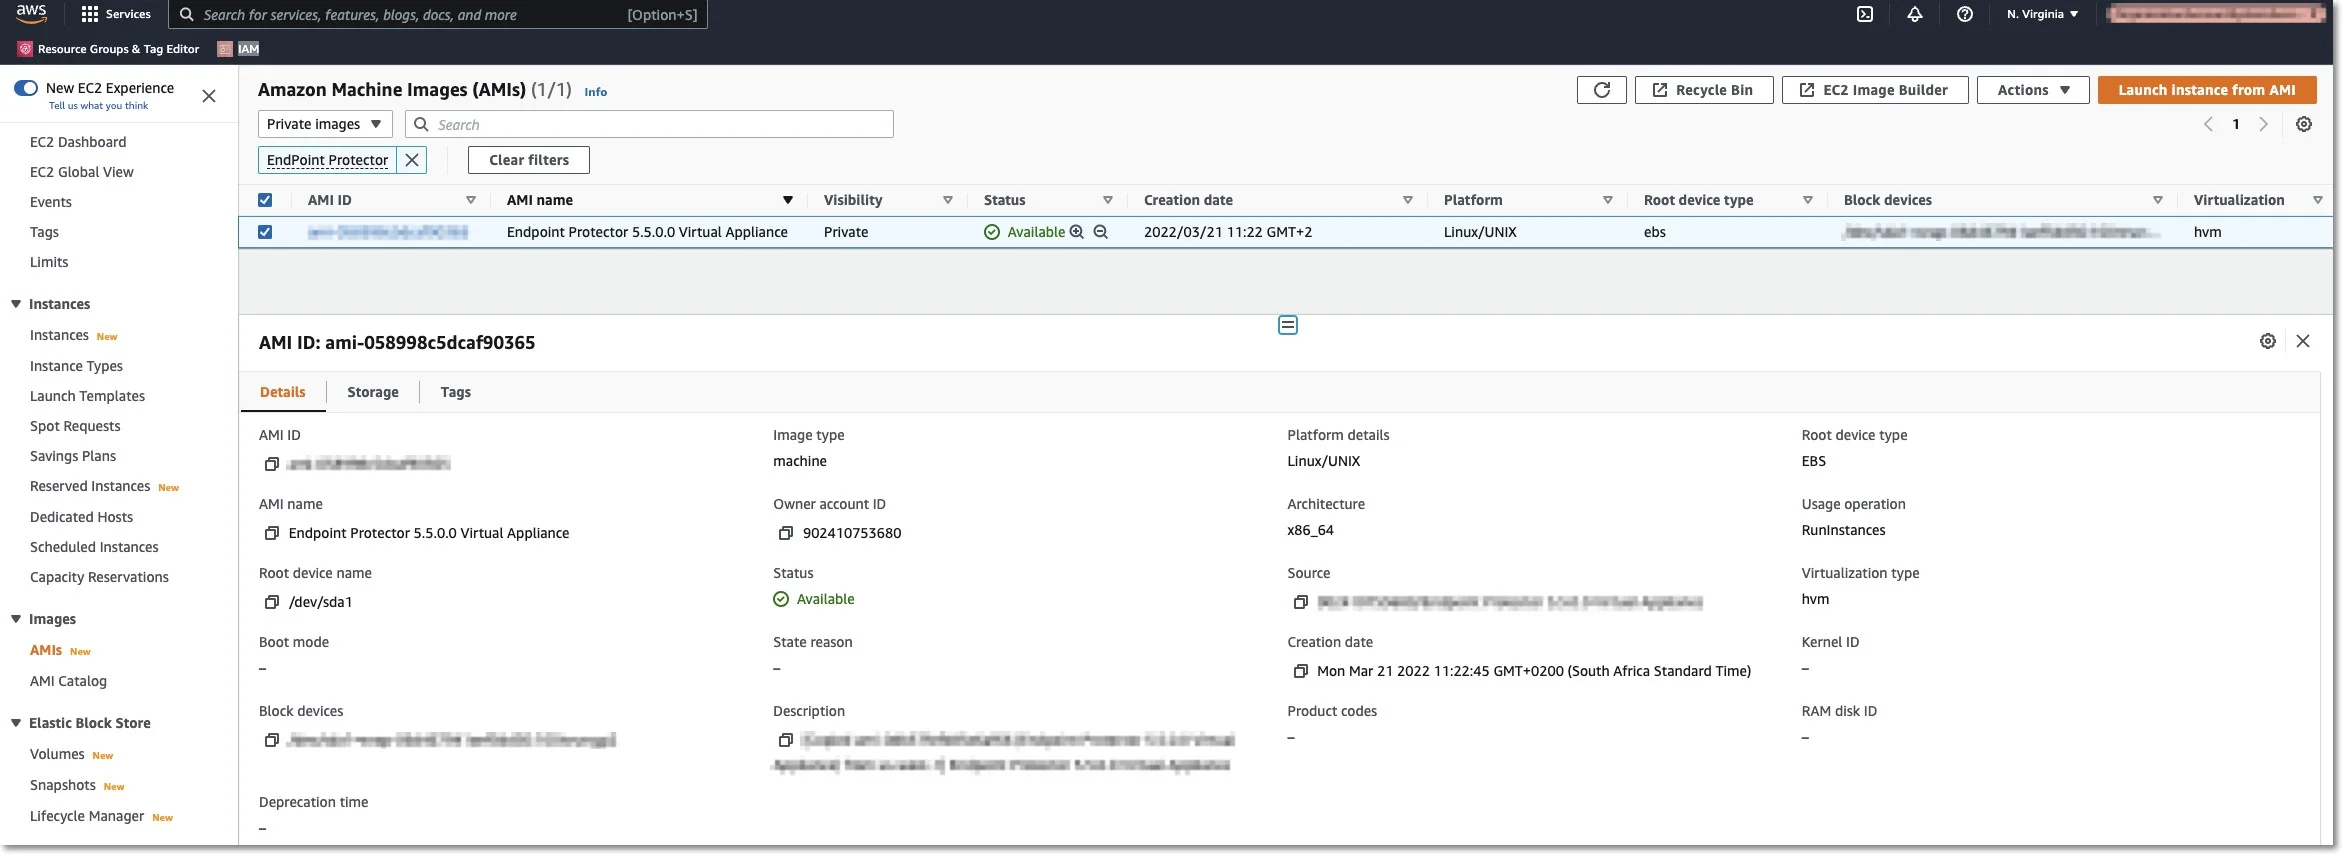
Step 2 – Go to Images: AMIs and select the type of the Private image and search for Endpoint Protector.
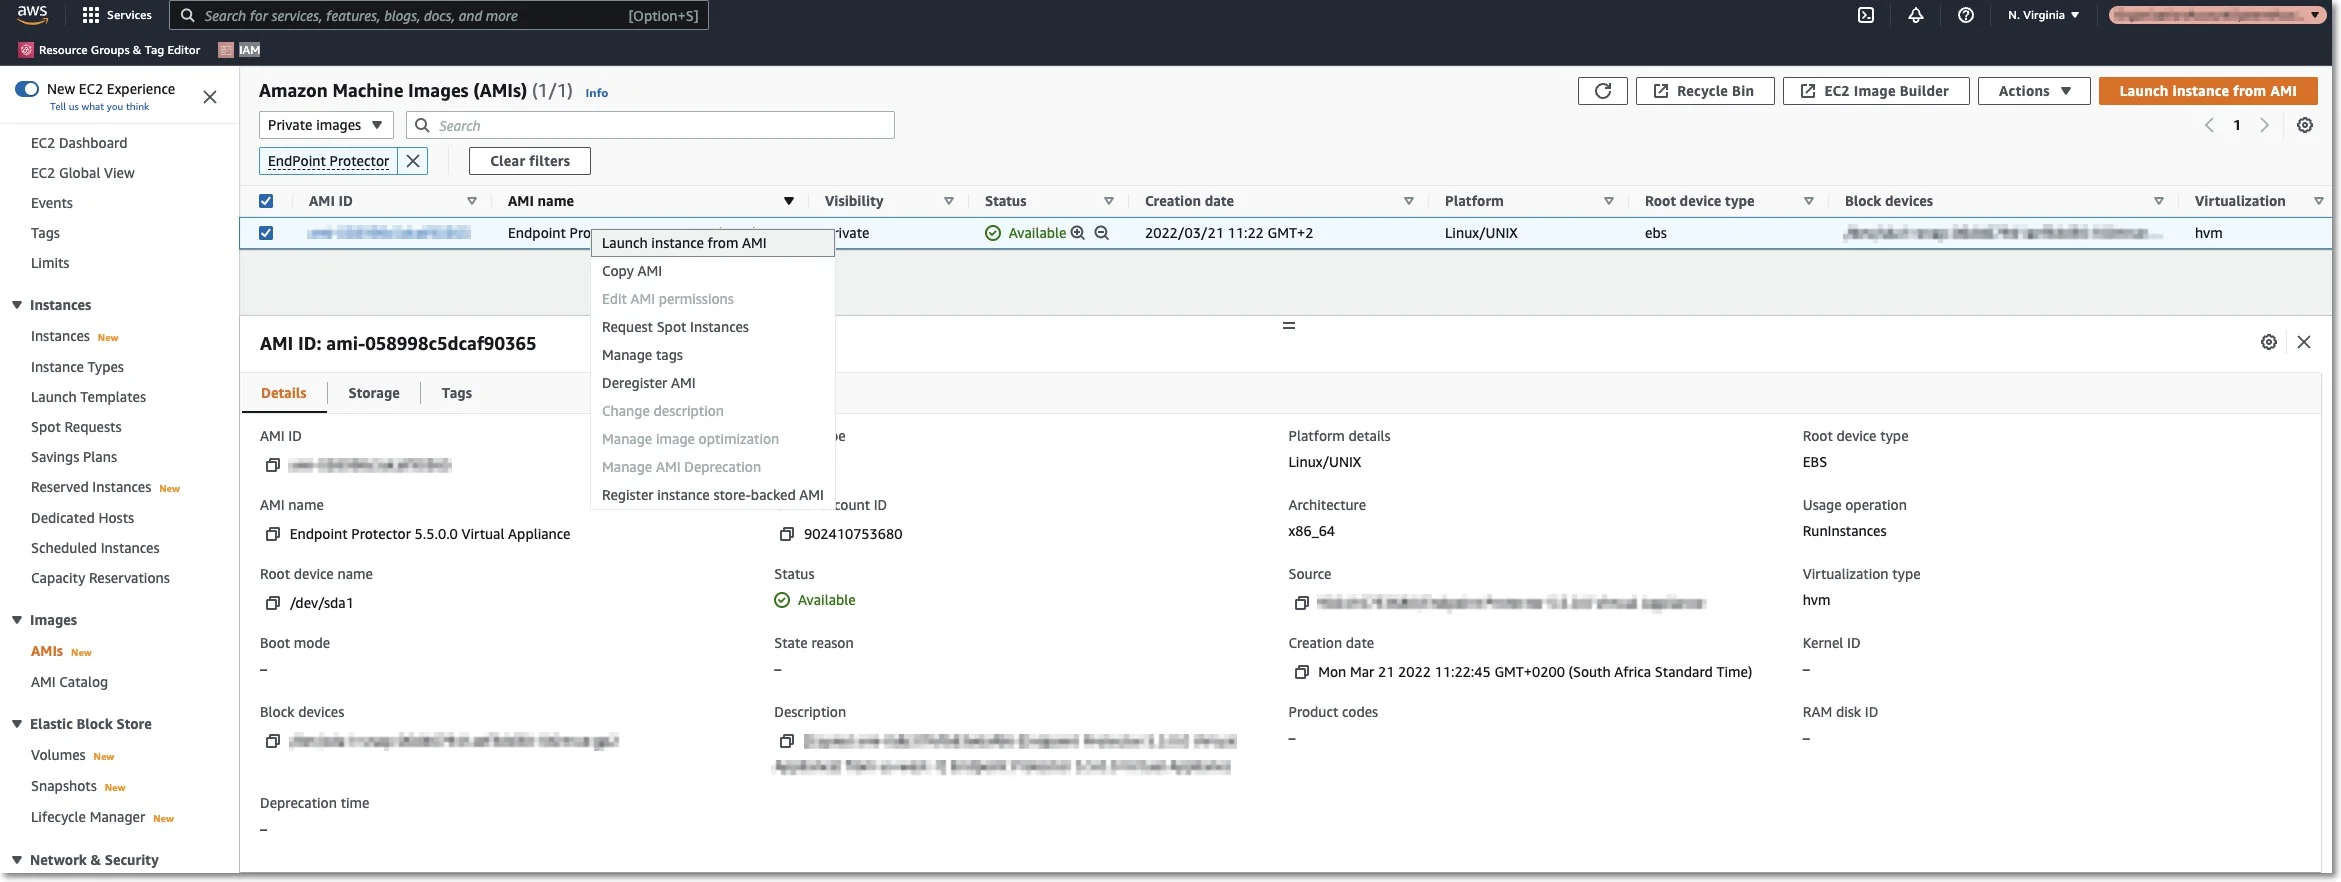
Step 3 – Right-click and select Launch Instance from AMI.
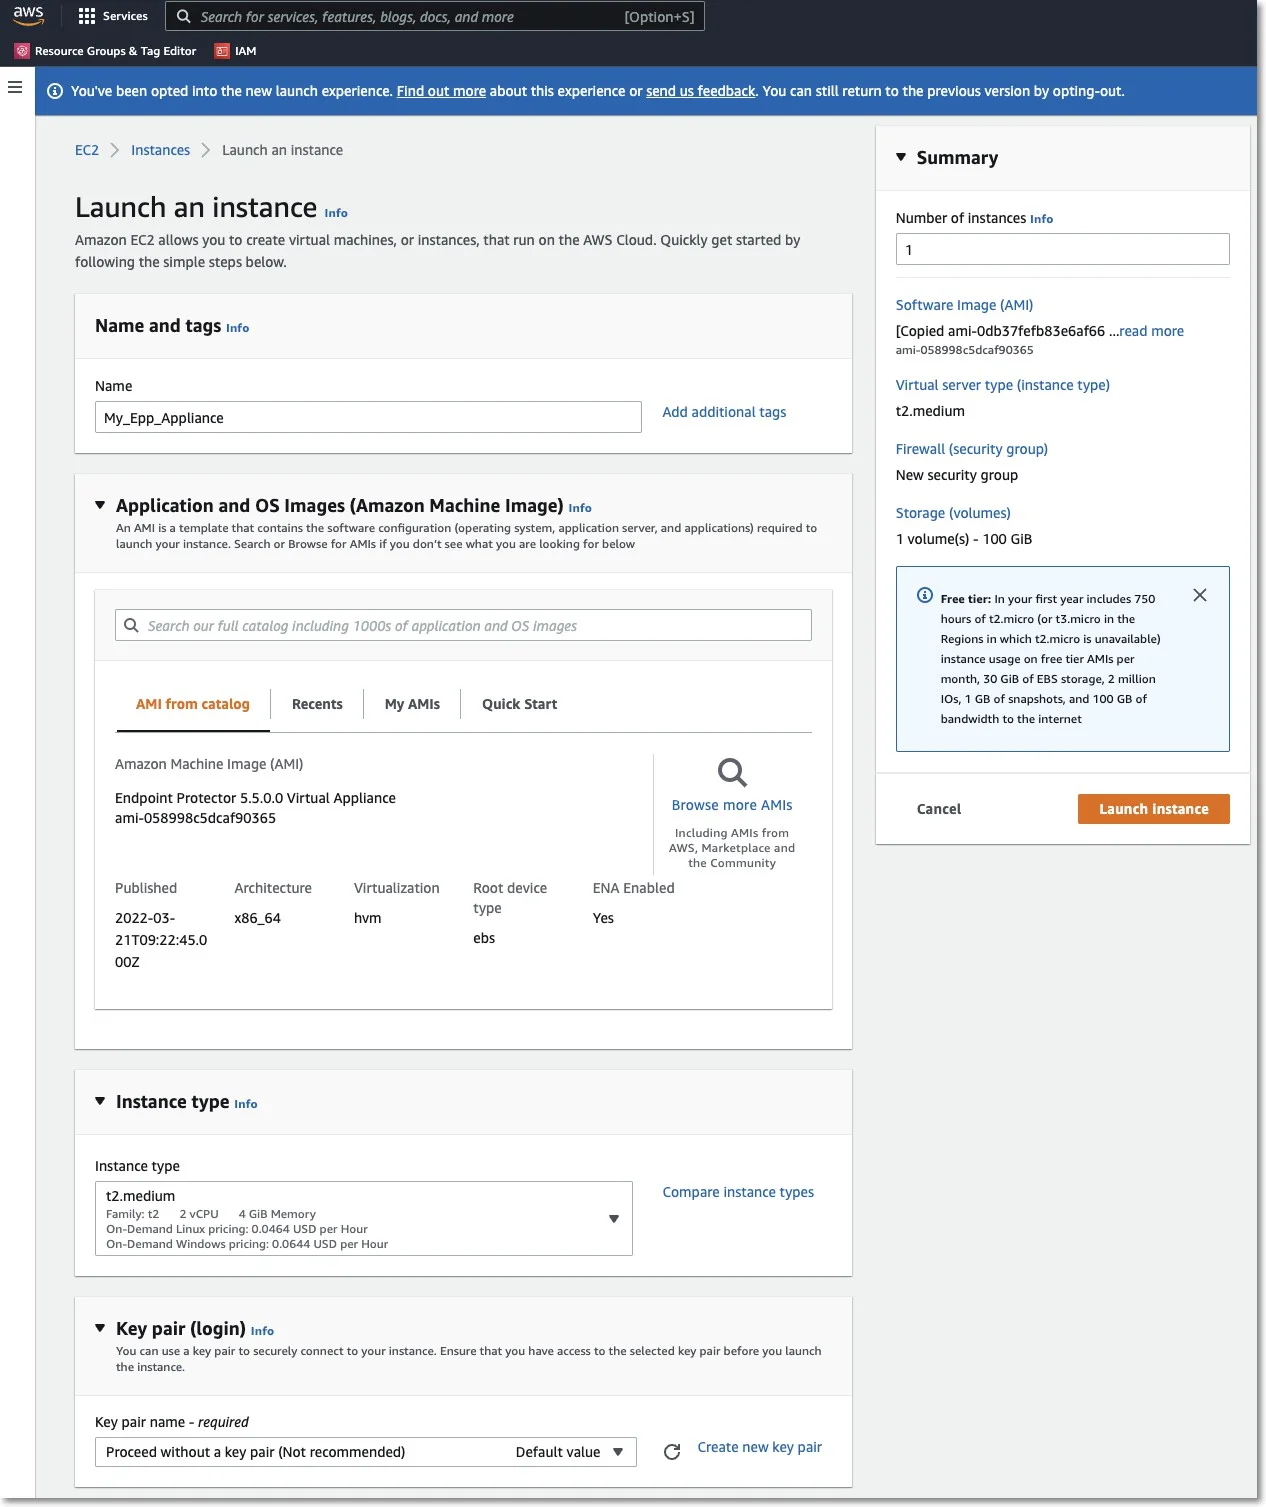
Step 4 – Enter the Name and Create tags as per your policies.
Step 5 – Select an Instance Type.
NOTE: For assistance in selecting the instance type that best suits your needs, customers should submit a support ticket through the Netwrix Customer Portal.
Step 6 – Select an available key pair or create a new key pair.
If you choose to use a key pair, you may need to share it with our Support Team for certain support requests. Ensure that the key pair is used exclusively for this instance to maintain security. We recommend selecting Proceed without a Key Pair and then clicking Launch Instances.
Step 7 – Configure the Network section.
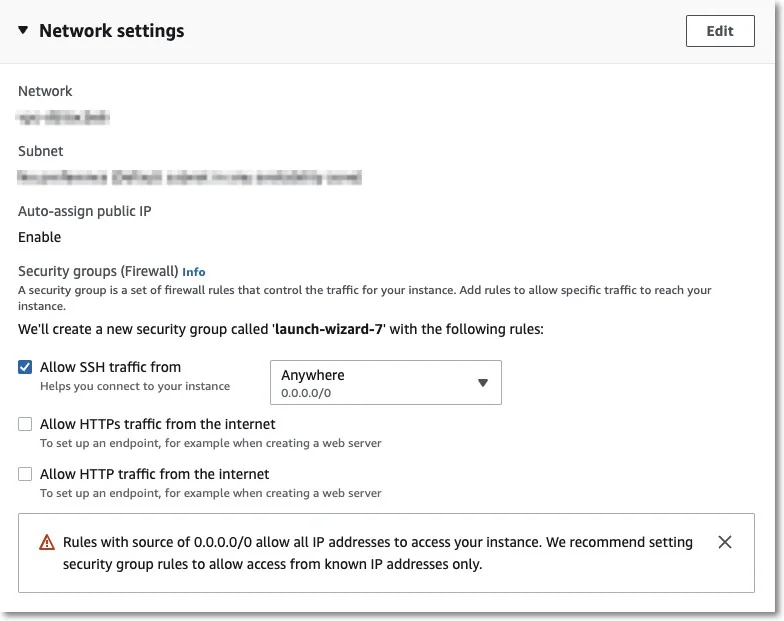
Step 8 – Edit Network Section and provide the following information:
-
Select a VPC and a Subnet
-
Enable the Auto-assign public IP
-
Select Create security group and then provide a name and description
-
Remove the existing Inbound rules
-
Add two new Inbound security group rules:
- Type HTTPS, Protocol TCP, Port range 443, Source type Custom, Source 0.0.0.0/0 (mandatory)
- Type HTTP, Protocol TCP, Port range 80, Source type Custom, Source 0.0.0.0/0 (optional)
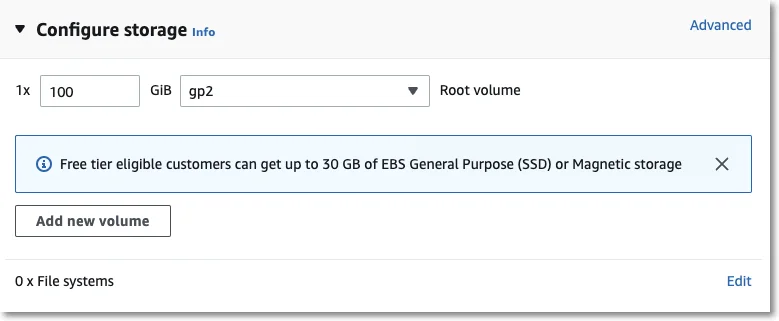
Step 9 – The Storage section does not require any changes.
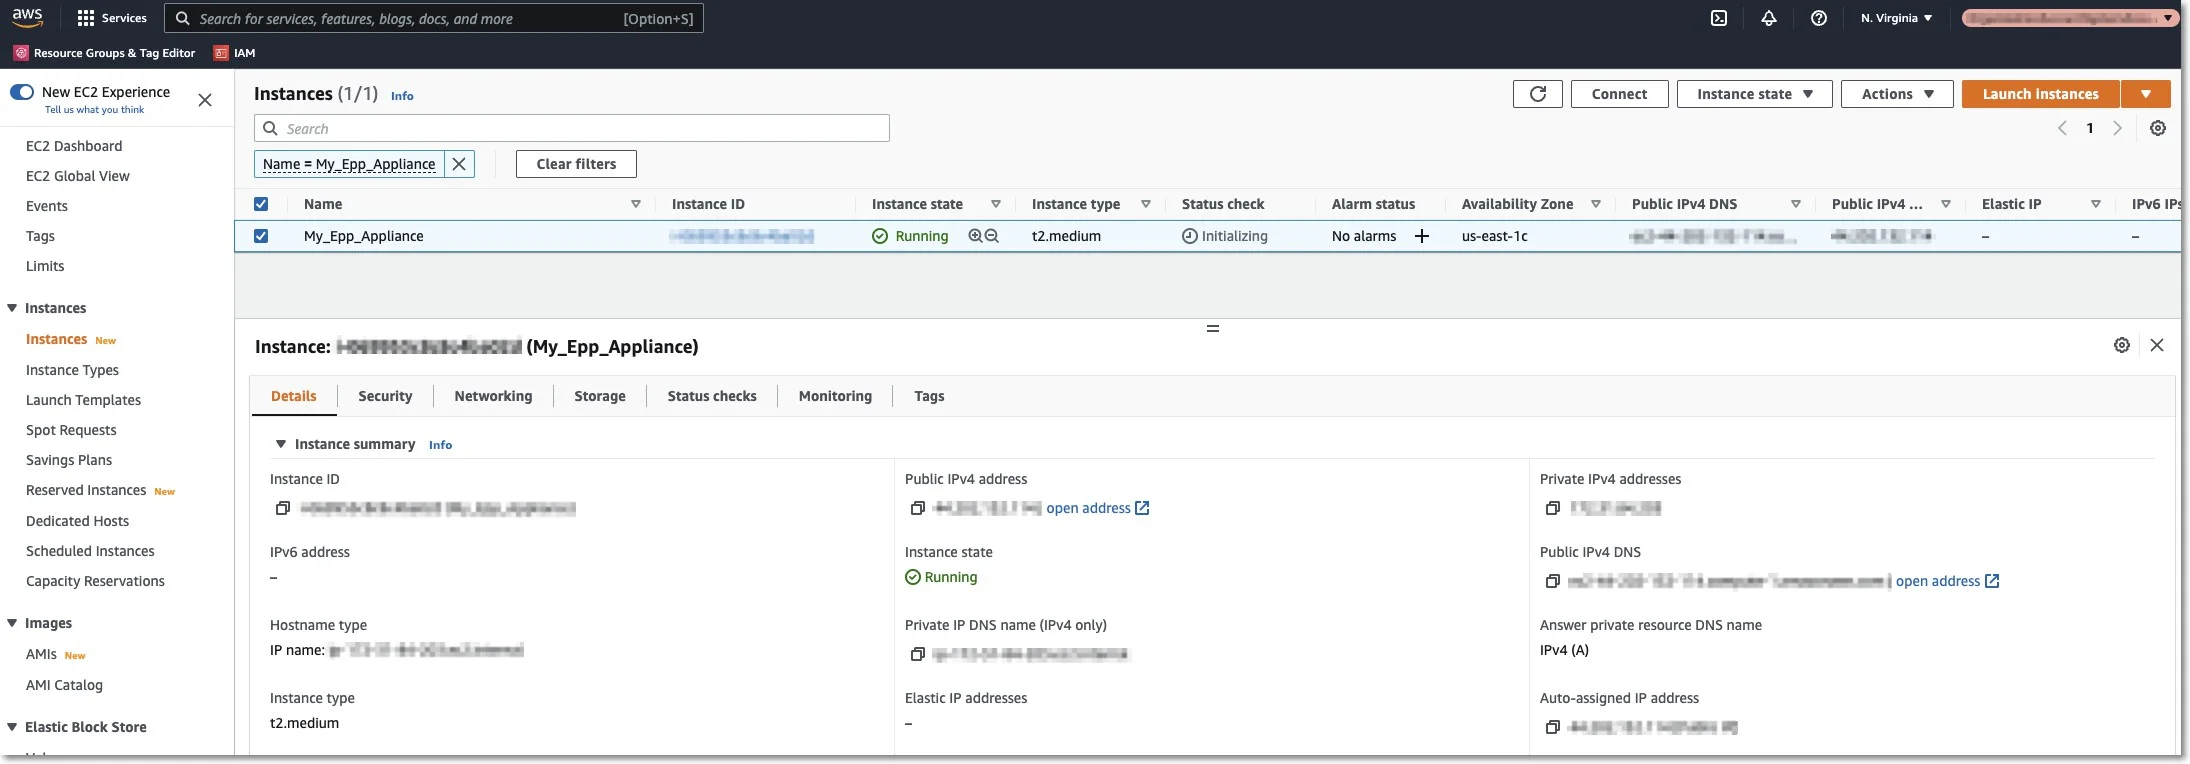
Step 10 – On the Summary section click Launch Instance.
Step 11 – Wait for the instance to start; this might take a few minutes while the Status Checks appear as Initializing.
Requesting an Elastic IP
This step is required so the Endpoint Protector Clients can communicate with the same IP Address in case of an instance restart. Without an Elastic IP (Static IP) the instance will assign a new IP address every time it is restarted and the Endpoint Protector Clients have to be reinstalled.
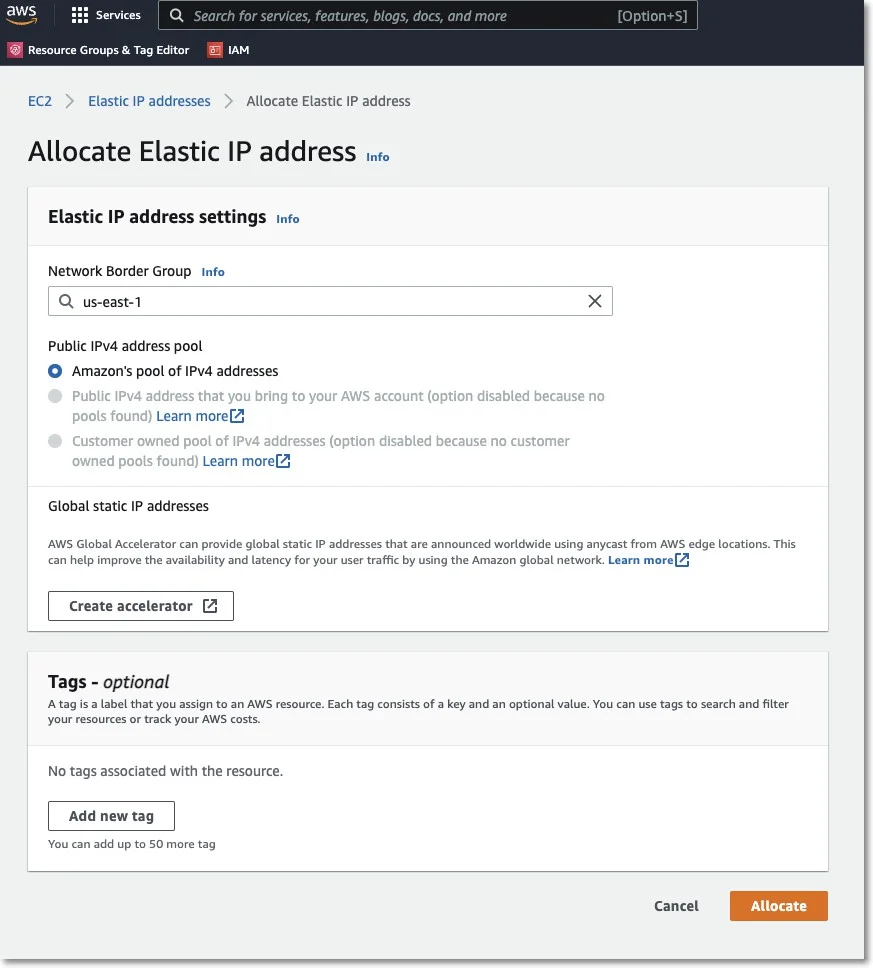
To request an Elastic IP, go in the AWS Management Console to the option Network & Security, Elastic IPs, and click Allocate New Address.
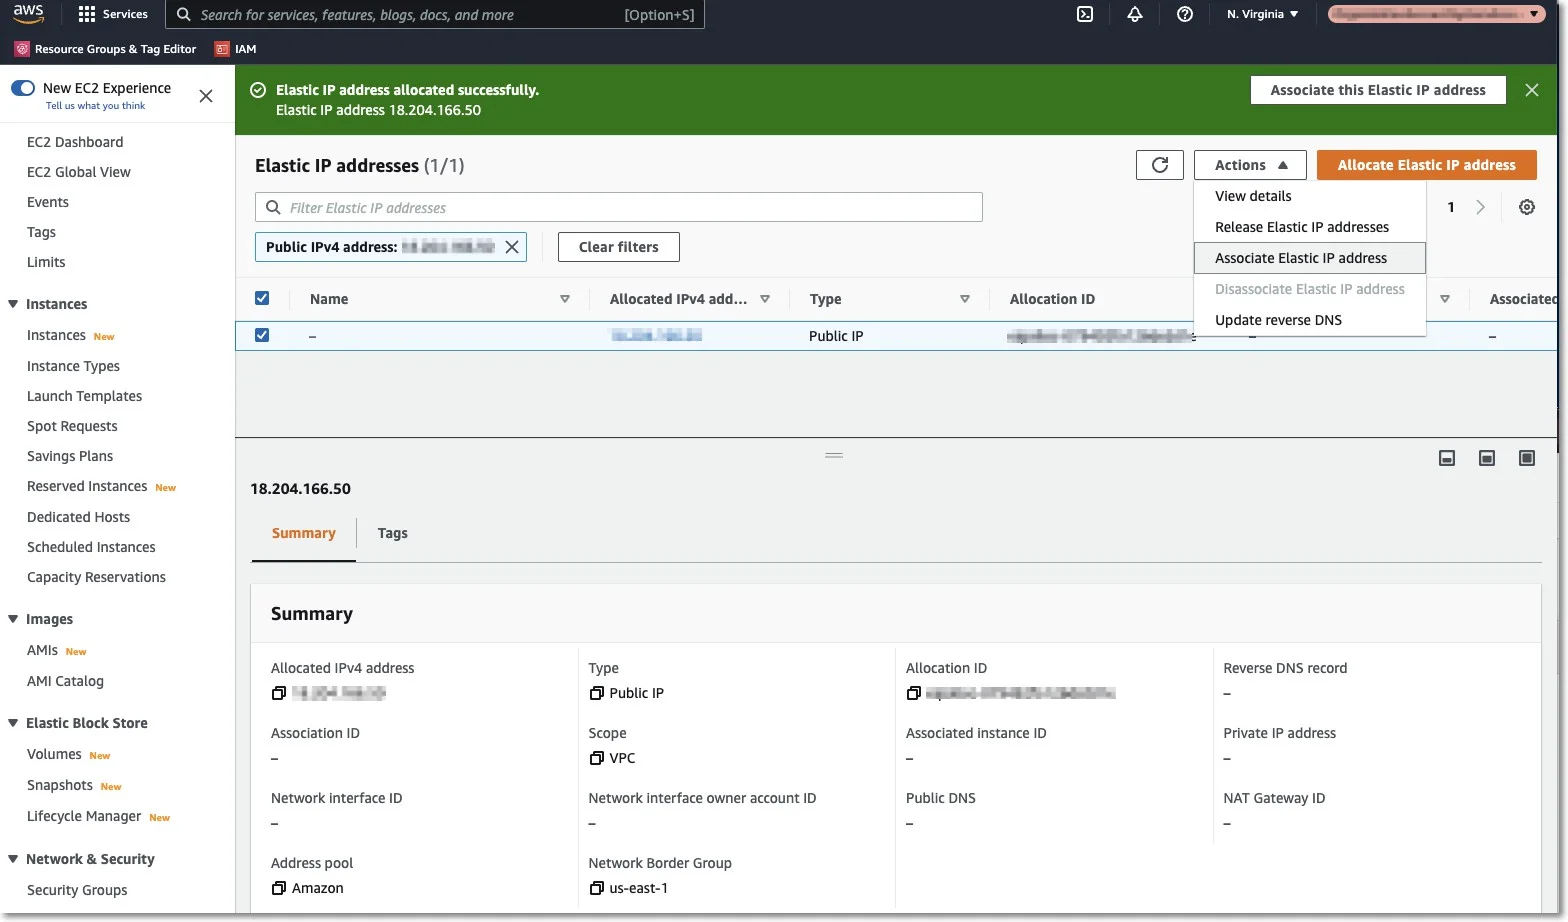
Step 1 – Associate the Elastic IP with your Endpoint Protector Instance.
Step 2 – Select the Endpoint Protector Instance from the dropdown list, the Private IP address, and then click Associate;
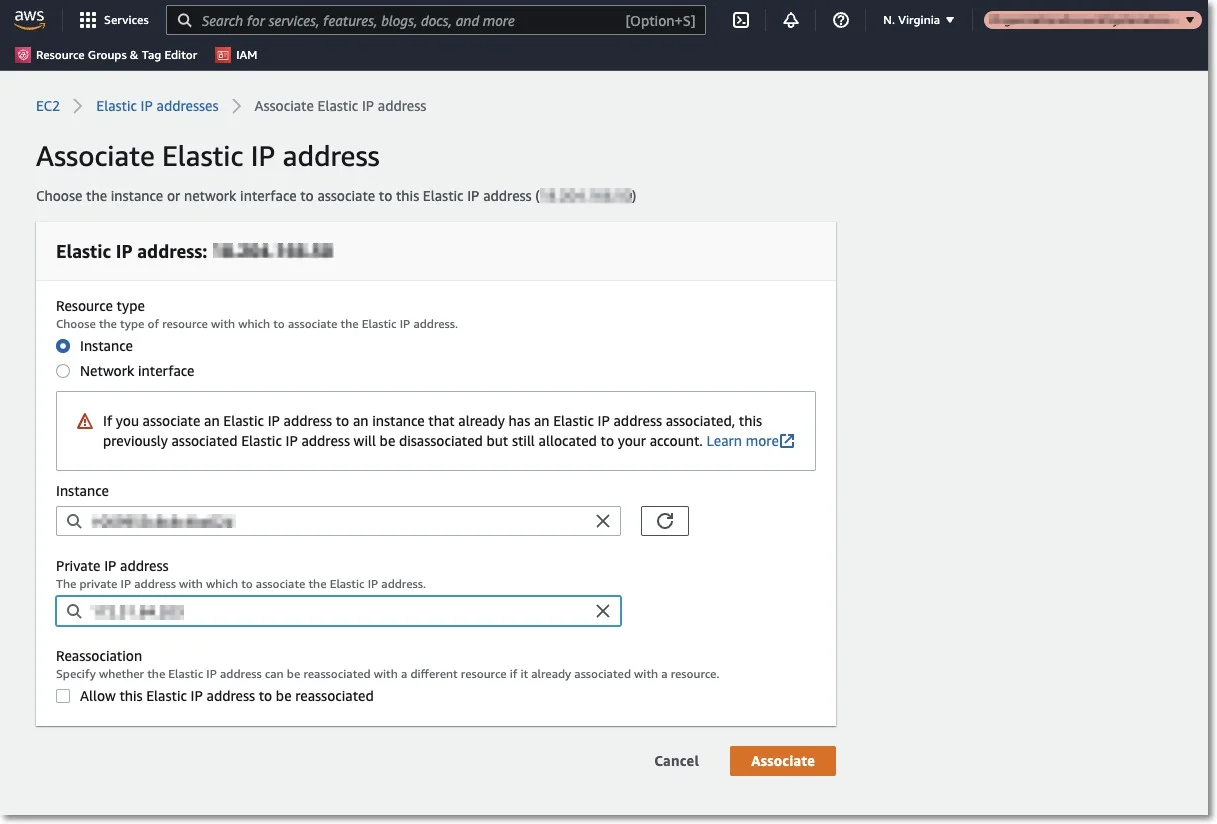
The Elastic IP is now associated with your Endpoint Protector Instance. After a few minutes, the Endpoint Protector Instance will be running associated with the Elastic IP.
NOTE: We recommend further securing your Instance by making all possible settings in the AWS Interface under the option Security Groups.