Start Screen Manager Settings
In the Quickstart, we created a collection by right-clicking within Endpoint Policy Manager Start Screen Manager or Endpoint Policy Manager Taskbar Manager and selecting Add | New Collection as seen in Figure 32.
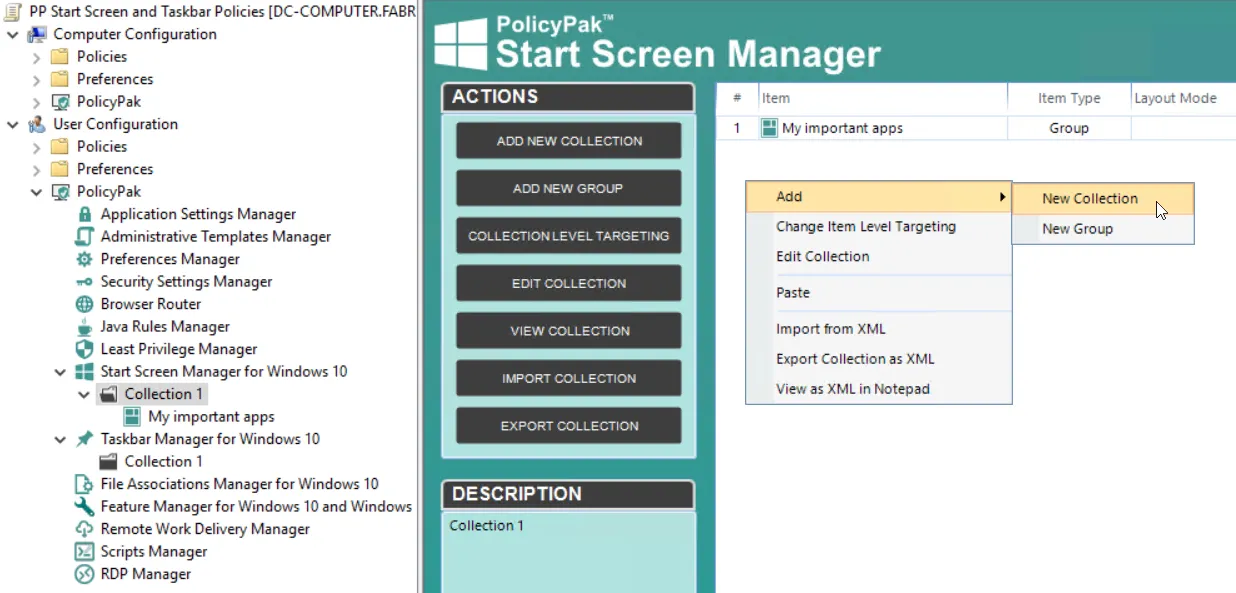
Figure 32. Creating collections with Endpoint Policy Manager Start Screen & Taskbar Manager.
For Endpoint Policy Manager Start Screen Manager, collections have two functions. As mentioned previously, they hold policies that create Windows 10 groups. But a Endpoint Policy Manager Start Screen Manager collection also defines how those groups will react. The two options for a Endpoint Policy Manager Start Screen Manager collection can be seen in Figure 33.
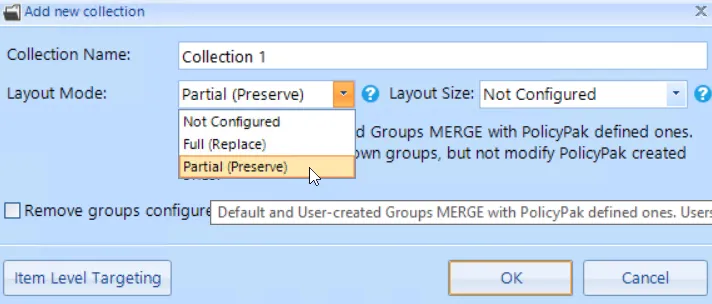
Figure 33. Collections hold policies and specify the layout mode.
There are two layout modes for a Endpoint Policy Manager Start Screen Manager collection. One is "Partial (Preserve)," which will maintain a user's existing groups, as well as any default groups, while adding your new groups to theirs. Users will not be able to modify the groups you assign. The other layout mode is "Full (Replace)," which will remove any existing groups and replace them with your new groups. Users will not be able to modify the groups you assign.
There are two layout size options for a Endpoint Policy Manager Start Screen Manager collection as shown in Figure 34. If you do not specify a layout size, the default will be Medium (Two Columns).
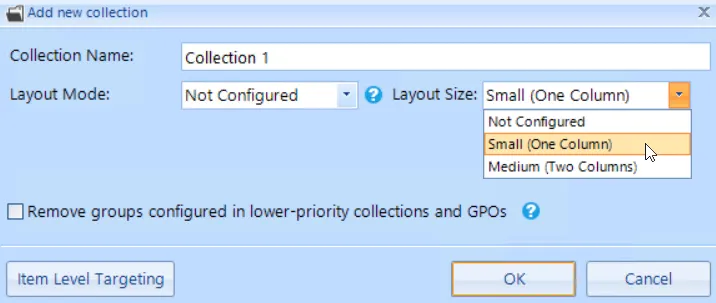
Figure 34. Choosing a layout size.
You can also select the Item-Level Targeting button to specify when this collection will apply. For instance, you might choose "Partial (Preserve)" on Windows 10 desktops and you might choose to have another collection with "Full (Replace)" on Windows 10 laptops.
The "Edit Item Level Targeting" menu item brings up the Targeting Editor, which is shown in Figure 35. You can select any combination of characteristics you want to test for. Administrators familiar with Group Policy Preferences' Item-Level Targeting will be at home in this interface as it is functionally equivalent.
You can apply one or more targeting items to a policy, which enables targeting items to be joined logically, also shown in Figure 35. You can also add targeting collections, which group together targeting items in much the same way parentheses are used in an equation. In this way, you can create a complex determination about where a policy will be applied. Collections may be set to "And", "Or", "Is", or "Is Not."
There are a few things to note about Figure 35. It is representative of the basic capabilities of the Targeting Editor. Endpoint Policy Manager Start Screen & Taskbar Manager cannot filter by user group since the node is only available on the Computer side. In addition, Endpoint Policy Manager Start Screen & Taskbar Manager is only valid for Windows 8.1 and later.
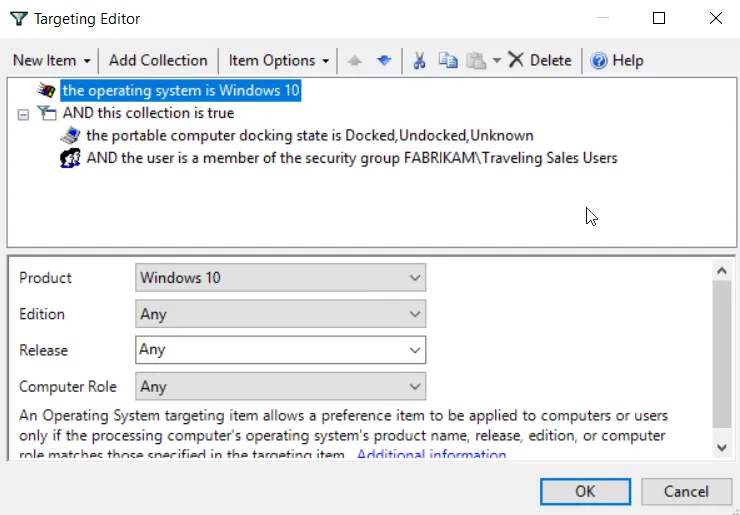
Figure 35. In this example, the Pak would only apply to Windows 10 machines when the machine is portable and the user is in the FABRIKAM\Traveling Sales Users group.
Below are some real-world examples of of how you can use Item-Level Targeting.
- Software prerequisites. If you want to configure an application's settings, first make sure the application is installed on the user's computer before configuring it. You can use File Match or Registry Match targeting items (or both) to verify a specific version of a file or a registry entry is present. (For an example of this, look in the Uninstall registry key.)
- Mobile computers. If you want to deploy settings exclusively for users on mobile PCs, then filter the rule to apply only to mobile PCs by using the "Portable Computer" targeting item.
- Operating system version. You can specify different settings for applications based on the operating system version. To do this, create one rule for each operating system. Then filter each rule using the "Operating System" targeting item.
- Group membership. You can link the Group Policy Object (GPO) to the whole domain or organizational unit (OU), but only members within a specific group will pick up and process the rule settings.
- IP range. You can specify different settings for various IP ranges, like different settings for the home office and each field office.
Close the editor when you are done. Note in Figure 36 that the icon for the policy or collection has changed to orange, which shows that it now has Item-Level Targeting.
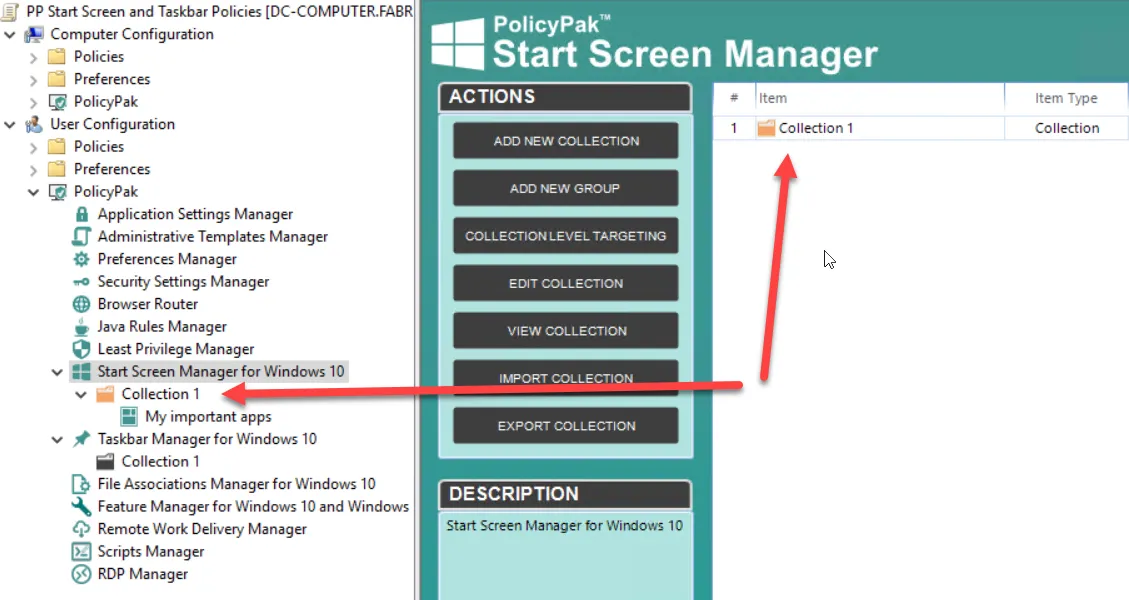
Figure 36. When the icon is orange, the entry has Item-Level Targeting.
When Item-Level Targeting is on, the policy won't apply unless the conditions are True. If Item-Level Targeting is on a collection, then none of the items in the collection will apply unless the Item-Level Targeting on the collection evaluates to True.
Inside Endpoint Policy Manager Start Screen Manager collections are policies for groups. You created a Group Policy earlier called "My Important Apps." You can select "Change Group Level Targeting" to jump right into the Item-Level Targeting Editor, or click "Edit Group," as shown in Figure 37 to see all Group options (including Item-Level Targeting).
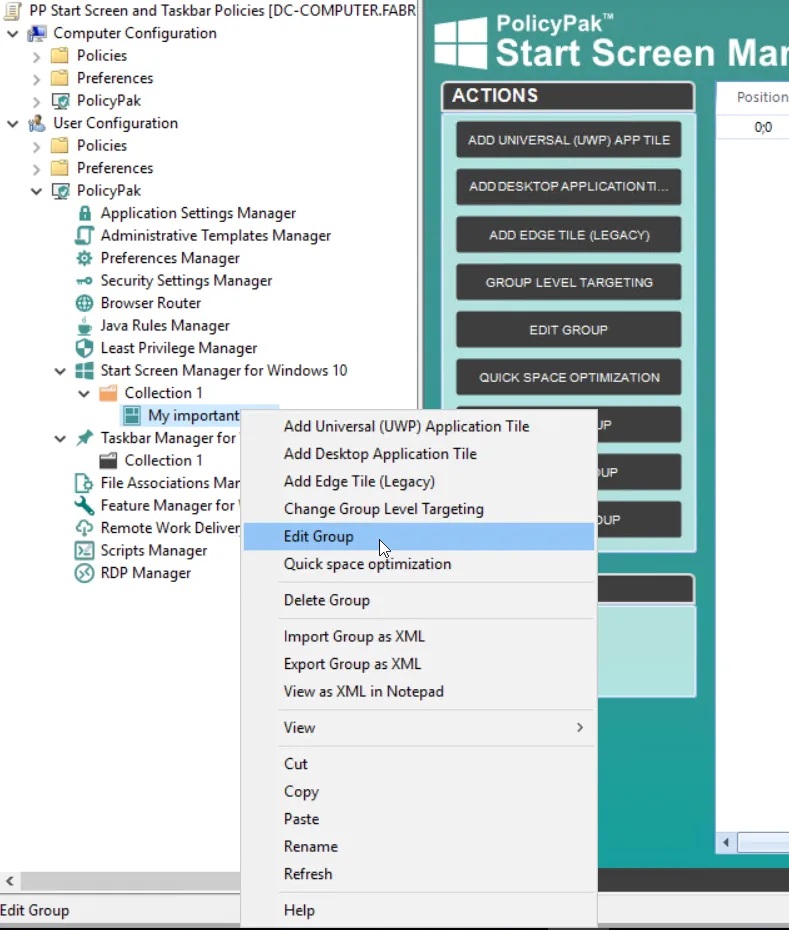
Figure 37. Clicking on "Edit Group" will enable you to see all group level options.
The group level options can be seen in Figure 38.
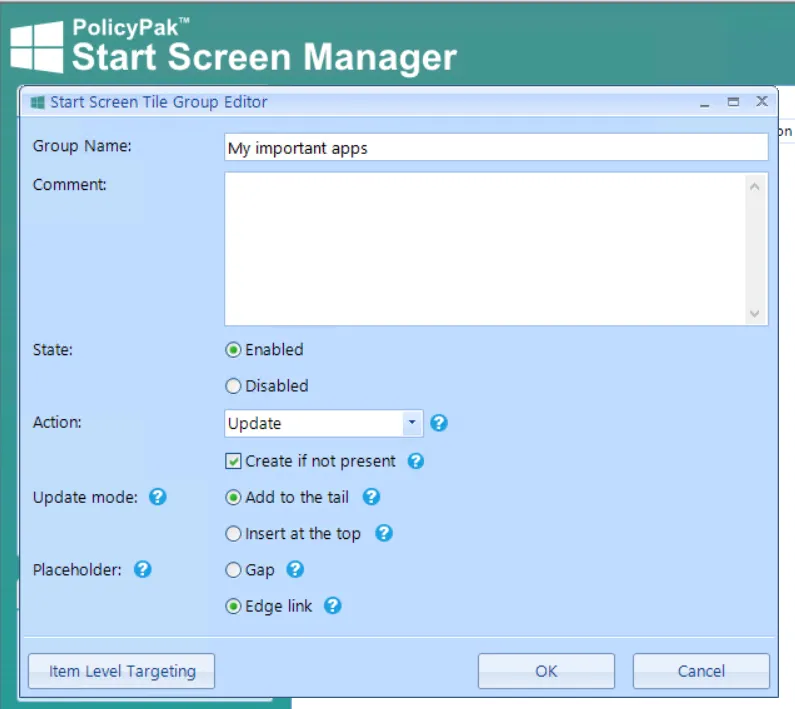
Figure 38. Endpoint Policy Manager Start Screen Manager groups have various options you can configure.
The fields inside the Group Editor are as follows:
- Group Name: The name of the actual Windows 10 group that you'll be manipulating on the computer.
- Comment: Space for optional comments to be added.
- State: Determines if the policy should apply or not.
- Action: Default settings are "Update" and "Create if not present." This will be described in more detail in the next section.
- Update Mode: Determines where new icons will be added. "Add to the Tail" will add new icons from the end and "Insert at the top" will insert new icons from the front of the group.
- Placeholder: This is needed when an application is absent, but you want to make a pointer or reference to them anyway. In this case, you can make a "gap" (which puts in a black, empty gap tile) or you can insert an "Edge link" (which will explain what was missing). This will be described in more detail in an upcoming section.
- Item-Level Targeting: This was described above.