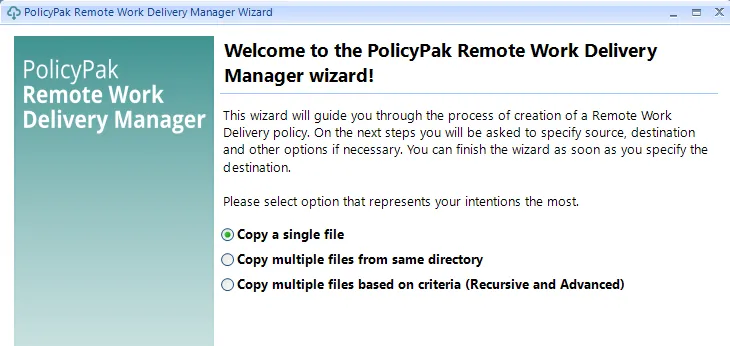
Getting Started with Standard Policies
In the following examples, we'll copy and install Notepad++ using Endpoint Policy Manager Remote
Work Delivery Manager, using \\DC2016\share as the share.
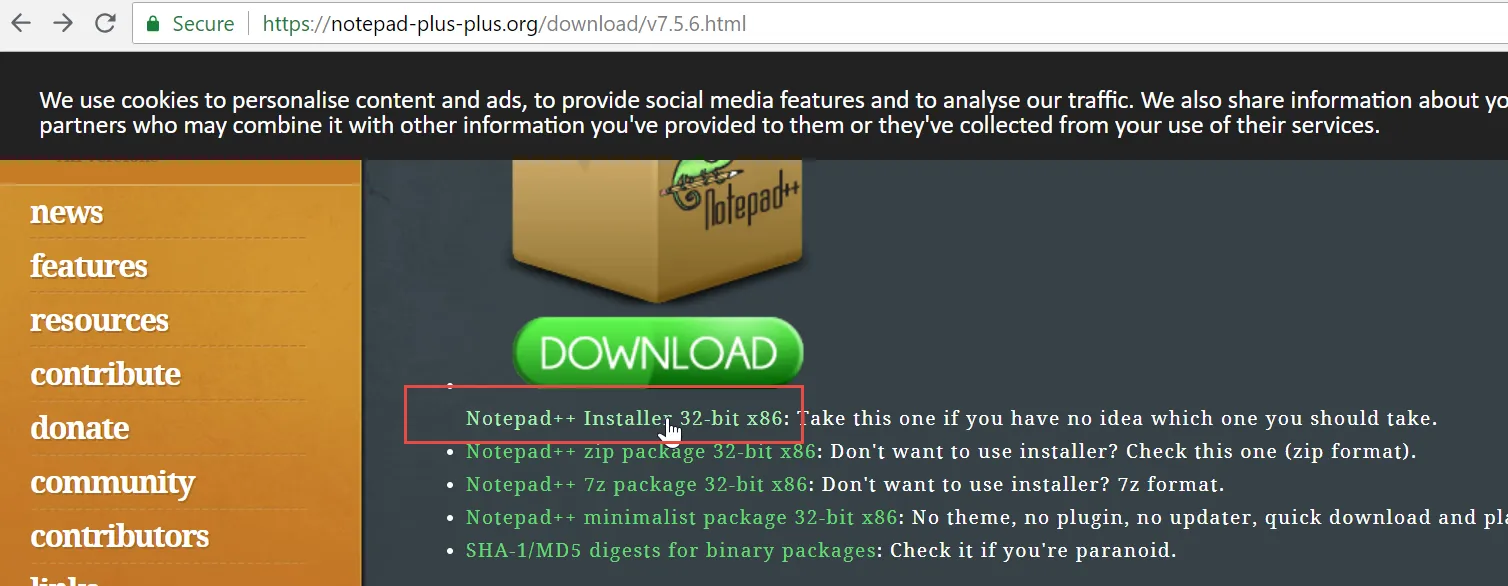
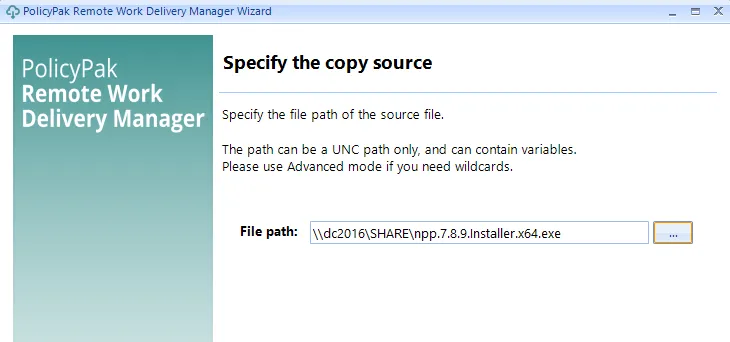
Step 1 – Start by downloading Notepad++ from https://notepad-plus-plus.org/, and put the installer file, which should be named something similar to npp.7.5.6.Installer.exe, in your share.
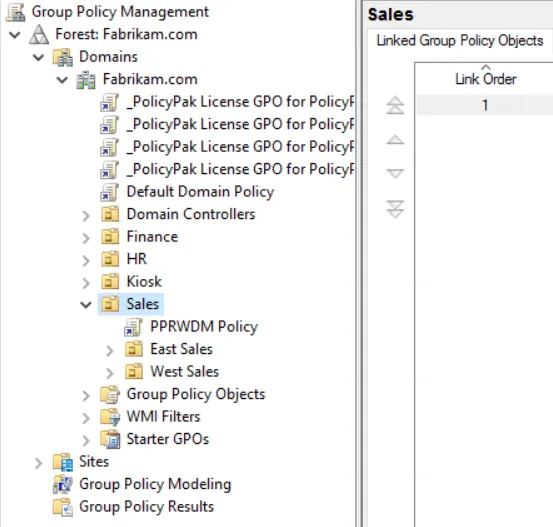
Step 2 – On your GPMC management station, create a GPO and link it to your users. In this example we have a GPO created and linked to the East Sales Users organizational unit (OU).
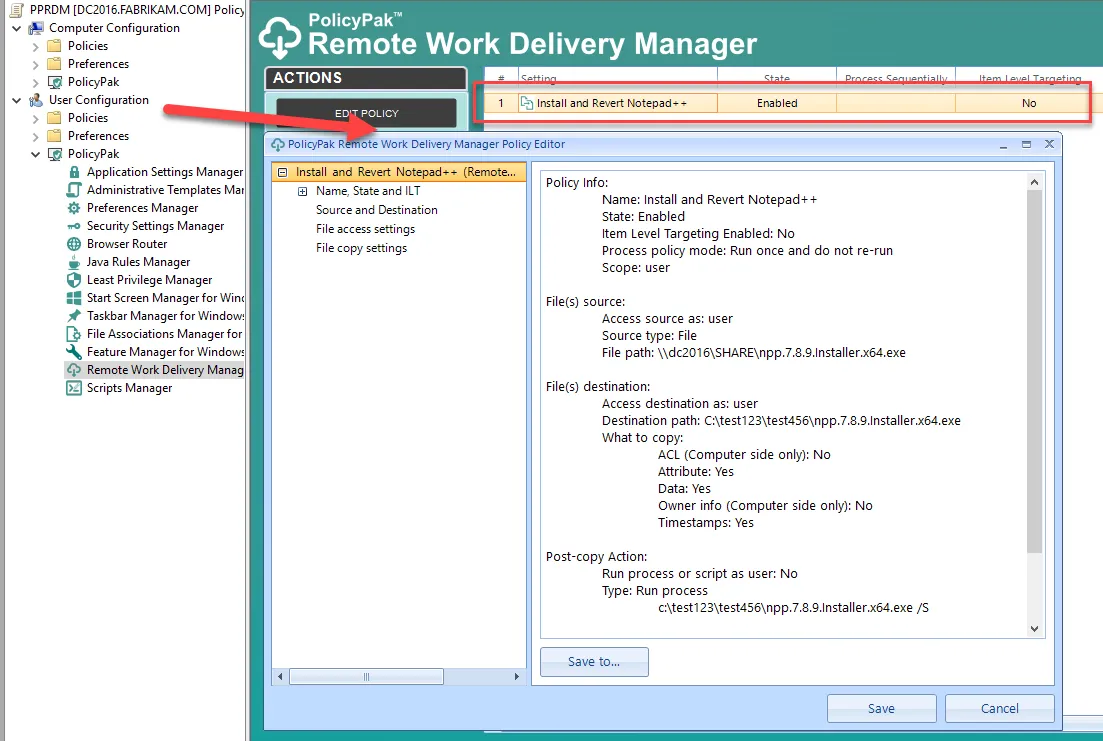
Step 3 – Edit the GPO, then go to
User Configuration > PolicyPak > Remote Work Delivery Manager, as shown below, and select
Add ``````>`````` New Standard Policy.
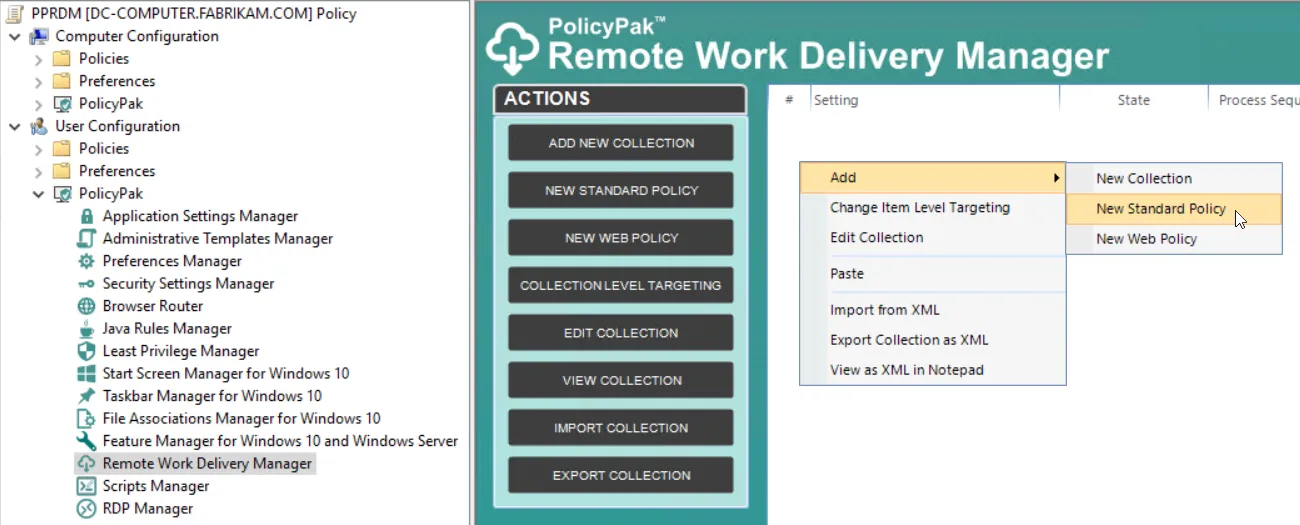
When you do this, the Endpoint Policy Manager Remote Work Delivery Manager Wizard appears.
Step 4 – Click Next and specify the file from the file path.
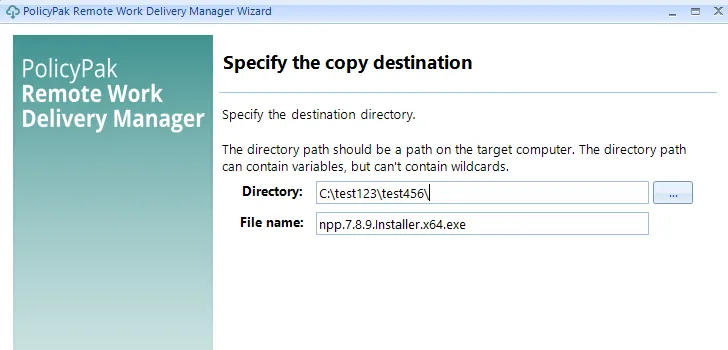
Step 5 – Click Next to continue. On the next page, specify the destination directory, which can be any folder you like. Folders that don't exist will be automatically created. In the example below, the folder is located two directories down. At this point, you can also change the destination name of the file.
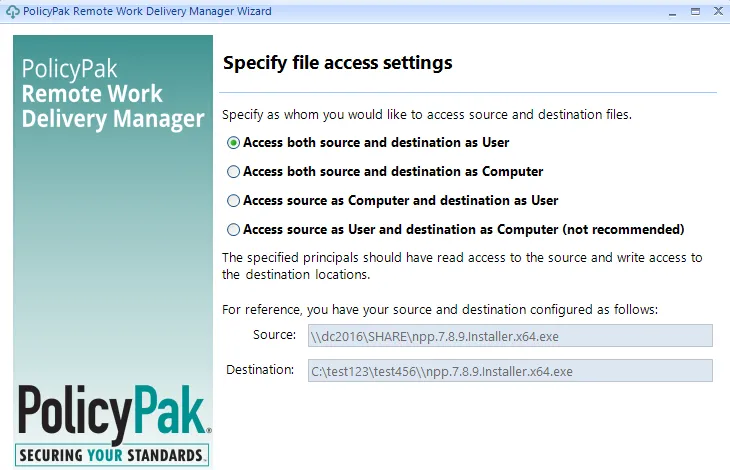
Step 6 – On the next screen, you can Specify file access settings,. On this screen, you can specify which security context is used for the reading and writing of the files. When reading from the source as User, the user needs read access to the files. When reading from the source as Computer, the computer needs read access to the files. When writing to the destination as User, the files are written with the user's context and ownership. So a user needs to have write access to the location you specify. When writing to the destination as Computer, the files are written as System. As such, files can be replaced where standard users cannot normally go, such as the Program Files folder and other system-restricted locations.
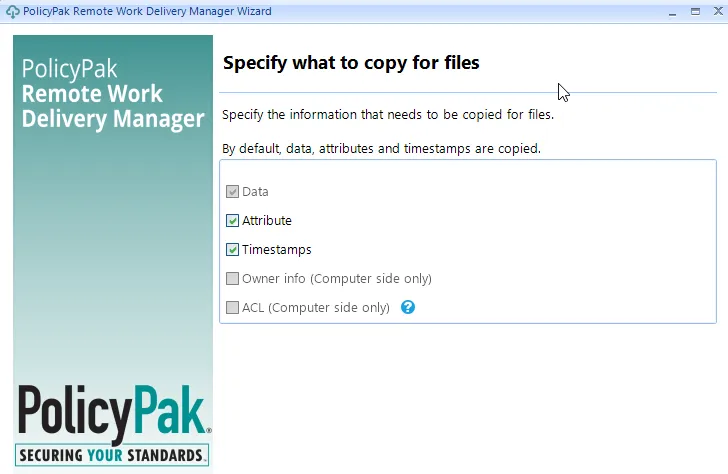
Step 7 – On the next screen you can decide which file attributes will be copied. Note that not all attributes are available, depending on which options have been previously selected.
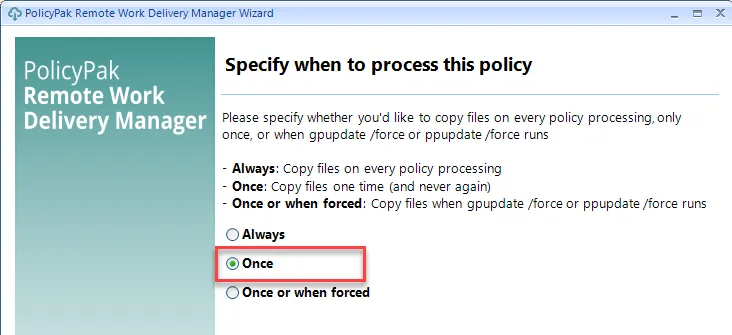
Step 8 – On the next screen decide when to process the policy.
You typically want to redeliver a file during all Group Policy updates, but the good news is that only files that change are brought down, which saves bandwidth and processing time. Changed files are only brought down when the policy is set to Always run (recommended).
For this example, you can select Once.
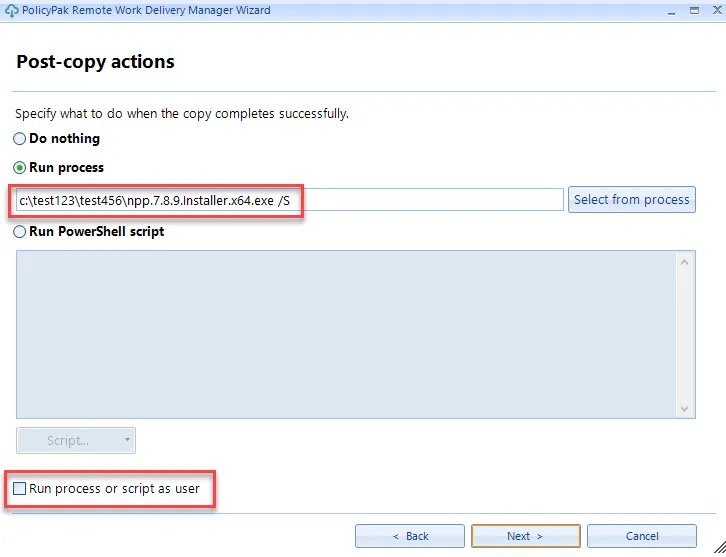
Step 9 – After the file is copied, we want to run it so that it installs. To do this, select Run process and specify the path and the filename. Note that installation programs typically need to run as System, so be sure to uncheck Run process or script as user, which will force it to process as System.
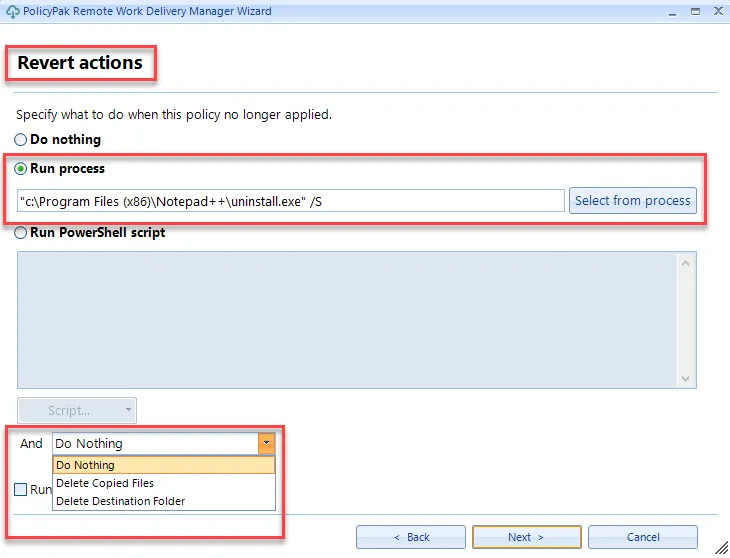
Step 10 – You can also specify what to do when the policy is reverted or no longer applies. For that we can run the Notepad++ uninstall command,
"c:\ProgramFiles (x86)\Notepad++\uninstall.exe" /S
Additionally, you can specify what to do with the files or folders that are not needed when the policy no longer applies.
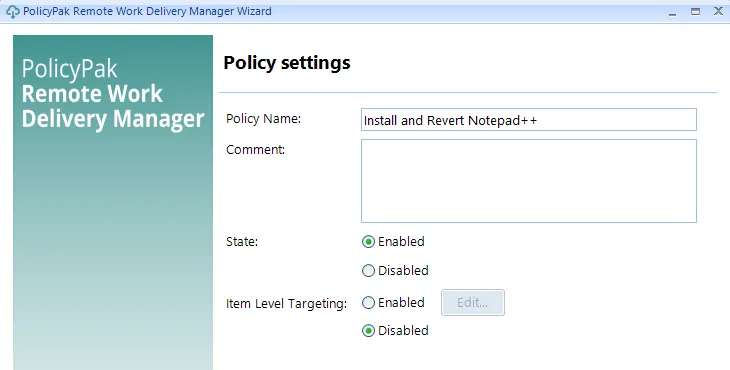
Step 11 – The last page of the wizard enables you to provide a Policy Name, enter notes into the Comment field, enable or disable the State field, or use the Item Level Targeting field to specify where this policy should apply (more on this later).
Step 12 – Click Finish to close the wizard and see the entry in the Group Policy Editor . You can also double-click the entry to see all of the settings in a flat list, instead of the wizard.
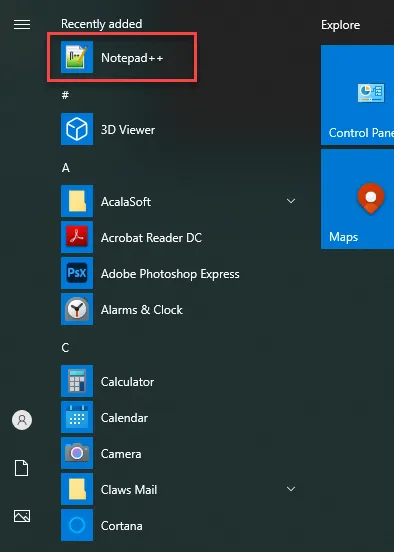
Step 13 – Finally, on the target machine, run GPupdate or log on as the user. You will see
Notepad++ appear under the Recently added heading.
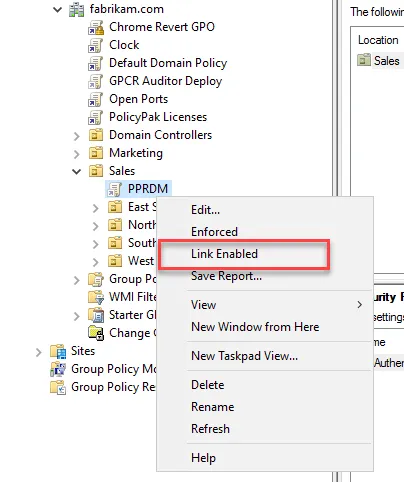
Step 14 – If you want to test it out, you can un-link enable GPO by removing the checkmark next to Link Enabled, or delete the GPO, and see Notepad++ go away.