How do I use Least Privilege Manager to Elevate .reg files to allow import by standard users
The registry requires elevated rights to be updated. Least Privilege Manager can be used to elevate the rights of a standard user to allow specific .reg files be imported without an administrator.
NOTE: We recommend you put the .REG file on a server so the file itself is under permissions which cannot be tampered with. It could be a risk to put the .REG file locally on the hard drive where anyone could edit the raw contents.
Method 1: New Executable Policy
Step 1 – Create new GPO where required.
Step 2 – Expand Netwrix Endpoint Policy Manager (formerly PolicyPak) node on either Computer, or User Configuration side, and click ,Least Privilege Manager.
Step 3 – Add new EXE Policy (a or b).
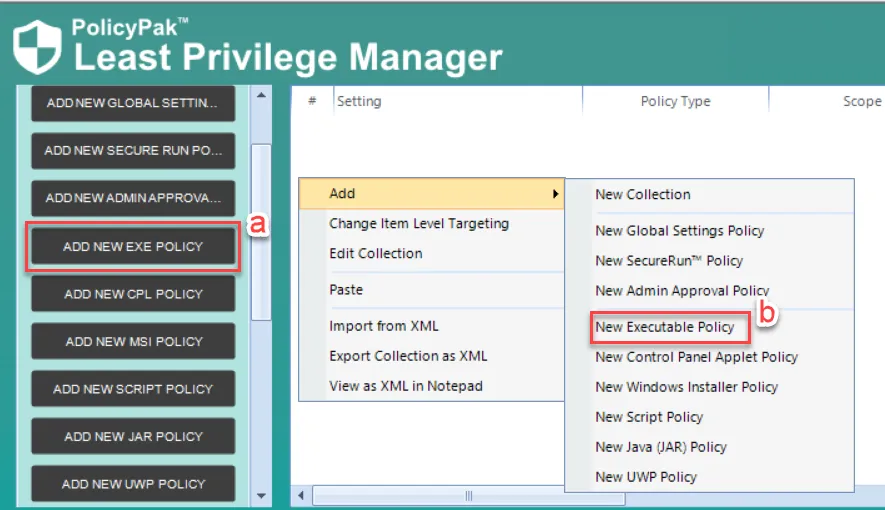
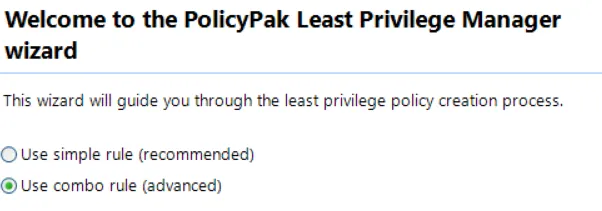
Step 4 – Select Use Combo Rule … and click NEXT.
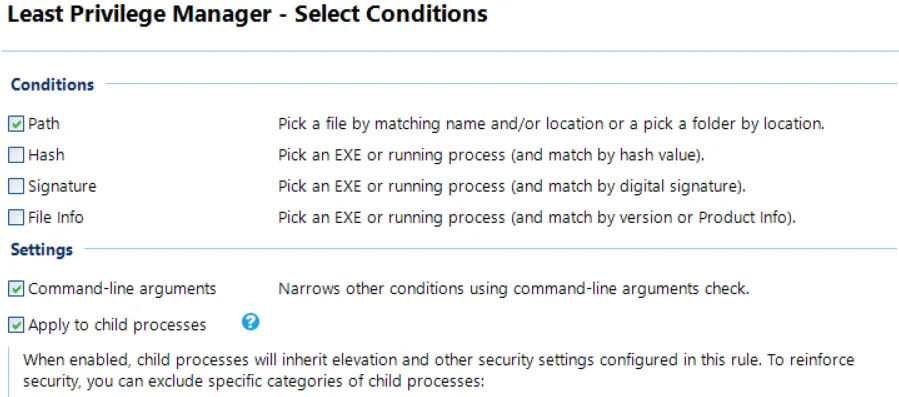
Step 5 – Under Conditions check Path, and under Settings check Command-line arguments and Apply to child processes . Click Next.
Step 6 – Under Path Condition click the Add drop-down and select Add file ....

Step 7 – Either browse for regedit.exe, or type in "%SYSTEMROOT%\regedit.exe" and click
OK.
![]()
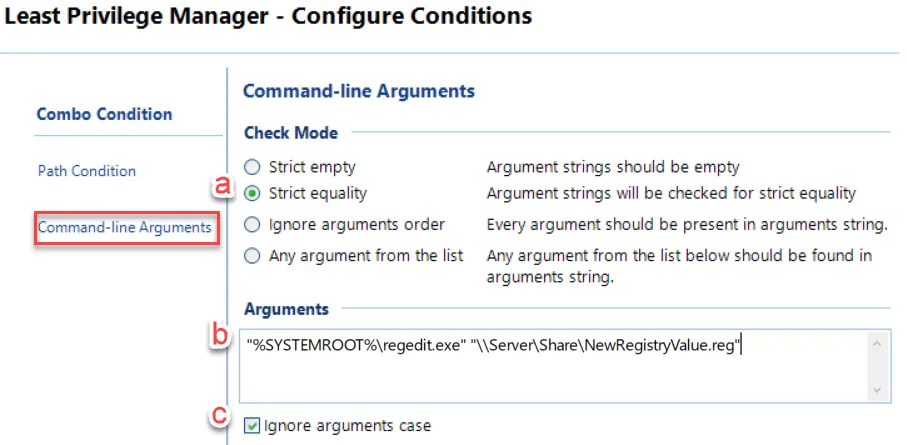
Step 8 – Click on Command-line Arguments
-
Under Check Mode select Strict equality
-
In the Arguments box type in text entered in Path Condition (step7) and path to
.regfile to elevate -
Check Ignore arguments case
-
Click Next.
Step 9 – Select Run with elevated privileges and Click Next.

Step 10 – Rename and set Item Level Targeting if required and click Finish.
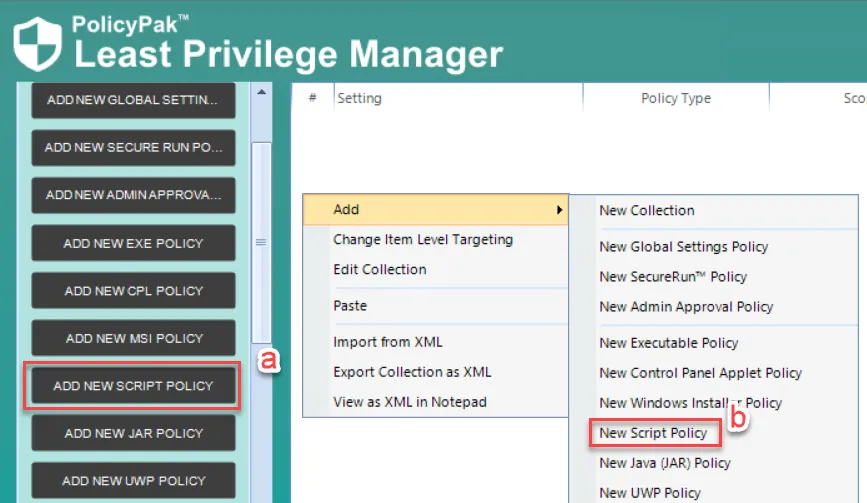
Method 2: New Script Policy
Before you create the policy, place your script on a server or secure, shared location (e.g.
\\server\share\PSscript.ps1). The following is a sample script that can be used with either
PowerShell or as a batch file to import a .REG file:
Regedit.exe /s \\server\share\NewRegValue.reg
Step 1 – Create new GPO where required.
Step 2 – Expand PolicyPak node on either Computer or User Configuration side and click on .Least Privilege Manager.
Step 3 – Create new SCRIPT Policy (a or b).
Step 4 – Select Use Combo Rule … and click Next.
NOTE: Although you can use a simple rule and simply use path as the qualifying factor, for security purposes it is recommended you have multiple qualifying factors.
Step 5 – Under Conditions check Path and Hash and click Next.
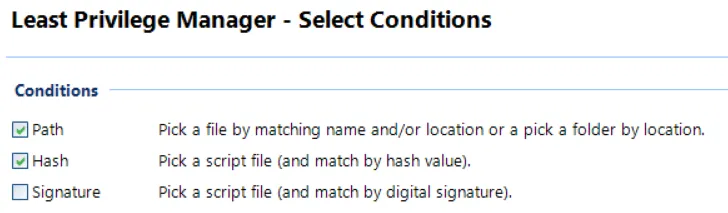
NOTE: If you make changes to the script, the Hash value will need to be updated for the policy to remain valid. Alternatively, if you digitally sign your script, Signature can be used instead of Hash as the second method of validation.
Step 6 – Under Path Condition click the Add drop-down and select .Add file ....

Step 7 – Browse to the location of the PowerShell script -> When Prompted, allow to
automatically fill in Hash value,

![]()
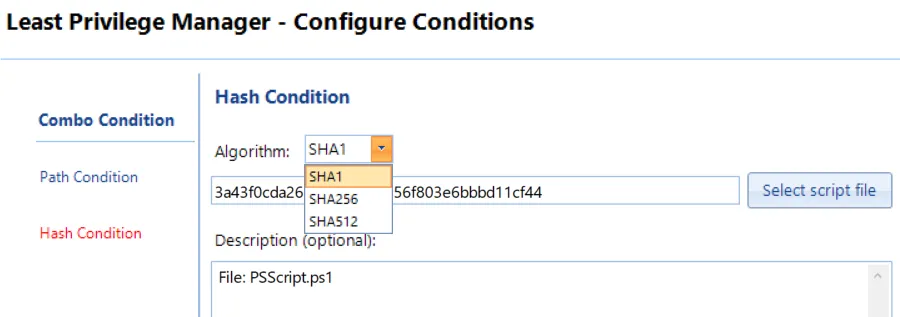
Step 8 – Click on Hash Condition to confirm Value has been set -> If desired, and change
algorithm to setting of .
Step 9 – Select "Run with elevated privilegesand click Next.
Step 10 – Rename and set Item Level Targeting if required and click Finish.