Elevating Executables
NOTE: For an overview of how to elevate applications that need admin rights, see the Kill Local Admin Rights (Run applications with Least Privilege) video.
In the previous section, we observed that when a Standard User tries to run Process Monitor, they are not allowed because it requires admin rights. Creating a Endpoint Policy Manager Least Privilege Manager policy and getting it delivered will remedy this.
In these examples we’ll be using Group Policy to create the policies and then delivering them. However, you may also use Endpoint Policy Manager Cloud, and MDM service like Intune, or your own system like SCCM.
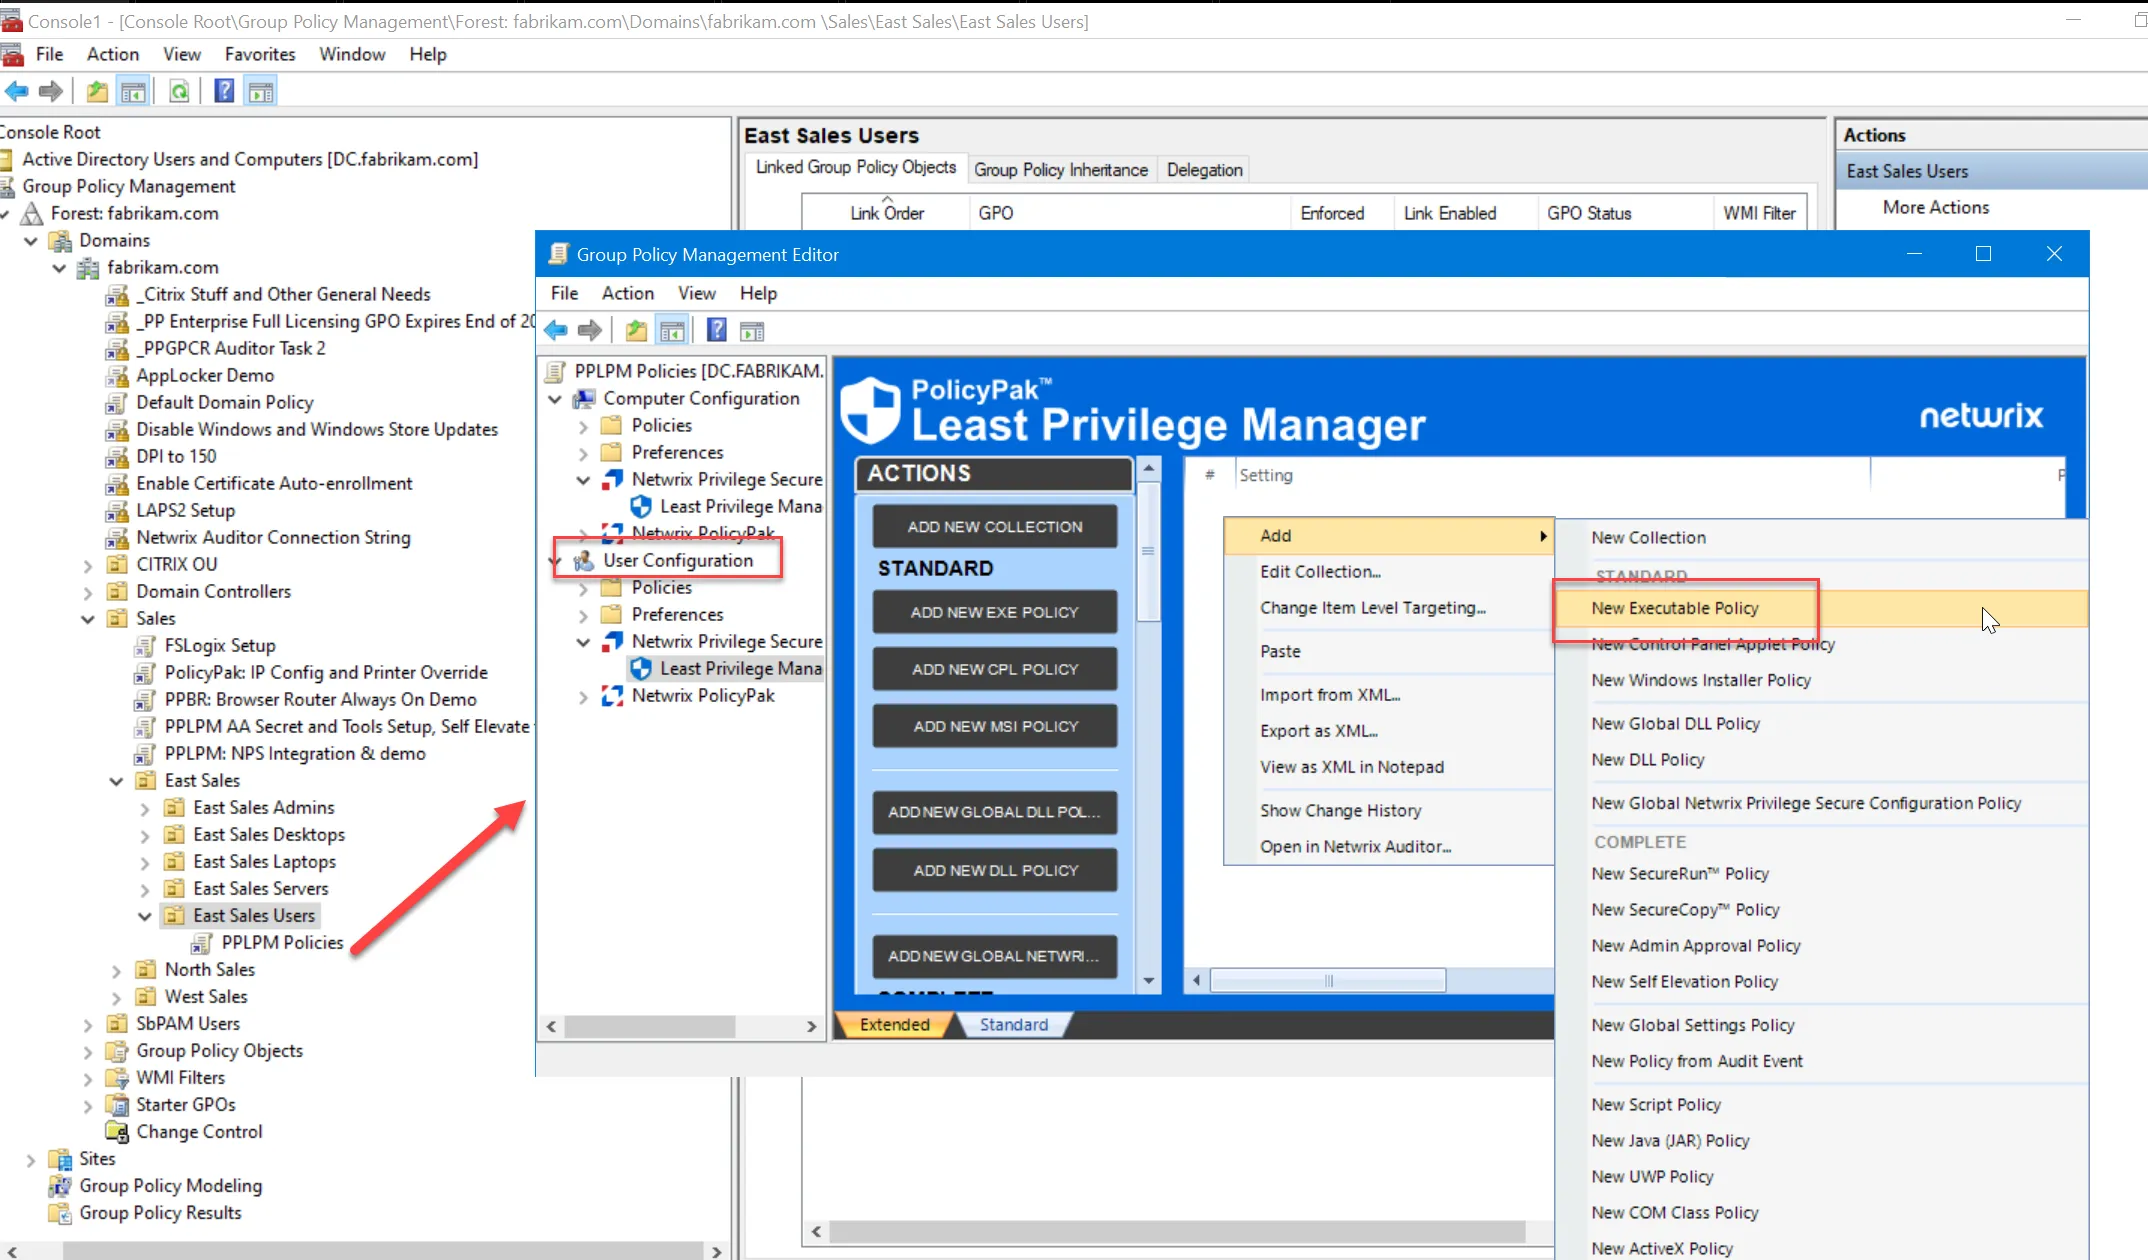
For these examples, you must link it to where users are and create a new executable policy. As shown in this example, create a GPO named PPLPM Policies and link it to the East Sales Users organizational unit (OU). Then in the User Configuration > Netwrix Privilege Secure > Least Privilege Manager section, select Add > New Executable Policy.
An executable rule can be one of two types:
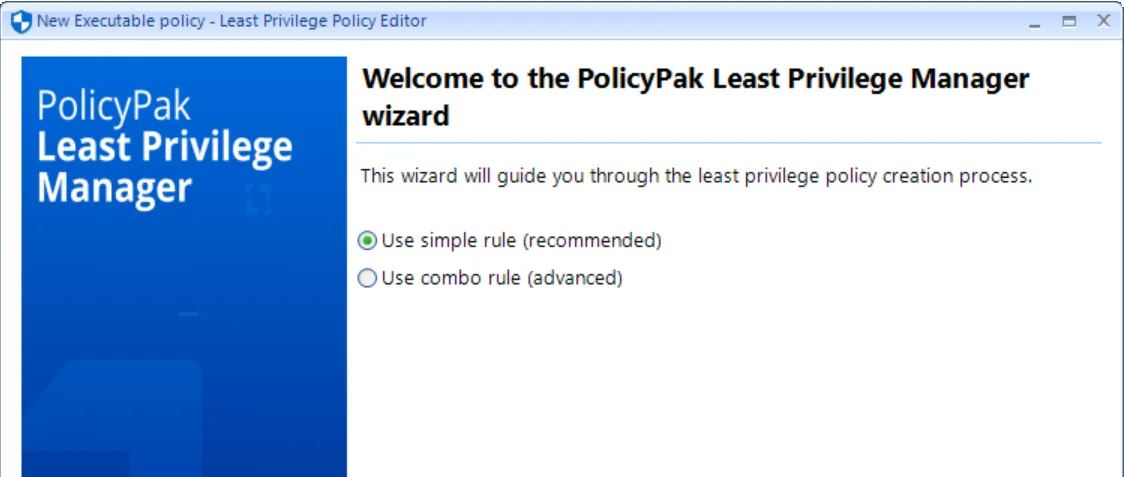
Simple rules match on a specific piece of criteria, which could include the name or location (Path), the fingerprint of the file (Hash), the company that digitally signed the file (Signature), or specific characteristics of a file such as version and inner name (File Info).
Combo rules enable matching on any or all the mentioned criteria. A popular combination is file name and publisher. You can make specific rules about the items you want to enable with elevated rights by using two conditions.
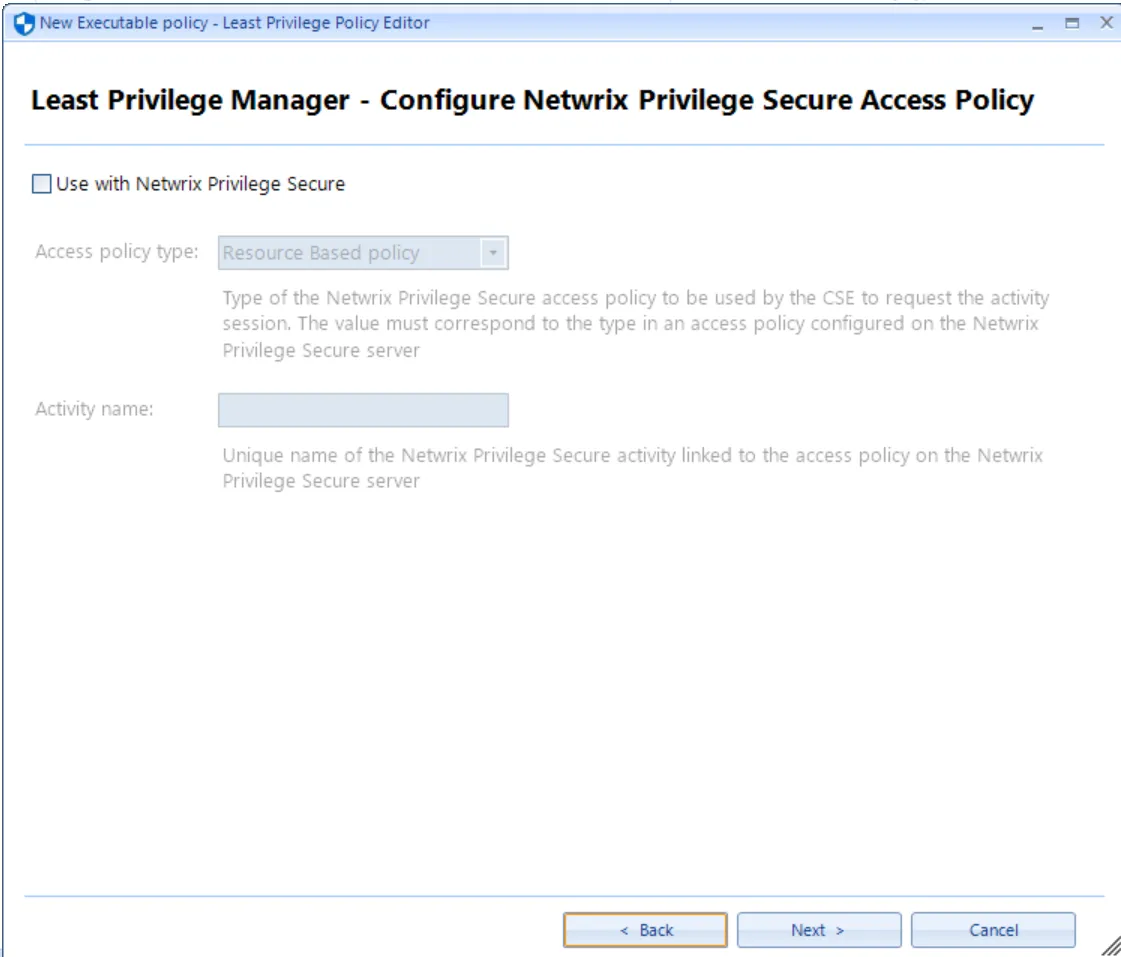
You’ll then be asked if you want this policy to be related to an action within Netwrix Privilege Secure. For now, we’ll skip this (leave unchecked) and we’ll return back to it in the Endpoint Policy Manager & Netwrix Privilege Secure topic. Future examples will purposely omit this step until we need it.
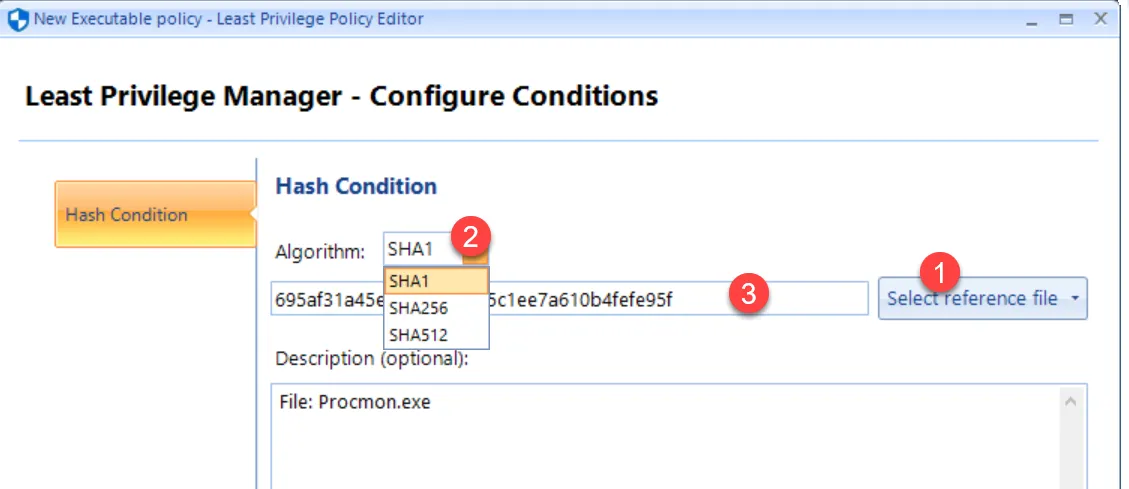
In this case, use a Hash condition, which indicates, "Run ProcMon.exe with elevated rights because of the Hash (fingerprint) of the file." Select Hash and click Next.
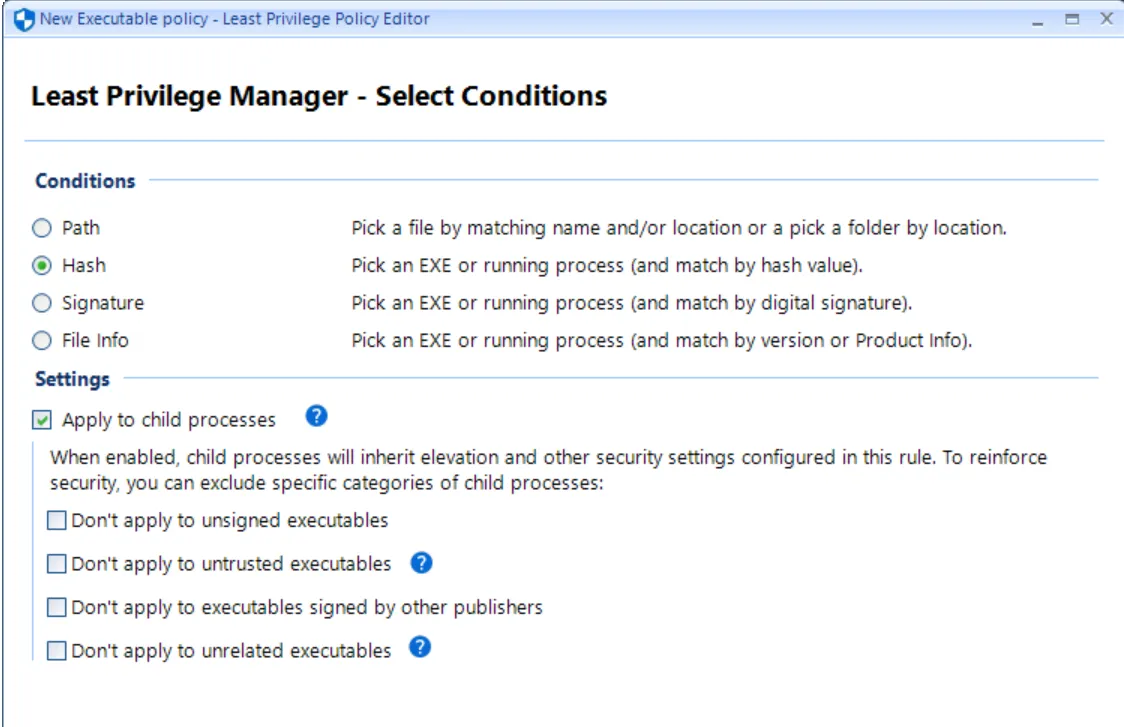
Additionally, this is where you set the settings for Apply to child processes. For now, leave as-is. You can learn more about this in ” in the section on“Best Practices and Miscellaneous Topics.”
Specify a file (in this example, we'll use the copy of Process Monitor) or a running process (which is not applicable in this scenario), as shown here. The hash is populated and you may choose which Algorithm to use.
The next screen, as shown here, demonstrates possible action types and options for Endpoint Policy Manager Least Privilege Manager.
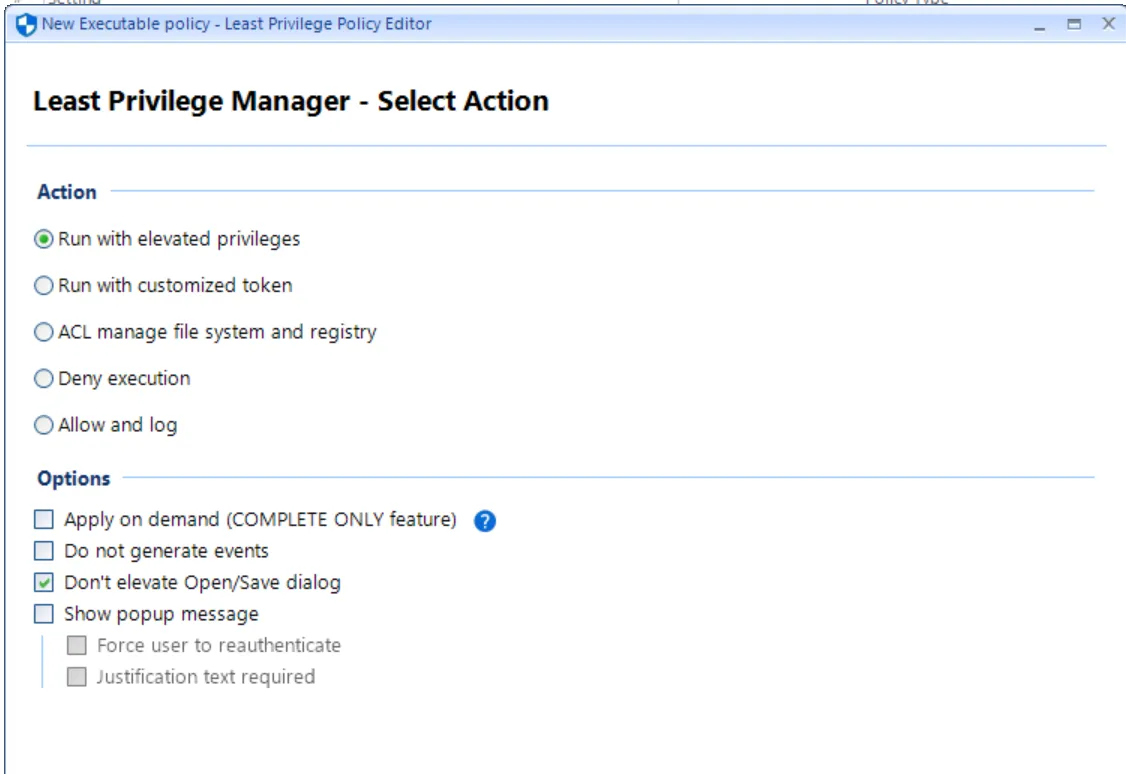
These action types are:
- Run with elevated privileges. This adds the SYSTEM token to the process, elevating it as needed when a Standard User runs it.
- Run with customized token. This is not usually needed but provides granular control of tokens in processes.
- ACL Manage file system and registry You can enable specific files or registry items to be managed when specific processes are run.
- Deny execution. This prevents something from running even if the user is an admin.
- Allow and log. This enables an application to run if otherwise prevented. When used in conjunction with SecureRun™, this can be useful. The next section and example will explore this in greater detail.
These Options are:
- Apply on demand. Enables the elevation only when application is right-clicked. For more information on this, seeApply on Demand Rules.
- Do not generate events. PolicyPak logs items in the Windows event log. Setting this item configured (checked) means that events will not be logged when this process is run.
- Do not elevate Open/Save dialog. By default Endpoint Policy Manager will prevent child processes from gaining elevation thru the Open/Save dialogs. See the Best Practices and Miscellaneous Topics topic for additional information.
- Show popup message. Optional requirement to either force the user to reauthenticate and/or put in Justification text before the process starts. See the Best Practices and Miscellaneous Topics for additional information.
The next page provides the opportunity to enhance this policy with these final touches:
- Name
- Comment
- State (default is enabled)
- Scope. See the Best Practices and Miscellaneous Topics for additional information.
- Item-Level Targeting. See the Best Practices and Miscellaneous Topics for additional information.
- Parent Process filter. See the Best Practices and Miscellaneous Topics for additional information.

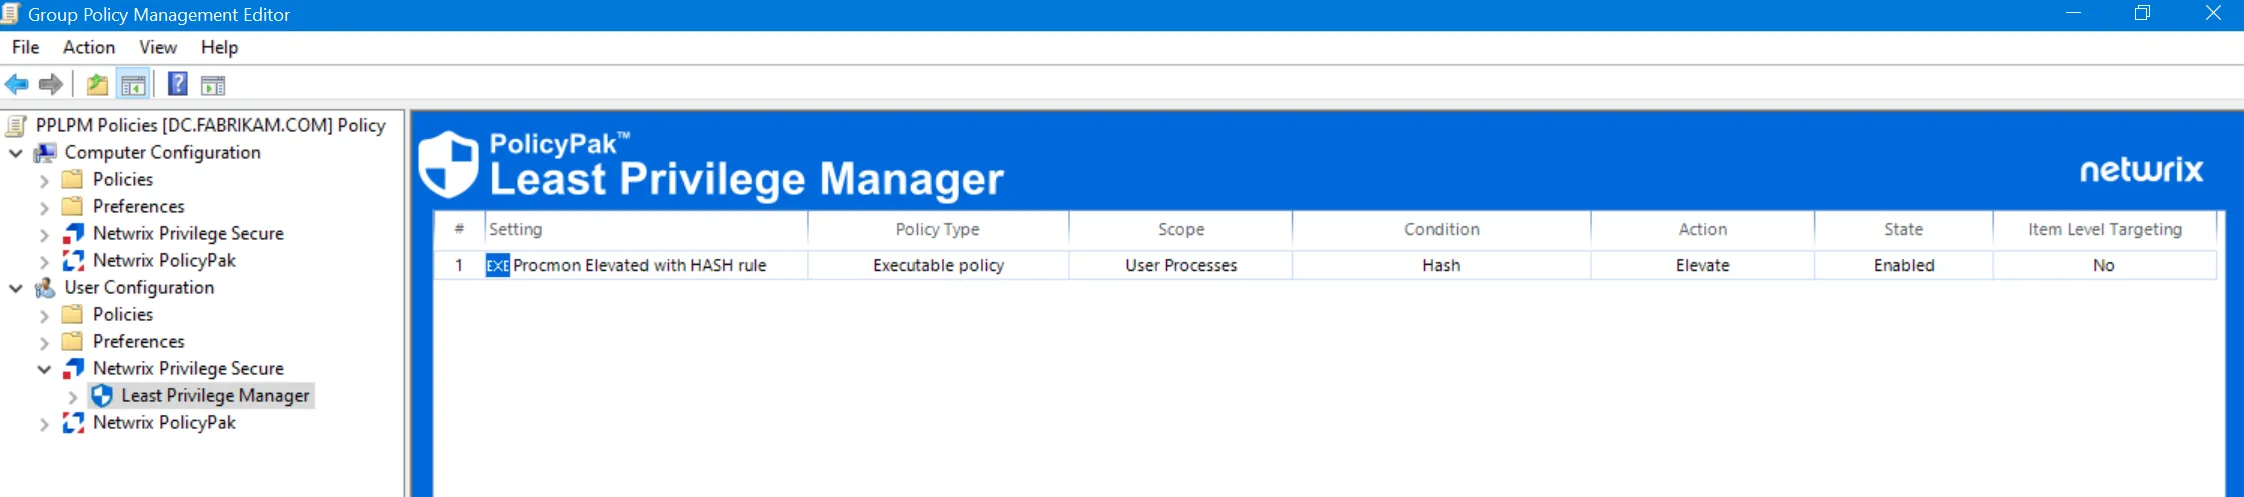
Once you have made your selections, an entry in the Group Policy Management Editor is obtained, as shown in here.
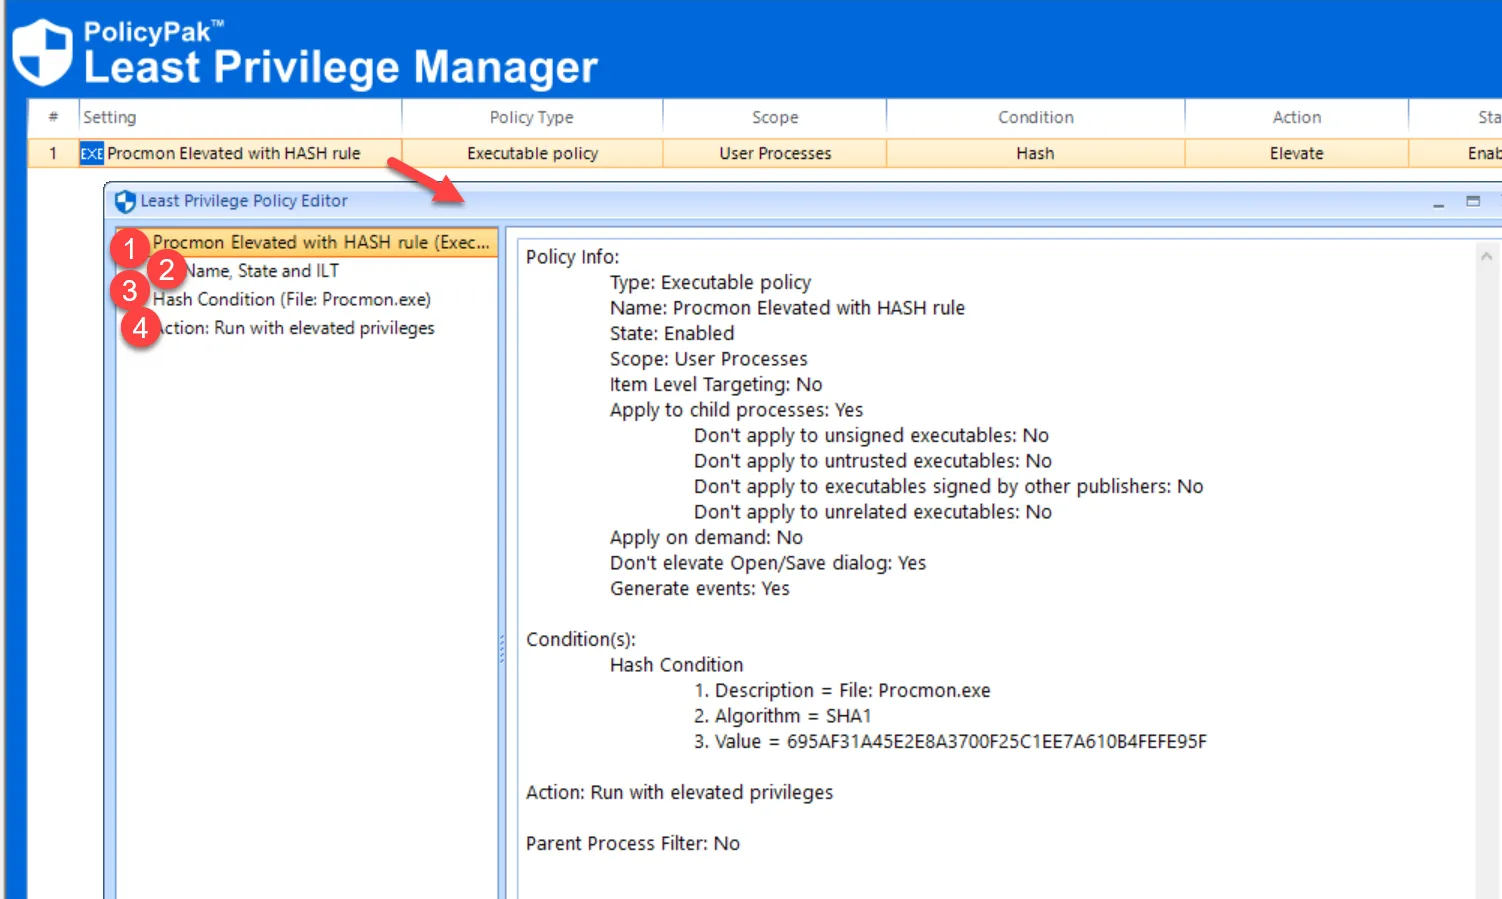
To re-edit the policy, it is not necessary to use the wizard again. Instead, just double-click the policy entry to view it in a flat list, as shown here. Then click on any of the numbered items to make any changes.
On your endpoint, log on as the user who will obtain the GPO (e.g., EastSalesUser1), or run GPupdate. Once the GPO applies, Process Monitor will run without a UAC prompt, as demonstrated here.
