How to use Remote Work Delivery Manager to apply Firewall policies
Step 1 – Using a Windows 10 computer configure the Firewall Rules as desired.
Step 2 – Use the command below from an elevated CMD window to export the Firewall policy to a
(.wfw) file.
netsh advfirewall export "C:\Temp\firewall-rules.wfw"
Step 3 – Upload the firewall policy (firewall-rules.wfw) to an external hosting site such as
Azure, Amazon S3, or Dropbox. For this example, we are using Dropbox.
Step 4 – Create a public link that points to the file you uploaded; this link should automatically download the file when used in a browser, note if your public link ends in a "0" you may need to change the "0" to "1" for testing in a browser.

Step 5 – From your Netwrix Endpoint Policy Manager (formerly PolicyPak) Cloud portal go to the File Box tab, then click Add external link. Fill out the following fields with the relevant info for your public link, lastly, click Validate Link. If the link is valid you will see a message stating Link is valid".
NOTE: Clicking Validate Link also updates the "0" in your public download link to a "1" if needed.


Step 6 – Once you receive the message Link is valid, click Save and move onto the next step of creating the RWDM policy.
Step 7 – Create a new RWDM policy, give the policy a descriptive name, and click the +Policy dropdown then select +Delivery to define the policy.


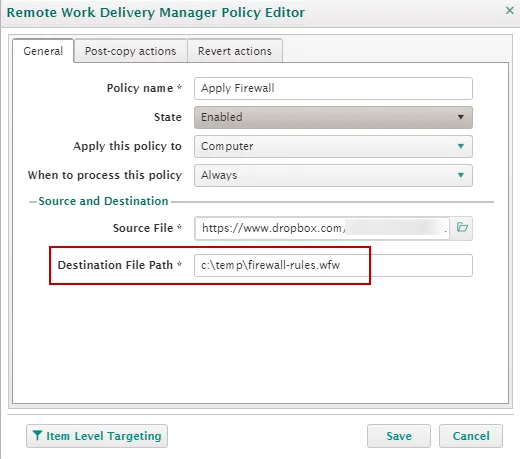
Step 8 – Under the General tab click the folder icon next to Source File to select the external link to the firewall policy file you defined earlier, then fill out the rest of the tab with your desired settings. See the example below and pay special attention to the Destination File Path. This value must be the full path, including the destination file name and extension.
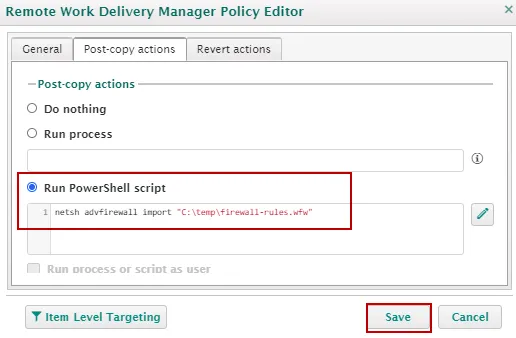
Step 9 – Under the Post-copy actions tab choose Run PowerShell script and paste in the following command line before optionally defining a Revert action and saving the policy.
netsh advfirewall import "C:\Temp\firewall-rules.wfw"
Step 10 – Since it is only one command, you could have alternatively used the Run Process field and pasted in the same single command line.
Step 11 – That's it, you are all done. Now apply the policy to a computer group in PPC and test
the policy on a PPC joined machine by running "ppcloud /sync" from a CMD prompt. You should see
your RWDM policy in the list of applied policies and, after the successful import, your new Firewall
rules should be reflected in the Advanced Firewall GUI. See below for examples.
The policy shows as applied after running "PPCLoud /sync" from CMD:

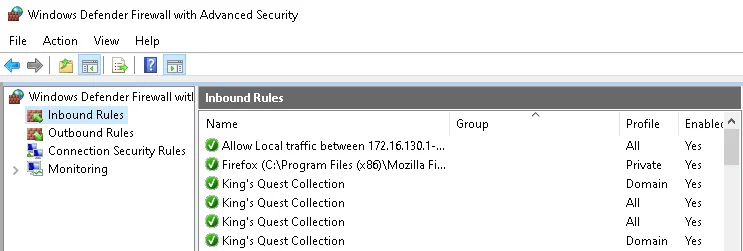
Endpoint Firewall settings BEFORE import:
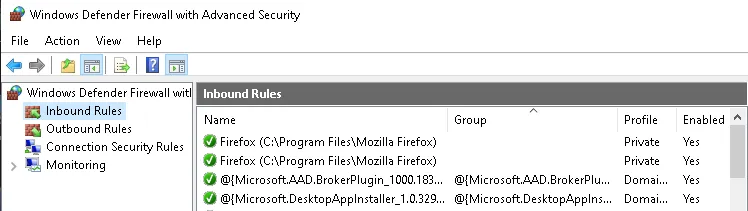
Endpoint Firewall settings AFTER import: