Permissions and Pop Ups
Starting recently in Firefox, you can only see permissions and pop-ups by doing the following:
Step 1 – Go to the website.
Step 2 – Click on the lock icon or another icon in that space.
Step 3 – Click the right arrow as shown in Figure 6.
Step 4 – Click on "More Information," as shown in Figure 7.
Step 5 – After doing this, you will reach the Permissions tab, as shown in Figure 8.
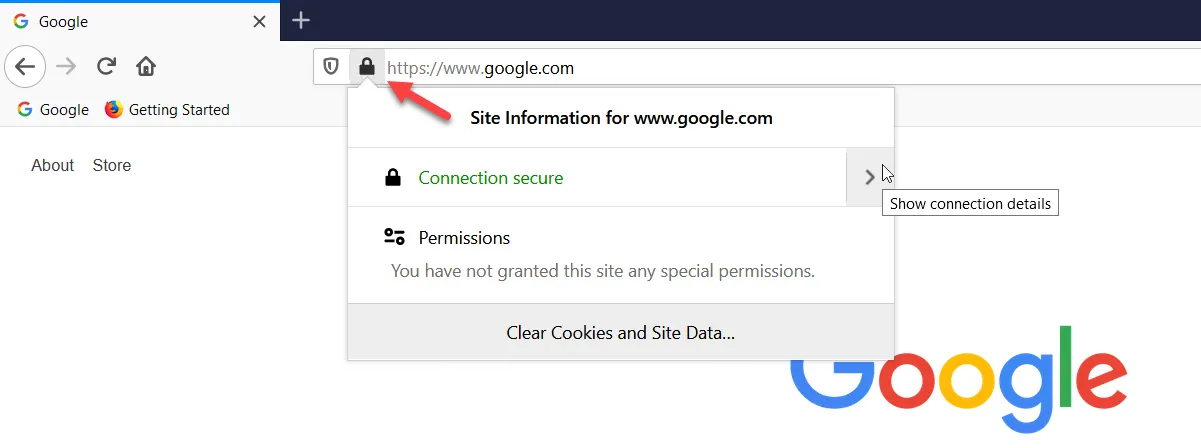
Figure 6. To see permissions and pop-ups click, one must click on the lock icon and then on the right arrow.
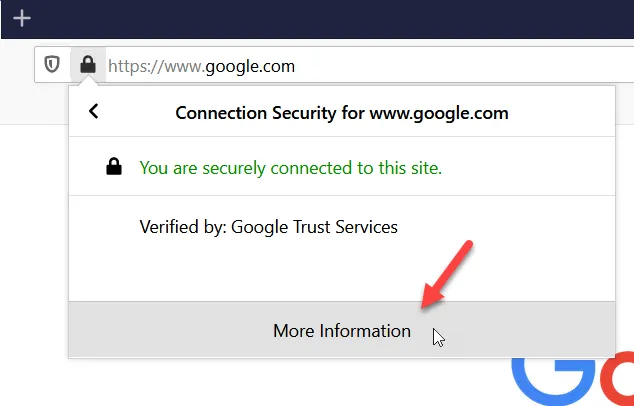
Figure 7. The next step to see the permissions and pop-ups is to click on "More Information."
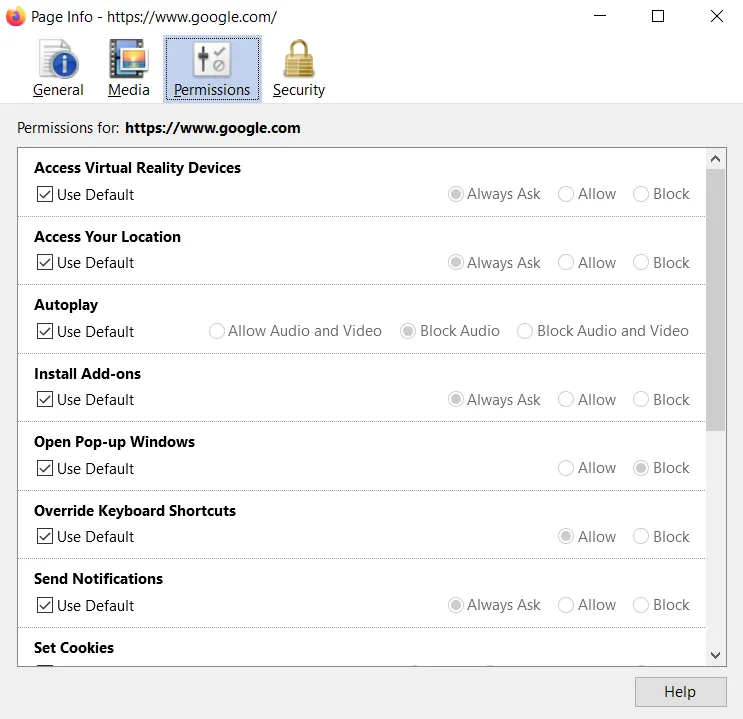
Figure 8. The Permissions tab.
You can see Firefox's pop-up exceptions using Options | Privacy & Security | Exceptions, as shown in Figure 9 and Figure 10.
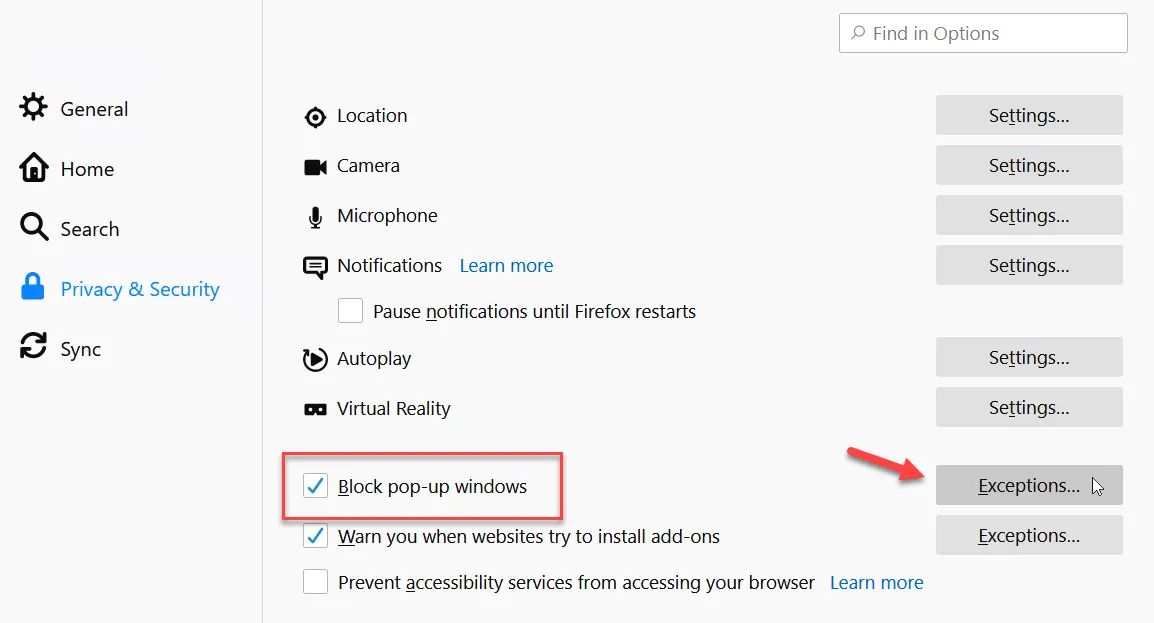
Figure 9. Firefox's pop-up exceptions.
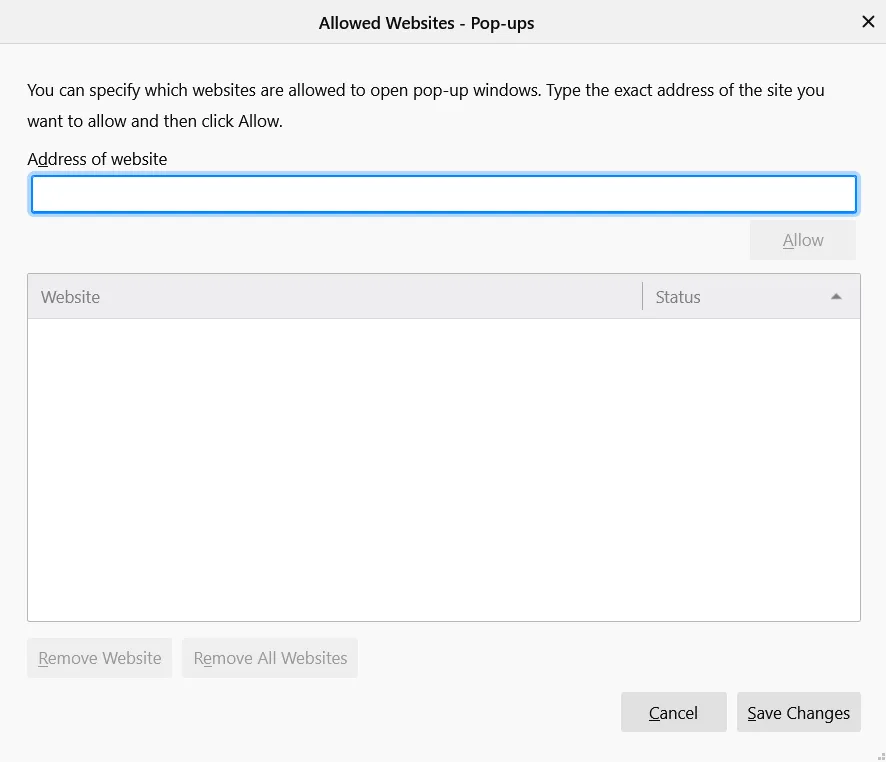
Figure 10. The pop-up exceptions page.
Netwrix Endpoint Policy Manager (formerly PolicyPak) can manipulate most areas of permissions and pop-ups. Within the Firefox AppSet, you can use the Permissions tab to enter in the values you wish for the sites that are allowed to have pop-ups and you can set permissions, as shown in Figure 11.
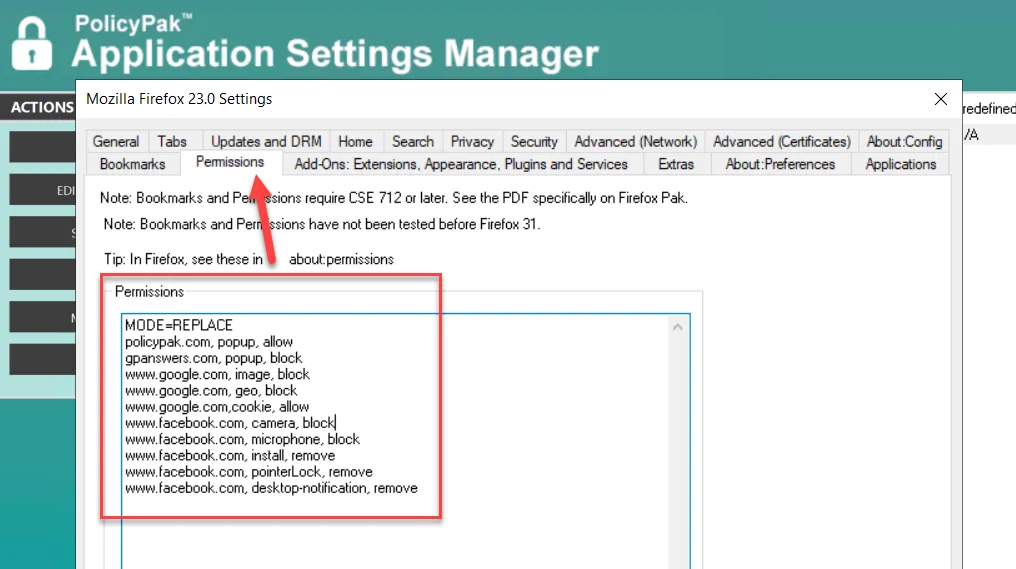
Figure 11. Using Endpoint Policy Manager to configure the Permissions tab.
To see a video of Endpoint Policy Manager managing permissions and pop-ups, to go http://www.endpointpolicymanager.com/video/endpointpolicymanager-manage-firefox-pop-ups-and-permissions-using-group-policy.html.
In Figure 11, you can see the key word after the website, like "image," "Geo," "cookie," and so on. Use Table 1 to find the key word for the area on the website you would like to manage.
Table 1: PolicyPak keywords.
| Endpoint Policy Manager Keyword (case sensitive) | Possible Verbs | Item in About:Permissions for a website | | ------------------------------------------------ | -------------- | --------------------------------------- | ------------------- | ------------------------ | | popup | Allow | Block | Open Pop-Up Windows | | camera | Allow | Block | Ask | Camera | | microphone | Allow | Block | Ask | Microphone | | fullscreen | Allow | Block | Ask | Fullscreen | | pointerLock | Allow | Block | Ask | Hide Mouse | | NOT AVAILABLE | Allow | Block | Store Passwords | | geo | Allow | Block | Ask | Share Location | | cookie | Allow | Block | Set Cookies | | indexedDB | Allow | Block | Ask | Maintain Offline Storage | | Image | Allow | Block | Load images | | Install | Allow | Block | Install Add-Ons | | desktop-notification | Allow | Block | Ask | Show Notifications | | plugin:[name] | Allow | Block | Ask | See below. |
A special case would be when you want a plugin to be enabled or always allowed for a particular website. To do this, you need the "short name" of the plugin.
Video: To see a video of how to discover the short name of a plugin and ensure it always works for a particular website, go to http://www.endpointpolicymanager.com/video/endpointpolicymanager-manage-firefox-plug-ins-per-website.html.
For example, if you want to ensure that when end-users go to a specific Citrix website, the Citrix ICA plugin is always set to ALLOW for that site, you would need to know the Citrix plugin short name, which is "npican." Then, you would enter http://site.com, plugin:npican, allow. This is illustrated in Figure 12.
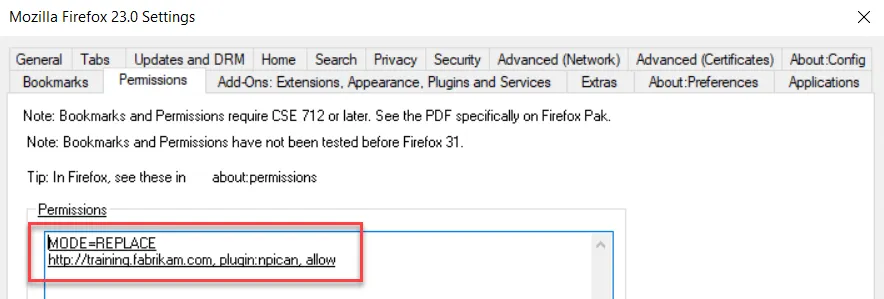
Figure 12. The plug in short name within the Permissions tab.
This will ensure on the endpoint that Firefox will perform the ALLOW command on that plugin for that website, as shown in Figure 13.

Figure 13. The plug in is allowed in Firefox.
To get plugin short names, you need to use a SQLLite browser, like http://sqlitebrowser.org/. Then, do the following:
Step 1 – Open the firefox permissions.sqllite database, as shown in Figure 14.
Step 2 – Select the table "moz_perms."
Step 3 – Locate the website and the type, as shown in Figure 14, to discover the short name.

Figure 14. Finding the plug in short name.