Set up Authentication via Authenticator
Users must install an authenticator app, such as Google Authenticator or Microsoft Authenticator, on their phones and use it to enroll and authenticate their identity store accounts in GroupID.
What do you want to do?
- Enable the Authenticator Authentication Type for an Identity Store
- Enforce Authentication by Authenticator for a Role in an Identity Store
Enable the Authenticator Authentication Type for an Identity Store
The Authenticator authentication type must be enabled for an identity store before it can be used for second factor authentication and multifactor authentication.
To enable it, see the Enable Authentication Types topic.
Enforce Authentication by Authenticator for a Role in an Identity Store
To enforce an authentication type, see the Enforce Authentication Types for Multifactor Authentication topic.
Role members must use an enforced authentication type for multifactor authentication. When an authentication type is enabled but not enforced, role members can choose to use it for enrollment and authentication.
See Also
Set up Authentication via Email
Users can enroll and authenticate their identity store accounts using Email. An email sent to a user’s email address contains a confirmation code that the user must enter in GroupID to enroll and authenticate their accounts.
GroupID provides a default notification template for enrollment/authentication via email in various languages. You can change the subject line and the body text in the template for any of these languages.
NOTE: Before configuring Email authentication, make sure that an SMTP server is configured for the identity store. See the Configure an SMTP Server topic.
What do you want to do?
- Enable Email Authentication for an Identity Store
- Modify the Email Template
- Enforce Email Authentication for a Role in an Identity Store
Enable Email Authentication for an Identity Store
The email authentication type must be enabled for an identity store before users can use it for second factor authentication and multifactor authentication.
To enable it, see the Enable Authentication Types topic.
Modify the Email Template
You can modify the subject line and body text of the email sent to users. The email contains a confirmation code that users have to enter in GroupID to enroll/authenticate their accounts.
To modify the subject line and body of the email:
-
In Admin Center, click Notification Editor at the bottom of the left navigation pane.
The Notification Editor is displayed. -
By default, notifications templates are displayed in US English. You can select a different language to customize notification templates for that language.
- To select a language, click Filter.
- On the Filter(s) dialog box, use the Locality drop-down list to select the ISO code for your required language.
- Click Apply.
-
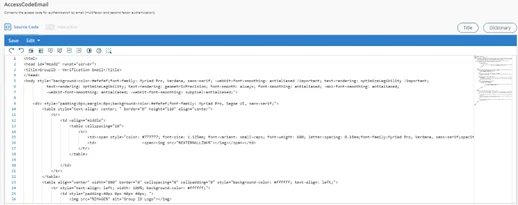
Search for AccessCodeEmail and click Edit in the Actions column to open it.
-
You can view the notification content in two distinct modes:
- Source Code (HTML) - This is the default mode, as shown in the figure above. You can make changes to the notification template in this mode.
- Interactive - This is the user-friendly, front-end view. Use it to view the email notification, as it will be sent to users.
-
Modify and format the text of the email, except the [USER] and [CODE] placeholders.
GroupID replaces [USER] with the name of the user and inserts a randomly generated verification code into the [Code] placeholder. The user must enter this code in GroupID to enroll and authenticate. -
Click the Title tile to change the subject line of the email notification.
-
After making the required changes, click Save.
-
Click Go Back to return to the Notification Editor.
Enforce Email Authentication for a Role in an Identity Store
To enforce an authentication type, see the Enforce Authentication Types for Multifactor Authentication topic.
Role members must use an enforced authentication type for multifactor authentication. When an authentication type is enabled but not enforced, role members can choose to use it for enrollment and authentication.
See Also
Set up Authentication via Linked Account
The GroupID portal enables a user to link accounts that he or she may have in different identity stores. When the user enrolls any one of those linked accounts in GroupID, it suffices for the enrollment of all linked accounts.
Users can then reset their account passwords and unlock accounts through a linked account. Let’s assume a user links his or her accounts in Identity Store A and Identity Store B. Using the Linked Account authentication type, the user can unlock the Identity Store A account by providing the credentials of the Identity Store B account and vice versa.
NOTE: The Linked Account authentication type is available for multifactor authentication only.
What do you want to do?
- Enable Linked Account Authentication for an Identity Store
- Enforce Linked Account Authentication for a Security Role
Enable Linked Account Authentication for an Identity Store
The Linked Account authentication type must be enabled for an identity store before it can be used for multifactor authentication.
To enable it, see the Enable Authentication Types topic.
Enforce Linked Account Authentication for a Security Role
To enforce an authentication type, see the Enforce Authentication Types for Multifactor Authentication topic.
Role members must use an enforced authentication type for multifactor authentication. When an authentication type is enabled but not enforced, role members can choose to use it for enrollment and authentication.
See Also
Configure Multifactor Authentication
You can define a multifactor authentication (MFA) policy for an identity store. This policy enforces users to enroll their identity store accounts in GroupID using one or more authentication types. Supported authentication types are discussed in the Authentication Policies - A Comparison topic.
Once enrolled, users must authenticate their identity store accounts using the authentication types they enrolled with, when they perform any of the following actions in the GroupID portal or the GroupID mobile app:
- Reset identity store account passwords
- Unlock their accounts
Helpdesk users with restricted access also use authentication type(s) to authenticate end-users before resetting their password or unlocking their identity store account. See the Set Restricted Mode topic.
NOTE: Multifactor authentication defined in Microsoft Entra Admin Center does not integrate with MFA in GroupID. See the Multifactor Authentication Policy topic.
What do you want to do?
- Configure Multifactor Authentication
Configure Multifactor Authentication
To configure multifactor authentication for a security role in an identity store, do the following:
- Enable one or more authentication types for the identity store.
See the Enable Authentication Types topic for details. - Enforce role members to use specific authentication types for multifactor authentication.
See the Enforce Authentication Types for Multifactor Authentication topic for details.
See Also
- Authentication Policy
- Configure Second Factor Authentication
- Enroll with Authentication Types
- Authenticate with Authentication Types
Set Up Authentication Types
The following topics guide you on how to set up different authentication types for an identity store and enforce them for a security role.
- Set up Authentication via Security Questions
- SMS Authentication
- Set up Authentication via Email
- Set up Authentication via Authenticator
- Set up Authentication via Linked Account
- Set up Authentication via YubiKey
- Set up Authentication via Windows Hello
See Also
Set up Authentication via Security Questions
GroupID provides a list of predefined security questions. This list can be referred to as the global question pool, as it is available to all identity stores in GroupID. You can add and remove questions to this pool.
Use the questions from the global pool to create a local pool of security questions for each identity store. Questions in the local pool are available to identity store users for enrolling with the security questions authentication type.
You can also specify the following settings for a user role in an identity store:
- The number of questions role members must use for enrollment and authentication
- The minimum answer length
What do you want to do?
- Modify the Global Question Pool
- Modify the Local Question Pool
- Enable Security Question Authentication for an Identity Store
- Enforce Security Question Authentication for a Role in an Identity Store
- Specify Policies for Security Question Authentication
Modify the Global Question Pool
See the Manage the Global Question Pool topic.
Modify the Local Question Pool
See the Manage the Local Question Pool topic.
Enable Security Question Authentication for an Identity Store
The security question authentication type must be enabled for an identity store before users can use it for second factor authentication and multifactor authentication.
To enable it, see the Enable Authentication Types topic.
Enforce Security Question Authentication for a Role in an Identity Store
To enforce an authentication type, see the Enforce Authentication Types for Multifactor Authentication topic.
Role members must use an enforced authentication type for multifactor authentication. When an authentication type is enabled but not enforced, role members can choose to use it for enrollment and authentication.
Specify Policies for Security Question Authentication
See the Define Security Question Settings for a Security Role topic.
See Also
Configure Second Factor Authentication
You can enable second factor authentication (SFA) for a user role in an identity store. This policy enforces role members to enroll their identity store accounts in GroupID using one or more authentication types. Supported authentication types are discussed in the Authentication Policies - A Comparison topic.
Once enrolled, role members must authenticate their accounts using an authentication type they enrolled with, while signing into Admin Center, GroupID portal or the GroupID mobile app. Users enrolled with multiple authentication types can use any one type to authenticate.
NOTE: GroupID SFA does not apply to Microsoft Entra ID MFA enabled users.
What do you want to do?
- Configure Second Factor Authentication
Configure Second Factor Authentication
To configure second factor authentication for a security role in an identity store, do the following:
Step 1 – Enable one or more authentication types for the identity store.
See the Enable Authentication Types topic for details.
Step 2 – Enable second factor authentication for a security role in an identity store.
See the Enable Second Factor Authentication topic for details.
See Also
- Authentication Policy
- Configure Multifactor Authentication
- Enroll with Authentication Types
- Authenticate with Authentication Types
Set up Authentication via Windows Hello
The Windows Hello authentication type can be used on Windows 10 devices only with specialized hardware installed, such as fingerprint reader and 3D camera.
NOTE: Windows Hello supports the Microsoft Edge browser only.
What do you want to do?
- Enable Windows Hello on Windows 10
- Enable Windows Hello Authentication for an Identity Store
- Enforce Windows Hello Authentication for a Role in an Identity Store
Enable Windows Hello on Windows 10
- On the Windows Start menu, select Settings.
- Go to Accounts > Sign-in options.
- You are prompted to enter a PIN. Click/tap Add under PIN to set up a PIN code.
Having set a PIN, you can proceed to add biometric data. - In the Windows Hello section, click Set up under Face or Fingerprint to add recognition data.
Enable Windows Hello Authentication for an Identity Store
The Windows Hello authentication type must be enabled for an identity store before it can be used for second factor authentication and multifactor authentication.
To enable it, see the Enable Authentication Types topic.
Enforce Windows Hello Authentication for a Role in an Identity Store
To enforce an authentication type, see the Enforce Authentication Types for Multifactor Authentication topic.
Role members must use an enforced authentication type for multifactor authentication. When an authentication type is enabled but not enforced, role members can choose to use it for enrollment and authentication.
See Also
Set up Authentication via YubiKey
YubiKey is a key-sized device that users can plug into the computer’s USB slot to verify their identity. They can use it to enroll and authenticate their identity store accounts in GroupID.
YubiKey can only be used on a physical machine. Virtual machines are not supported.
YubiKey supports the following browsers:
- Google Chrome version 38 or later
- Opera version 40 or later
- Firefox (requires the U2F Support Add-on extension)
What do you want to do?
- Enable YubiKey Authentication for an Identity Store
- Enforce YubiKey Authentication for a Security Role in an Identity Store
Enable YubiKey Authentication for an Identity Store
You must enable the YubiKey authentication type for an identity store for users to use it for second factor authentication and multifactor authentication.
To enable it, see the Enable Authentication Types topic.
Enforce YubiKey Authentication for a Security Role in an Identity Store
To enforce an authentication type, see the Enforce Authentication Types for Multifactor Authentication topic.
Role members must use an enforced authentication type for multifactor authentication. When an authentication type is enabled but not enforced, role members can choose to use it for enrollment and authentication.
See Also
Authenticate Your Identity Store Account
With second factor authentication enabled, users must authenticate the identity store account they use for logging into the portal.
This means that a user must prove his or her identity using the Authentication Types they used to enroll his or her identity store account with.
Authenticate your identity store account
-
On the login page of the portal, select an identity store and then provide your user name and password to connect the portal to it.
-
Click Sign In.
-
You are directed to the Authenticate Account page.
This page displays the authentication type(s) you enrolled this account with. You must authenticate using one authentication type.
-
Authenticate using Security Questions
- On the Authenticate Account page, select Security Questions and click Continue.
- Provide answers to the security questions you enrolled your account with.
- Click Verify and Continue.
-
Authenticate using SMS
- On the Authenticate Account page, select Security Questions and click Continue.
- Type the last four digits of your mobile number and click Send Code.
- In the access code box, type the 5 digit access code sent on your mobile phone by SMS.
- Verify and Continue.
If you do not receive a code, click Send Again and then enter the received code in the box.
-
Authenticate using Email
- On the Authenticate Account page, select Email Verification and click Continue.
- Complete your email address and click Send Code.
- In the access code box, type the 5 digit access code sent to the provided email address.
- Click Verify and Continue.
If you do not receive a code, click Send Again and then enter the received code in the box.
-
Authenticator using Authenticator
- On the Authenticate Account page, select Authenticator and click Continue.
- Launch the Google Authenticator or Microsoft Authenticator app on your smartphone. The app generates a verification code and displays it on your phone’s screen.
- Enter the code in the Security code box and click Verify and Continue.
Authenticator apps generate a new code every 30 seconds, with each code expiring after 30 seconds.
-
Authenticate using YubiKey
-
Insert the YubiKey device in the USB slot of your computer.
-
On the Authenticate Account page, select YubiKey Verification and click Continue.
-
Click your YubiKey device name.
The portal directs you to tap on the device.
-
On tapping, you are authenticated on the portal.
-
-
Authenticate using Windows Hello
- On the Authenticate Account page, select Windows Hello and click Continue.
- Click Authenticate and Continue.
- Provide the biometric information you enrolled your account with.
-
See Also
Enroll Your Identity Store Account
With second factor authentication enabled for a user role in an identity store, unenrolled users must enroll their identity store accounts before they can connect the portal to that identity store and log in.
Enrolling an identity store account means that a user must register this account in GroupID using an Authentication Type.
Once a user has enrolled his or her account, he or she must authenticate with the same authentication types whenever he or she has to log into the GroupID portal using that account.
What do you want to do?
- Enroll your identity store account
Enroll your identity store account
-
On the login page of the portal, select an identity store and then provide your user name and password to connect the portal to it and click Sign In.
OR
Scan the QR code if the OR code is enabled in GroupID Admin Center.
-
Click the profile icon on the top right corner and select Enroll your account.
-
The authentication type(s) available for enrollment are listed as tabs on Your Enrollments page. Select an authentication type to enroll your account with.
-
Enroll your account using Security Questions
- On the Your Enrollments page, click the Security Questions tab.
- From a Question X list, select a security question of your choice (X represents the question number).
- In the Answer box, type an answer for the selected question.
If the answer meets the requirements, such as length-related checks, a tick mark is displayed for it. - Repeat steps 2 and 3 to select another security question and provide an answer.
- Click Enroll Account.
-
Enroll your account using SMS
- On the Your Enrollments page, click the Mobile tab.
- Select your country and then type your mobile number in the box.
- Click Send Code.
- When the code is successfully sent to your provided mobile number, a box is displayed; enter the received code in it.
- Click Enroll Account.
If you do not receive the code, recheck your mobile number and click Send code again.
-
Enroll your account using Email
- On the Your Enrollments page, click the Email tab.
- Type your email address in the box and click Send Verification Code.
- When the code is successfully sent to your provided email address, a box is displayed; enter the received code in it.
- Click Enroll Account.
If you do not receive the code, recheck your email address and click Send code again.
-
Enroll your account using Authenticator
-
On the Your Enrollments page, click the Authenticator tab.
-
Scan the QR code with the authenticator app installed on your phone.
The app generates a verification code and displays it on your phone's screen.
-
Enter this code in the box and click Enroll Account.
The authenticator app generates a new code every 30 seconds, with each code expiring after 30 seconds.
-
-
Enroll your account using YubiKey
- Insert the YubiKey device in the USB slot of your computer.
- On the Your Enrollments page, click the YubiKey tab.
- Enter a name for your YubiKey device and click Enroll Account.
- The portal directs you to tap on the device. This enrolls your account on the portal.
-
Enroll your account using Windows Hello
- On the Your Enrollments page, click the Windows Hello tab.
- Enter a name for your authentication device and click Start Registration.
-
See Also
Reset Passwords
The GroupID portal enables enrolled users in an identity store reset their account passwords securely. They can reset their passwords if they have forgotten or lost their existing passwords. Unenrolled users can reset their passwords if the administrator has enabled the Second Way Authentication option for their role.
The GroupID portal provides an authentication mechanism, whereby users must authenticate themselves with Multifactor Authentication type(s) they enrolled their accounts with.
If the administrator has enabled multifactor authentication for the identity store, users must authenticate their accounts using the authentication type(s) they enrolled their account with. After successful authentication, users can reset account password in accordance with the password policies the GroupID administrator has defined for your role in the identity store.
What do you want to do?
- Reset identity store account password (enrolled users)
- Reset identity store account password (unenrolled users)
Reset identity store account password (enrolled users)
-
On the Welcome to GroupID page of GroupID portal, click the Forgot Password card.
-
Select the identity store where your account exists from the identity store drop down list.
-
Type your identity store account name in the user name box.
-
Provide the displayed captcha code in the Captcha box.
-
Click Reset Password. You will be directed to a page that shows the authentication type(s) you enrolled this account with.
-
Authenticate your account using the required type(s).
-
Security Questions
- On the Multifactor Authentication window, select the Security Questions check box and click Continue.
- The page lists the security questions you enrolled your account with. Provide answers to these questions.
- Click Verify and Continue.
-
Mobile Verification
- On the Multifactor Authentication window, select the Mobile Verification check box and click Continue.
- Type the last four digits of your mobile number and click Send Code.
- In the displayed box, type the 5 digit access code sent on your mobile phone.
- Click Verify and Continue.
If you have not received a code, click Send Again and then enter the received code in the given box.
-
Email Verification
- On the Multifactor Authentication window, select the Emailcheck box and click Continue.
- Complete your email address and click Send Code.
- In the displayed box, type the 5 digits access code sent to the provided email address.
- Click Verify and Continue.
If you have not received a code, click Send Again and then enter the received code in the given box.
-
Authenticator
-
On the Multifactor Authentication window, select the Authenticatorcheck box and click Continue.
-
Launch the authenticator app on your smartphone.
-
The app displays a 6-digit code. Enter that code in the Security Code box on the Authenticator page.
The app generates a new code every 30 seconds.
-
Click Verify and Continue.
-
-
Link Account
-
On the Multifactor Authentication window, select the Link Account check box and click Continue.
-
On the Link Account tab, select a link account you want to use for resetting the password of your account.
This tab lists the link account(s) that have the Allow Authentication option enabled.
-
Type the username and password of the selected linked account in the respective boxes.
-
Click Next.
-
-
YubiKey
Insert the YubiKey device in the USB slot of your computer.
- On the Multifactor Authentication window, select the YubiKeycheck box and click Continue.
- Click your YubiKey device name. The portal directs you to tap on the device.
On tapping, you are authenticated.
-
Windows Hello
-
On the Multifactor Authentication window, click the Windows Hello check box and click Continue.
-
Click Authenticate and Continue.
Authenticate with the provided biometric information or with the PIN given in Windows Hello sign-in options.
-
On getting authenticated, the Reset My Password page is displayed.
-
-
All your linked accounts, if any, are listed in the Select the account to reset their passwords section. Select the check boxes for the account(s) to reset their password(s).
-
Type your new password in the New password box. On typing the new password, the Password Acceptance box appears. The new password must meet the password complexity requirements and conform to the password complexity rules defined by the GroupID administrator for the identity store.
To meet the password complexity requirements, the password must:
-
be at least as per the characters length defined in the password policy of the provider.
-
contain uppercase lowercase characters, digit or special character:
- English uppercase characters (A through Z)
- English lowercase characters (a through z)
- Base 10 digits (0 through 9)
- Special characters (for example, !, $, #, %)
-
-
Type the new password for the selected account(s) in the Confirm new password box.
-
Click Reset Password.
If you have reused an old password and it does not meet the Enforce password history policy of the provider, a message inform you that the password must be different from the old one.
-
On reset, the Reset Password Results page displays the message ,"Password has been reset successfully.".
-
Click OK.
Reset identity store account password (unenrolled users)
-
On the Welcome to GroupID page, click the Forgot Password card.
-
Select the identity store from the Identity Store list your account resides in.
-
Type your user name in the Username box.
-
Provide the displayed captcha code in the Captcha box.
-
Click Reset Password. You will be directed to a page that shows the second way authentication type(s) the GroupID administrator has enabled for your role.
-
Authenticate your account using the listed types.
-
Security Question
- Select the Security Questions check box and click Continue.
- Provide answer to the question the administrator has set for you.
- Click Verify and Continue.
-
Mobile Verification
- Select Mobile Verification check box and click Continue.
- Type the last four digits of your mobile number in the box and click Send Code.
- In the displayed box, type the 5 digit access code sent on your mobile phone.
- Click Verify and Continue.
If you have not received a code, click Send Again and then enter the received code in the given box.
-
Email Verification
- Select Email Verification check box and click Continue.
- Complete your email address and click Send Code.
- Type the 5 digit access code sent to the provided email address in the displayed box.
- Click Verify and Continue.
If you have not received a code, click Send Again and then enter the received code in the given box.
-
-
Follow the steps 6 - 12 in Reset identity store account password (enrolled users) section to reset your password.
See Also
Second Factor Authentication
The GroupID administrator can enable second factor authentication for a user role in an identity store.
This implies that, in addition to providing a valid user name and password to connect the portal to an identity store, role members must authenticate themselves using an authentication type.
Second factor authentication works as follows:
-
An unenrolled user must enroll his or her identity store account in GroupID. See the Enroll Your Identity Store Account topic. Enrollment is a one-time process.
-
An enrolled user has to authenticate on the GroupID portal using the authentication type he or she used to enroll his or her identity store account with. See theAuthenticate Your Identity Store Account topic.
Authentication is required every time the user logs into the portal.
GroupID supports seven authentication types for second factor authentication. The administrator can enable all or any of these for enrollment. Of the enabled authentication types, users have to enroll and then authenticate with any one type.
Supported Authentication Types
GroupID supports the following authentication types:
- Security Questions Authentication
- SMS Verification
- Email Verification
- Authenticator app
- Link Account authentication
- YubiKey authentication
- Windows Hello authentication
Security Questions Authentication
The administrator is responsible for configuring the security questions that users must answer to enroll their identity store accounts using the GroupID portal. Administrators can also enroll using GroupID Admin Center.
To authenticate using the security questions, users must provide answers to the security questions they used to enroll their accounts with.
SMS Verification
In SMS authentication, confirmation codes sent on the user’s mobile phone are used to enroll and authenticate.
- To enroll an identity store account through SMS verification, a user has to enter his or her mobile number in the portal. The portal will send a verification code on this number via SMS and the user has to enter it in the portal to enroll his or her account.
- To authenticate using SMS, a user has to provide the last 4 digits of his or her registered mobile number. The portal then sends a confirmation code on this number; the user has to enter the code in the portal for authentication.
NOTE: The SMS authentication type is available if the GroupID administrator has linked an SMS gateway account with the identity store.
Email Verification
In Email authentication, confirmation codes sent on the user’s email address are used to enroll and authenticate.
- To enroll an identity store account through Email verification, a user has to enter his or her email address in the portal. The portal will send a verification code to this email address and the user has to enter it in the portal to enroll his or her account.
- To authenticate using Email, a user has to complete the email address he or she provided during enrollment. The portal then sends a confirmation code to this email address; the user has to enter the code in the portal for authentication.
NOTE: The Email authentication type is available if the administrator has defined an SMTP server for the identity store.
Authenticator app
Users have to install the Google Authenticator or Microsoft Authenticator app on their smartphones and use it to enroll and authenticate their identity store accounts on the portal.
-
To enroll, a user has to use the Authenticator app on his or her phone to scan the QR image displayed on the portal. This generates a verification code in the app, that the user has to enter in the portal to enroll.
Authenticator apps generate a new code every 30 seconds, with each code expiring after 30 seconds.
-
To authenticate, the user simply has to launch the Authenticator app on his or her phone and enter the QR code generated by the app in the portal.
Link Account authentication
The GroupID portal enables a user to link accounts that he or she may have in different identity stores. When the user enrolls any one of those linked accounts in GroupID, it suffices for the enrollment of all linked accounts.
Users can then reset their account passwords and unlock accounts through a linked account. Let’s assume a user links his or her accounts in Identity Store A and Identity Store B. Using the Linked Account authentication type, the user can unlock the Identity Store A account by providing the credentials of the Identity Store B account and vice versa.
YubiKey authentication
YubiKey is a key-sized device that users can plug into the computer’s USB slot to provide another layer of security when accessing their identity store accounts.
YubiKey supported browsers:
- Google Chrome version 38 or later
- Opera version 40 or later
- Firefox (requires the U2F Support Add-on extension)
IE and Microsoft Edge are not supported.
- To enroll your identity store account on the portal using YubiKey, insert the YubiKey device in the USB slot of your computer, enter a name for your device in the portal and tap on the device.
- To authenticate with this YubiKey, insert the device in your computer and then tap on the device in the portal.
NOTE: Users can enroll and authenticate with a YubiKey only on a physical machine. Virtual machines are not supported.
Windows Hello authentication
The Windows Hello authentication type can be used on devices running Windows 10 with specialized hardware installed, such as fingerprint reader and 3D camera.
Enable Windows Hello on Windows 10
-
Go to the Start menu and select Settings.
-
Go to Accounts Sign-in options.
-
Windows Hello prompts you to enter a PIN; click/tap Add under PIN to set up a PIN code first.
Having set a PIN, proceed to add biometric data.
-
In the Windows Hello section, click Set up under Face or Fingerprint to add the recognition data.
NOTE: If your device does not meet the hardware requirements, Windows Hello is not available, even
if Windows 10 is installed on it.
Window Hello supports the Microsoft Edge browser only.
See Also
Disabled Users
To view a list of disabled users in the identity store, click Users on the left navigation bar and select My Direct Reports. On the displayed page, select the Disabled Users tab.
The list consists of:
-
Users that have been expired by the User Life Cycle job for not validating their profiles within the required period.
An expired user is disabled in the directory.
-
Users that have been terminated or disabled by their respective managers.
-
Users that are disabled in the directory.
A disabled user can be reinstated but not extended. An expired user can be extended but not reinstated. The administrator or a Helpdesk user is responsible for reinstating and extending users.
What do you want to do?
- View User Properties
- Reinstate a Disabled User
- Grant extension to an Expired User
- Send Disabled Users list to an Excel file
- Navigate the Disabled Users listing
View User Properties
To view and modify the properties of a disabled or expired user, select it and click Properties on the toolbar.
Refer to the information for user properties to manage the properties of a disabled/expired user.
Reinstate a Disabled User
To reinstate a disabled user, select it and click Reinstate on the toolbar.
Grant extension to an Expired User
To grant an extension period to an expired user, select it and click Extend on the toolbar.
The extension period applies to users who did not validate their profiles within the required period, and were consequently expired.
On extension, the user's account is temporarily unlocked. If they do not validate their profile information within that extension period either, GroupID expires them again. Only the administrator or Helpdesk users can reactivate these accounts.
The duration of the extension period is set by the administrator in identity store configurations.
Send Disabled Users list to an Excel file
To export list of disabled users to an Excel file, click Export Results on the toolbar.
Navigate the Disabled Users listing
Use the page numbers under the disabled users listing to page through the records.
You can control the number of records to be displayed per page by modifying the Search results per page setting on the User Settings panel. You can modify the search results in Modify Search Directory. You can select entire directory or a domain to search active groups from.
See Also
Linked Accounts
The GroupID portal allows users to reset their accounts' passwords and unlock their accounts through their linked accounts.
A user can have accounts in multiple identity stores configured in Admin Center. They have to enroll each of these accounts separately on the GroupID Portal before they can reset its password or unlock it.
To eliminate the necessity of separate enrollment, a user can simply enroll one of these accounts on the portal and then link other accounts with it. Once it's done, the enrolled account becomes the master account.
A user can then unlock or reset the password of any linked account through the authentication policy associated with the master account.
Any account linked with the master account can neither be enrolled, nor used to log on to the portal. Users must use their master account credentials to log into the portal.
When two accounts are linked, notification emails are sent to the master account as well as to the linked account, provided that notifications are configured for the respective identity stores in GroupID Admin Center. Un-linking an account also initiates notifications.
What do you want to do?
Link an account
Enroll any one of your identity store accounts on the GroupID Portal. This account becomes the master account, with which you can link other identity store accounts that you may have.
-
In GroupID portal, click Users in the left pane and select Linked Account.
-
On the My Linked Accounts page, select the account you want to link and click Link Account.
-
On the GroupID Authenticate window, provide the sign in information for the account to link to the master account.
-
A message Account has been successfully linked is displayed.
If the master account is not enrolled yet, it automatically gets enrolled when an account is linked to it.
NOTE: An already enrolled or linked account cannot be linked to a master account.
-
Turn on the Allow Authentication button against the account(s) you want to use to authenticate with, while unlocking any linked accounts or resetting passwords of linked accounts.
If you do not enable it either for master or child account(s), then the Link Account authentication type cannot be used both for master account and child account(s).
If in the Multifactor Authentication policy for your role:
- Only Link Account authentication is defined, then a message appears that Link Account authentication is disabled.
- Other authentication type(s) are defined along with the Link Account authentication, then you can use those authentication type(s) to unlock your account and reset password of your identity store account.
-
To link another account, click Link Account again and repeat steps 3-4.
Link MicroSoft Entra ID account(s)
The Entra ID account(s) that you want to link with must be logged into the Entra ID portal in the same browser. Use the Sign in with a different account option in the Entra ID portal for logging into multiple accounts.

-
In GroupID portal, click Users in the left pane and select Linked Account.
-
On the My Linked Accounts page, select the account you want to link and click Link Account.
-
On the GroupID Authenticate window, click the SAML button or image for the configured SAML provider in GroupID. The following window is displayed:

-
Select the account you want to link to. You will be redirected back to the GroupID portal’s My Linked Account page and a message Account has been successfully linked is displayed.
If the master account is not enrolled yet, it automatically gets enrolled when an account is linked to it.
NOTE: An already enrolled or linked account cannot be linked to a master account.
-
Turn on the Allow Authentication button against the account(s) you want to use to authenticate with, while unlocking any linked accounts or resetting passwords of linked accounts.
If you do not enable it either for master or child account(s), then the Link Account authentication type cannot be used both for master account and child account(s).
If in the Multifactor Authentication policy for your role:
- Only Link Account authentication is defined, then a message appears that Link Account authentication is disabled.
- Other authentication type(s) are defined along with the Link Account authentication, then you can use those authentication type(s) to unlock your account and reset password of your identity store account.
-
To link another account, click Link Account again and repeat steps 3-4.
View your linked accounts
If you are not logged on to the portal, the GroupID Authenticate window appears. Provide the information of your master account. In GroupID portal, click Users in the left pane and select Linked Account to view your linked account.
Un-link a linked account
-
In GroupID portal, click Users in the left pane and select Linked Account.
If you are not logged on to the portal, the GroupID Authenticate window appears. Provide the logon information of your master account.
-
On the My Linked Account page, select the check box for the account you want to un-link.
-
Click Un-link Account.
See Also
Change your password
You can change the password of your identity store account provided that the administrator has granted you the required permissions. After changing it, use the new password to sign into GroupID and any other application that uses your domain account.
To do this, provide the existing password and then a new password to replace it. The new password must conform to the password policy the administrator has defined for your role in the connected identity store.
NOTE: Microsoft Entra ID users with multifactor authentication enabled cannot change their passwords in GroupID. The following message is displayed:

If the user's account is a master account, password of its child accounts also cannot be changed in GroupID.
Follow these steps to change your password:
-
In GroupID Portal, click your profile info in the top right corner and select Change Password on the My Account panel.
-
In the Select the accounts to change their password section, your account and its linked accounts, if any, are listed. Your logged in account is selected.
-
In the Change Password section, do the following steps:
-
In the Current Password box, type the password of your account you are logged on with on the portal.
-
Type your new password in the New password box. On typing the new password, the Password Acceptance box appears. The new password must meet the password complexity requirements and conform to the password complexity rules defined by the GroupID administrator for the identity store.
To meet the password complexity requirements, the password must:
-
Be at least as per the characters length defined in the password policy of the provider.
-
Contain uppercase and lowercase characters, digit or special character:
- English uppercase characters (A through Z)
- English lowercase characters (a through z)
- Base 10 digits (0 through 9)
- Special characters (for example, !, $, #, %)
-
-
Type the new password for the selected account(s) in the Confirm New Password box.
-
-
Click Change Password.
If you have reused an old password and it does not meet the Enforce password history policy of the provider, a message inform you that the password must be different from the old one.
-
On successful change password, the message,"Password has been reset successfully." is displayed.
-
Click OK.
See Also
GroupID Credential Provider
GroupID Credential Provider is a web interface for unlocking user accounts and resetting passwords.
You must install it on each client workstation to make the password reset and account unlock features available to all users. It provides links on the Windows logon screen, which route users to the web page(s) where they can unlock their accounts and reset their passwords.
Files in the download package
The Credential Provider package consists of:
| NetwrixdirectorymanagerCredentialprovider.msi | Application |
| CPSettings.xml (contains settings for Credential Provider) | File |
| MST Guide | File folder |
| 838060235bcd28bf40ef7532c50ee032.cab | Cab file |
| a35cd6c9233b6ba3da66eecaa9190436.cab | Cab file |
| fe38b2fd0d440e3c6740b626f51a22fc.cab | Cab file |
| Orca-x86_en-us.msi | Orca installer |
| readme.txt | .txt file |
See Also
Update your Direct Reports
To view the users and contacts that report directly to you, click Users on the left navigation bar and select My Direct Reports.
The page lists the direct reports for which you are the primary manager. To include the direct reports for which you are an additional manager, select the Display Additional Manager Direct Reports check box on the User Settings panel.
You can:
-
View and modify the Properties of a direct report.
The properties for a direct report are the same as the properties of a user/contact. Refer to the information for user or contact properties to manage the properties of a direct report.
-
Select a direct report and click Delete on the toolbar to delete the direct report from the directory.
-
Select a direct report and Managed By on the toolbar to get a list of all groups managed by a direct report (i.e., all groups for which the direct report is a primary or additional owner).
-
Select a direct report and click Add to Contacts on the toolbar. The portal creates the direct report's vCard and prompts you to save it on your machine. You can then use it to add the direct report's email address to your email contact list.
-
Select a direct report and click Add to Group on the toolbar to the direct report to the membership of a group. The Find Dialog Box is displayed, where you can search and select the group(s) to add the direct report as a member.
-
Select a direct report and click Send email on the toolbar to send an email to the direct report. This launches the default Windows email application for sending an email to the direct report.
-
Click Export Results on the toolbar to export the direct report list to a Microsoft Excel file.
Use the page numbers under the direct report listing to page through the records.
You can control the number of records to be displayed per page by modifying the Search results per page setting on the User Settings panel. You can modify the search results in Modify Search Directory. You can select entire directory or a domain to search active groups from.
NOTE: You cannot add or remove direct reports on this page. Use the Organization tab of your
profile to add or remove your direct reports.
You can also transfer and terminate your direct reports while you validate your Profile.
To view any changes made to your direct reports, see the My Direct Reports' History topic.
See Also
Install GroupID Credential Provider
You can install GroupID Credential Provider in one of the following ways:
- Install GroupID Credential Provider Manually
- Install GroupID Credential Provider via a Group Policy Object (GPO)
Install GroupID Credential Provider Manually
Browse to the folder where you have copied the package:
-
Click the NetwrixdirectorymanagerCredentialprovider.msi file. The wizard opens and installs GroupID Credential Provider.
-
After the installation, it asks you to restart your machine.
-
After the restart, the Windows logon screen appears as follows:
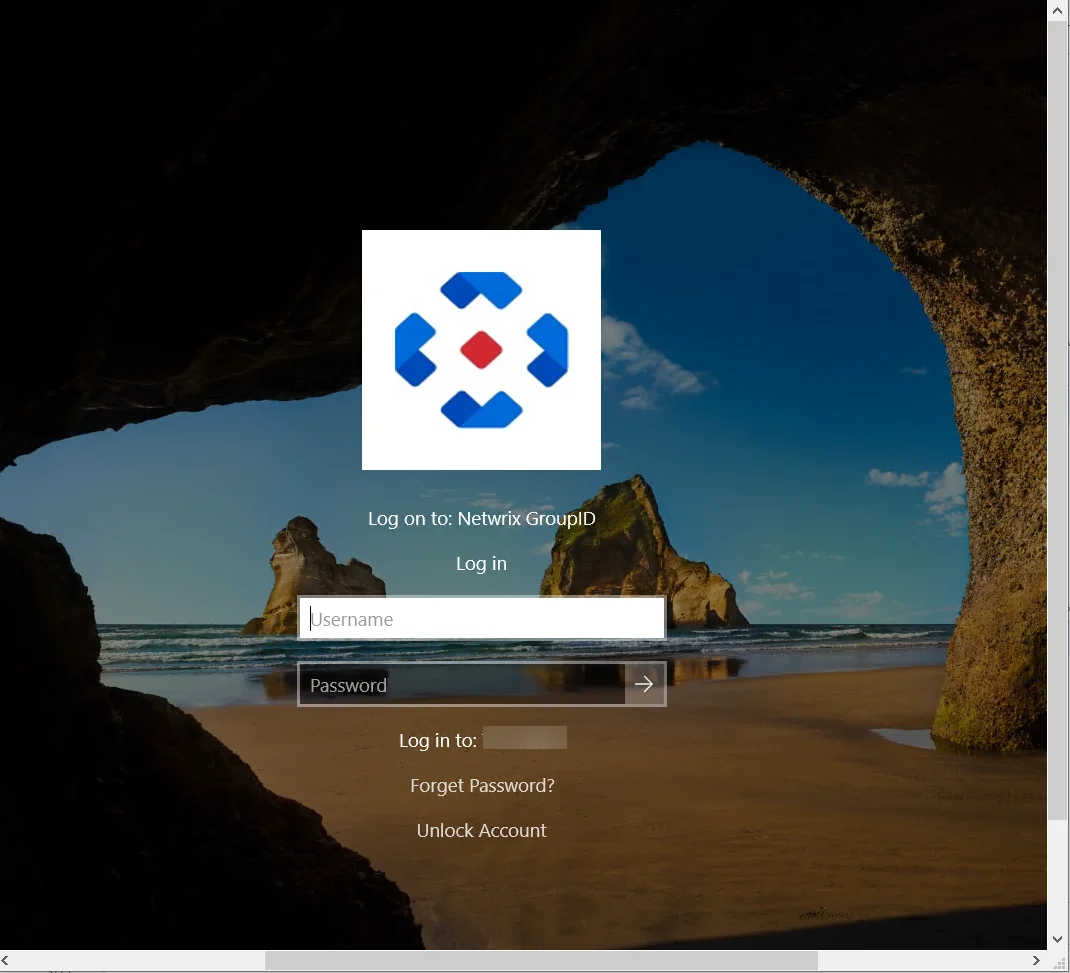
The Forgot Password and Unlock Account options are now available on the Windows logon screen. They route you to the URLs provided for these options in the CPSettings.xml file. You can modify the URLs as well as the text of these options.
Let’s have a look at the settings which are available in the CPsettings.xml file:
-
<ForgetPasswordText value="Forget Password?" />Provide the text for the ForgotPasswordText key. This text will appear on the Windows logon screen for the Forgot Password option.
-
<UnlockAccountText value="Unlock Account" />Provide the text for the UnlockAccountText key. This text will appear on the Windows logon screen for Unlock Account option.
-
<ResetMyPasswordUrl value="https://MachineName:port/Portalname" />Provide the URL to which you want to redirect the user to reset his/her forgotten password.
- For GroupID 10:
https://MachineName:port/portalname - For GroupID 11:
https://MachineName:port/portalname/Home/PasswordReset
- For GroupID 10:
-
-
<UnlockMyAccountUrl value="https://MachineName:port/Portalname" />Provide the URL to which you want to redirect the user to unlock his/her locked account.
- For GroupID 10:
https://MachineName:port/Portalname - For GroupID 11:
https://MachineName:port/portalname/Home/UnlockAccount
- For GroupID 10:
-
<CPTitle value="Log on to: Netwrix GroupID" />Provide the text for the CPTitle key. This text will appear as title under the Netwrix logo on the Windows logon screen.
Install GroupID Credential Provider via a Group Policy Object (GPO)
Instead of installing Credential Provider manually on each individual client workstation, you can distribute it for automatic installation using a GPO, for substantial time savings (especially with larger networks). The GPO can be defined for an organizational unit or applied on the entire domain. Credential Provider is installed automatically at the next Windows startup.
Installing Credential Provider is a two-step process:
Install Orca
Before Credential Provider’s installation via GPO, Orca software is to be installed:
-
Browse to the folder where you have copied the Credential Provider package.
-
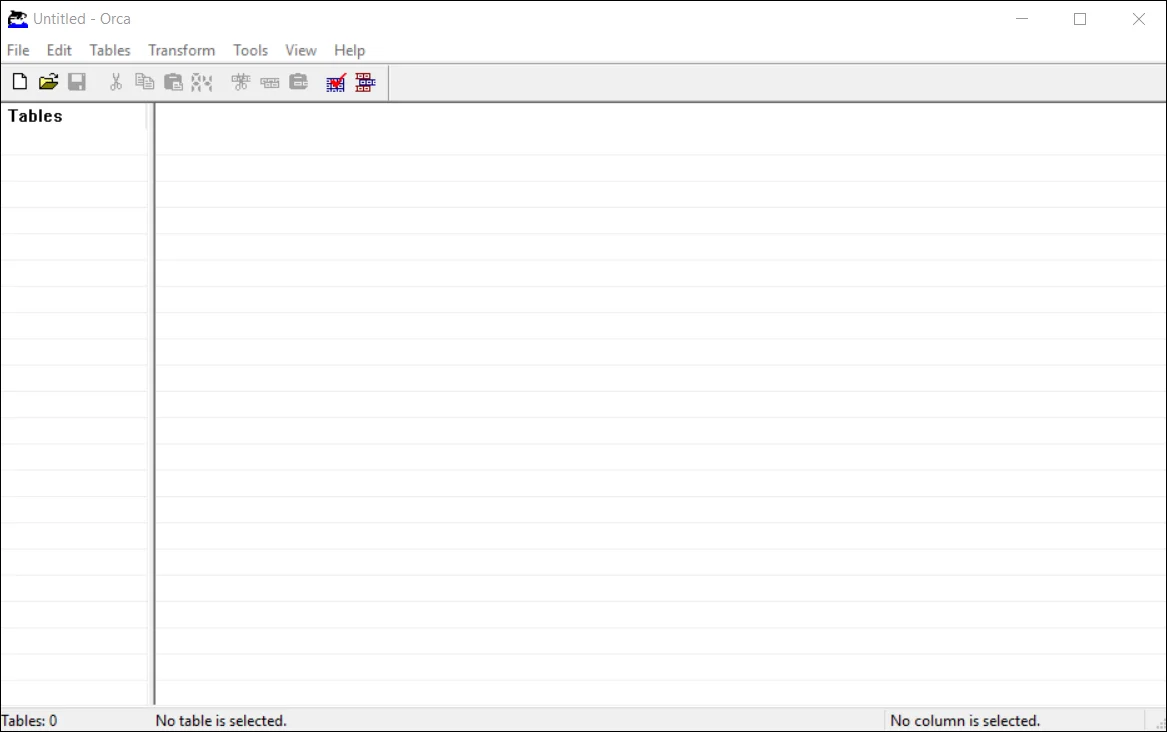
Go to the MST Guide folder and run the Orca-x86_en-us.msi application. The Orca console opens:
-
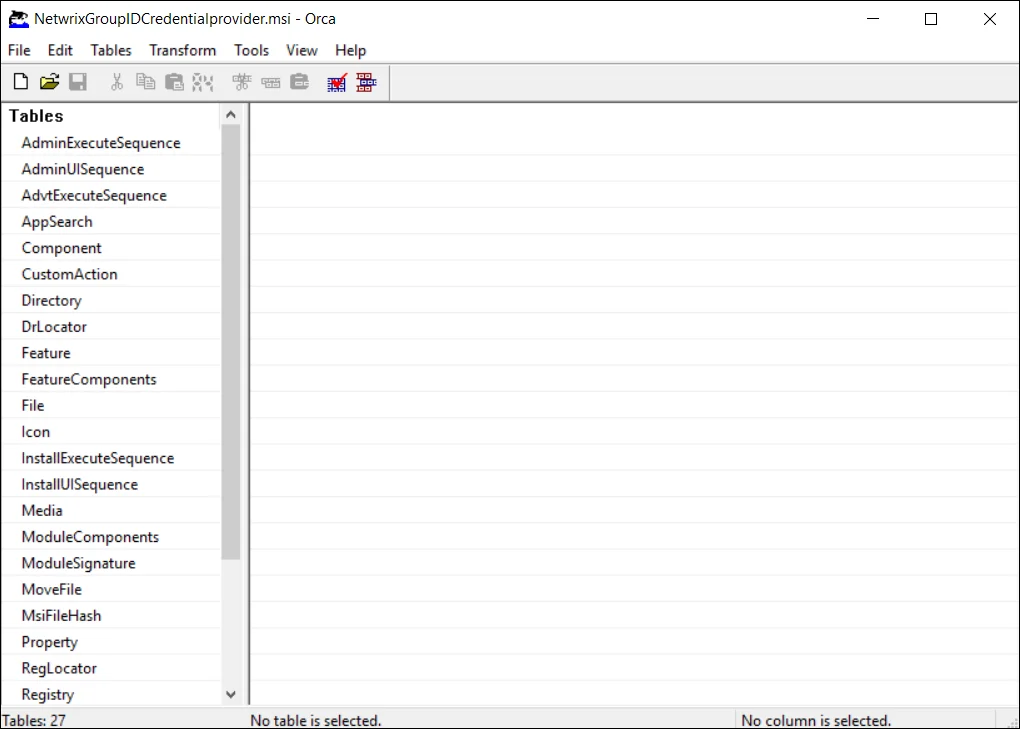
In Orca, click File > Open. Browse to the Netwrix GroupID Credential Provider folder and load the NetwrixdirectorymanagerCredentialprovider.msi in Orca.
-
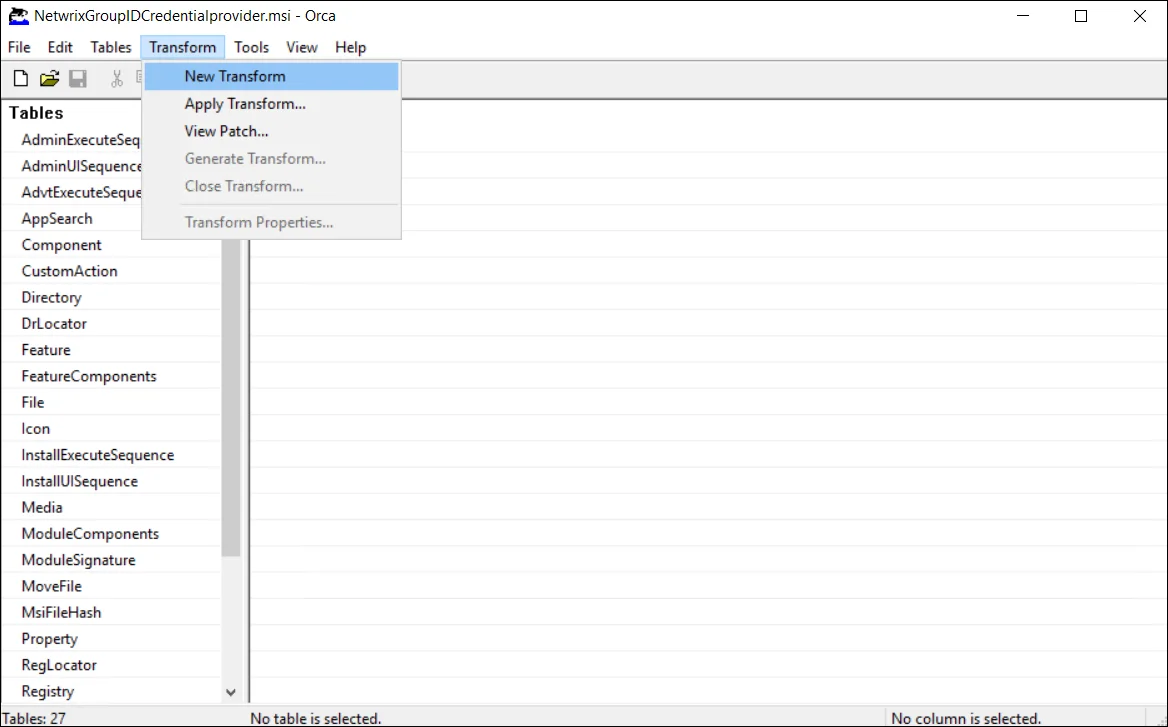
From the menu, select Transform > New Transform:
-
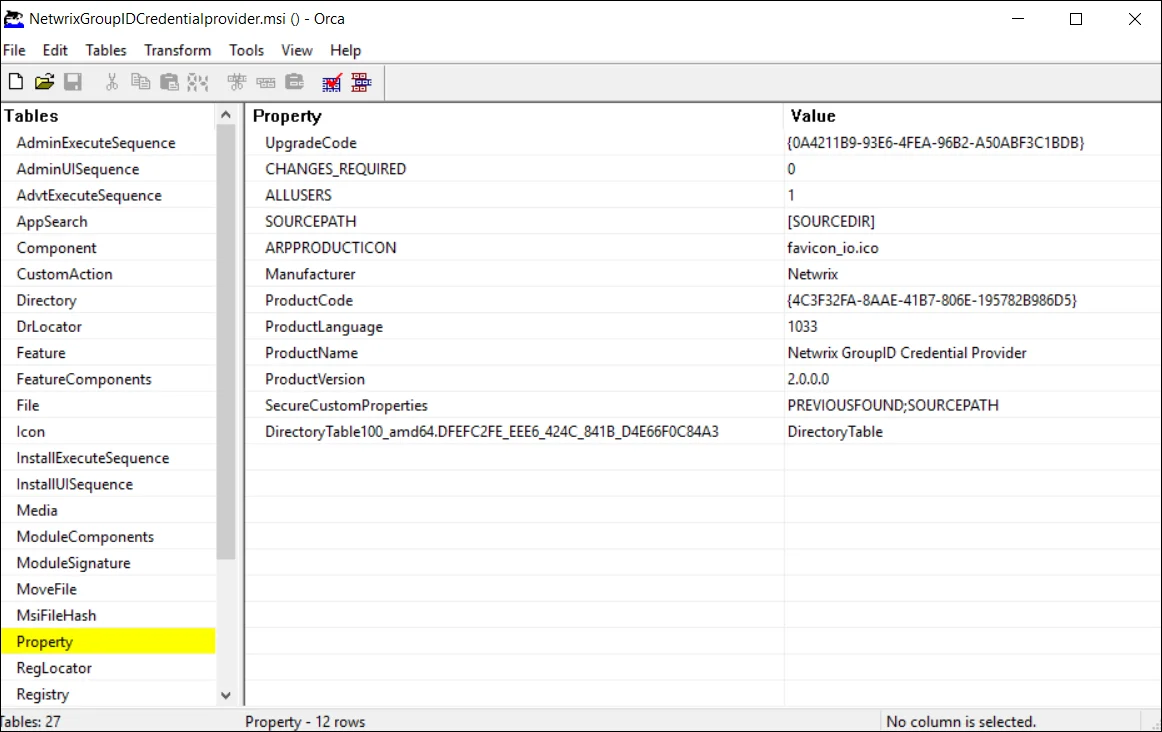
Click Property in the left pane, list of the properties are displayed in the Property main window:
-
On your machine, create a new folder and copy the following files to it:
- CPsettings.xml
- NetwrixdirectorymanagerCredentialprovider.msi
-
Share the folder with the Everyone group with Read permission.
-
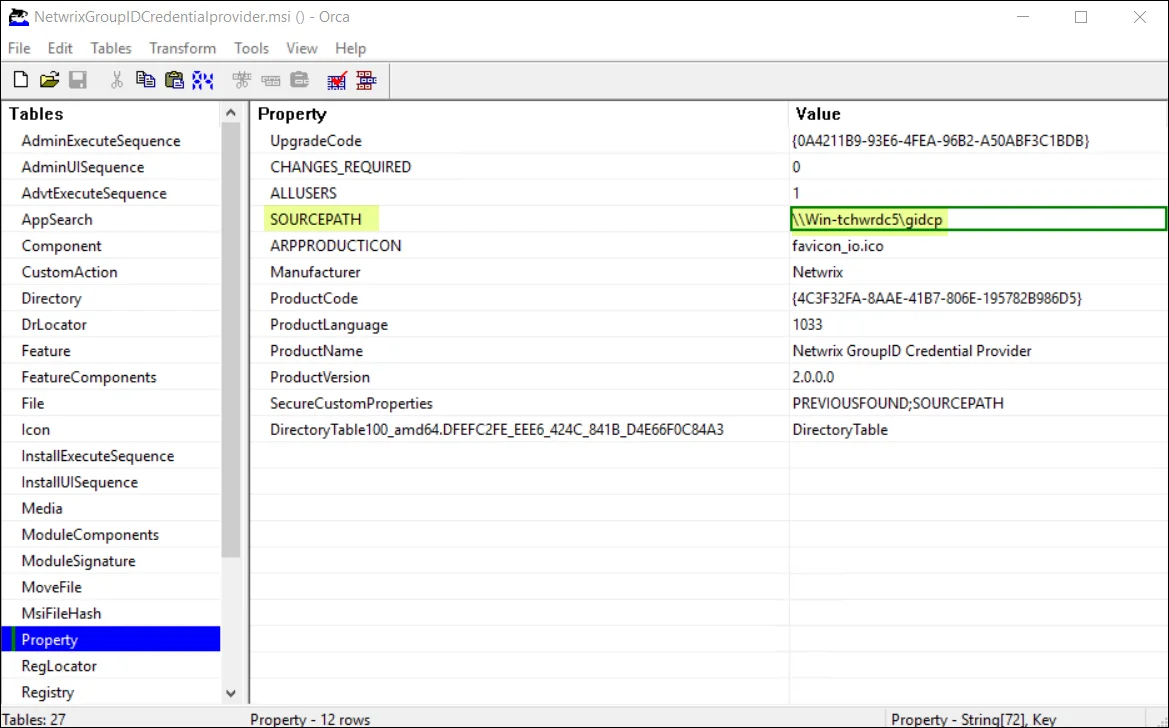
Provide the path of this newly created folder in the SOURCEPATH box.
-
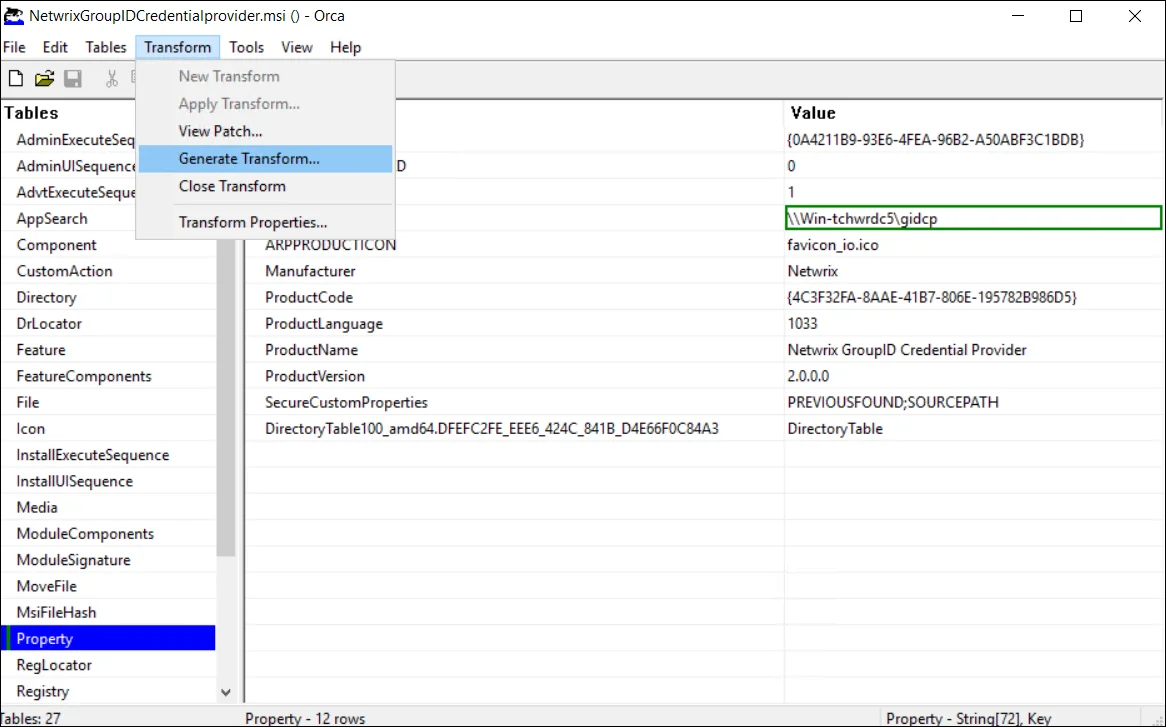
From the menu, select Transform > Generate Transform:
-
Type a filename for the generated .mst file and save it into the shared folder you just created.
-
Close Orca.
Deploy Credential Provider via a GPO
Having Orca successfully installed, follow these steps to deploy Credential Provider via a GPO.
-
Launch Group Policy Management console by typing gpmc.msc in the Run box and clicking OK. The Group Policy Management Editor opens.
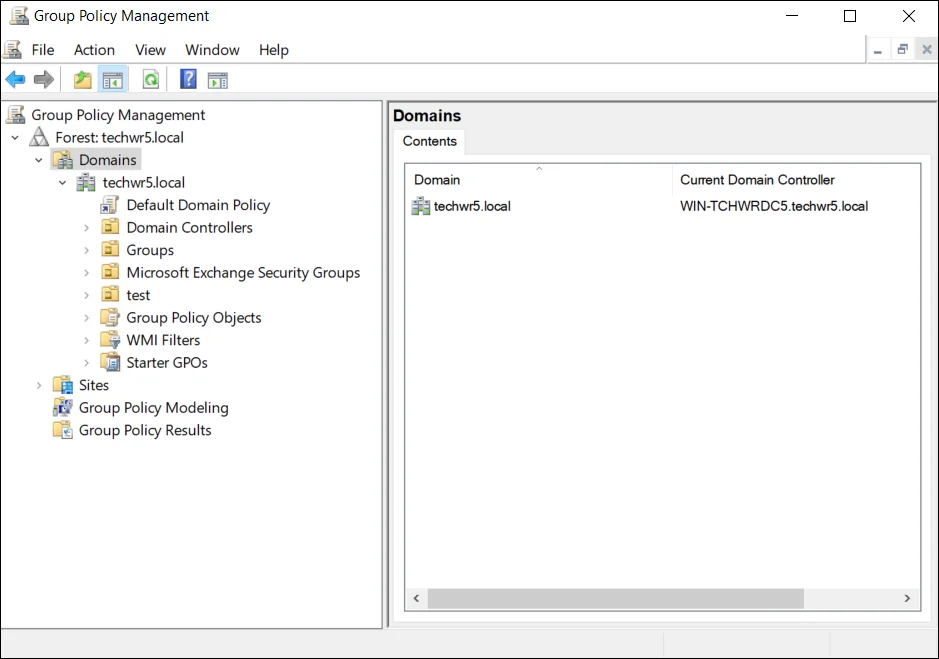
NOTE: Group Policy Management console is available if the Group Policy Management feature has been installed.
-
Right-click the domain or organizational unit for the computers that you want the Credential Provider installed on. Select Create a GPO in this domain, and link it here...:

Or
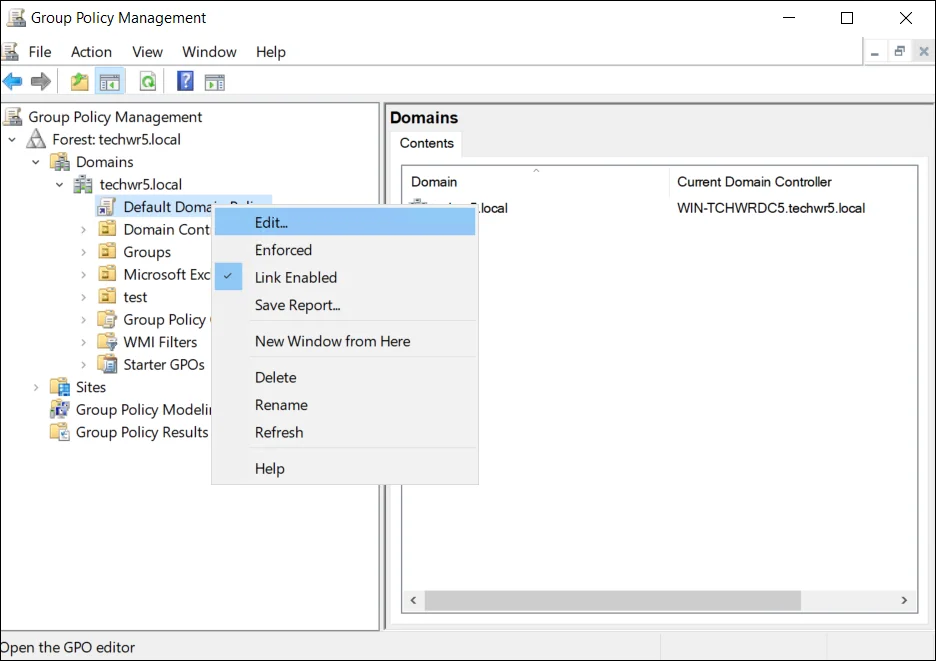
Right-click the Select Default Domain Policy and select Edit:
-
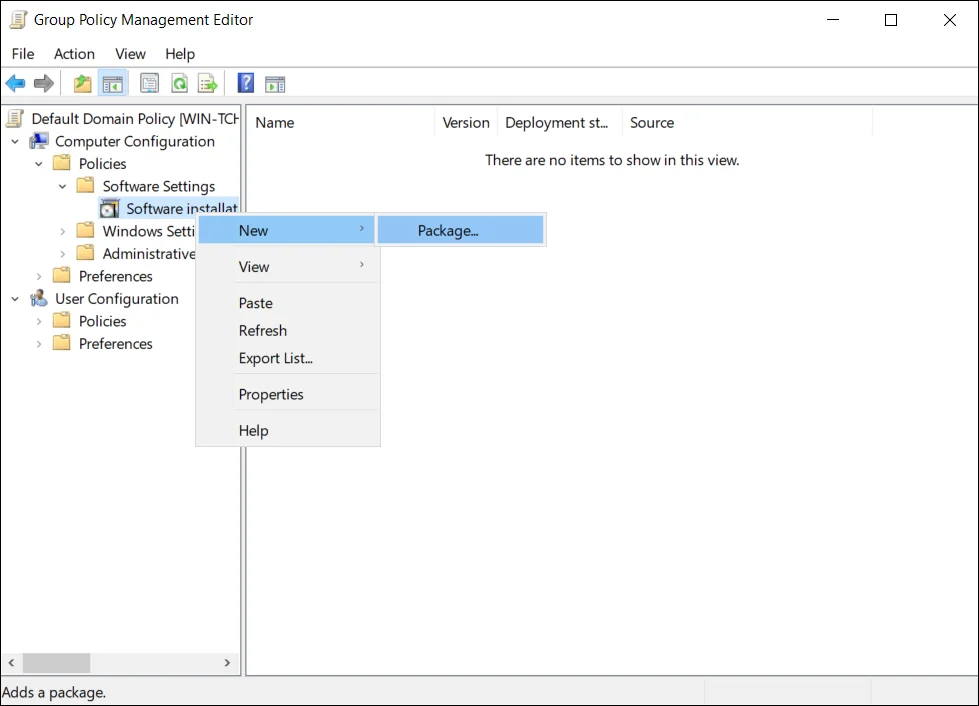
In the Group Policy Management Editor, click Computer Configuration > Policies > Software Settings > Software installation > New > Package.
NOTE: This documentation describes steps for editing the default policy.
-
Browse to the shared folder. The folder must have the following files in it:
- CPSettings.xml
- Netwrixdirectorymanagercredentialprovider.msi
- .mst file
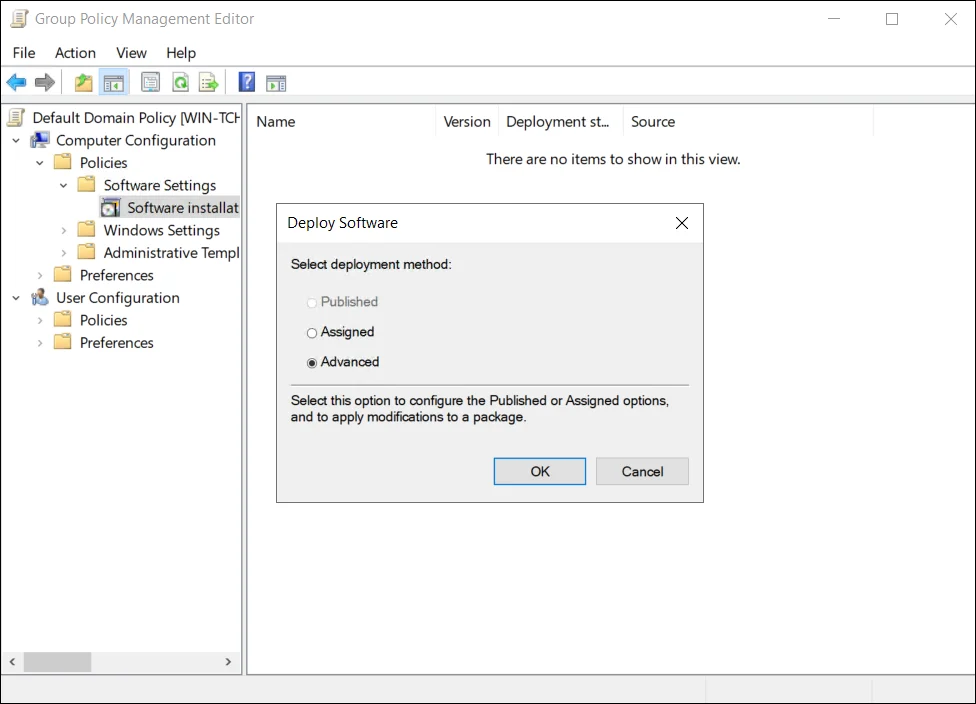
Select the Netwrixdirectorymanagercredentialprovider.msi and click Ok.
-
Select Advanced and click Ok. The following window opens:

-
Select the Modifications tab. Click Add.
-
Browse to the shared folder where you saved the generated .mst file. Select that file and click Ok.
-
Close the Group Policy Management Editor.
The GroupID Credential provider is deployed on your machine via the default domain policy.
Run the credential provider
- Restart the machine
or
Run Command Prompt as administrator and type the following command in the cmd window:
gpupdate /force
Run the credential provider on client machines
The modified domain policy will be installed on the client machines, which are in the scope of the Group Policy Object, upon their next restart. The Windows logon screen appear as follows:
See Also
Organizational Hierarchy
You can view the organizational hierarchy for a user. it shows the direct reports of the reference user recursively, starting from the immediate direct reports of the user and moving downwards till the nth level. This hierarchy is presented in graphical form, creating a kind of an organogram that displays the email address, photo, and other attributes of each user.
By default, the organizational hierarchy chart is displayed for the logged-in user. However, the user can view it for any user in the organization.
What do you want to do?
View the hierarchy structure for a user
-
In GroupID portal, go to My Profile or search for the user whose organizational hierarchy you want to view on the Directory Search dialog box.
-
On the toolbar tab of the user profile's page, select Organizational Hierarchy. The Organizational Hierarchy page displays the organizational hierarchy chart for the logged-in user.
-
To view the chart for another user, click the ellipsis button next to Select User.
-
On the Find Dialog Box, search and select the required user and click OK. This displays the organizational hierarchy chart for the selected user.
-
You can:
- Click a user’s name to view his or her profile.
- Click a user’s email address to send an email to him or her.
- Use the Export button to export the chart to a PNG file.
See Also
Manage Users
Using GroupID portal, you can perform the following actions:
- Update your Direct Reports
- Validate your profile
- Reset your password
- Change your password
- Unlock your accounts
See Also
Password Management
Complex passwords keep network infrastructure secure but there is a real cost to that security. Users forget their complex passwords. They can be given two options: either they call helpdesk to reset their password at an exorbitant cost or have a self-service tool. GroupID can serve both these functions. Using it:
-
Helpdesk: can reset passwords and unlock accounts for users after authentication. See the Reset Passwords topic for detailed information.
-
Users: can reset their own passwords and their own accounts after passing multifactor authentication. They can perform these password related functions through various mediums, such as:
-
GroupID portal: Using it, they can:
- reset their forgotten passwords. See the Reset Passwords topic for further information on how to reset forgotten passwords.
- change their account passwords. See the Change your password topic for further information on how to change their account passwords.
- reset their own password or password of any other user. See the Reset your password topic for further information.
- unlock their identity store account. See the Unlock your accounts topic for detailed information on how to unlock their identity store accounts.
-
GroupID app: Using it, they can:
- change their identity store account password
- reset their identity store account password
- unlock their identity store account
-
Client Software and Web Access
The client software to install on user workstations is called GroupID Credential Provider and available for distribution using various IT enabled distribution methods such as group policy and Microsoft System Center Configuration Manager (SCCM). See the Install GroupID Credential Provider topic for additional information.
The distributed client enables the Forgot Password? and Unlock Account links on the Windows logon screen of users’ workstations. Users, who forget their passwords or are locked out, can easily access these functions from their machine. There is also an option for web access for users if they are on a remote computer.
-
Passwordless Authentication with QR Code
Opt for a hassle-free experience by signing into GroupID through QR code as an alternative to entering a username and password. See the With QR Code section in the Access Admin Center topic.
-
Reset your password
GroupID Portal enables you to reset password for user accounts. You can reset your identity store password, and even the account passwords of other users in the connected identity store, provided you have the rights.
The new password must meet the complexity requirements specified for the identity store.
-
Select the account from the list.
-
Search for the user whose password you need to reset on the Directory Search dialog box.
-
On the toolbars tab, select Reset Password enter the information for the given fields:
-
Identity Store - Shows the name of the identity store the portal is connected to.
-
User name - Shows your logged-on user name.
If you have the rights to reset the passwords for other user accounts, then type the login name of a user.
-
New password and Confirm password - Type a new password for the specified user.
-
-
Click Save.
See Also
Uninstall GroupID Credential Provider
You can uninstall GroupID Credential Provider using one of the following:
-
Windows Control Panel: If you have installed GroupID Credential Provider manually, you can uninstall it using Windows Control Panel.
-
Group Policy Object: If you have installed the GroupID Credential Provider via Group Policy Object you can uninstall it using the following steps:
- Open Group Policy Management by typing gpmc.msc in the Run box and clicking OK.
- Right-click the required GPO under the domain or organizational unit that contains the GPO distributing GroupID Credential Provider and click Edit. The Group Policy Management Editor opens.
- Click Computer Configurations > Policies > Software Settings > Software Installation.
- Right-click the GroupID Credential Provider package, point to All Tasks and click Remove.
- In the Remove Software dialog box, select Immediately uninstall the software from users and computers and click OK.
- Click Close to close the Group Policy Object Editor.
- When a client workstation restarts, the GPO, now without the Credential Provider object, is applied on it. This removes the installed GroupID Credential Provider from all client workstations. Once it is removed from the client workstation, the user must restart it again to remove the links from the Windows logon screen.
See Also
Unlock your accounts
With the GroupID portal, you can unlock your identity store account yourself, without having to contact the administrator or wait.
Your account can get locked due to:
-
Wrong password attempts while logging on to the portal
- the consecutive number of times a user can provide the wrong password (Account lockout threshold), after which the user's identity store account gets locked.
- the duration to lock the user account (Account lockout duration).
-
Invalid response to authentication type(s)
The GroupID Administrator can specify Password Policy for the identity store, which includes:
- the consecutive number of times a role member can provide a wrong value for any authentication type (Failed Authentication Attempts Threshold).
- the duration to lock the user account (Account Lockout duration).
With authentication disabled, you cannot authenticate yourself on the GroupID portal; hence, you cannot unlock your identity store accounts or reset your passwords until the account is unlocked.
What do you want to do?
- Unlock Identity Store User Accounts after Wrong Password Attempts (Enrolled Users)
- Unlock Identity Store User Accounts after Wrong Password Attempts (Unenrolled Users)
- Unlock Identity Store User Accounts after Providing Wrong Response to Authentication Types (Enrolled and Unenrolled Users)
Unlock identity store user accounts (after wrong password attempts) - enrolled users
While logging on GroupID portal you provide wrong password on the GroupID Authenticate window for the specified number of times, the following message appears:

Now you cannot login to portal unless you unlock your identity store account. Follow the instructions given below to unlock your account:
-
On the Welcome to GroupID page of GroupID portal, click Account Locked? card.
-
Select the identity store where your account exists from the identity store drop down list.
-
Type your identity store account name in the Username box.
-
Enter captcha in the Captcha box.
-
Click Unlock Account. You will be directed to a page where the authentication type(s) you enrolled your account with are listed.
To get authenticated through the required authentication type(s), click the relevant option below:
-
Security Questions
- On the Multifactor Authentication window, select the Security Questions check box and click Continue.
- The page lists the security questions you enrolled your account with. Provide answers to these questions.
- Click Verify and Continue.
-
Mobile Verification
- On the Multifactor Authentication window, select the Mobile Verification check box and click Continue.
- Type the last four digits of your mobile number and click Send Code.
- In the displayed box, type the 5 digit access code sent on your mobile phone.
- Click Verify and Continue.
If you have not received a code, click Send Again and then enter the received code in the given box.
-
Email Verification
- On the Multifactor Authentication window, select the Email check box and click Continue.
- Complete your email address and click Send Code.
- In the displayed box, type the 5 digits access code sent to the provided email address.
- Click Verify and Continue.
If you have not received a code, click Send Again and then enter the received code in the given box.
-
Authenticator
-
On the Multifactor Authentication window, select the Authenticator check box and click Continue.
-
Launch the authenticator app on your smart phone.
-
The app displays a 6-digit code. Enter that code in the Security Code box on the Authenticator page.
The app generates a new code every 30 seconds.
-
Click Verify and Continue.
-
-
Link Account
-
On the Multifactor Authentication window, select the Link Account check box and click Continue.
-
On the Link Account tab, select a link account you want to use for resetting the password of your account.
This tab lists the link account(s) that have the Allow Authentication option enabled.
-
Type the username and password of the selected linked account in the respective boxes.
-
Click Next.
-
-
YubiKey
Insert the YubiKey device in the USB slot of your computer.
-
On the Multifactor Authentication window, select the YubiKey check box and click Continue.
-
Click your YubiKey device name. The portal directs you to tap on the device.
On tapping, you are authenticated.
-
-
Windows Hello
-
On the Multifactor Authentication window, click the Windows Hello check box and click Continue.
-
Click Authenticate and Continue.
Authenticate with the provided biometric information or with the PIN given in Windows Hello sign-in options.
-
-
-
Click Unlock Account.
-
A message that the account has been unlocked successfully is displayed.
You can now log in to GroupID portal with your account and perform the required function.
Unlock identity store user accounts (after wrong password attempts) - unenrolled users
On entering the wrong password on the GroupID Authenticate window for the specified number of times, your account gets locked. You cannot login to Password Center user portal unless you unlock your identity store account. Follow the instructions given below to unlock your account:
-
On the Welcome to GroupID page of GroupID portal, click Unlock my account card.
-
Select the identity store where your account exists from the identity store drop down list.
-
Type your identity store account name in the user name box.
-
Click Unlock Account.
You will be directed to a page where the Second Way Authentication type options are listed as the administrator has configured for your role.
To get authenticated through the defined authentication type(s) for your role, click the relevant option below:
-
Security Question
- On the Second Way Authentication window, select the Security Question check box and click Continue.
- Provide answer to the question the administrator has set for you.
- Click Verify and Continue
-
Mobile Verification
-
On the Second Way Authentication window, select the Mobile Verification check box and click Continue.
-
Type in the last four digit of your mobile number.
-
Click Send Code.
-
Type the 5 digits access code sent on your mobile phone.
-
Click Verify and Continue.
If you have not received a code, click Send Again and then enter the received code in the given box.
-
-
Email Verification
-
On the Second Way Authentication window, select the Email Verification check box and click Continue.
-
Complete your email address and click Send Code.
-
In the displayed box, type the 5 digits access code sent to the provided email address.
-
Click Verify and Continue.
If you have not received a code, click Send Again and then enter the received code in the given box.
-
-
-
You will be asked to enroll your account as per the Multifactor Authentication policy defined for your role.
On successful enrollment, you are redirected to the Unlock My Account page. Your account is listed on this page with the check box selected for it.
-
Click Unlock Account.
A message that the account has been unlocked successfully is displayed.
-
You can now log in to portal with your account and perform the required function.
Unlock identity store user accounts (after providing wrong response to authentication types) - enrolled and unenrolled users
While authenticating on the portal, if enrolled or unenrolled users provide a wrong answer for the specified number of times, their account gets locked and the following message is displayed:

This type of account unlock can be resolved in one of the following two ways:
-
While logging on to the portal, you provide the correct password for your account.
OR
-
You wait for the specified duration, after which the account will be unlocked automatically.
NOTE: Helpdesk members cannot unlock accounts that get locked out on providing a wrong response to the authentication type(s).
See Also
Validate your profile
The profile validation process in GroupID is designed to ensure the accuracy of users' information in the directory.
When the administrator applies profile validation to a group in an identity store, all group members must verify and update their profile information in the directory using the GroupID portal. The administrator also specifies a profile validation life cycle period (for example, 90 days), so that each member must validate his/her profile once during each 90-day cycle.
While validating the profile, a user can:
- Update his or her directory profile.
- Specify or change his or her primary manager.
- Transfer his or her direct reports to another manager.
- Terminate his or her direct reports.
Periodically, users receive reminder emails to validate their profile information. GroupID expires users who ignore these reminders and do not validate their profiles within the required time. Expired users get disabled in the directory.
Such users can request the administrator or Helpdesk to unlock their accounts temporarily and grant an extension period. If they do not validate their profile information within that extension period either, GroupID expires them again and their managers are informed by email. To reactivate these accounts, users' managers must send a request to the administrator or Helpdesk. The administrator or Helpdesk user can extend the profile validation period on the Disabled Users page of the portal.
NOTE: For notifications to be sent, an SMTP server must be configured for the identity store.
Profile Validation for New Users
Apart from the regular profile validation life cycle, the administrator can set a separate profile validation period for new users by specifying a certain number of days, say 30.
All new users receive a welcome email and a profile validation request, so that users must validate their profiles for the first time within the given number of days. Once they validate their profiles, the regular profile validation life cycle settings would apply.
The User Life Cycle job
The profile validation feature in GroupID is monitored by the User Life Cycle job. This is a scheduled job that runs on a set frequency and does the following:
- Monitors the profile validation dates of users.
- Generates reminder emails.
- Expires users who do not validate their profiles within the given period.
What do you want to do?
- Validate your profile
Validate your profile
If profile validation applies to you, then you will see the following message displayed on the My Account panel:

The message displays the number of days left to validate your profile.
-
The My Profile card on the dashboard indicates your profile validation status. Click it to launch the user properties page.
-
The toolbar on user properties page will display Validate your profile option. Click on it to launch the profile validation window.
-
Provide or update information in the fields displayed on this window.
-
Your direct reports, if any, are listed in the My Direct Reports area. Select one of these options for each of your direct reports:
- Works for me
- Transfer
- Terminate
-
After verifying and updating the information, click the Validate Now button. Your profile is validated and a message is displayed that your changes have been saved.
NOTE: You can also manage your direct reports and managers on the Organization tab of the my profile window.
Change your primary manager
The Manager field displays the name of your primary manager (if you have one); else it is blank.
To add or change your primary manager, click the ellipsis button next to the field. This launches the Find Dialog Box, where you can search and select your primary manager.
When you change your primary manager (Manager A), then Manager A is notified by email to accept or reject the request. If Manager A accepts, your manager is changed. If Manager A rejects the request, you remain with Manager A and a notification is sent to you and Manager A.
NOTE: This is the default flow of the 'Workflow to Change Manager' workflow. If the administrator disables the workflow or changes the approver, the flow changes accordingly. See Requests.
Transfer your direct report
When you transfer a direct report, the direct report is notified by email to accept or reject the transfer. If the direct report accepts the transfer, he or she has to select another primary manager and validate his or her profile. If the direct report rejects the transfer, he or she is transferred back to the old manager, i.e., you.
NOTE: This is the default flow of the 'Workflow to Transfer a User' workflow, with the direct report set as the workflow approver. If the administrator disables the workflow or changes the approver, the flow changes accordingly. See Requests.
Terminate your direct report
When you terminate a direct report, it takes effect immediately if the 'Workflow to Terminate a User' workflow is disabled. If enabled, a request is sent to the approver. If the approver accepts it, the direct report is terminated and if the approver rejects it, the direct report remains with the manager, i.e., you.
See Also
Manage your profile
To view and update your profile information in the directory, click your profile info in the top right corner and select See full profile.
The profile page has the same tabs as the user properties page. Refer to the information for User Properties to manage your profile.
User profile validation
If profile validation applies to you, then you must verify and update your profile information in the directory using the GroupID portal.
Profile validation is not a one-time process; rather, the administrator specifies a profile validation life cycle period (for example, 90 days), which implies that you must validate your profile once during each 90-day cycle.
On your profile page, your profile validation status is displayed next to your name.
-
The status, Verified User, indicates that your profile is validated.
-
The status, Verification Pending, indicates that you must validate your profile.
Click Validate Your Profile on the toolbar. The Validate Profile Properties window is displayed, where you can validate your profile.
-
The status, Expired User, indicates that a user has expired because he or she did not validate his or her profile within the required duration. An expired user is disabled in the directory.
See Also