Dashboard
After signing into the GroupID Portal, from the left pane select Synchronize to land on the dashboard.
The interface has intuitive navigation options:
- Quick Search
- Top Right Options
- Menu Pane
- Dashboard
Quick Search
Look on the top of the page for Search. Use it to locate and display information for the jobs and job templates.
Top Right Options
The top right corner of the application displays:
| Icon | Description |
|---|---|
| Background jobs icon | View the status of jobs and job collections that are running in the background. It displays: - Jobs - Completed Jobs: Jobs that have been completed. - In Progress Jobs: Jobs that are still in running. - Job Collections - Completed Jobs: Job collections that have been completed. - In Progress Jobs: Job collections that are still in running. |
| Help icon | Launch the synchronize portal help. |
| User profile icon | Displays your profile picture with your name and the identity store that GroupID Portal is connected to. Click it to launch the menu that displays the option to Sign Out of the portal. |
Menu Pane
Look on the left side of the page for the navigation pane, which lists links to:
- Create New (Create a Job and Create a Job Collection )
- Dashboard
- Manage a Job
- Manage a Job Collection
- Job Templates
- Job Collection Template
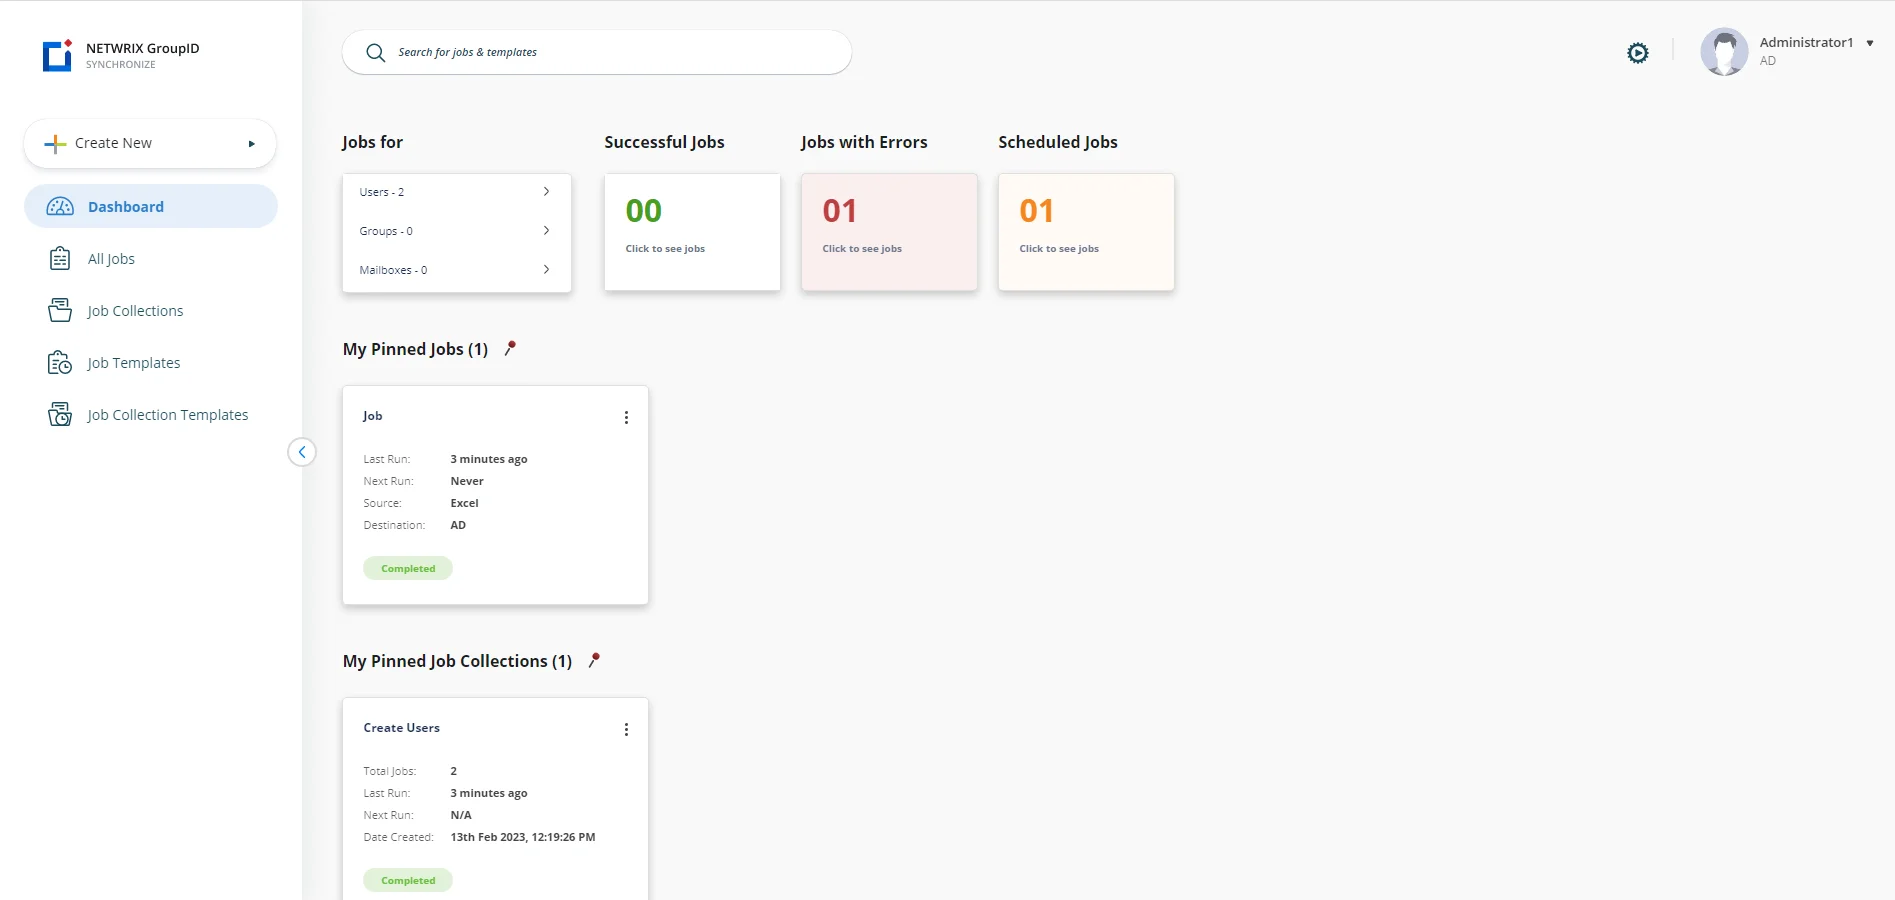
Dashboard
The dashboard comprises of the following cards:
| Cards | Description |
|---|---|
| Jobs For | Displays the jobs based on their object types. |
| Successful Jobs | Displays the jobs that have been completed successfully. |
| Jobs with Errors | Displays the jobs that are completed with errors. |
| Scheduled Jobs | Displays jobs that will run based on the time set for them. |
| My Pinned Jobs | Displays frequently used jobs. |
| Pinned Job Collections | Displays frequently used job collections. |
See Also
Messaging System
GroupID enables users to configure messaging systems to efficiently create or edit mail enabled objects through a Synchronize job. Users can sync or deprovision subscriptions from the following messaging systems:
See Also
Manage Jobs
Synchronize allows its users to create, manage, and schedule jobs and job collections. Synchronize simplifies this process by providing an efficient system to manage jobs and job collections.
See Also
- Manage a Job
- Job Templates
- Manage a Job Collection
- Job Collection Template
- Schedule a Job / Job Collection
Synchronize
GroupID Synchronize is a web-based application that can be accessed using the GroupID portal. The application is a bi-directional synchronization engine for transferring data from one data source to another. The data sources may include directory servers, databases or files. Utilizing a very intuitive GUI, you can create Synchronize jobs to provision, de-provision or synchronize multiple data sources.
The Synchronize portal is also capable of applying transformations to the data being transferred. This allows you to convert data after retrieving it from the source and before it gets saved at the destination.
Prerequisites for Synchronize
Using GroupID, you can create identity stores for several identity providers (such as Active Directory and Microsoft Entra ID) as well as create data sources for providers such as files and databases. GroupID Synchronize uses user-defined identity stores (as source and destination) built on databases, files and other applications such as Oracle, SQL and so on. To view the list of supported Synchronize providers, see the Synchronize Providers topic.
The following must be defined before you can use Synchronize:
-
Identity Store: Identity stores must be created in Admin Center for sources and destinations providers. For working with Synchronize, create a Synchronize based identity store for creating jobs and job collections.
Synchronize data for AD and Microsoft Entra ID is directly saved to Elasticsearch and Replication is not required.
-
Data sources: You need to add the data sources in Admin Center like Microsoft Excel, Text, Oracle, etc for creating job and job collections.
-
Permissions: For performing Synchronize operations, the logged-in user must have Synchronize specific permissions. These permissions enable the user to create, edit and run jobs or job collections as per the defined Synchronize policy.
-
Policies: Using the Synchronize policy, you can allow or disallow a provider to be used as a source or destination. You can choose the object types that can be created or synced at the destination using a Synchronize job. For each object type in an identity store and data source, specify the attributes that will be available for mapping the source and destination fields in a Synchronize job.
-
History: Synchronize can maintain a complete track of actions performed in a directory through a Synchronize job, provided that an identity store for the destination provider has been defined in GroupID Admin Center and history tracking is enabled for that identity store. The actions to be tracked for Synchronize are also specified in history settings of that identity store.
-
Workflows: Workflow requests can be enabled to run job or job collections. A workflow needs to be created in the Admin Center and an approver must be assigned for that workflow. Each time if a user runs a synchronize job, the job runs only when the approver approves the request. If they deny, the job will not run.
-
Notifications: An SMTP server must be configured for the destination's identity store. Using that SMTP server email notification can be sent to designated recipients for different actions performed while executing a Synchronize job.
-
Messaging Provider: A messaging provider must be configured for the destination's identity store so that mail-enabled objects can be created through Synchronize job in the destination.
Dashboard
Synchronize dashboard displays performance widgets and cards displaying the data about your jobs and job collections. On the navigation pane on the left side, you will see the following tabs:
- Create New (Create a Job and Create a Job Collection )
- Dashboard
- Manage a Job
- Manage a Job Collection
- Job Templates
- Job Collection Template
See Also
Synchronize Providers
You can create identity stores for several identity providers (such as Active Directory and Microsoft Entra ID) as well as create data sources for providers such as files and databases. These identity stores and data sources can be used as source and destination in Synchronize jobs. Synchronize transfers data from one data source to another.
A brief description of about each supported data provider is given below.
Identity Stores
Identity store must be created for these providers. Identity store providers can be used as both source and destination.
-
Microsoft Active Directory
The Active Directory provider can serve as both a source and destination provider. This provider supports dynamic schema detection.
-
Microsoft Entra ID
Microsoft Entra ID is a cloud computing platform operated by Microsoft. It can also be used as source and destination provider.
-
Generic LDAP version 3.0
Use the Generic LDAP Version 3.0 provider to connect to any LDAP version 3-compliant directory server. This provider does not support dynamic schema detection. The schema included for this provider mostly contains commonly used fields. You can add fields to the existing schema.
Synchronize supports many LDAP-compliant directory servers directly and provides specialized providers for connecting with them. These directories include:
- Active Directory
- Lotus Notes
- Novell Directory Services
- Sun ONE Directory Server
When connecting with any of these, it is recommended that you use their specific provider instead of the generic LDAP provider. The use of specialized providers results in performance gains since they eliminate the extra steps involved in connecting with generic providers.
-
Google Workspace
Use Google Workspace to connect to Google Workspace plans. You can use it as a source and destination provider.
See the Identity Stores topic for additional information on identity stores.
Data Sources
External data sources must be created first in Data Sources tab in Admin Center.
-
Microsoft Access
Use the Access provider to connect to a Microsoft Access (.mdb | .accdb) database. Microsoft Access (.mdb | .accdb) supports automatic schema detection.
For communicating with this provider, Synchronize requires data connectivity components to be installed on your machine. You can download a compatible version of the required components from either of the following links:
- Microsoft Access Database Engine 2010 Redistributable
- 2007 Office System Driver: Data Connectivity Components
-
Microsoft Excel
Use Microsoft Excel (*.xls | xlsx) as a source and destination provider. You can use the Excel provider as destination to export source data to a new Excel worksheet, where the schema of the new Excel worksheet is automatically built according to fields that you select from the source to map to the destination.
To use Microsoft Excel as provider, you must install these software components on your machine:
- Microsoft Office 2007/2010
Data connectivity components found at these sites:
- Microsoft Access Database Engine 2010 Redistributable
- 2007 Office System Driver: Data Connectivity Components
You may encounter the following issues while using Excel provider in a Synchronize job:
- In case of Excel as destination (with Replace file-discard existing content option selected on the Destination Provider page of the Job wizard), if any sheet name of the Excel file is of two or less character the Synchronize job corrupts all the sheets in that Excel file.
- In case of Excel as destination (with Delete option selected on the Create Object page of the Job wizard), If the Excel file schema is of more than 127 columns the job fails.
-
Oracle
You can use the Oracle provider as both a source and destination provider. This provider supports dynamic schema detection.
The Oracle client must be installed to use this provider (you must reboot your computer after installing the Oracle client.
-
ODBC
You can connect the ODBC provider to any ODBC-compatible data source including databases, directories, and files.
-
Microsoft SQL Server
Use the SQL Server provider to connect to Microsoft SQL Server 2005, 2008, 2008 R2 and 2012. It can be selected both as a source and destination. This provider supports dynamic schema detection.
To connect with Microsoft SQL Server versions 6.5 and 7.0, use the ODBC provider.
-
Text
Use the Microsoft Text Driver (*.txt; *.csv) to connect to comma-separated value (CSV) text files or tab-separated value (TSV) text files. This provider supports automatic schema detection if a header row is included in the file.
See the Data Sources topic for additional information on Data Sources.
See Also
Transform
During the creation of synchronize jobs, you can apply transformation scripts to manipulate source data before saving it to the destination.
You can use transformations to perform these actions and more:
- Combining the values of two source fields into one destination field.
- Extracting a set of characters from field values.
- Assigning a string constant to a field regardless of source restrictions.
Synchronize includes a set of commonly used transformations, or you can write your own transformation scripts using the Visual Basic .NET or Python editor.
Synchronize provides these transformations:
Static
During synchronization, the static transformation copies specified text to the destination field and ignores the value in the source field mapped to it.
-
Type the text in the Static text box. This text is copied for the field at the destination.
You can also specify Windows environment variables as static text. While transferring the data during a job run, the job obtains the current value of the variable and saves it to the destination field.
Examples:
-
If static text is set to %COMPUTERNAME%, running the Job will save the host computer's name in the target field.
-
If static text is set to variables %NOW% and %Computer% as follows:
Updated by GroupID %NOW% from %COMPUTERNAME%.
Running the job will return the current date and the name of the host machine. The results will look like as:
Updated by GroupID 1/12/2003 10:04 AM from EX01-DTM
Environment variables may vary for different Windows releases and editions. Before using environment variables, determine that they are supported by the Windows installed on your host machine
-
-
Auto-Generate Unique, Complex Passwords based on complexity rules
You can assign a single password to all synced objects or generate individual passwords for each object.
Resolve
The Resolve transformation attempts to locate a recipient at the destination that matches the selected filter and returns the distinguished name. It is useful for setting the manager or owner fields.
destination: The target location to which to copy data. Destinations must be Exchange 5.5, Active Directory, SQL Server, or Excel.
NOTE: This transformation can adversely affect performance, as it adds an additional query to each record. It applies to Active Directory and Exchange only.
Join
The Join transformation combines values from two source fields into a single destination field.
For instance, you can use a Join transformation to create a Display Name field at the destination from the source’s FirstName and LastName fields. The values for the two source fields are saved as a single value in the destination.
The following table list the three parameters the Join transformation requires:
| Parameter | Description |
|---|---|
| First field | Select the first source field. |
| Separator | Specify the character to use as separator between the values of the two fields. You can specify more than one characters as separators. |
| Second field | Select the second source field. |
Left
Use the Left transformation to return a specific number of characters from the left side of a source value. You can use a Left transformation to pull characters from a value to create an abbreviation or an alias.
For example, your requirement is to set the first three characters of a user's logon name as their initials. You can easily achieve this by applying the settings shown in the following figure.
The following table lists the two parameters the Left transformation requires:
| Parameter | Description |
|---|---|
| Source field | Select the source field from which to get the value. |
| Number of characters | Specify here the number of character to extract starting from the left. |
Substring
The Substring transformation returns a set of characters from the source value. The set of characters to extract from the source value is determined form the Start at and Length parameters passed to the transformation.
Substring transformation is useful in cases where the set of characters to extract are from within a value that has a fixed number of characters or digits. The use of this transformation can become tricky if the number of characters or digits in values of the source field may vary.
The following table lists the parameters the Substring transformation requires:
| Parameter | Description |
|---|---|
| Source field | Select the source field from which to get the value. |
| Start at | Specify the index number of the character to set as the starting point. The character at this position will not be included in the result itself. |
| Length | This represents the count of characters to extract from the starting point. |
Example:
Telephone numbers are usually written with country and city codes. You may have a destination field where you may only require the country code to be copied excluding the city code and the number itself.
Consider the number, +92-42-5787711. Where:
| Country Code | City Code | Telephone |
|---|---|---|
| 92 | 42 | 5787711 |
To extract the country code, you would set the parameters for this transformation. When executed, this would extract 92 from the number and save it to the destination field.
Script
Unlike the built-in transforms described above, the Script transformation is a template for writing custom scripts. Use the Script template by selecting a built-in transform that provides most of the functionality you need, select parameters, if any, and then switch the transform type to Script to view the resulting script. You can then modify the script to add the functionality you need.
See Also