Configure NDC SQL database
Netwrix Data Classification uses Microsoft SQL Server database as metadata storage. During installation, you have been prompted to create a dedicated NDC SQL database on your SQL Server instance. Upon installation completion, you need to configure it as shown below for the product to function properly. You can create the database manually prior to the product installation—Using SQL Server Management Studio or Transact-SQL. Refer to the following Microsoft article for detailed instructions on how to create a new database: Create a Database.
NOTE: For performance purposes, Netwrix strongly recommends to separate NDC and SQL Server machine.
For certain product features, SQL Server Standard or Enterprise edition is required.
To configure NDC database
NOTE: The account used to create the NDC SQL database must be granted the dbcreator server-level role.
-
On the computer where SQL Server instance with the NDC SQL database resides, navigate to Start → All Programs → Microsoft SQL Server → SQL Server Management Studio.
-
Connect to the server.
-
Locate the NDC_Database, right-click it and select Properties.
-
Select the Files page and set the Initial Size (MB) parameter for PRIMARY file group to 512 MB.
-
Click Expand next to PRIMARY file group and set Autogrowth / Maxsize as follows:
Option Description File Growth - Recommended—128 MB. - Large environment— 512 MB. Maximum File Size Select Unlimited. -
Go to Options page and make sure that the Recovery model parameter is set to "Simple".
NOTE: Netwrix recommends that you do not change the recovery model to avoid log files growth.
Configuring NDC Servers Cluster and Load Balancing with DQS Mode
The Distributed Query Server (DQS) mode allows you to balance the load between multiple Netwrix Data Classification Servers (NDC Servers) while data collection, indexing and classification. This approach is strongly recommended if you need to process large data volumes, for example:
- File Servers—Up to 64 m objects per cluster of 4 servers.
- SharePoint—Up to 32 m objects per cluster of 4 servers.
To apply Distributed Query Server mode, you need to arrange your NDC Servers in a 'cluster' for load distribution, as described below. Each clustered NDC Server will store its own set of .CSE files — that is, NDC Index will be a distributed index. To assemble and combine data required for the search results, each NDC Server will automatically communicate with the other clustered servers.
NOTE: All NDC Servers in the cluster will share a single NDC SQL database.
This functionality is implemented through the QueryServer application installed together with NDC Server.
Applying DQS Mode
DQS mode can be configured via the administrative web console.
If you want to implement DQS configuration for your NDC deployment, consider the following:
- This action cannot easily be undone, so before applying the DQS mode, take a full backup of your NDC deployment. Also, read the related documentation sections thoroughly before you start.
- Make sure all servers you plan to add to the DQS cluster have proper network connection and are visible to each other across the network. Adjust firewall settings if necessary.
- Initially, all existing documents will be ‘allocated’ to the first server in the 'cluster' and then re-distributed across all configured servers.
To be able to configure the DQS mode, current account requires a Superuser role.
To arrange NDC Servers cluster and apply DQS mode
-
Install and configure the first Netwrix Data Classification Server as described in the Install Netwrix Data Classification section.
-
Open administrative web console.
-
Navigate to Settings → Utilities → DQS.
-
Select Enable DQS.
NOTE: Once the DQS mode is enabled, you cannot roll back your configuration. Netwrix strongly recommends to ensure that you have taken a full backup of your environment. If ready, confirm the DOS enablement operation when prompted.
-
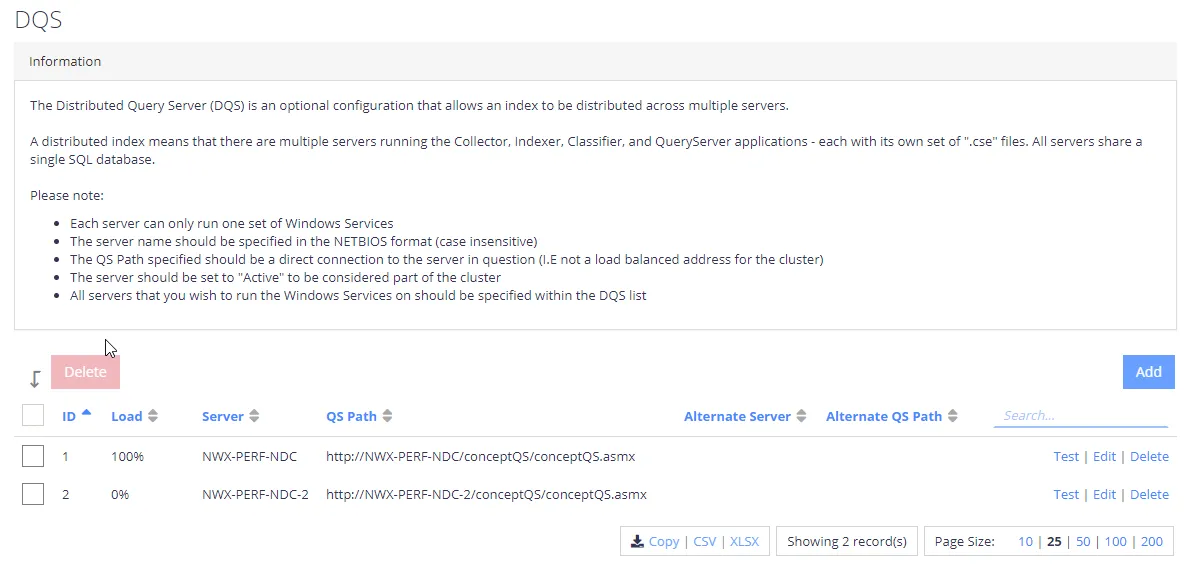
On the DQS tab, click Add to add servers you prepared, one by one.
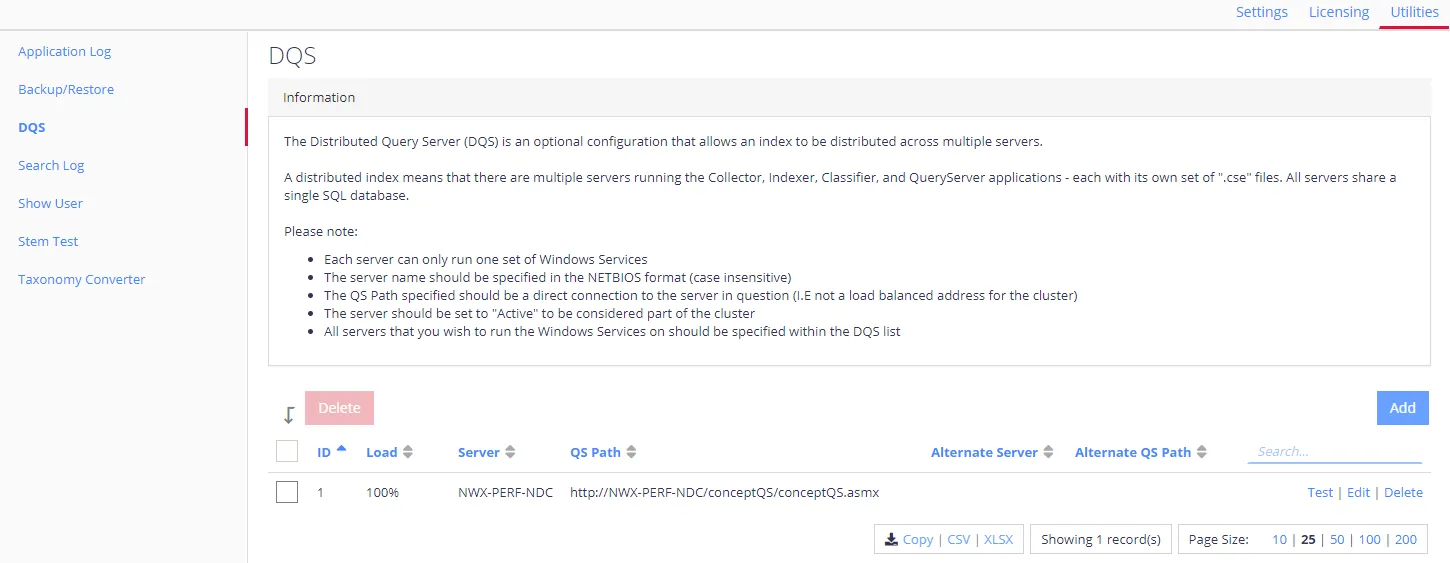
Complete the following fields:
Setting Value Server Provide the NDC Server name or IP address (name format is case-insensitive). QS Path Path to the solution component responsible for DQS mode, residing on the server being added. Filled in automatically; leave the default value. Active Select to enable clustering for the instance being added. Alternate Server Netwrix recommends using default values. Alternate QS Path Netwrix recommends using default values. -
Click Save to close the dialog.
-
Prepare to install other Netwrix Data Classification Server instances, assuming each server requires a dedicated machine. Make sure they meet the Hardware Requirements and general Software Requirements
-
On each server, follow the installation steps as described in the Install Netwrix Data Classification section until SQL Database configuration.
-
On the SQL Database step, provide the name of the SQL Server instance that hosts NDC SQL database you configured for the first NDC Server.
NOTE: Ignore the confirmation dialog on the existing schema in the selected SQL database.
- Complete the installation.
- Repeat steps 2 - 6 for every NDC Server, then review the list of servers to make sure the new server was included.
- If you were configuring the DQS mode for the existing NDC deployment, you will be prompted to re-collect data from the data sources —in order to re-distribute the content index across all NDC Servers in the cluster.
NOTE: To force re-distribution when necessary, you can use the Re-Collect command available after clicking Run Cleaner button on the Settings > Core > Collector tab.
To review system health and check your configuration, use the product dashboards. See Operations and Health Dashboards for more information.