Configure Health Alerting
On this step, you will be prompted to email settings for health reporting and select immediate health alerts.
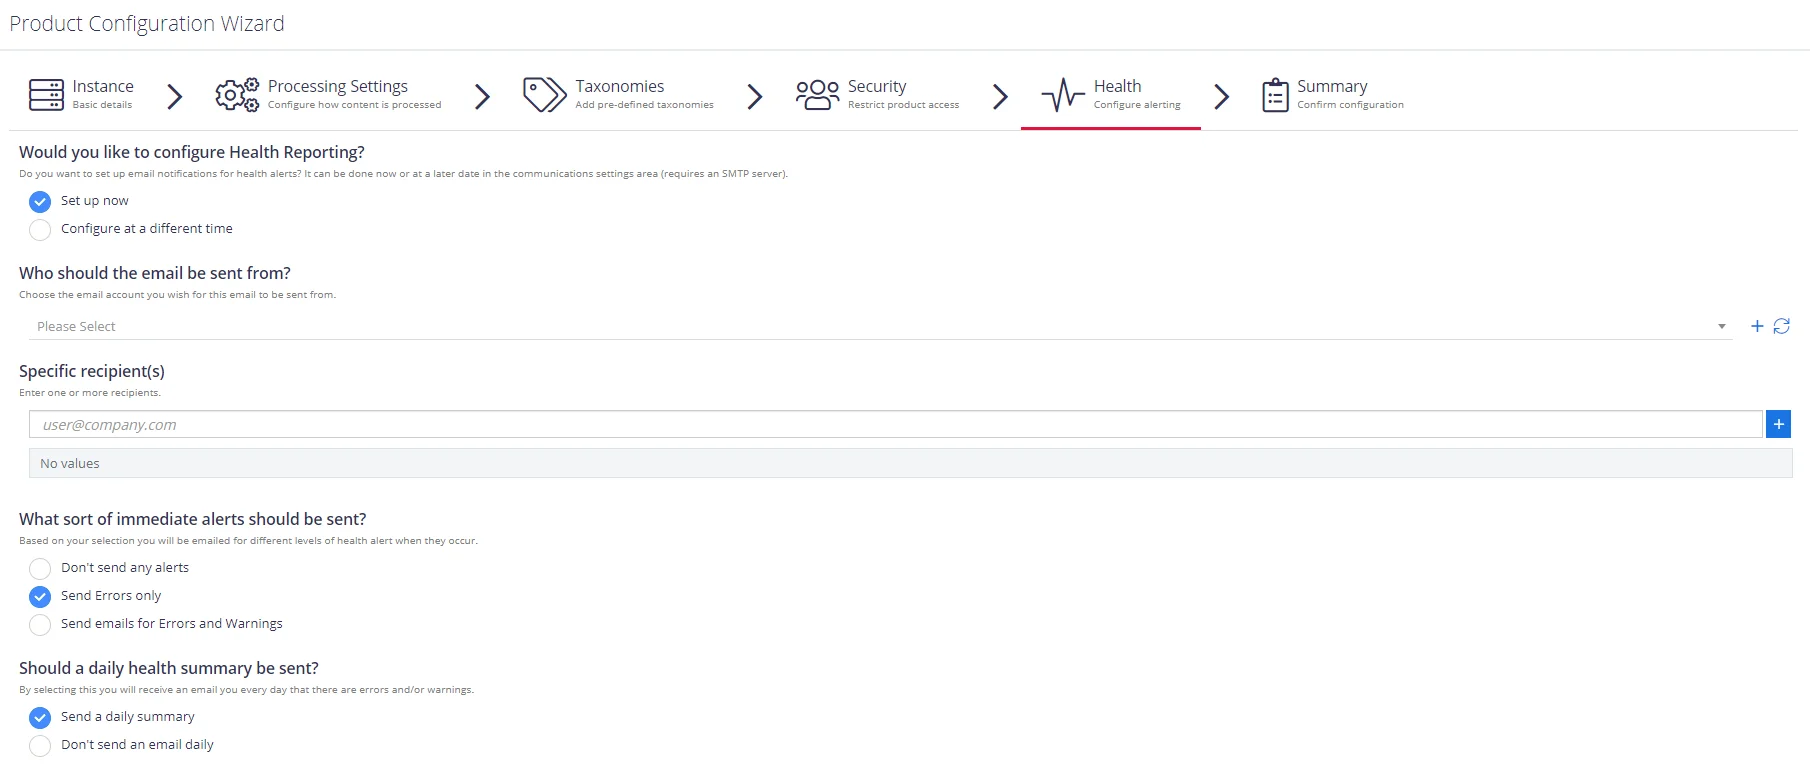
Complete the following fields:
| Setting | Description |
|---|---|
| Would you like to configure Health Reporting? | Select Setup now if you want to receive health alerts. You can do it later in the communication settings area. See System Health for more information. |
| Who should the email be sent from? | Select a user registered in Netwrix Data Classificationadministrative web console in the field or go to the Specific recipients below and specify one or more email addresses outside your organization. |
| What sort of immediate alerts should be sent? | Select the appropriate alerting level: do not receive any alerts at all, receive errors only, or get both: emails for errors and warnings. See System Health for more information. |
| Should a daily health summary be sent? | Select whether you want to receive daily summary on the product health. |
Select Processing Mode
At this step of the wizard, select processing (indexing) mode for your environment.
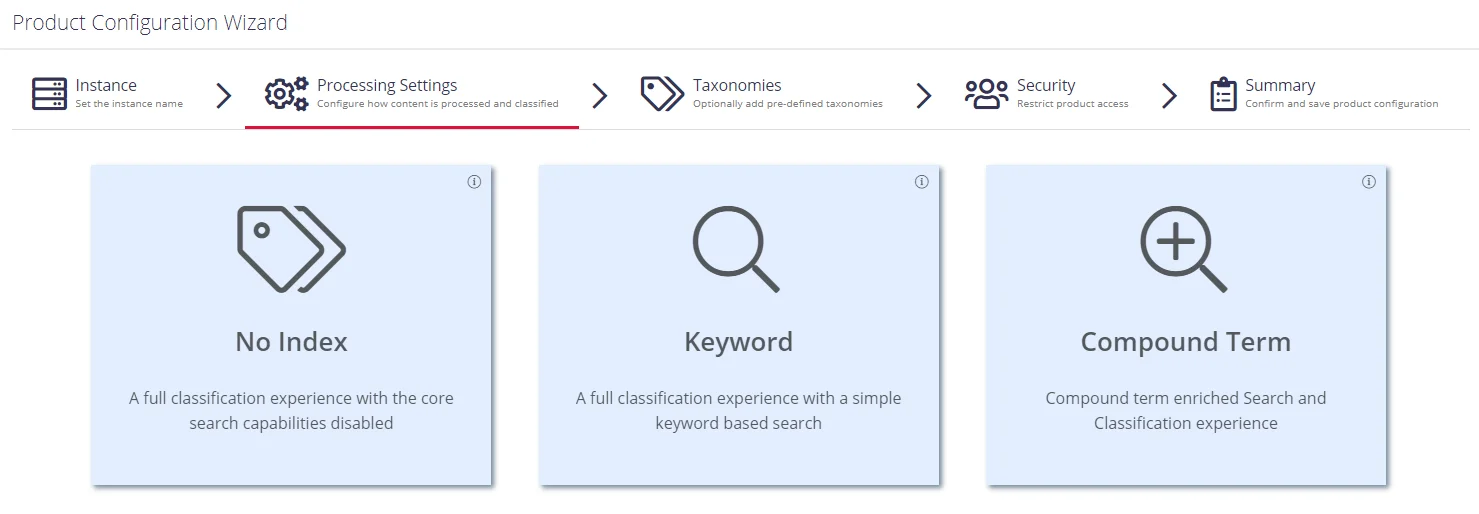
For starter and evaluation purposes, select Keyword mode.
Review the short description below and select mode:
No Index
In this mode, the core search index will be disabled, heavily reducing the disk space requirements for the CSE files and improving overall document throughput for classification. Under this mode Search is not available and Browse functionality is not subject to security trimming. Recommended for data discovery, data security governance and compliance use cases.
Keyword
In this mode the search index will be created; however, disk space required for the core search index will be of medium size. Both Browse and Search by keyword will be supported. Overall throughput is capable of supporting large number of documents (> 1M). Recommended for compliance, data discovery and classification rules tuning.
Compound Term
In this mode you will get a fully featured index, supporting Search by compound term. Consider that data storage will require more space, and overall throughput may decrease (compared to the Keyword mode). Recommended for knowledge management, data storage optimization, legal search, other content services.
Proceed with configuring processing settings. See Processing Settings next.
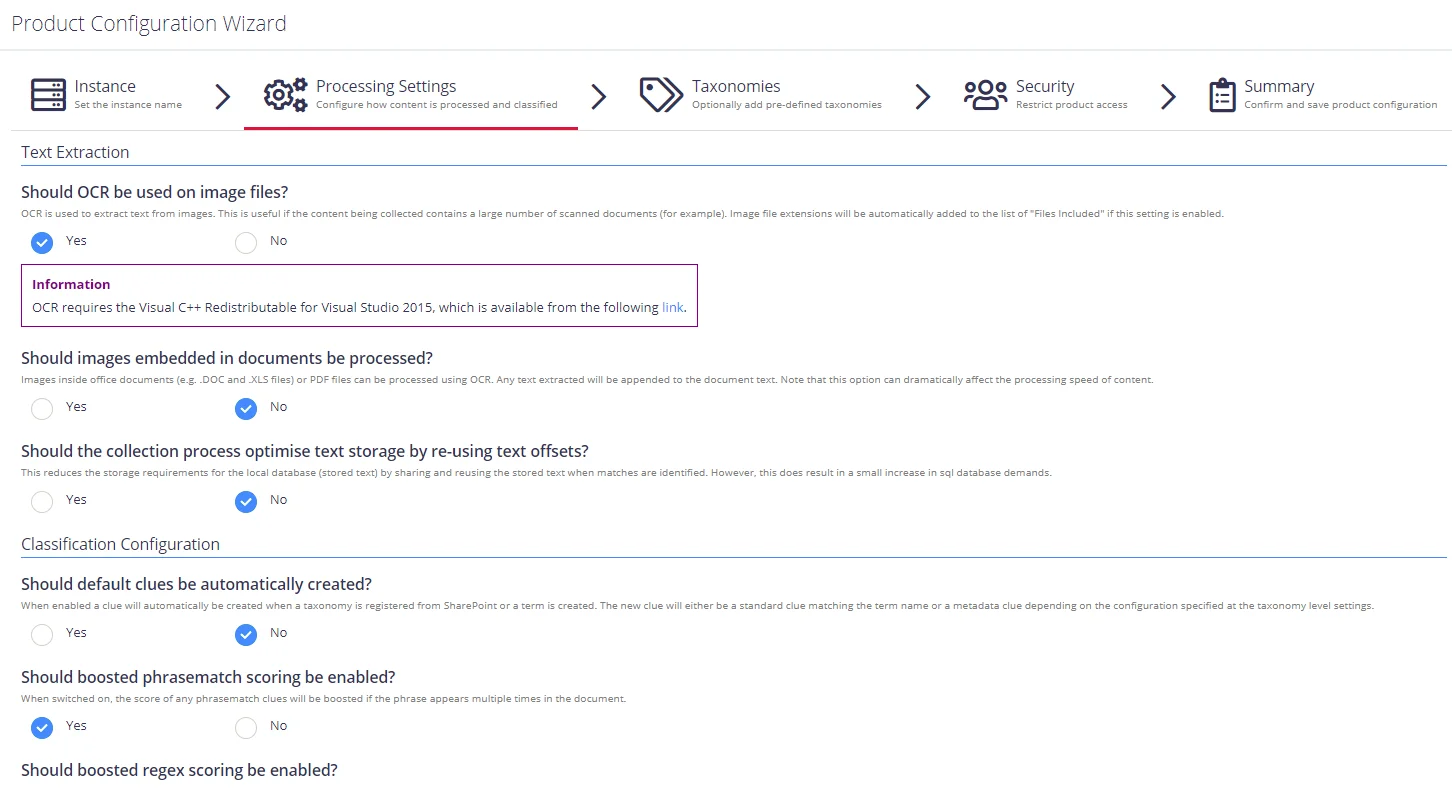
Processing Settings
On the Processing Settings step, select options for data processing and classification.
Review the following for additional information:
| Option | Description |
|---|---|
| Text Extraction | |
| Should OCR be used on image files? | Optical Characters Recognition is a technology used to extract text from images. Enable OCR if the content being collected contains a large number of scanned documents (for example). Performing OCR on documents can significantly reduce indexing performance. IMPORTANT! OCR requires the Visual C++ Redistributable for Visual Studio 2015. Visit Microsoft website for downloading. |
| Should images embedded in documents be processed? | Enable this option to recognize documents with integrated images. |
| Should the collection process optimise text storage by re-using text offsets? | Enable this option to use text offsets. |
| Classification Configuration | |
| Should default clues be automatically created? | Enable if you want a clue to be created automatically when a registering taxonomy from SharePoint or term creation. The created clue is standard and matches the term name or a metadata clue depending on the configuration specified at the taxonomy level settings. See Classification Rules (Clues) for more information. |
| Should boosted phrasematch scoring be enabled? | Enable to boost the score of any phrasematch clues if the phrase appears multiple times in the document. |
| Should boosted regex scoring be enabled? | Enable to boost the score of any regex clues if the regular expression appears multiple times in the document. |
| How should regular expressions be processed? | Enables and disables case sensitivity when processing regular expressions. |
| Store trimmed classifications to improve reclassification performance? | Enable to store trimmed classifications to SQL database (trimmed due to the maximum number of classifications being hit for a document). This improves classification performance, however, this may lead to additional data in the SQL database. |
Proceed with adding taxonomies.
Review Your Configuration
On this step, review your configuration. Once you complete the wizard, you can:
- Add a Source
- Add a Taxonomy
- Take the Product Tour
- Get Help
Add Taxonomy
On this step, you are prompted to load predefined taxonomies.

Click the search bar and select one or several taxonomies you want to add. See Built-in Taxonomies Overview for the full list of built-in taxonomies supported by Netwrix Data Classification.
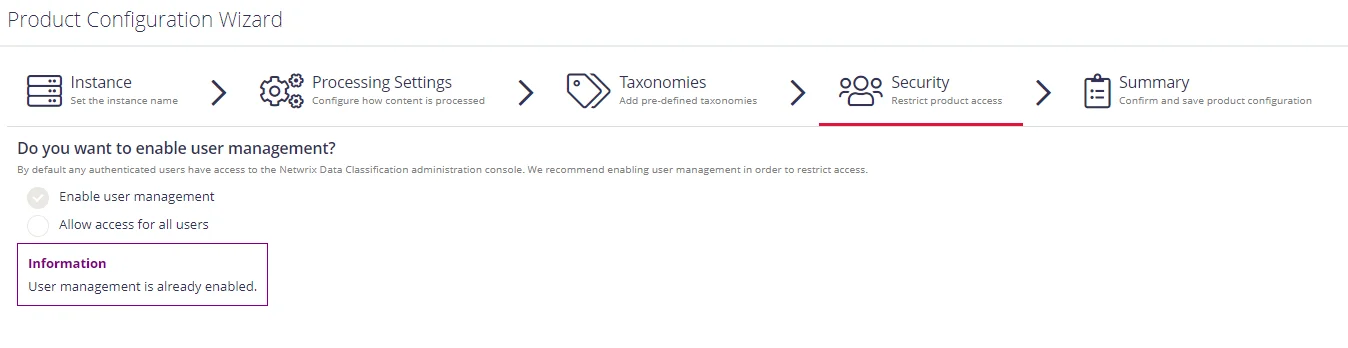
Security
On this step, you are prompted to restrict access to administrative web console by adding users.
-
Enable user management – select to add super users and prevent unauthorized access to administrative web console. By default, any authenticated users have access to the console.
NOTE: Netwrix recommends enabling this option.
When selected, you are prompted to add super users. Type the name of the new user and click + on the right.
-
Allow access for all users – select to allow any user access administrative web console.
Initial Product Configuration
The Product Configuration Wizard allows you quickly configure basic Netwrix Data Classification settings such as processing mode, taxonomies, etc.
In your web browser, navigate to the following URL: http://hostname/conceptQS where hostname is the name or IP address of the computer where Netwrix Data Classification is installed and perform initial configuration steps.
On the Instance step, provide the unique name for your Netwrix Data Classification instance. For example, "Production".
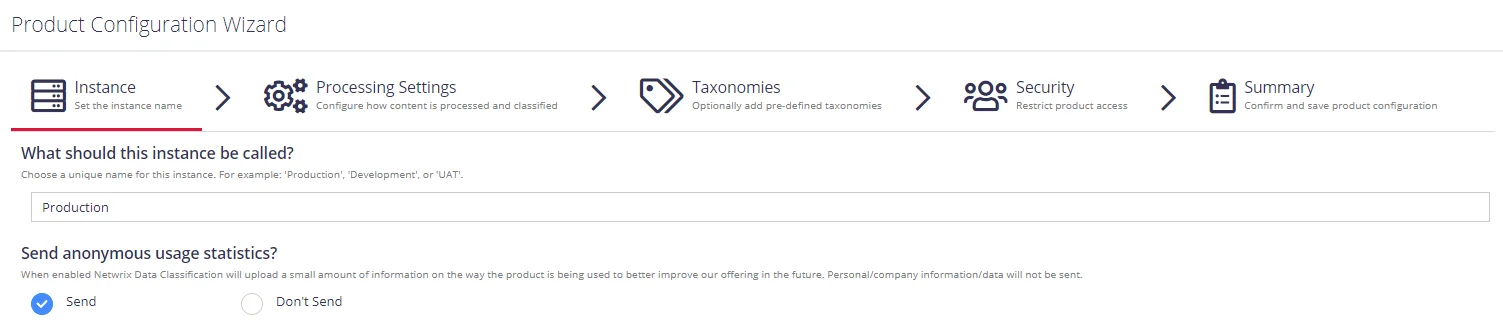
Click Next to proceed. See also: