SharePoint Online
Microsoft OneDrive is the default document library in a user's MySite in SharePoint Server or in Microsoft 365. The contents of this library can optionally be synchronized with one or more of the user's computers or devices.
Office 365 customers can configure the collector service to automatically detect and queue their employees OneDrive (Personal Sites) hosted in Office 365. An account with Tenant administration rights must be supplied, and the frequency of the detection of new One Drive sites must be set. It is also possible to provide a filter expression to ensure that certain OneDrive paths are included and others excluded as required.
Optionally, it is also possible to set up the resources necessary to ensure Netwrix Data Classification is enabled and configured on the detected OneDrive sites. Templating allows an administrator to pre-configure classification configurations for site collections. For more information please review the associated templating guide.
To crawl the data within SharePoint Online, you need to enable Multi-Factor Authentication:
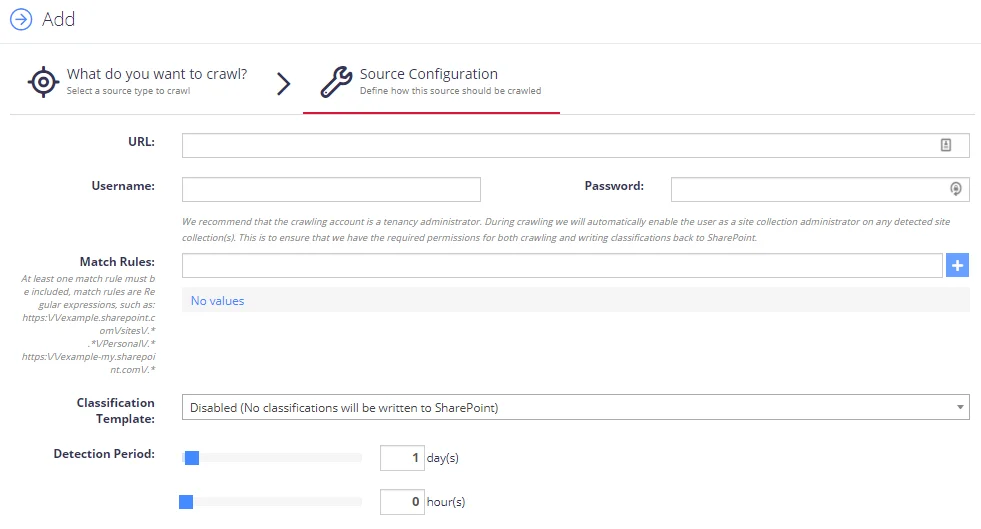
Complete the following fields:
| Option | Description |
|---|---|
| SharePoint URL | - The root of the site collections to be added, by clicking the “(Multiple Urls)” link you can add multiple SharePoint Online Site Collections to be crawled against the same credentials. |
| Username | Enter username in the following formats: DOMAIN\USERNAME and USERNAME@DOMAIN. |
| Password | Enter you password for SharePoint Online. |
| Match Rules | Enter the site collections' path for crawling the documents. At least one match rule must be included. Match rules are regular expressions, for example, https://example.sharepoint.com/sites/. |
| Classification template | Specify the required Classification template for writing classifications. See the Enable Write Classifications and Working with SharePoint templates topics for more information. |
| Detection Period | Specify how often you will detect new site collections. Default period is 1 day and 0 hour(s). |
After configuring the settings, click the Save button.