Add a Content Source
To start processing your data, you need to add a corresponding content source to the Netwrix Data Classification scope.
To add a content source
-
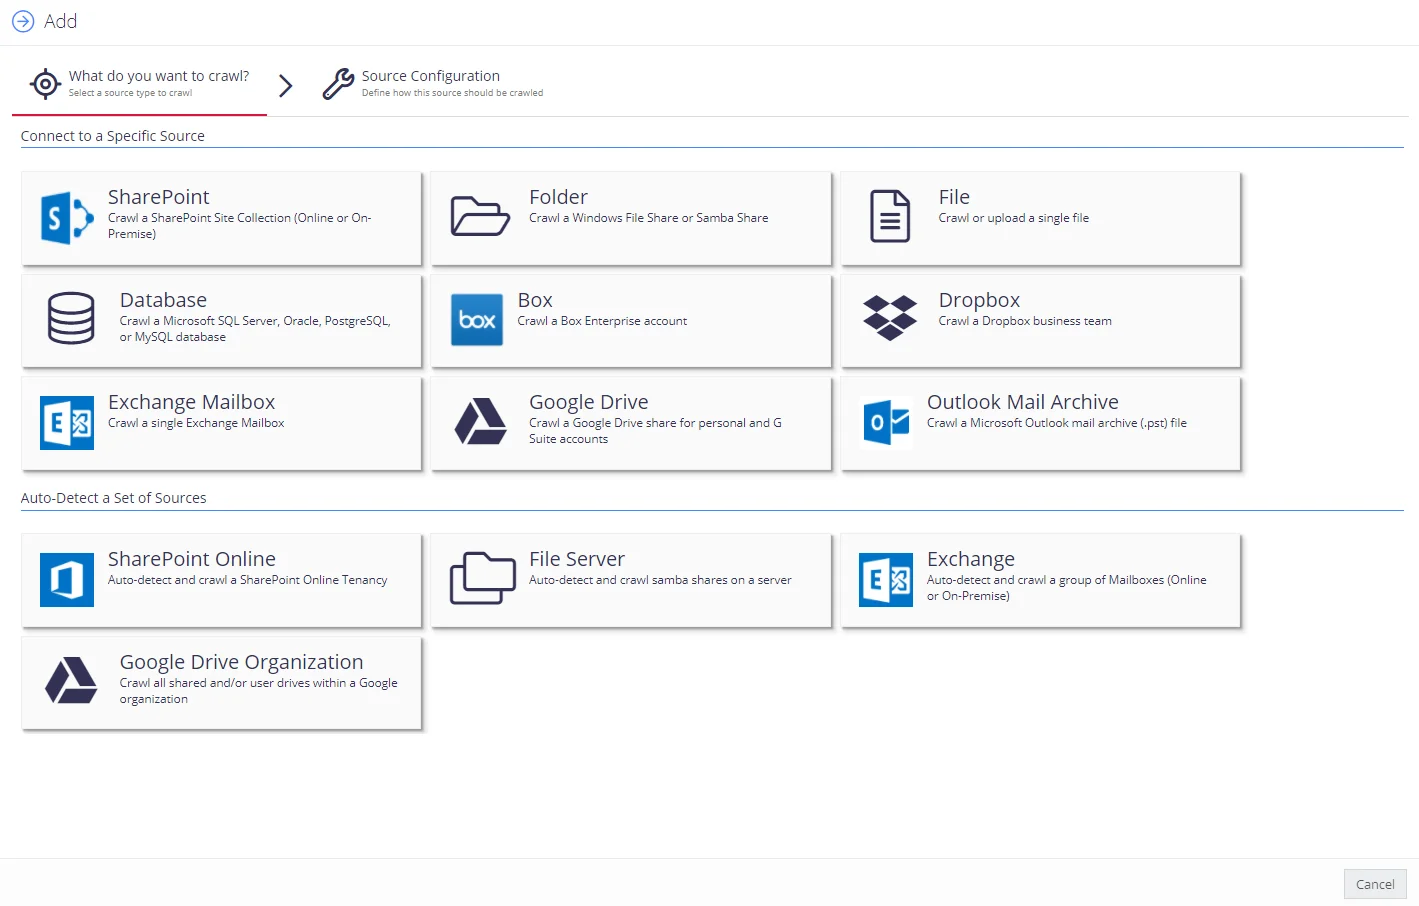
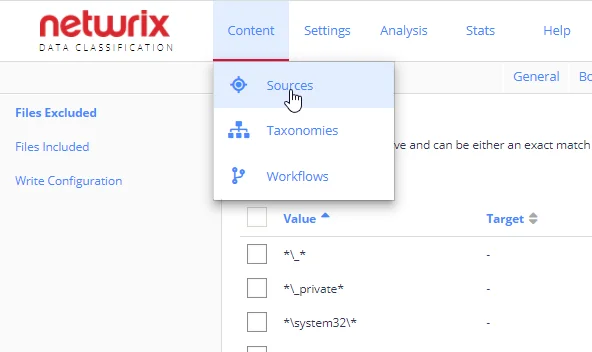
In administrative web console, navigate to Content →Sources → General and click Add to launch the Add source wizard.
-
Select the source you need and configure its settings. See detailed instructions for the sources:
- Box
- Add Database Source (Microsoft SQL Server or Oracle database)
- Dropbox
- Exchange Server or Exchange Mailbox
- File System (includes Folder and File)
- Google Drive Source
- Outlook Mail Archive
- SharePoint or SharePoint Online
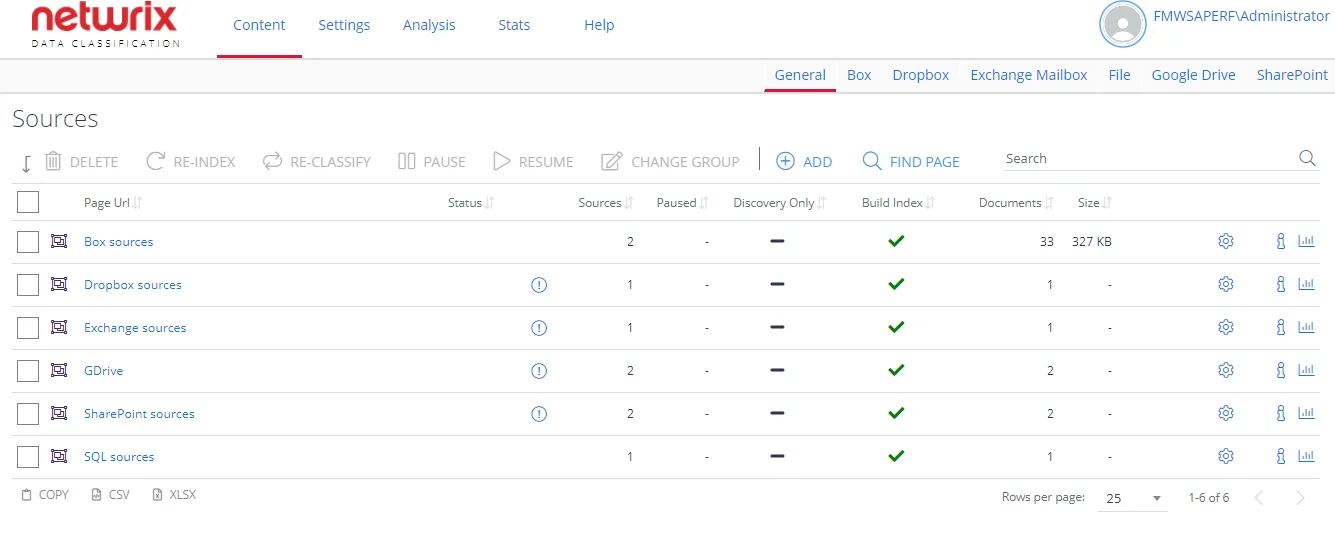
All your content sources will be listed in the Sources section.
NOTE: When adding a source or managing source configuration, the most commonly used source settings are displayed by default. However, some source types have additional configuration options that can be displayed by clicking the Advanced Settings ("wrench" icon). You can allow these advanced settings to be always shown to authorized users. Users and Security Settings
Narrow Data Collection Scope
Inclusions and exclusions provide a granular way of limiting collection scope to a specific set of documents within a content source.
This functionality is currently supported for the following source types:
- Exchange
- File System
- Google Drive
See next:
Content Configuration Overview
Content Configuration section in Netwrix Data Classification management console includes the following areas
- To add and manage the content systems you want to index, click Sources .
- To work with the data classification taxonomies, click Taxonomies.
- To configure automated workflows that will be triggered upon classification results, click Workflows.
IMPORTANT! To access the Sources area, users require sufficient rights. See the User Management section for more information.
See next:
Configuring Tagging
For a SharePoint source, tagging means the automatic population of managed metadata fields with classification attributes from SharePoint Term Sets that were registered as taxonomies within Netwrix Data Classification.
To configure tagging for your SharePoint source, you should first check the prerequisites and take preparatory steps described below. Then you will be able to launch a specially designed SharePoint Tagging Wizard.
To check the prerequisites
- Make sure you have set up the necessary term sets as described in this Microsoft article.
- Configure one or more managed metadata columns with the libraries that you plan to apply auto-classification to. See this Microsoft article for details.
- Ensure that the desired term sets are registered as taxonomies within the Netwrix Data Classification console. See Importing Taxonomies - SharePoint section in Search and Filter Taxonomies for details.
- Ensure that the appropriate SharePoint product is installed in your SharePoint environment
(typically, the provider-hosted add-In named conceptClassifierApp; see the procedure below for
details).
This add-on provides a specially designed Wizard that assigns taxonomies to Content Types in SharePoint. It also creates the necessary event handlers to keep the classification up to date as new documents are added and existing documents are edited.
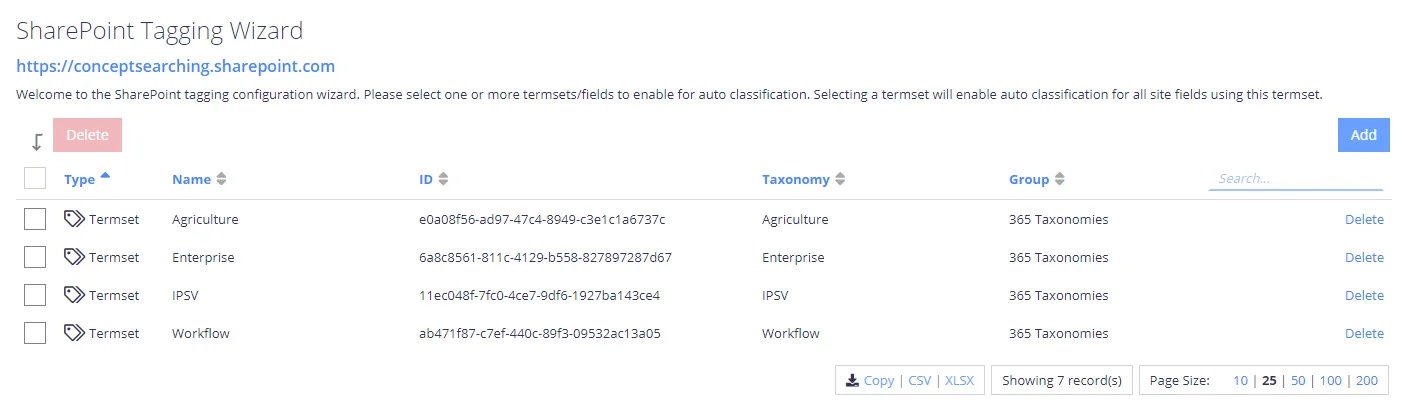
To configure tagging using the wizard
- Click on the app to start the SharePoint Tagging wizard.
-
Configure the Term Sets that you wish to auto-classify. For that, click the Add button and then select the required Term Sets or fields:

-
If needed, select the specific site/list columns you wish to restrict auto-classification to.
-
Confirm the selection.
-
Finally, having configured the desired tagging, you should re-classify the appropriate content — for the tags to be written back to SharePoint.
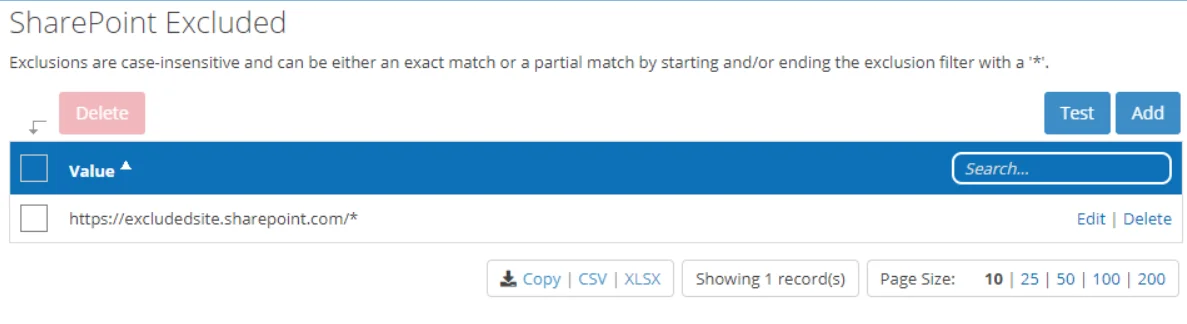
Managing list of exclusions
When indexing SharePoint files, you can specify the list of file locations that will be ignored. For that, in the list of sources, select SharePoint, then select Settings →SharePoint Excluded on the left, and click Add.
-
On the Filter tab, in the Filter field specify the objects (files or folders) to exclude:
To exclude a certain document, enter the page URL with no wildcard indicators (e.g. http://test.sharepoint.com/sites/documents/excluded%20document.docx
You can use wildcards anywhere in the exclusion pattern definition as follows:
- The asterisk character (*) matching any sequence of characters
- The question mark character (?) matching any single character
For example:
- http://test.sharepoint.com/sites/documents/\* will exclude all documents in the folder
- */Restricted Folder/* will exclude such folder in any site
NOTE: Exclusions are case-insensitive.
-
Optionally, enter full exclusion URL to verify the settings and click Test.
-
If needed, you can use metadata conditions to restrict when an exclusion filter should be applied. For that, click Condition tab and click Add. Then select how the exclusion conditions will work: it can check if metadata field of the document has any value, is not specified, or matches a specific metadata value.
Criteria Condition Comparison Compare a value in the document metadata field with the value set by condition. With this criteria selected, you will then need to specify: - Field name — document metadata field to check - Comparison — operator to use (for example, "does not contain") - Value — value to compare against For example, to exclude documents tagged with year 2018, set the condition as follows: - Field Name — DocYear - Comparison — equals - Value — 2018 Has any value Exclude the document if its metadata field has any value. With this criteria selected, specify Field Name. Has no values Exclude the document if metadata field value is not specified. With this criteria selected, specify Field Name. 
When finished, click Add.
-
Finally, click Save and close the window.
Content Sources
A content source in terms of Netwrix Data Classification is a repository of data to be crawled and classified. Each content source has an individual configuration and, where appropriate, credentials.
For adding and managing content sources, use the Content Configuration→Sources area of the Netwrix Data Classification management console.
IMPORTANT! To access the Sources area, users require sufficient rights. See the User Management section for more information.
You can manage the individual content sources or organize them into source groups, which are used as logical containers.
NOTE: You can configure the unlimited number of sources to work with.
See next:
- Add a Content Source
- Manage Sources
- Manage Sources and Control Data Processing
Manage Sources and Control Data Processing
The following commands are available on the General tab of the Sources section:
- Delete—Removes the source from processing. Its content will not appear in the search results in due course.
NOTE: This does not delete content from the external system
-
Re-Collect—Queues the source for re-processing. Crawled items will be deleted, and the entire source re-crawled
-
Re-Index—Queues a source or item to be re-indexed regardless of if the documents were changed or not. You can select Re-Index scope:
- Selected Item(s) and All Descendants — select to Re-Index an Item and child of a child of so forth child element.
- Selected Item(s) and Children — select to Re-Index an Item and its direct child elements.
- Selected Item(s) Only — select to Re-Index only current item and ignore its child elements.
-
Re-Classify—Queues a source or item to be re-classified against the latest configured classification rules
NOTE: See Index Maintenance for more information on these operations.
- Pause—Temporarily pauses source content processing
- Resume—Resumes a source from a temporary pause
- Add To Group—Adds a source to a logical container (Source Group), either an existing or a newly created one.
Besides, in the source list on the General tab you can do the following for selected source:
- View Results
- Edit the source details by clicking on the "gear" icon
- View source-specific statistics by clicking on the "chart" icon
- View detailed information by clicking on the “i” icon
- Navigate to the source by clicking on the “link” icon
NOTE: When adding a source or managing source configuration, the most commonly used source settings are displayed by default. However, some source types have additional configuration options that can be displayed by clicking the Advanced Settings ("wrench" icon). You can allow these advanced settings to be always shown to authorized users. See Users and Security Settings for more information.
Modify Source Settings
To edit configuration settings for the certain source, select the source and go to the corresponding tab, e.g. Box or SharePoint. Then you can, in particular, specify Write configuration (i.e. "tagging") settings and apply source-specific parameters. See Use Tagging for more information.
See also:
Use Tagging
Overview
Tagging in Netwrix Data Classification means writing classification attributes back to the content files. Tagging enables external systems (that is, not directly integrated with Netwrix Data Classification) to leverage the automatically generated classifications for a variety of business purposes, for example:
- Enriching the search experience
- Driving the application of DLP/Security labelling
- Enabling external workflow applications
- Applying IT policies to the classified objects
Tagging is designed to work as natively as possible with each source type. Therefore, each integration varies in the way that classifications can be written, with some overlaps.
Typically, to use tagging, you need to take the following steps:
- Ensure that an appropriate license has been loaded to enable document tagging. For that, go to System Configuration →Config → Licensing → Licensing Summary.
- Ensure that the credentials you plan to use for accessing the source system have been granted the appropriate Modify permissions.
- Ensure that tagging has been enabled for the source objects— for that, select the Write Classifications option in the source settings.
- Configure the source-specific settings to map the classifications results back to the source properties, as described in the related section.
NOTE: If you are unsure of the correct source specific settings to use, then we recommend initially working with some sandbox data.
You can Pause source processing while you are configuring the correct settings to ensure that no tagging will occur with partial/incorrect configuration settings.
Configure tagging for content sources
To learn how to set up tagging for the certain content sources, refer to related sections of these chapters:
View Results
Data Processing Statistics
Select the source from the list on the Sources - General tab, and click the Reports ("chart") icon to view data processing statistics for that source.
Content Crawling and Classification Results
Click on a source row in the list of sources on the General tab to view the crawled data, including the number of processed documents/URLs (Documents column), the size of the crawled content (Size), status, etc.
To browse the whole structure of the crawled content, click on the items in the list. It is also possible to filter the list by any field.
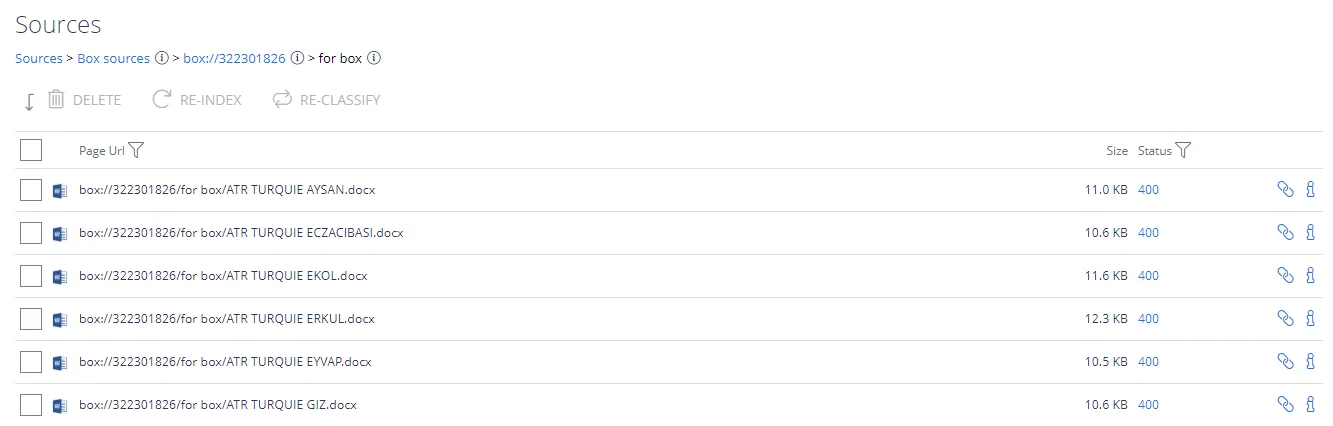
- Each document has an associated status (shown as the ID). Click the numeric ID to read the status description:

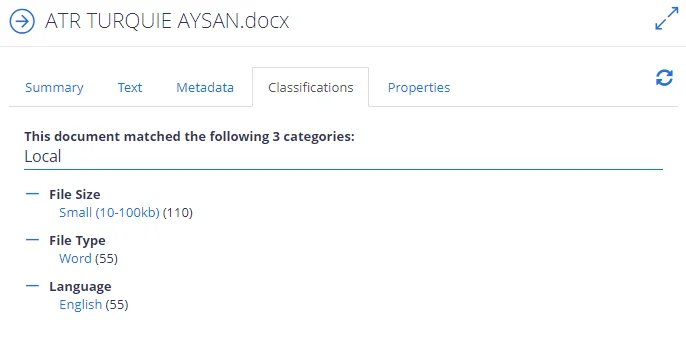
- Click the "Info" icon for the document/item to view its Properties, including summary, classifications (if any), etc.:
- For content sources that support writing the classifications back to the source system, i.e.
"tagging" (e.g. such as writing classifications to SharePoint managed metadata fields):
- a tick will also be displayed if tagging was successful
- a cross displayed if tagging failed
See the related content source description for details.