Configure Microsoft Exchange for Crawling and Classification
When preparing your Exchange Server for data classification, consider that for on-premise Exchange Server, Basic authentication is supported for crawling account, and for Exchange Online you can use either Modern authentication or Basic authentication. Both scenarios are described in the sections below.
Basic Authentication
This method is supported for Exchange Online and on-premise Exchange organizations. You should configure sufficient permissions that will allow the crawling account to impersonate the mailboxes that you wish to crawl. This requires the setup of two permissions:
- ApplicationImpersonation—Allows the crawling account to impersonate each of the mailboxes / users configured for collection
- Mailbox Search—Allows the crawling account to enumerate mailboxes (automatic discovery of mailboxes)
Review the related procedure that corresponds to your Exchange deployment:
Exchange Online
-
Log in to the Office 365 Exchange Admin Portal.
-
Go to Roles > Role Assignments > Exchange.
-
Select Add new role.
-
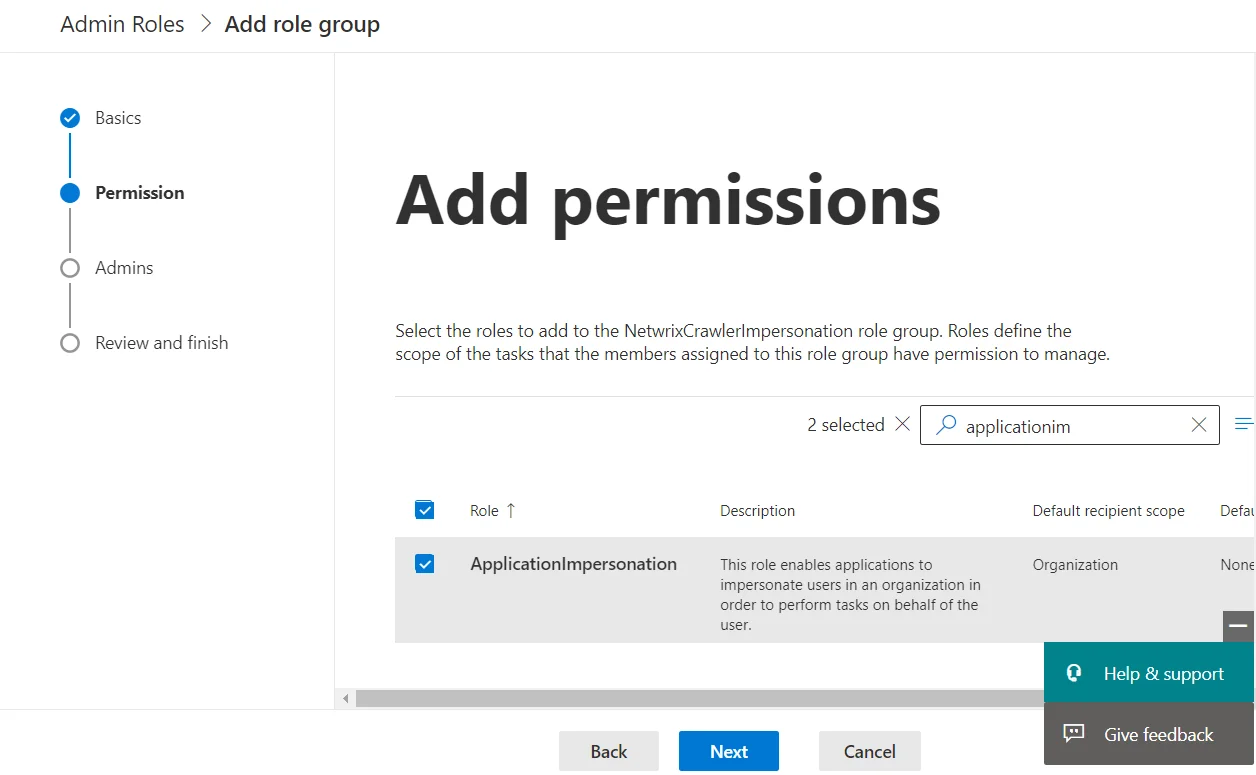
In the Set up basics step, enter the Name and Description 'NetwrixCrawlerImpersonation' . Select Next.
-
On the Add Permission step, select ApplicationImpersonation and Mailbox Search permissions. Select Next.
-
Select the users to assign to this role group. They will have permissions to manage the roles that you assigned in the previous step.
-
Finish adding the permissions by selecting __Add role group__.
Exchange Server (On-Premise)
-
Log in to one of the Exchange servers (RDP).
-
Open a Powershell window.
-
Run the following commands (replacing ADMINUSERNAME with the username of your crawling account):
New-ManagementRoleAssignment –Name "NetwrixCrawlerImpersonation" –Role "ApplicationImpersonation" –User ADMINUSERNAME
New-ManagementRoleAssignment –Name "NetwrixCrawlerSearch" –Role "Mailbox Search" –User ADMINUSERNAME
NOTE: If crawling Microsoft Office 365 for Small Business or many hosted Exchange systems, then it is not possible to setup Application Impersonation.
Modern Authentication
Starting with version 5.5.3, Netwrix Data Classification allows for crawling Microsoft Exchange Online organization mailboxes using Modern authentication. For that, it uses an Azure AD application which can leverage Microsoft API to connect to Exchange Online organization.
NOTE: You need to use an admin user name with Modern Authentication.
You should configure sufficient permissions that will allow the crawling account to impersonate the mailboxes that you wish to crawl. This requires the setup of two permissions:
- ApplicationImpersonation—Allows the crawling account to impersonate each of the mailboxes / users configured for collection
- Mailbox Search—Allows the crawling account to enumerate mailboxes (automatic discovery of mailboxes)
If you plan to implement the scenario that involves modern authentication, you should do the following:
- Create Azure AD app for Modern Authentication
- Configure Exchange Server source settings.
Create Azure AD app for Modern Authentication
To connect to Exchange Online organization that uses Modern authentication, you need to create an Azure AD application, as described in this section.
Step 1: Prepare application certificate
Prepare application certificate as follows:
- Create (or load) an IIS certificate on NDC Server (recommended).
NOTE: This certificate should be installed for the local machine so that it can be accessed by Netwrix Data Classification and other services.
-
Export the certificate (.CER file):
- Open the certificate in IIS management console.
- Go to the Details tab.
- Select Copy to File.
NOTE: Do not export private key.
- Set file type to DER-encoded CER.
Step 2: Create and Register a new app in Azure AD
To register a new Azure AD application, do the following:
- Sign into the Microsoft 365 Admin Center (with your Global Administrator, Application Administrator or Cloud Application Administrator account) and go to the Azure Active Directory admin center.
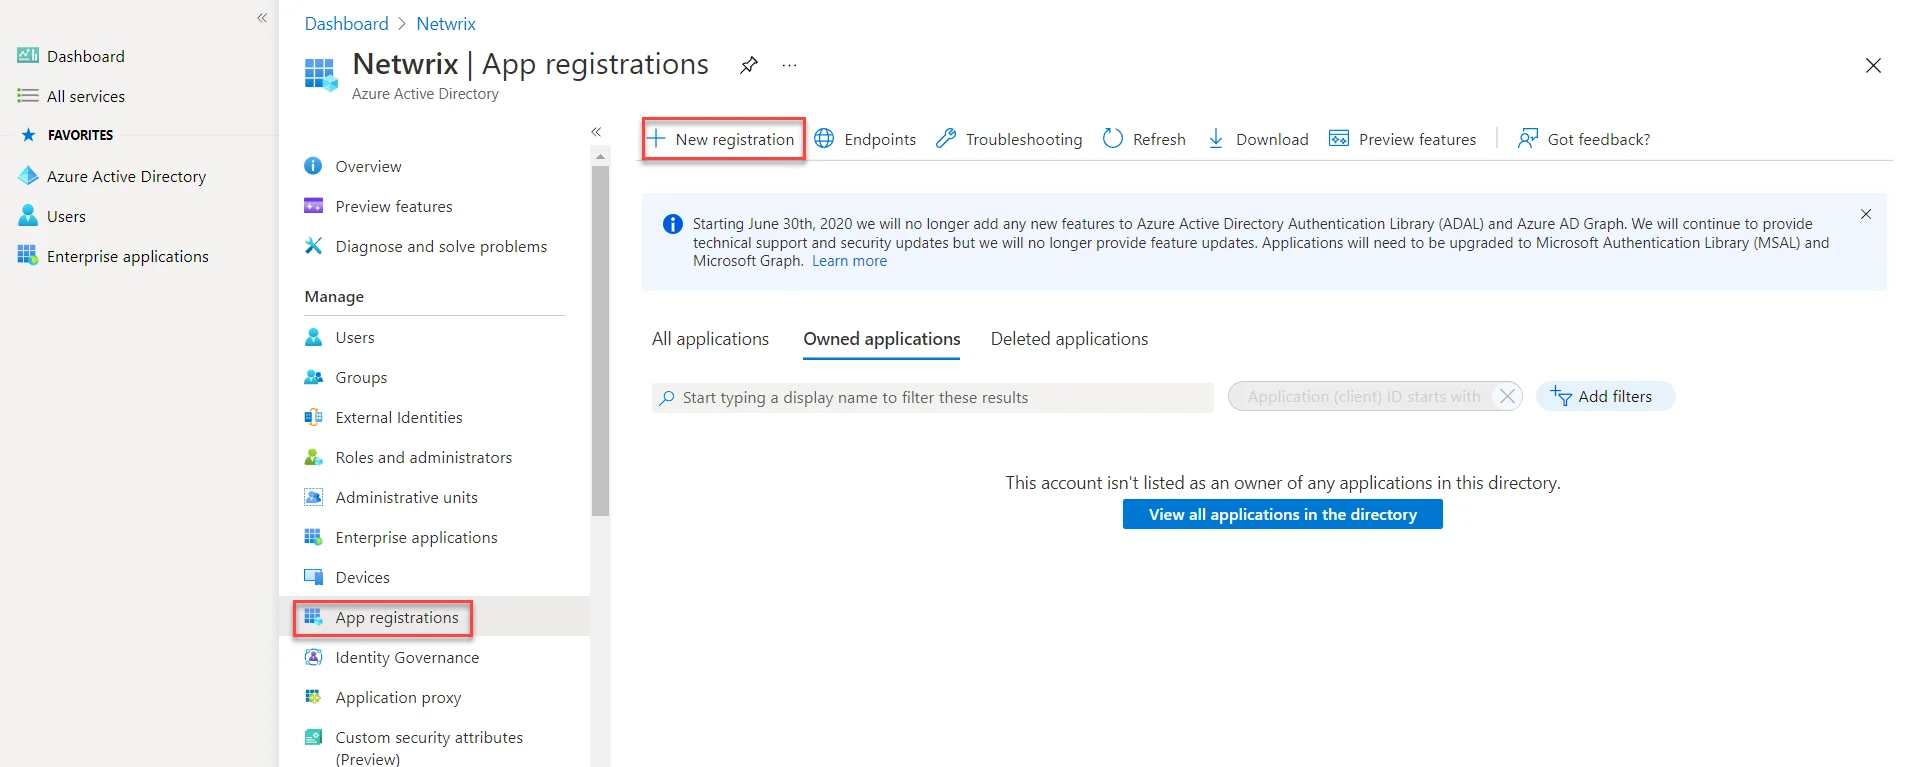
- Under the App registrations section, select New registration:
- d
- In the Name field, enter the application name.
- In the Supported account types select who can use this application – use the Accounts in this organizational directory only option.
- Click the Register button.
NOTE: Application redirect URI is optional, you can leave it blank on this step.
- Your application ID is now available in the Overview section. Copy it to a safe location.
Step 3: Grant Required Permissions
Next, you need to grant your new application the required API permissions.
Azure AD applications can be assigned Delegated or Application permissions:
- Delegated permissions require a signed-in user present who consents to the permissions every time an API call is sent.
- Application permissions are consented by an administrator once granted.
For the newly created app, you should use Application permissions.
NOTE: By default, a new application is granted one delegated permission for Microsoft Graph API – User.Read. It is not required and can be removed.
Do the following:
When found, click on the entry and proceed with adding the necessary permissions. The steps from here on remain the same, so in most cases you would need the Application permissions entry, and the relevant set of permissions therein (such as full_access_as_app for EWS OAuth, Exchange.ManageAsApp for CBA). Select the relevant entries, hit the Add permissions
- At the top of the Request API permissions pane, click the APIs my organization uses tab and search for Office 365 Exchange Online.
- Click on the Office 365 Exchange Online entry in the list of apps found.
- Proceed with adding the permissions for this app: select Application permissions and then select full_access_as_app.
- Click Add permissions.
Finally, you need to grant admin consent to the tenant (that is, for Exchange organization whose audit data will be collected by the newly registered app).
Do the following:
- Go to the new app settings > API permissions and click Grant admin consent for
<tenant name>. - When prompted to confirm granting, click Yes.
Step 4: Configure Certificates & secrets
Having configured the app, you can upload its application certificate.
- In the app settings, click Certificates & secrets and select Upload certificate.
- Upload the .CER file you prepared at Step 1: Prepare application certificate.
- Copy the certificate thumbprint to a safe location.
Step 5: Obtain Tenant ID
- Open Azure Active Directory admin center.
- Select Azure Active Directory > Overview section for the required Exchange Online organization.
- Locate the Tenant ID and copy it to a safe location.