Email Templates
The HTML templates used to format notification email can be customized. These templates are designed to make the message viewable within an email client. It is recommended to edit text and layout as desired, but NOT to embed new images or logos. The following table shows the notification email templates and describes the purpose of each.
| Template Name | Message Type Description |
|---|---|
| EntitlementReviewReminder | Reminds owners of pending reviews; manually sent by a Review Administrator from the Entitlement Reviews interface |
| OwnershipChangeNotification | Sent to owners when assigned ownership is changed for a resource which already has pending reviews |
| OwnershipConfirm | Sent to owners to confirm or decline ownership of a given resource; manually sent by an Ownership Administrator from the Resource Owners interface |
| ReminderDigest | Weekly reminder configured by Administrators on the Notifications page of the Configuration interface to owners with pending reviews |
While customizing the template content, take note of the inline Substitution Tokens. These exist to provide the message with dynamic content, i.e. inserting values and strings from data in line with the static portion of the message body. These Substitution Tokens begin and end with the “@” symbol, e.g. @UserName@.
Substitution Tokens are only valid for certain Notification message templates. Below is a table of the Substitution Tokens, the value or string they represent, and the message templates in which they may be used.
| Substitution Token | Description | Applicable Template(s) |
|---|---|---|
| @LoginUrl@ | URL that allows a user to access the default (login) page | OwnershipChangeNotification ReminderDigest |
| @ResourceDescription@ | Description of resource - To use the resource's description in emails instead of the path, replace @ResourcePath@ with @ResourceDescription@ | OwnershipConfirm ReminderDigest |
| @ResourcePath@ | Path of the current resource - To use the resources’ description in emails instead of the path, replace @ResourcePath@ with @ResourceDescription@ | OwnershipConfirm ReminderDigest |
| @ResourceType@ | Type of resource | OwnershipConfirm ReminderDigest |
| @ResourceUrl@ | URL specifically created to respond to a request | EntitlementReviewReminder OwnershipConfirm |
| @ResponseCount@ | Numerically formatted count of pending reviews | ReminderDigest |
| @ReviewCount@ | Numerically formatted count of pending reviews | ReminderDigest |
Customize Email Templates
Email templates are shipped in a ZIP file and stored in the Access Reviews installation directory:
...\Netwrix\Access Reviews
Follow the steps to customize the email templates.
NOTE: To successfully modify these Notifications email templates, a familiarity with basic HTML is necessary.
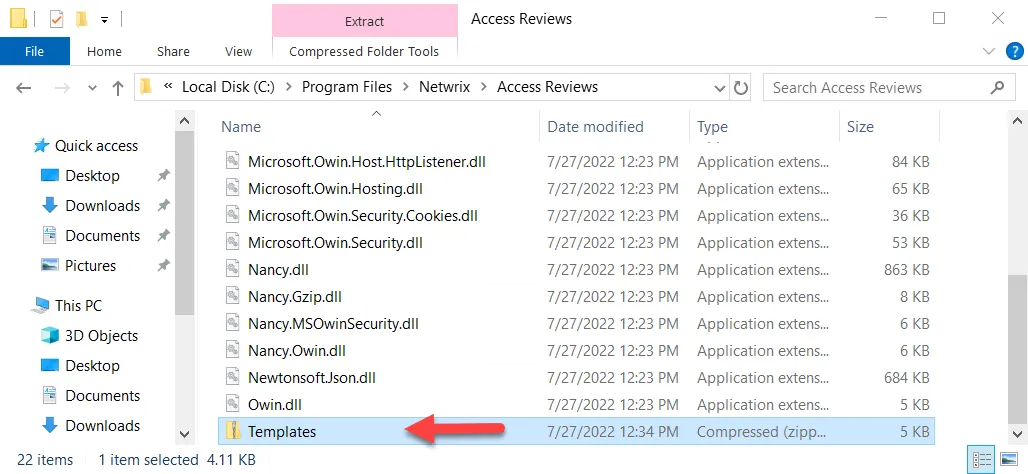
Step 1 – Navigate to the Access Reviews installation directory.
Step 2 – Unzip the Templates.zip file and save the contents to a folder within this directory
named Templates.
CAUTION: The customized email templates must be in the Templates folder within the
installation directory to be preserved during future application upgrades.
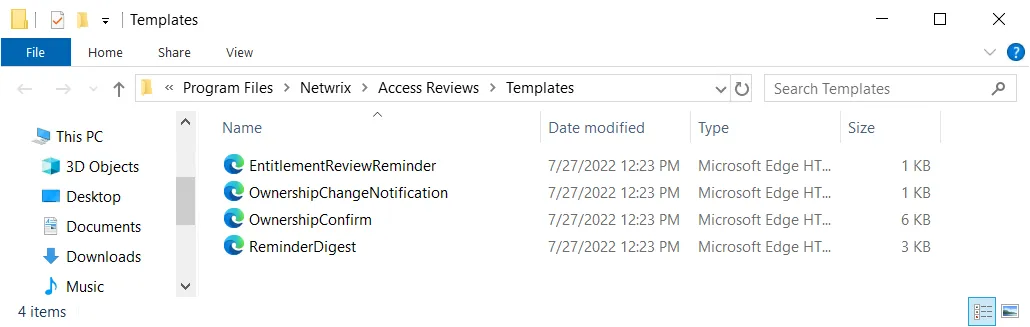
Step 3 – Locate the desired HTML message template.
Step 4 – Open the file with a text editor, e.g. Notepad, and customize the email body.
NOTE: Using a tool other than a text editor to edit HTML files, such as a WYSIWYG web page editor which may drastically alter the underlying HTML code, is not supported.
Step 5 – Email subject lines can be edited by changing the text between the opening <title>
tag and the closing </title> tag.
Step 6 – After making changes, save the file and view it within a web browser to see what the changes will look like. The Substitution Tokens will display without supplied values.
Step 7 – After making the desired changes, save and close the text editor. Then re-launch the application.
The modifications to the HTML email templates are in use by the notification emails.
Additional Configuration Options
In addition to the settings that are available on the Configuration interface, the following configurations and customizations can be done by Administrators:
Timeout Parameter
A user session will end when the timeout parameter for inactivity has been reached, and the user will be logged out. By default this is set to 15 minutes.
The timeout parameter is configured within the AccessInformationCenter.Service.exe.Config file in
the Access Reviews installation directory:
...\Netwrix\Access Reviews
Follow the steps to modify the timeout parameter.
Step 1 – Open the AccessInformationCenter.Service.exe.Config file with a text editor, e.g.
Notepad.
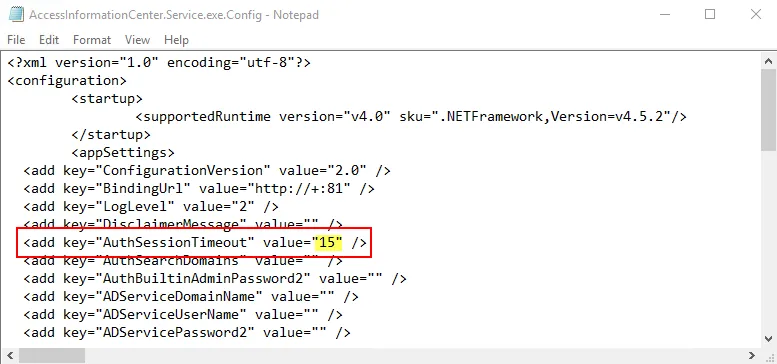
Step 2 – Change the value for the AuthSessionTimeout parameter to the desired number of
minutes. For example:
Step 3 – Save and close the file.
A user session times out after the number of minutes specified for inactivity, for example after 20 minutes.
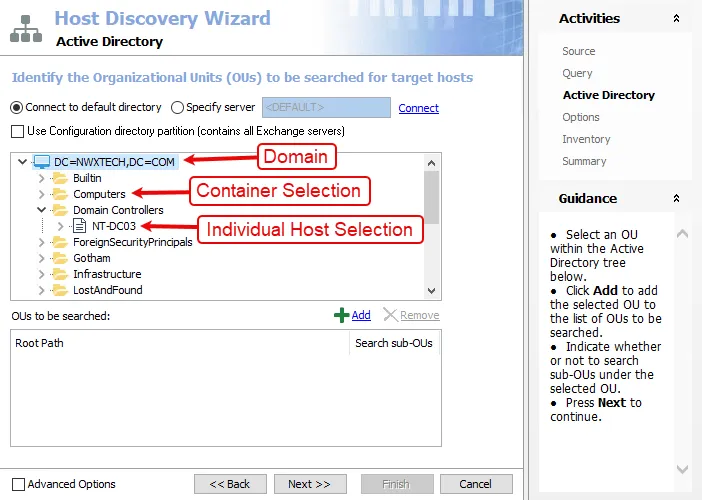
Active Directory Page
The Access Reviews application needs to be connected to Active Directory for user authentication and to assign resource ownership in the Resource Owners interface. The Active Directory service account is configured on the Active Directory page of the Configuration interface. Read access to Active Directory is required for this purpose.
The Active Directory service account is configured during installation based on the account used for connecting to the database. If your Database service account uses:
- SQL Server authentication credentials — Active Directory service account is configured to use the Local System, or computer account, which typically has Read rights to the domain
- Windows authentication credentials — The same domain credentials are also used for the Active Directory service account
There are two options for the type of Active Directory service account:
- Use the account running this service — Local System, or computer account (NT AUTHORITY\SYSTEM)
- Use the following Active Directory account — Uses a domain account with the required permissions to Active Directory. The supplied User Name [DOMAIN\USERNAME] and Password are used as the Active Directory service account.
Multiple Domains
The Allow authentication from the following domains option is where additional domains can be introduced to the Access Reviews Console. By default the domain where the Access Reviews Console resides is listed. Domains that are in the same forest or have a trust can be added in a comma-separated list.
- For example: nwxtech.com,example.com
Remember, click Save when any changes are made to this page.
Update the Active Directory Service Account Password
Follow the steps to update the Active Directory service account password. These steps only apply for the Use the following Active Directory account option.
Step 1 – On the Active Directory page, enter the new password in the correct field.
Step 2 – Click Save. Then click OK to confirm.
The Active Directory service account password has been updated.
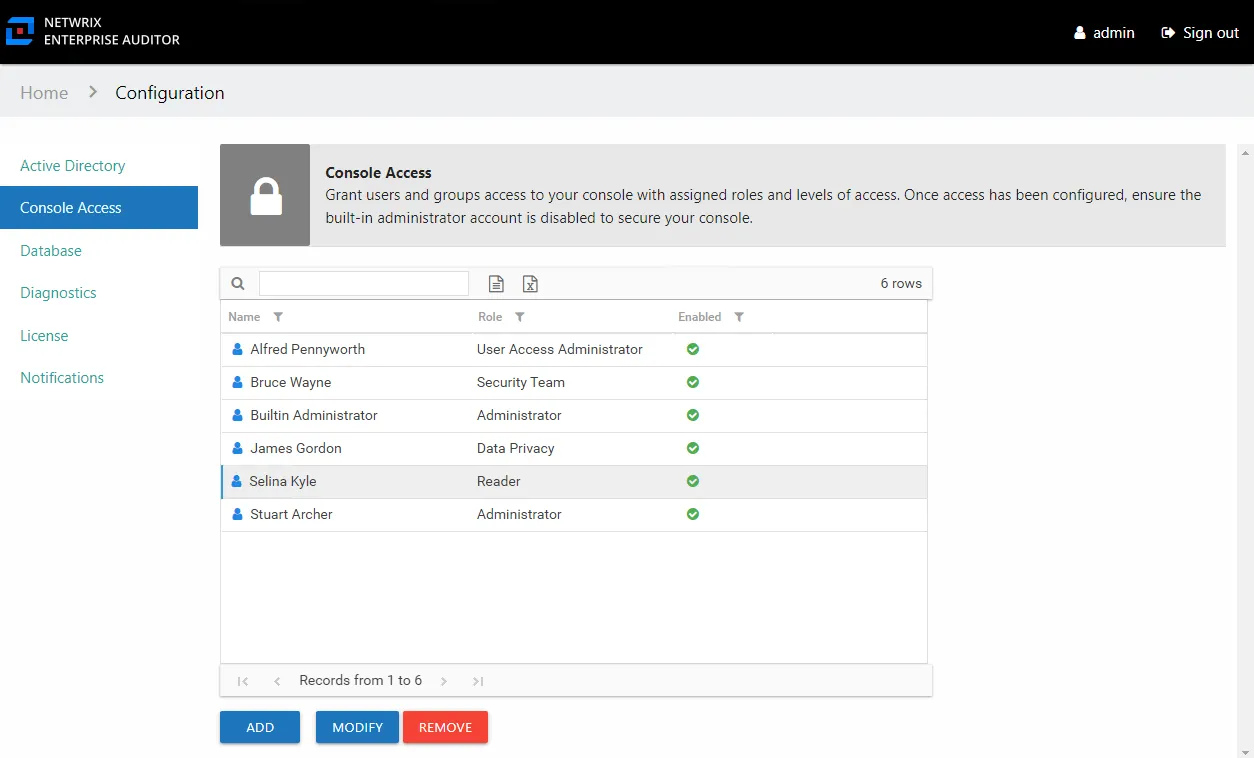
Console Access Page
Console access is configured through the Configuration > Console Access page. Adding users to the Access Reviews Console requires the Active Directory service account to be configured.
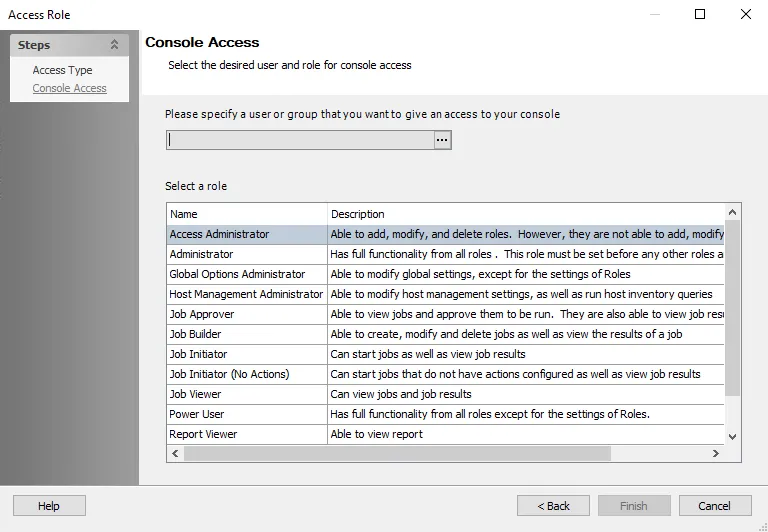
There are two levels of access, or roles, which can be granted to domain users or groups:
-
Administrator – Role allows access to all interfaces including the Configuration interface
-
Security Team – Role allows access to all interfaces except for the Configuration interface
- In the Entitlement Reviews interface, this role can only view reviews that the logged in user has created.
- Access can be limited by resource types (File System, SharePoint, or Active Directory)
CAUTION: Before disabling the Builtin Administrator account, it is necessary to first assign at least one domain user account to the Administrator role. Login with another Administrator account to disable the Builtin Administrator. Failure to do this could result in being locked-out of the Configuration interface. As an alternative to disabling this account, the password can be changed. See the Modify the Builtin Administrator Account topic for additional information.
Once users have been granted console access, they can login with their domain credentials. Console access is not a requirement for owners to complete Access Reviews. See the URL & Login topic for information on how users will log in and where they are directed after login based on their assigned role or lack of role.
Add Console Users
Follow the steps to grant domain users or groups console access.
Step 1 – In the Configuration interface on the Console Access page, click Add. The Console Access wizard opens.

Step 2 – On the Select Trustee page, enter the following information and click Next:
- Domain — If the Access Reviews Console has been configured for multiple domains, use the drop-down menu to select the desired domain
- Search — Begin typing the sAMAccountName or display name and the field will auto-populate options from Active Directory sAMAccountName
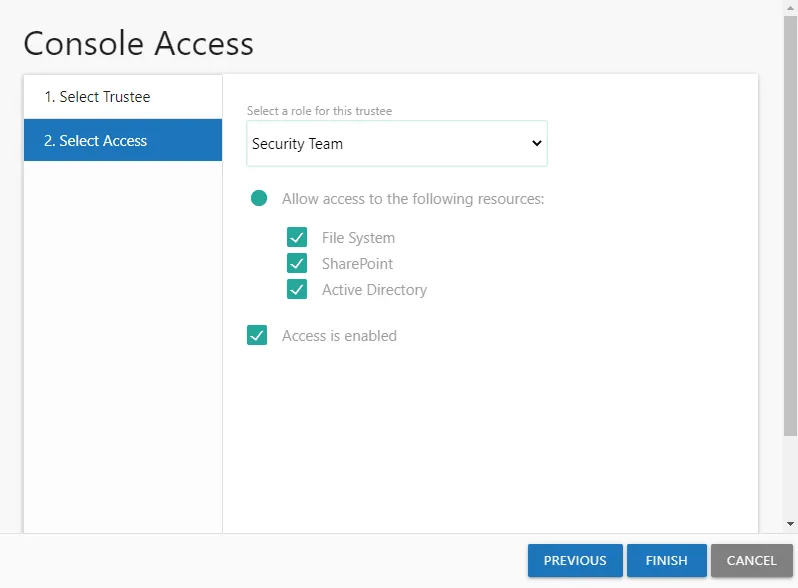
Step 3 – On the Select Access page, enter the following information and click Finish:
-
Select a role for this trustee – Select a role from the drop down list:
- Unlimited Access — The Administrator role grants unlimited access
- Limited Access — All other roles can be granted limited access
-
Allow access to the following resource — When enabled, users can be limited to only having visibility into data for the selected types of resources. Check the boxes for the type of resource data to be made available to this user.
-
Access is enabled – A user's account must be enabled in order to log into the console. Unchecking this option allows you to configure access to be granted at a future time.
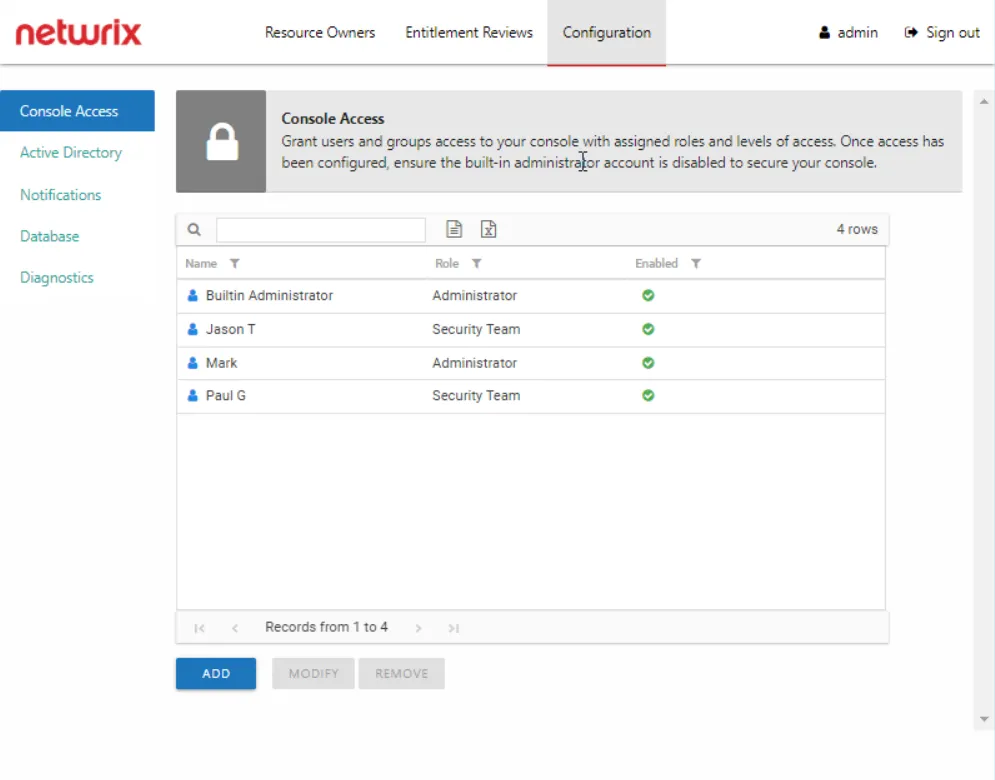
Step 4 – The new user displays in the list on the Console Access page. Repeat these steps for each trustee to be granted console access.
Once the first user with the role of Administrator has been added, the Builtin Administrator account can be disabled by that user. See the Modify the Builtin Administrator Account topic for additional information.
Modify Console Users
Follow the steps to modify a user’s console access.
NOTE: These steps are for modifying domain users with console access roles and do not apply to the Builtin Administrator account. See the Modify the Builtin Administrator Account topic for additional information.
Step 1 – In the Configuration interface on the Console Access page, select the user to be modified and click Modify. The Console Access wizard opens to the Select Access page.

Step 2 – Modify the desired settings and click Finish:
-
Select a role for this trustee – Select a role from the drop down list:
- Unlimited Access — The Administrator role grants unlimited access
- Limited Access — All other roles can be granted limited access
-
Allow access to the following resource — When enabled, users can be limited to only having visibility into data for the selected types of resources. Check the boxes for the type of resource data to be made available to this user.
-
Allow access to the following servers — When enabled, users can be limited to only having visibility into data for specific servers. Begin typing server names and the field will auto-populate with known servers from scanned data. A resource type appears in parentheses after the host name for quick reference.
-
Access is enabled – A user's account must be enabled in order to log into the console. Unchecking this option allows you to configure access to be granted at a future time.
Any modifications to the user’s role are visible in the list on the Console Access page.
Delete Console Users
CAUTION: Confirmation is not requested when deleting users. An alternative to deleting a console user is to disable their access. See the Modify Console Users topic for additional information.
Follow the steps to remove a user’s configured console access.
Step 1 – In the Configuration interface on the Console Access page, select the user.
Step 2 – Click Remove.
The user is removed from the list on the Console Access page.
Modify the Builtin Administrator Account
The Builtin Administrator account can be disabled or its password can be changed. Follow the steps to modify this account.

Step 1 – In the Configuration interface on the Console Access page, select the Builtin Administrator account and click Modify. The Builtin Administrator window opens.
Step 2 – Modify the account as desired and click OK:
- Access is enabled — Indicates whether the account can be used to login
- Change Password — Allows you to change the password for this Builtin Administrator account. Check the box and enter the new password in both entry fields. The password must be eight or more characters long.
The modifications to the Builtin Administrator are processed.
NOTE: The new password is encrypted in the AccessInformationCenter.Service.exe.Config file, in
the AuthBuiltinAdminPassword parameter. If you forget the Admin password, you can clear the
AuthBuiltinAdminPassword value in the AccessInformationCenter.Service.exe.Config file. Then use
the default first launch login credentials to set a new password.
Database Page
The Access Reviews application must have access to the SQL Server hosting the database. It is configured during installation. If it is necessary to modify these setting after installation, that is done on the Database Page of the Configuration interface.
SQL Server database information:
-
Server Name – Host name of the SQL Server serving the database in one of the following formats:
-
No named instance: [SQLHostName]
- Example: NT-SQL02
-
Named instance: [SQLHostName][SQLInstanceName]
- Example: NT-SQL02\Netwrix
-
No named instance with non-standard port: [SQLHostName],[PortNumber]
- Example: NT-SQL02,1392
-
Named instance with non-standard port: [SQLHostName][SQLInstanceName],[PortNumber]
- Example: NT-SQL02\Netwrix,1392
-
-
Database – Name of the SQL database
Database service account information:
- Use the windows account running this service — Local System, or computer account (NT AUTHORITY\SYSTEM)
- Use the following SQL account – Uses SQL Authentication to the database. Provide the properly provisioned SQL credentials for the database
Remember, click Save when any changes are made to this page.
Update the Database Service Account Password
Follow the steps to update the Database service account password. These steps only apply for the SQL Authentication option.
Step 1 – On the Database page, enter the new password in the correct field.
Step 2 – Click Save. Then click OK to confirm.
The Database service account password has been updated.
Diagnostics Page
Download logs and enable debug log level for troubleshooting with Netwrix Support on the Diagnostics page of the Configuration interface.
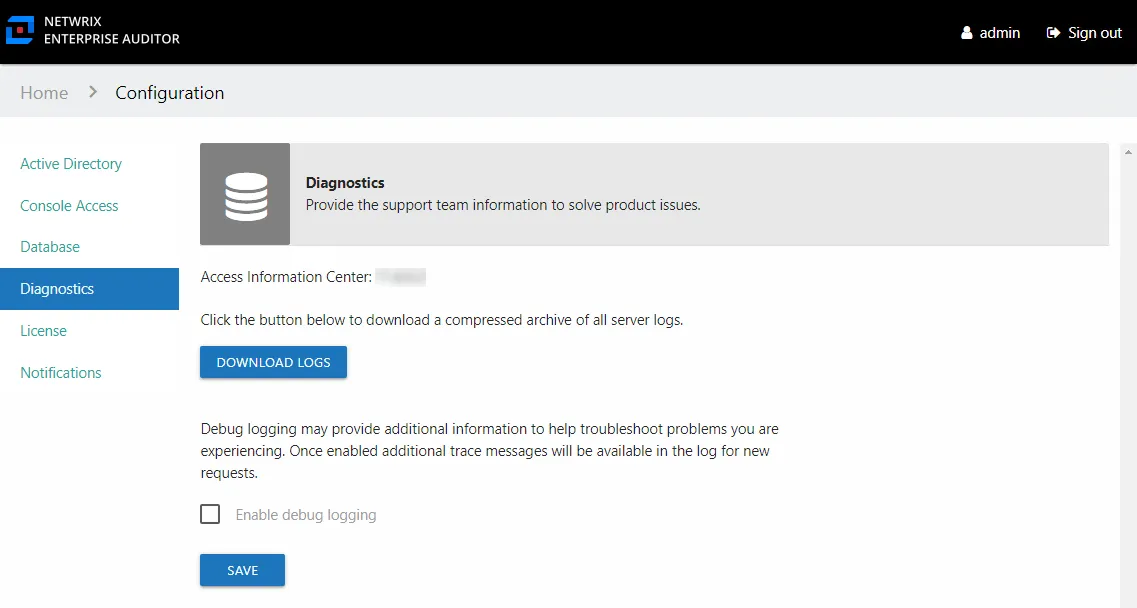
When requested by Netwrix Support, click Download Logs to download the archive of all application logs.
Debug Logs
When requested by Netwrix Support , follow the steps to provide debug logs.
Step 1 – On the Diagnostics page, check the Enable debug logging box.
Step 2 – Click Save.
Step 3 – Reproduce the issue you are having.
Step 4 – On the Diagnostics page, click Download Logs.
The downloaded logs have the debug logging information and can be sent to Netwrix Support. When your issue is resolved, do not forget to turn off Debug logs.
Notifications Page
The Access Reviews application uses the Simple Mail Transfer Protocol (SMTP) to send email messages. SMTP server information and several messaging options can be set through the Configuration > Notifications page.

At the top, the SMTP server and email security settings are configured. The Notification options is where you configure the sender information, and other optional settings. The Reminders section is for configuring weekly reminders for owners with outstanding reviews.
Configure SMTP Server Settings
SMTP server information is supplied and modified on the Notifications page. Follow the steps to configure or modify the SMTP settings.
Step 1 – In the Configuration interface, select the Notifications page.
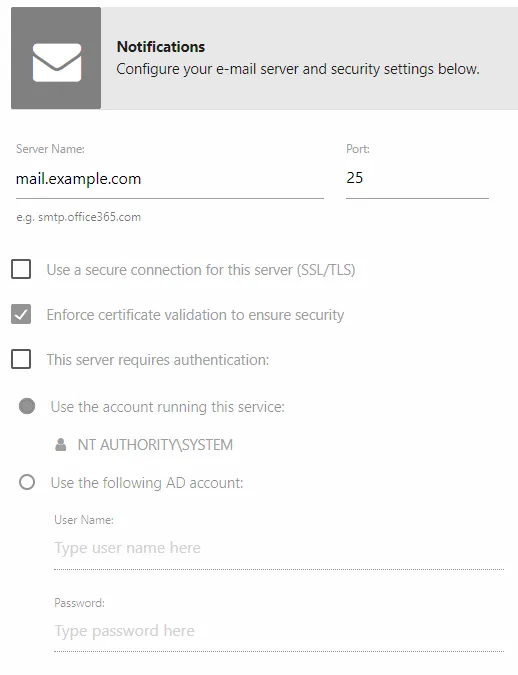
Step 2 – Enter the SMTP Server Name in the textbox. This should be the fully qualified domain name (mail.example.com) or IP Address.
Step 3 – If needed, modify the Port used by your SMTP server to listen for new messages. Historically, the default for SMTP has been port 25. However, if a secure connection is desired (SSL/TLS), the SMTPS port needs to be changed, traditionally 465. Alternately, environments with off-premises or outsourced email service, e.g. gmail.com, hotmail.com, etc., may have to supply a different submission port, traditionally port 587. Ultimately it is an organization’s email/messaging administrator who will know the proper value for the SMTP port.
Step 4 – SMTP security settings:
-
Use a secure connection for this server (SSL/TLS) – Allows for the use of a secure transport layer for message relay requests (submissions) and authentication requests
-
Enforce certificate validation to ensure security — Forces the use of certificate validation
-
This server requires authentication – Enable if the identified SMTP server requires authentication. Some SMTP servers traditionally have been configured to deny all but anonymous relay requests, i.e. an attempt to authenticate results in a denial, while an anonymous request is not denied. Select this checkbox, and then select one of the following radio buttons if authentication is required:
-
Use the account running this service
- To use this option, the SMTP server must be configured to use Integrated Windows Authentication (IWA).
- Select this radio button if the configured Active Directory service account will also be used to authenticate to the SMTP server.
-
Use the following AD Account
- To use this option, the SMTP server must be configured to use Integrated Windows Authentication (IWA).
- Select this radio button to specify either domain account or a traditional SMTP account and password to authenticate to the SMTP server.
-

Step 5 – Click Test Settings to ensure a connection to the SMTP server. The Test Settings window opens. Enter a valid email address and click OK.

Step 6 – If the SMTP settings are configured correctly, you receive a successful message. Click OK to close the Testing your settings window. The test recipient should have recieved a test email.
Step 7 – Click Save. Then click OK to confirm.
The Access Reviews Console is now configured to send email. See the following topics for additional Notification options.
Notification Options
Once the SMTP server is configured, there are additional options. Only the Reply-To field must be populated:
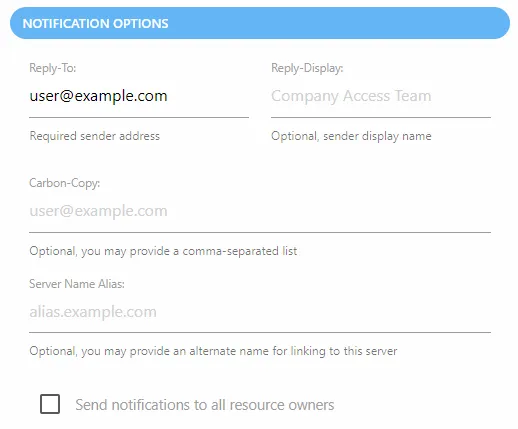
- Reply-To — The email address that receives responses to notifications sent by the application. This can be a “no reply” address.
- Reply-Display — Optionally enter a display name for the sender
- Carbon-Copy — Optionally set additional email addresses to be CC’d on all email messages sent
- Server Name Alias — Optionally provide an alternate name for the URL link to the Access Reviews Console. By default, the URL is the hosting server name and port, e.g. NEWYORKSRV10:81. If you do not want the server name visible in the URL, provide an alias here, e.g. AIC.NWXTECH.com.
- Send notifications to all resource owners — This option applies only to resources with multiple assigned owners. When unchecked, notifications are only sent to the Primary Owner. Check this option to send owner notifications to all assigned owners.
Remember, click Save after making modifications to the Notification settings.
Reminders
Resource Owners receive notification email when there are new pending tasks associated to their resources. You can also set up automated weekly reminders for outstanding pending tasks. Follow the steps to configure weekly reminders to resource owners.

Step 1 – In the Configuration interface, select the Notifications page and scroll down to the Reminders section.
Step 2 – Check the Send reminders to owners with pending events option.
Step 3 – Set the date and time for when the reminder will be sent:
- Day of the week – Select the day of the week from the drop-down menu
- Time of day – Click on the field to open a clock window. Set the time of day reminders will be sent, e.g. 12:00 AM
Step 4 – Click Save. Then click OK to confirm.
Assigned resource owners now receive weekly reminders of pending events. The Notifications were last sent on field will populate with the date timestamp for when the last set of reminders were sent.
Configuration Interface Overview
The Configuration interface is available only to users with the Administrator role. It is opened by the Configuration tab.
It has the following pages:
- Console Access Page – Grant users console access
- Active Directory Page – Configure the Active Directory service account used to add console users.
- Notifications Page – Configure the SMTP server, email security settings, notification options, and owner reminder settings
- Database Page – Configure the connection to the database
- Diagnostics Page – Download logs and enable debug log level for troubleshooting
Install
Once the prerequisites have been met, follow the steps to install the Access Reviews application.
Step 1 – Run the AccessReviews.exe executable, and the Netwrix Auditor Access Reviews Setup
wizard opens.
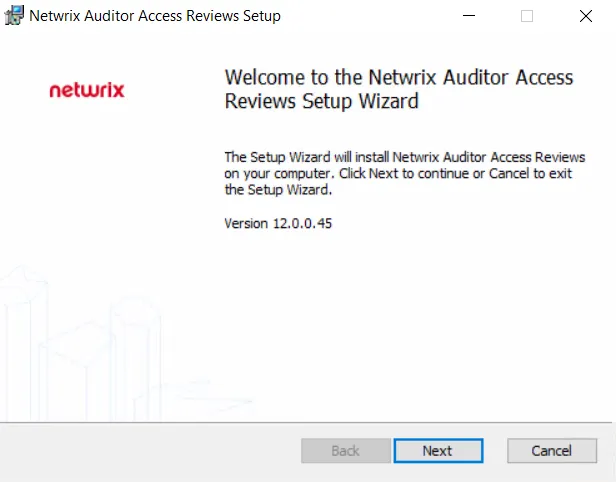
Step 2 – On the Welcome page, click Next to begin the installation process.
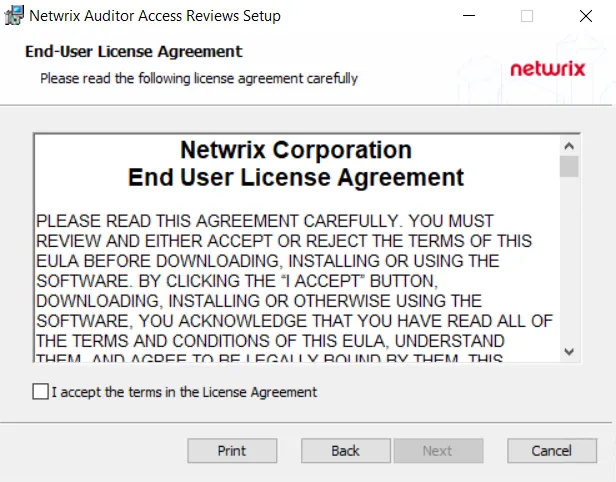
Step 3 – On the End-User License Agreement page, select the I accept the terms in the License Agreement checkbox and click Next.
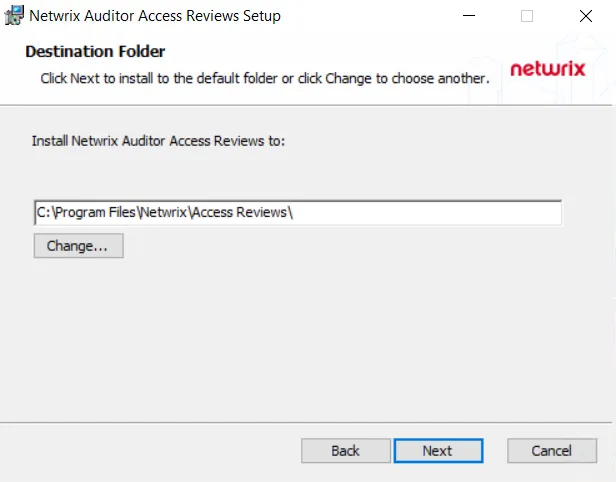
Step 4 – On the Destination Folder page, you can choose between the default destination folder and a custom folder. Click Change to browse for a different location. When the destination is set as desired, click Next.
NOTE: The default location is C:\Program Files\Netwrix\Access Access Reviews\. There are no
specific requirements for changing the path.
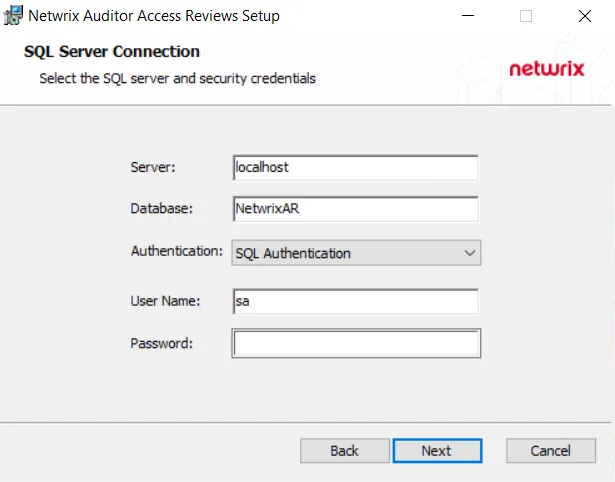
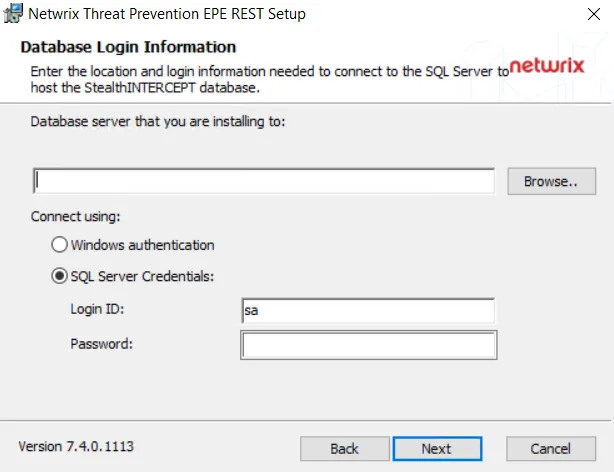
Step 5 – On the SQL Server Connection page, provide the required database information. Click Next to test the connection to the SQL Server.
-
Server — Enter the database server hostname (NetBIOS name, FQDN, or IP address) with the instance name or non-standard port, if applicable, in one of the following formats:
- No named instance, use
[SQLHostName], for exampleNT-SQL02 - Named instance, use
[SQLHostName]\[SQLInstanceName], for exampleNT-SQL02\Netwrix - No named instance with non-standard port, use
[SQLHostName],[PortNumber], for exampleNT-SQL02,72 - Named instance with non-standard port, use
[SQLHostName]\[SQLInstanceName],[PortNumber], for exampleNT-SQL02\Netwrix,72
- No named instance, use
-
Database — Enter the name of the database. By default, this is set to NetwrixAR.
-
Authentication – Select the Database service account type from the drop-down menu. Then enter the account information in the User Name and Password fields.
- For Windows Authentication – User Name format must be
[DOMAIN]\[username], for exampleNWXTECH\ad.bruce
- For Windows Authentication – User Name format must be
NOTE: See the Database Page topic for additional information.

Step 6 – If there are no errors, you will be asked to confirm creation of the new database. Click Yes.
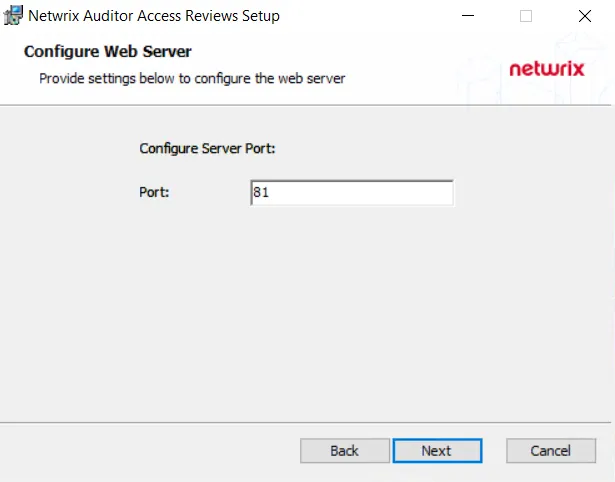
Step 7 – On the Configure Web Server page, you can choose between the default port and a custom port on which the application will be accessible. To change the port, enter a new port number in the field. When the port is set as desired, click Next.
NOTE: The default port is 81.
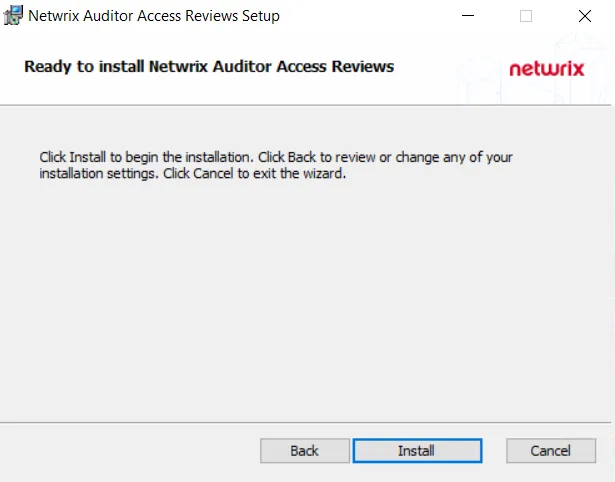
Step 8 – On the Ready to install page, click Install to begin the process.
Step 9 – Once the installation has successfully completed, click Finish to exit the wizard.
The installation wizard placed a Netwrix Auditor Access Reviews icon on the desktop. Now proceed to the First Launch topic for next steps.
Installation Overview
The Netwrix Auditor Access Reviews application relies on collected and analyzed data that is stored in a Microsoft® SQL® Server database. Netwrix Auditor must be installed and collecting data before installing and using the Access Reviews application. The Access Reviews Configuration tool must be used after installation to complete the integration of these products.
NOTE: Access Reviews is a separately licensed product and is not included with Netwrix Auditor. Make sure that you have the Access Reviews license enabled in Auditor.
Prerequisites
The Access Reviews application must be installed on the same server as Netwrix Auditor.
Permissions
Permissions are needed to the Netwrix Auditor database and to Active Directory. This can be one account with sufficient rights to each or two separate accounts. For the purpose of this document, these will be referred to as the Database service account and the Active Directory service account.
-
Database service account – This is the same account used by Netwrix Auditor for a database service account. This credential is required for installation.
NOTE: Database connection via TLS 1.2 (SQL Native Client) is supported.
-
Active Directory service account – The Access Reviews Console login authentication requires the Active Directory service account to have rights to "read" Active Directory. This credential is configured during installation based on the account used for connecting to the database. See the Active Directory Page topic for additional information.
Software Compatibility & Versions
For proper functionality, it is necessary for the version of the Access Reviews to be compatible with the existing Netwrix Auditor installation. If necessary, Netwrix Support can confirm whether the two product versions are compatible.
Latest Version Compatibility
| Component | Current Version |
|---|---|
| Netwrix Auditor Console | 10.7* |
| Netwrix Auditor Access Reviews | v12.0* |
Last Updated 6/6/2022
See the Upgrade Procedure topic for additional information.
Supported Browsers
Supported browsers for the Access Reviews Console include:
- Google® Chrome®
- Microsoft® Edge®
- Mozilla® Firefox®
Screen Resolution Requirement
Supported screen resolution of 1368 x 768 or greater.
Secure Console Access
Enable Secure Sockets Layer (SSL) for secure, remote connections to the application web server. In order to enable SSL, you need to create a certificate and then bind it to the secure port.
NOTE: Organizations typically have one or more system administrators responsible for Public Key Infrastructure (PKI) and certificates. To continue with this configuration, it will first be necessary to confer with the PKI administrator to determine which certificate method will conform to the organization’s security policies.
Follow the steps to enable SSL.
Step 1 – Create an SSL Binding.
Step 2 – Modify the AccessInformationCenter.Service.exe.Config File.
The Access Reviews application is now configured to use SSL for secure, remote connections.
Create an SSL Binding
You run a PowerShell command to create an SSL binding. The binding command has several environmental variables:
- The
$certHashvalue is theThumbprintvalue. - The
$ipvalue of the IP addresses. In the example script below, the value [0.0.0.0] is set for all IP addresses. - The
$portvalue must be accurate for your environment. The HTTP default port is 81. The HTTPS default is 481. However, it can be customized during installation. - The
$guidvalue is required for specifying a valid GUID value to identify the owning application for a binding purpose. It obtained from any valid GUID.
If you need to find the $certHash value of a certificate that was already created, run the
PowerShell dir command below on the certificate's drive. This will output the Thumbprint (Hash)
value and the certificate name:
dir cert:\localmachine\my
Replace the environmental variables in the example script below. Then Run the PowerShell command to create an SSL binding:
$guid = "1be32670-7644-4dce-9a5d-01643022074e"
$certHash = "03CFD5D51A0DAA2F3DCDA9407486B220449D0E92"
$ip = "0.0.0.0"
$port = "481"
"http add sslcert ipport=$($ip):$port certhash=$certHash appid={$guid}" | netsh
The next step is to modify the AccessInformationCenter.Service.exe.Config file.
Modify the AccessInformationCenter.Service.exe.Config File
Follow the steps to modify the Modify the AccessInformationCenter.Service.exe.Config file for
HTTPS.
Step 1 – Open the AccessInformationCenter.Service.exe.Config file in a text editor, e.g.
Notepad. It is located in the installation directory:
...\Netwrix\Access Reviews
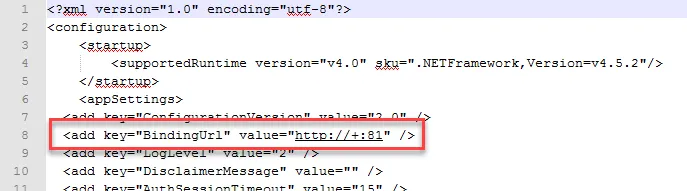
Step 2 – Change the BindingUrl key value to "https://+:481" (ensure the port number matches
the port number used in the PowerShell command run to create the SSL Binding.
Step 3 – Save and close the file.
Step 4 – Restart the Netwrix Auditor Access Reviews service in Services Manager
(services.msc).
The URL for the Access Reviews Console is now accessible
https://[Fully Qualified Domain Name for the Machine]:481 (if port 481 was used when creating the
binding). For example, https://NEWYORKSRV10.NWXTech.com:481.
Upgrade Procedure
CAUTION: If you are upgrading from the Netwrix Access Information Center for Netwrix Auditor to the Netwrix Auditor Access Reviews application, see the Special Considerations topic for upgrade steps.
To upgrade the Access Reviews application to a newer version, simply run the new AccessReviews.msi
executable. It is not necessary to uninstall the existing version. See the Install
topic for additional information.
Remember, the Access Reviews version must align to the compatible Netwrix Auditor version.
When the installer is run over an existing version, the following is happening in the backend:
-
During the installation process, a Backup folder is created in the Access Reviews installation directory
...\Netwrix\Access Reviews
- The Backup folder contains the files where various settings reside listed in the table below
-
The backup folder files are copied over the default files laid down by the installer, preserving customized settings
-
After the installation is complete, the Backup folder is removed
| File | Location | Guidance |
|---|---|---|
| Email Templates (multiple files) | Located in the Backup folder | The HTML templates that are used to send notification email. These can be customized with logos or corporate branding. |
| AccessInformationCenter.Service.exe | Located in the Backup folder | Contains custom application settings and logging levels. |
| Version.txt | Located in the Backup folder | Indicates the version number associated with the backup contents. |
Special Considerations
The originally released Netwrix Access Information Center has been rebranded to Netwrix Auditor Access Reviews. This rebranding project included changing the installation directory, the name of the service, and the default name of the database created by the installer. Follow the steps to replace Netwrix Access Information Center with Netwrix Auditor Access Reviews.
Step 1 – Install the Netwrix Auditor Access Reviews application on the same server where the Netwrix Access Information Center was installed. See the Install topic for additional information. On the SQL Server Connection page:
- Supply the information for the existing database. The default name for the original database was NetwrixAIC. However, it could have been Customized.
- Use the same credentials for the SQL Server Connection.
NOTE: The new destination folder will be ...\Netwrix\Access Reviews.
Step 2 – Launch the application and reset the Builtin Administrator password. See the First Launch topic for additional information.
Step 3 – It will be necessary to add your Console Users again. See the Console Access Page topic for additional information.
Step 4 – It will be necessary to configure the Notification settings. See the Notifications Page topic for additional information.
Step 5 – If you have customized your email templates, it will be necessary to copy the Templates
folder from the old ...\Netwrix\Access Information Center installation directory to the new
...\Netwrix\Access Reviews installation directory.
All of the resources with assigned owners will be visible on the Resource Owners tab. All reviews will be visible on the Entitlement Reviews tab.
After the upgrade has been confirmed to be successful, you can optionally remove/delete the old
installation directory: ...\Netwrix\Access Information Center.
Select Data Sources
Remember, the Access Reviews must already be installed on the Auditor server.
You can configure Netwrix Auditor Access Reviews in two ways:
- Select Data Sources in the General Settings
- Select Data Sources in the Monitoring Plan
Select Data Sources in the General Settings
If you plan to use Access Reviews for multiple data sources, configure the settings to work with the data sources that you select.
Follow the steps to configure Access Reviews in the Netwrix Auditor.
Step 1 – Go to Settings > General > Access Reviews.

Step 2 – Click Manage.
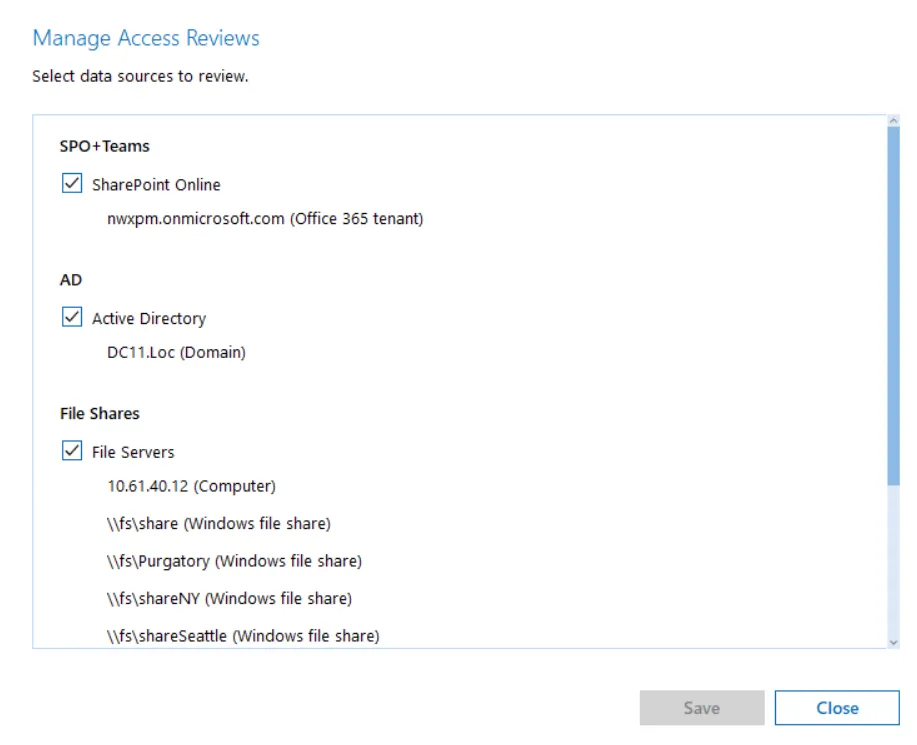
Step 3 – Select the desired data sources to review.
Step 4 – Click Save.
Netwrix Auditor Access Reviews is configured and ready to use in the Netwrix Auditor.
Select Data Sources in the Monitoring Plan
If you plan to use Access Reviews for a specific monitoring plan, configure Access Reviews in that monitoring plan.
Follow the steps to configure Access Reviews in the Netwrix Auditor.
Step 1 – Go to Configuration > Monitoring plans.
Step 2 – Double click the desired monitoring plan.
Step 3 – Click Edit data source button on the left.

Step 4 – Navigate to the Send data for Access Reviews and select the checkbox.
Step 5 – Click Save or Save & Close.
Netwrix Auditor Access Reviews is configured and ready to use in the Netwrix Auditor.