Active Directory Tab
The Active Directory tab provides options to configure the agent settings for monitoring an Active Directory domain controller. These settings are part of the Active Directory monitoring and can only be enabled for agents on domain controllers.
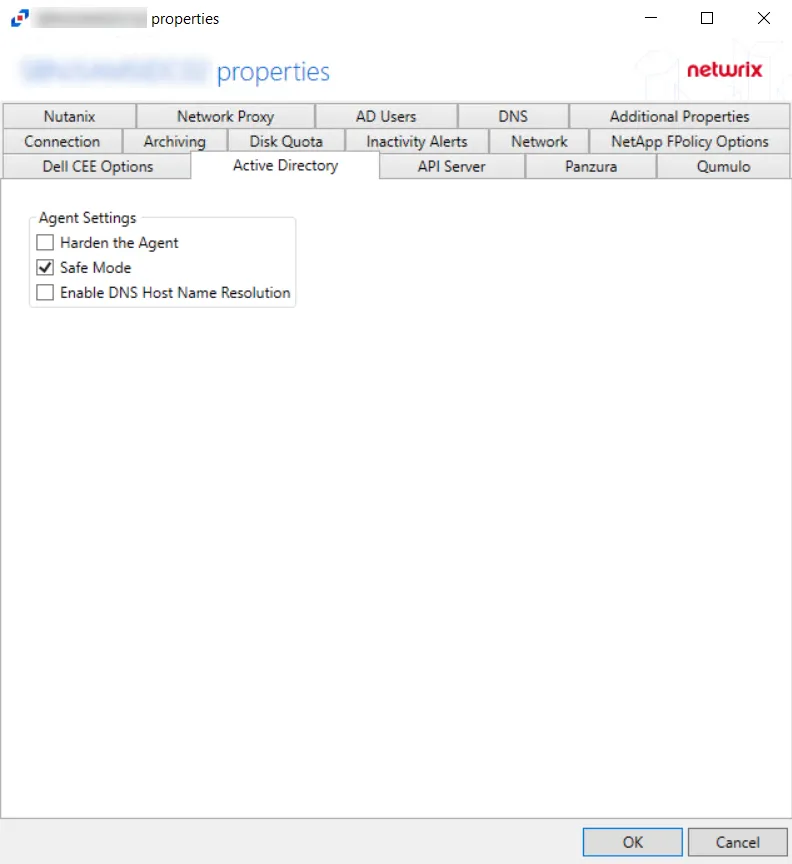
The Agent Settings allow users to control the AD agent’s properties:
-
Harden the Agent – Protects the AD agent from being altered, stopped, or started from within the local Service Control Manager
-
Safe Mode – If selected, the AD agent checks LSASS versions upon start up. Any change in LSASS since the previous start prevents the monitoring modules from loading.
NOTE: This is a safety measure that disables monitoring if the environment changes as in rare cases the instrumentation may cause LSASS crashes. Should the version change occur, a warning will be shown next to the agent on the Agents page. The Start pending modules button allows you to force the agent to enable monitoring.
-
Enable DNS Host Name Resolution – If selected, the AD agent looks up the missing data (a NetBIOS name, a Fully Qualified Domain Name, or an IP Address) that is missing fromthe event
NOTE: This provides more uniform data, but may have a performance impact on the machine where the AD agent is deployed, especially if that machine does not handle the name resolution locally.
Click OK to commit the modifications. Click Cancel to discard the modifications. The Agent Properties window closes.
Advanced Active Directory Monitoring using StealthINTERCEPT
More advanced Active Directory Monitoring features are available for use through Threat Prevention. See the following sections for additional information:
- See the Migrate Active Directory Monitoring to StealthINTERCEPT topic for additional information
- See the Configuring StealthINTERCEPT to Send Active Directory Activity to the Activity Monitor topic for additional information
Migrate Active Directory Monitoring to StealthINTERCEPT
To transfer Active Directory Activity Monitoring from the Activity Monitor to Threat Prevention, deploy Threat Prevention Agents to targeted domain controllers.
NOTE: If Threat Prevention installed SI Agents on domain controllers before the Activity Monitor AD agents were deployed, then skip to the next set of instructions to configure Active Directory Monitoring through Threat Prevention.
If Threat Prevention data is not used by other Netwrix products, uninstall the activity agent from the domain controllers if you do not plan to receive Active Directory activity in Activity Monitor anymore and the agents are not used for file system monitoring. If Threat Prevention data is to be used by other Netwrix products, see the Configuring StealthINTERCEPT to Send Active Directory Activity to the Activity Monitor topic for additional information.
Configuring StealthINTERCEPT to Send Active Directory Activity to the Activity Monitor
Once the activity agent is deployed to a domain controller with an existing Threat Prevention agent, a connection can be secured between both agents. Follow these instructions to configure the policy used for Active Directory Activity Monitoring from the Threat Prevention Admin Console.
Step 1 – Configure the File, Syslog, or Threat Manager outputs on the Monitored Domains Tab in the Activity Monitor Console. See the Output for Monitored Domains topic for additional information.
Step 2 – Within the Threat Prevention Admin Console, select the Threat Manager Event Sink Configuration Window option under the Configuration menu, and enter amqp://localhost:4499 within the Threat Manager URI field on the pop-up window. Then click Save.
Step 3 – Still within Threat Prevention, create a New Policy or select an existing one to send Active Directory events data to Activity Monitor. See the Navigation Pane Right-Click Commands section of the Netwrix Threat Prevention Documentation for additional information.
Step 4 – Enter a description within the General Tab of the New Policy Configuration page to identify the AD Module policy settings. Click the button in front of the policy status to toggle from Disabled to Enabled.
Step 5 – On the Event Type Tab, add events and objects to monitor. Click the AD Operations to include in the policy.
Step 6 – Under the Actions Tab, check the Send to StealthDEFEND checkbox to enable sending Active Directory Activity events data to Activity Monitor. Click Save
See the Netwrix Threat Prevention Documentation for additional information on policy configurations.
AD Users Tab
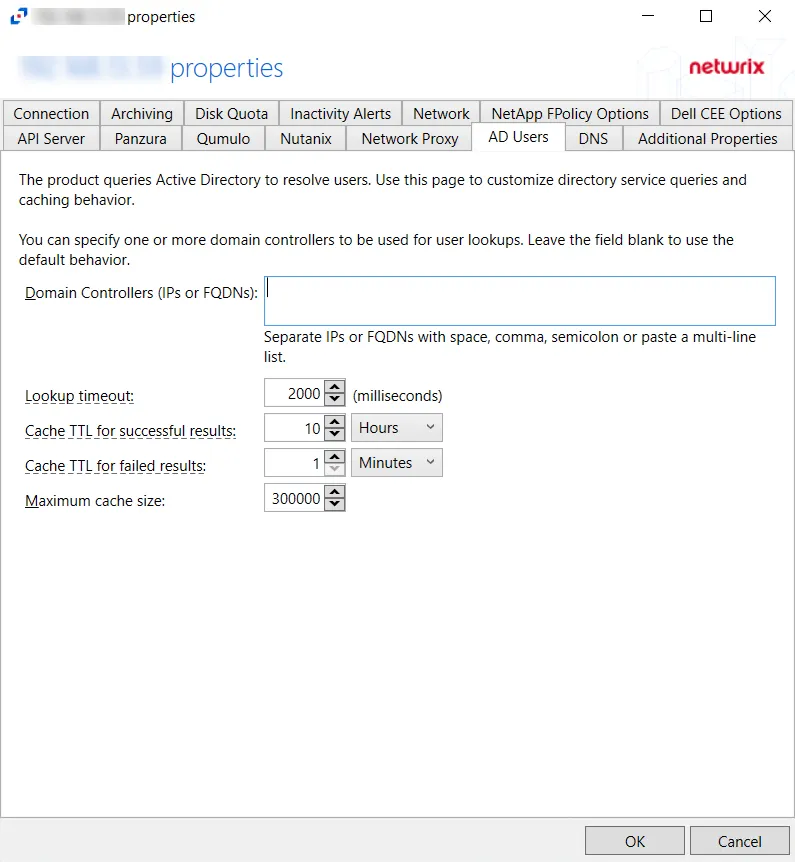
Use the AD Users tab to customize Active Directory service queries and caching behavior.
The configurable options are:
- Domain Controllers (IPs and FQDNs) – IP addresses or FQDN of domain controllers. IP addresses or FQDN should be entered as separate addresses with space, comma (,), semicolon (;), or a multi-line list. Leave the box blank to use the default domain controller.
- Lookup timeout – Specify the time for look-up timeout in milliseconds. The default is 2000 milliseconds. If a query fails to complete in the specified interval then the product reports an empty username or a previous result from the cache. The product continues to wait for a response in the background so that further events can use the resolution result.
- Cache TTL for successful results –Specify the caching interval (time-to-live) for successful AD responses.The default is 10 hours. When an AD query returns a valid username or SID, the response is cached for the specified time. It is recommended to use large TTL values as the user information does not often change.
- Cache TTL for failed results – Specify the caching interval (time-to-live) for failed AD responses. The default is 1 minute. When an AD query cannot resolve a SID or username, the failed result is cached for the specified time. Caching of failed responses helps to reduce the load on domain controllers and improve performance of event processing. Short TTL values are recommended to make the product report accurate user information.
- Maximum cache size – Specify the maximum cache size for both successful and failed responses. The default is 300000.
Click OK to commit the modifications. Click Cancel to discard the modifications. The Agent Properties window closes.