Model Changes in the AIC
Follow the steps to model resource access changes for a single trustee or multiple trustees.
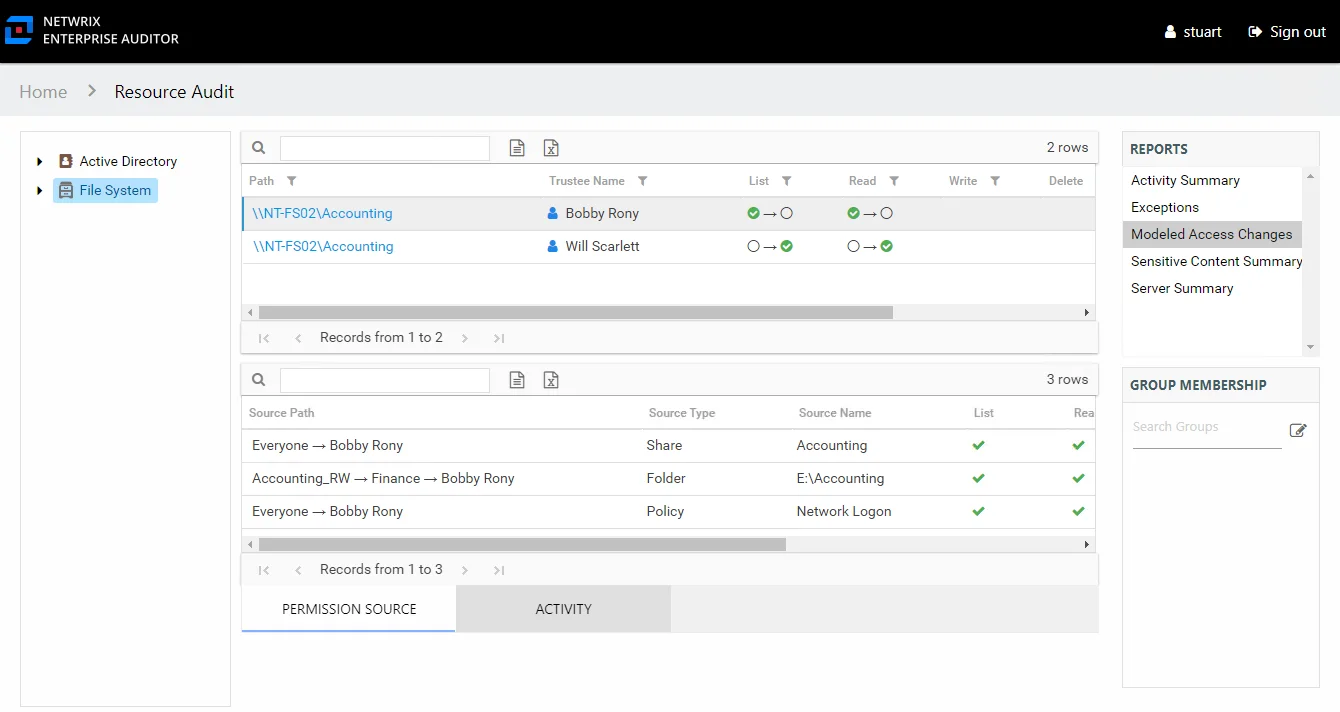
Step 1 – Navigate to a desired file system resource and select the Effective Access report in the Reports pane.
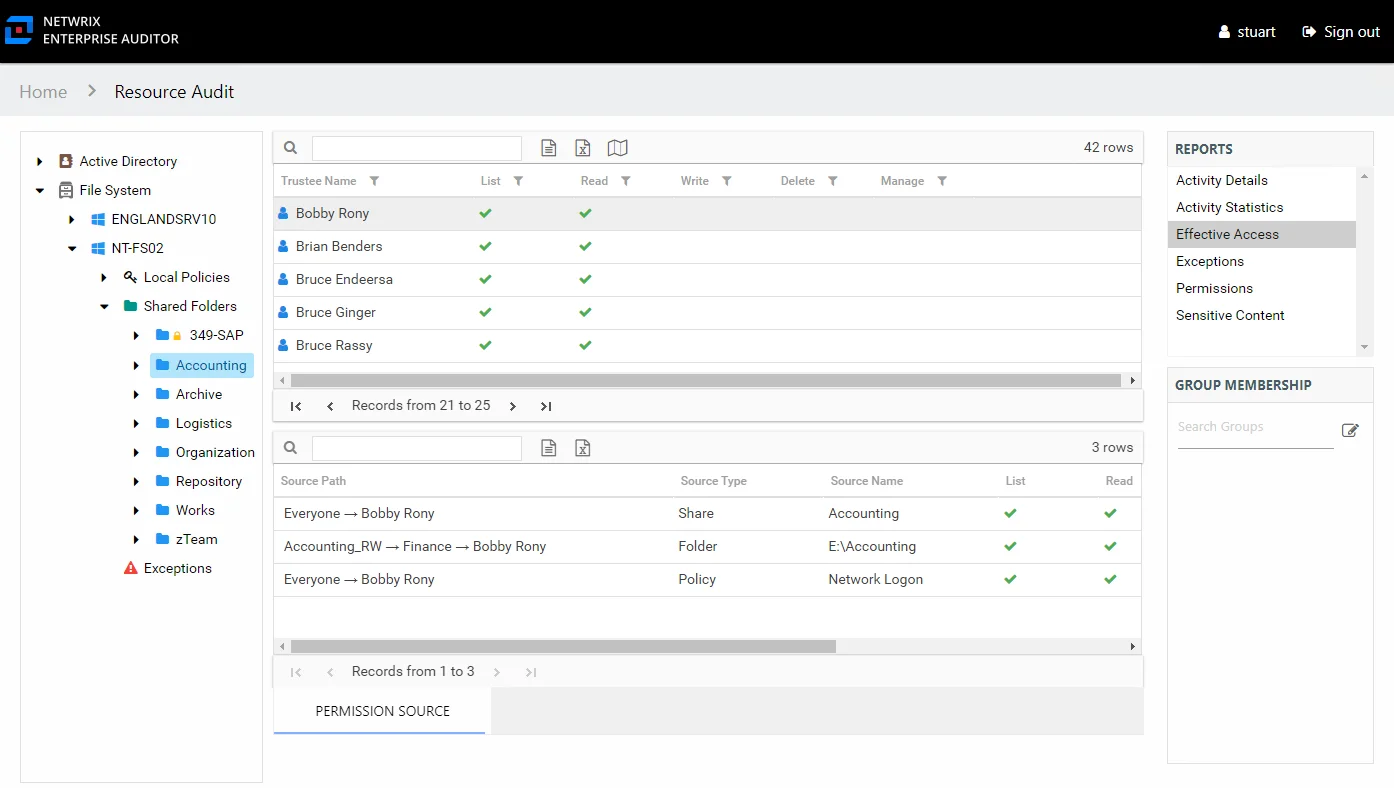
Step 2 – Select a trustee from the top table in the report. The Permission Source table displays the Source Path, or methods of access, to the selected resource. In this example, the trustee has access through three sources on policies, shares, and folders.
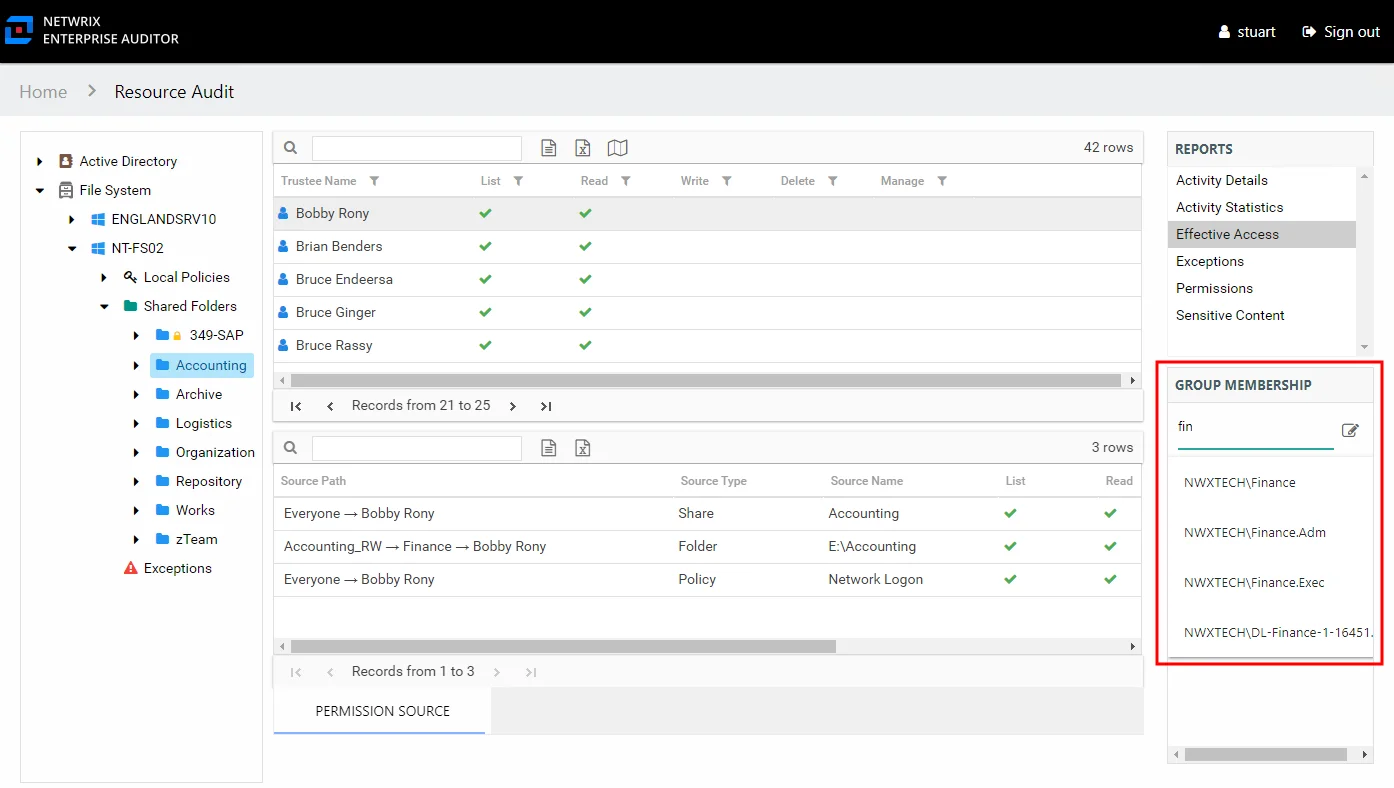
Step 3 – In the Group Membership pane, begin to enter the name of the group that grants the access to be changed. Select it from the list that shows in the drop-down menu. The group’s membership list opens.
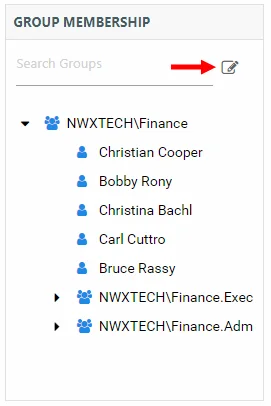
Step 4 – Click the Change Group Membership button on the Group Membership pane. The Group Membership Changes window opens.
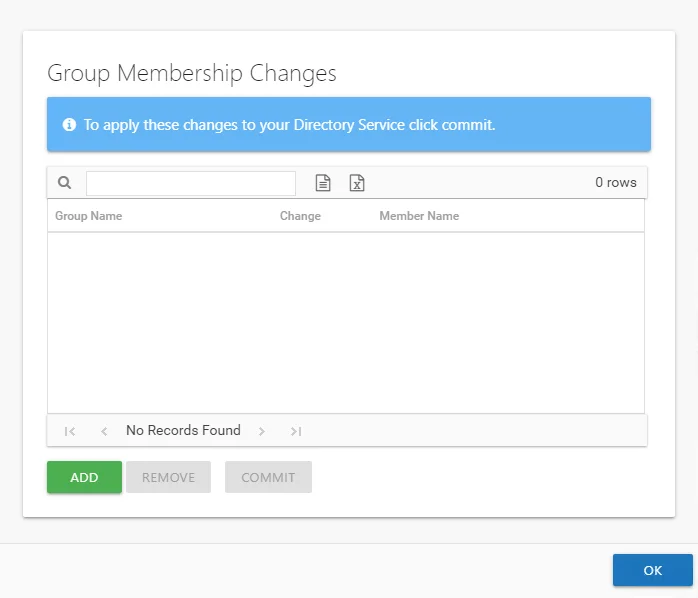
Step 5 – If this is the first change being modeled, the table is empty. If other changes are being modeled, they are listed in the table. Click Add to open the Add Membership Change wizard.
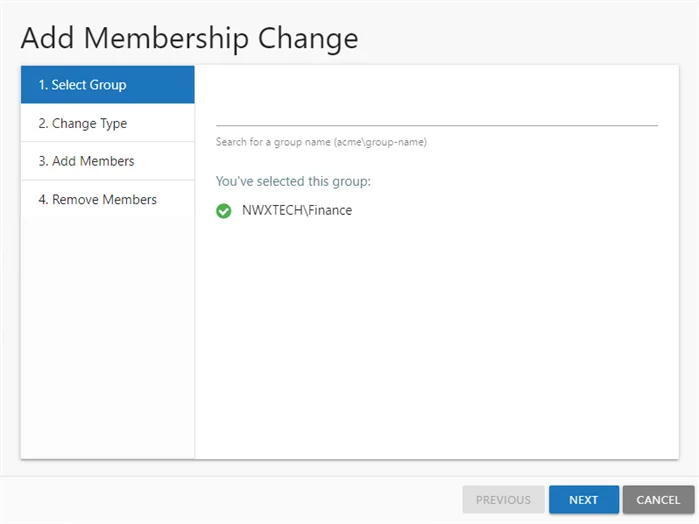
Step 6 – On the Select Group page, the selected group is displayed. You can search to select a different group. Click Next.
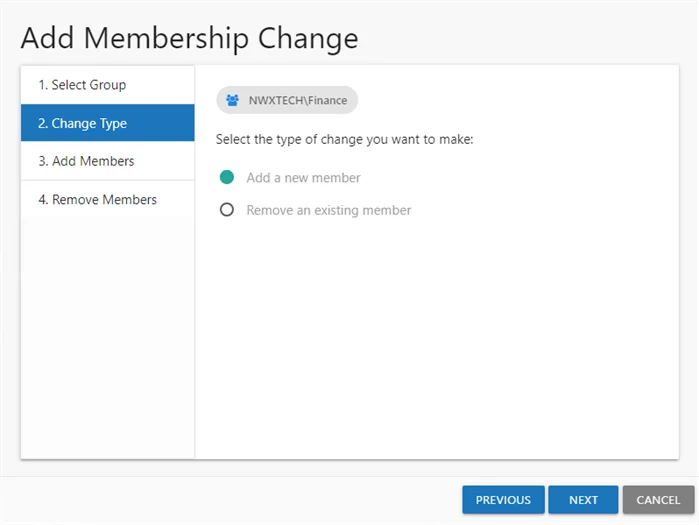
Step 7 – On the Change Type page, indicate the type of change to be modeled:
- Add a new member – Opens the Add Members page. If you select this option, proceed to Step 8.
- Remove an existing member – Opens the Remove Members page. If you select this option, skip to Step 10.
Click Next.
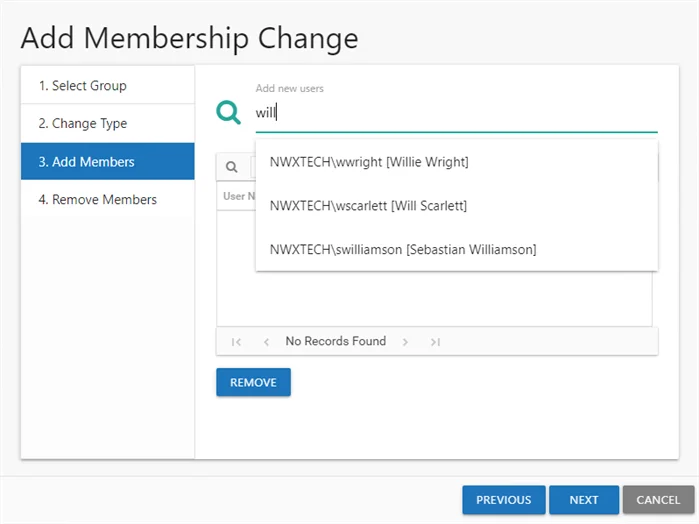
Step 8 – Begin to enter the trustee name in the search box. Available groups and users auto-populate in the drop-down menu. Select the desired trustee and the new member is added in the user list. Repeat as desired to add multiple members.
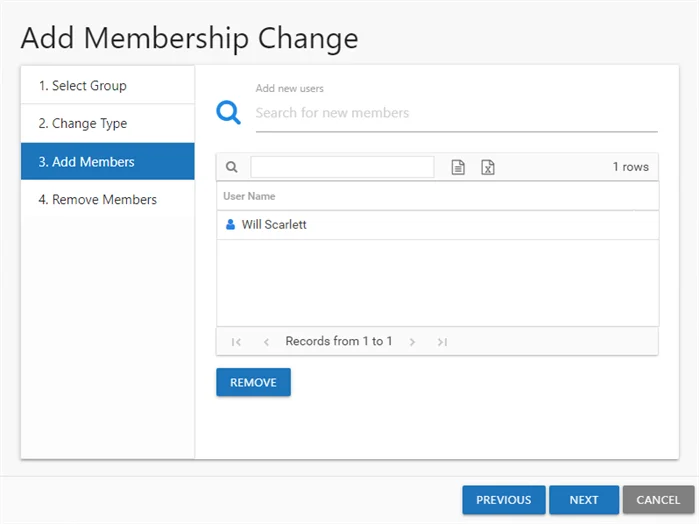
Step 9 – The members to be added are shown in the User Name table. Click Next. The Add Membership Change wizard closes, and the new members are listed on the Group Membership Changes window. Skip to Step 12.
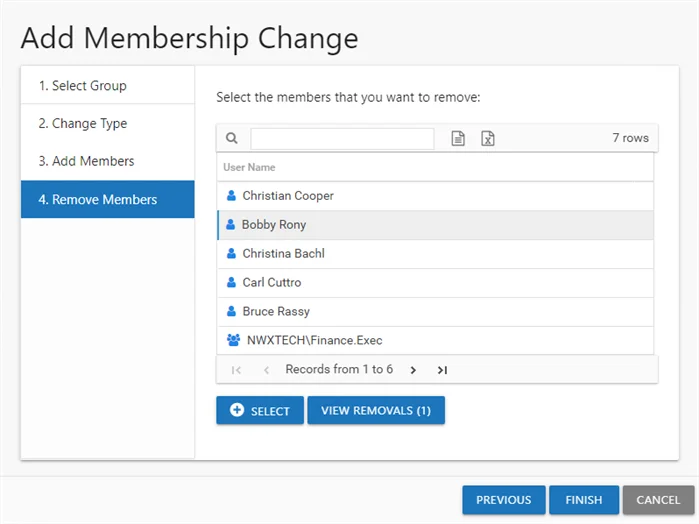
Step 10 – On the Remove Members page, the existing group members are listed. Select the desired members and click Select.
NOTE: The number on the View Removals button changes to reflect the number of users selected.

Step 11 – (Optional) Click View Removals to view the members selected for removal. To remove a member from this list, click Remove and then click OK.
Step 12 – The members selected for removal are shown in the User Name table. Click Finish. The Add Membership Change wizard closes, and the members to be removed are listed on the Group Membership Changes window.
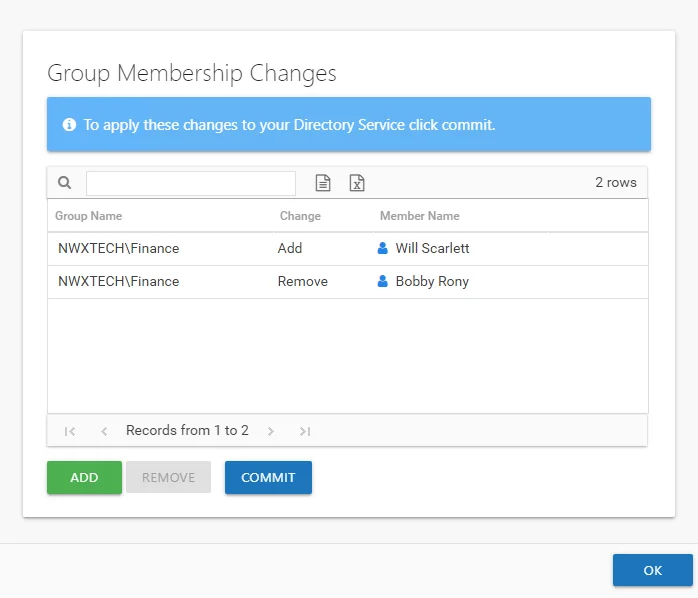
Step 13 – Repeat Steps 5-9 to model adding more members. Repeat Steps 5-7 and 10-11 to model removing more members. When the changes to be modeled are set as desired, click OK. The Group Membership Changes window closes.

When the modeled changes impact the effective access for a trustee, it is displayed in the top section of the Effective Access report selected in Step 1. An illustration shows exactly how the modeled changes would impact a trustee’s access to the selected resource. It may take removing the trustee from multiple groups or adding the trustee to another group before access is modified as desired. View the global impact these changes will have on the trustee’s access to all organizational resources in the Modeled Access Changes report at the File System node level. See the Modeled Access Changes Report topic for additional information.
Modeled Access Changes Report
The Modeled Access Changes report at the File System node provides an enterprise wide view of modeled access changes. This report is blank if no changes have been modeled or if the modeled changes have no impact on the environment. This report includes the following tables:
- Permission Source – Displays all of the ways the trustee has been granted rights to the resource
- Activity – Displays additional information on recent activity performed by the trustee which would have been impacted by the modeled change
This report is comprised of the following columns:
- Path – Location of the resource where the modeled change had an impact
- Trustee Name – Owner of the trustee account
- Trustee Account – Active Directory account associated with the trustee
- Department – Department to which the trustee account belongs
- Title – Trustee’s title as read from Active Directory
- Mail – Trustee’s email account as read from Active Directory
- EmployeeId – Corporate ID for the employee as read from Active Directory
- Description – Description of the trustee object as read from Active Directory
- DistinguishedName – Distinguished name for the trustee account
- ObjectSid – Security ID of the object
- Disabled – True or False if trustee account is disabled
- Deleted – True or False if trustee account is deleted
- Stale – True or False if trustee account is stale (according to the length of inactive time used by the Enterprise Auditor data collection and analysis configuration to identify stale accounts)
- Direct – True or False if the permission is directly assigned
- Impacted – True or False if recent activity would have been impacted by the modeled change. The activity must have occurred within the value set for the ActivityDays parameter in the web.config file. By default, this is set to 90 days. This feature requires the File System Activity Auditing (FSAC) collection jobs in Enterprise Auditor to be executed on a regular basis.
The following rights are a normalized representation of the Share and NTFS permissions granted to the trustee:
- List – Right to view list of files and subfolders
- Read – Right to view/read files and subfolders
- Write – Right to add or modify files and subfolders
- Delete – Right to delete files and subfolders
- Manage – Equivalent to full control over files and subfolders
There are two tables at the bottom displaying Permission Source and Activity for the selected resource.
Permission Source Table
The Permission Source table contains all of the ways the trustee has been granted rights to the resource. The number of rows for this table indicates the number of ways this trustee would be granted access. This table is comprised of the following columns:
-
Source Path – Location for which the trustee would be granted rights to the selected resource, which can be represented two ways:
- Directly Applied – Rights would be granted directly to the selected trustee
- Access through another trustee, path starts with trustee assigned the direct rights and shows all nested groups leading to the selected trustee
-
Source Type – Share or folder source of the permission
-
Source Name – Name of the resource where the permission is assigned
The following rights are a normalized representation of the Share and NTFS permissions granted to the trustee:
- List – Right to view list of files and subfolders
- Read – Right to view/read files and subfolders
- Write – Right to add or modify files and subfolders
- Delete – Right to delete files and subfolders
- Manage – Equivalent to full control over files and subfolders
The following columns display the combined direct and inherited rights:
- Allow Mask – Bitmask corresponding to Windows ACE permission bits for combined direct and inherited allow rights
- Deny Mask – Bitmask corresponding to Windows ACE permission bits for combined direct inherited deny rights
Activity Table
The Activity table contains additional information on recent activity performed by the trustee which would have been impacted by the modeled change. Activity data displays local time stamps. This table will be blank if any of the following are true:
- Activity is not being monitored for the targeted environment
- The FSAC jobs within Enterprise Auditor have not been run
- There were no operation events logged for the selected trustee

This table is comprised of the following columns:
- Access Time – Date and timestamp for when the operation occurred
- Trustee Name – Name of the trustee
- Trustee Account – Active Directory account associated with the trustee
- Department – Department to which the trustee account belongs
- Title – Trustee’s title as read from Active Directory
- Mail – Trustee’s email account as read from Active Directory
- EmployeeId – Corporate ID for the employee as read from Active Directory
- Description – Description of the trustee object as read from Active Directory
- DistinguishedName – Distinguished name for the trustee account
- ObjectSid – Security ID of the object
- Disabled – True or False if trustee account is disabled
- Deleted – True or False if trustee account is deleted
- Resource – Type of resource
- Operation – Type of operation performed on the file (read, add, update, delete, permission change, rename)
- Access – Whether the trustee was granted access to execute the operation: Allowed or Denied
- Path – Location of the file
- Target Path – New location if changed by the operation. Blank if the operation does not result in a new path.
- Process Name – Name of the process which performed the operation
Clear Modeled Changes
Modeled changes remain modeled for as long as the Access Information Center user is logged in unless committed to Active Directory by the Access Information Center. Follow the steps to clear modeled changes without signing out.
Step 1 – Click the Change Group Membership button in the Group Membership pane to open the Group Membership Changes window.
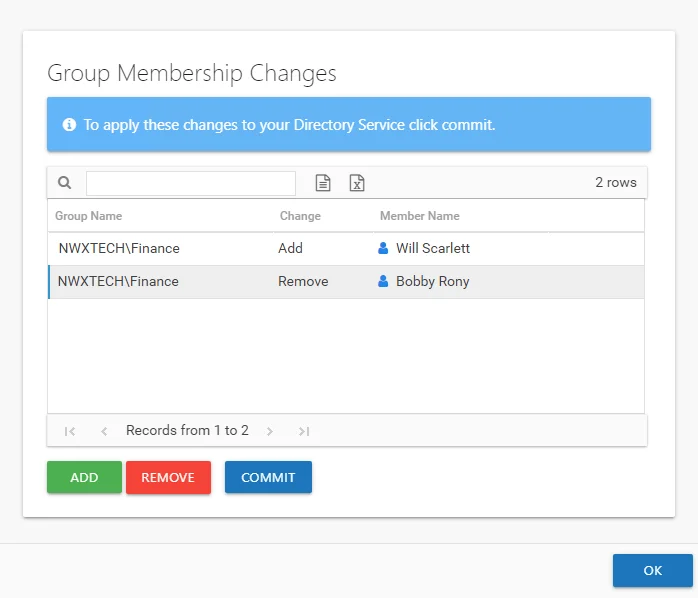
Step 2 – Select all changes being modeled. Use the Window’s ctrl and left-click key command to select multiple changes.
Step 3 – Click Remove. If no modeled changes are selected, only the change at the top of the list is removed.
Step 4 – Click OK. The Group Membership Changes window closes.
The Modeled Access Changes report reloads to a blank state. The Effective Access report reloads to only show current effective access.