2-Oracle_SensitiveDataScan Job
The 2-Oracle_SensitiveDataScan job discovers sensitive data in Oracle databases across all targeted Oracle database servers based on pre-defined or user-defined search criteria. See the Sensitive Data Discovery topic for additional information.
Query for the 2-Oracle_SensitiveDataScan Job
The SensitiveDataScan Query uses the SQL Data Collector for the following query:
- SensitiveDataScan – Collects Sensitive Data from targeted instances
Configure the 2-Oracle_SensitiveDataScan Query
The 2-Oracle_SensitiveDataScan job is preconfigured to run using the default settings for the Sensitive Data Collection category in the SQL Data Collector. Follow the steps to customize configurations:
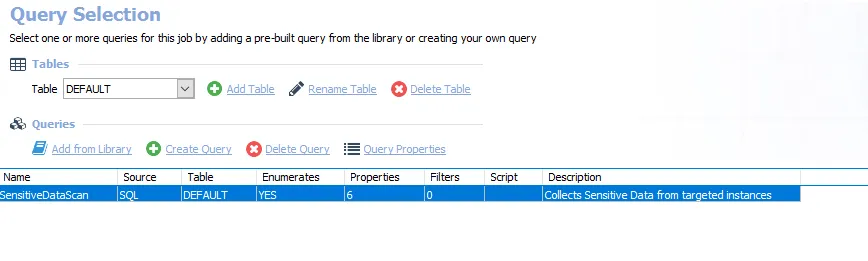
Step 1 – Navigate to the Databases > 0.Collection > Oracle > 2-Oracle_SensitiveDataScan > Configure node and select Queries.
Step 2 – In the Query Selection view, select the SensitiveDataScan query and click Query Properties. The Query Properties window opens.
Step 3 – Select the Data Source tab and click Configure. The SQL Data Collector wizard opens.
CAUTION: Do not make changes to wizard pages not listed in these steps. They have been pre-configured for this job.
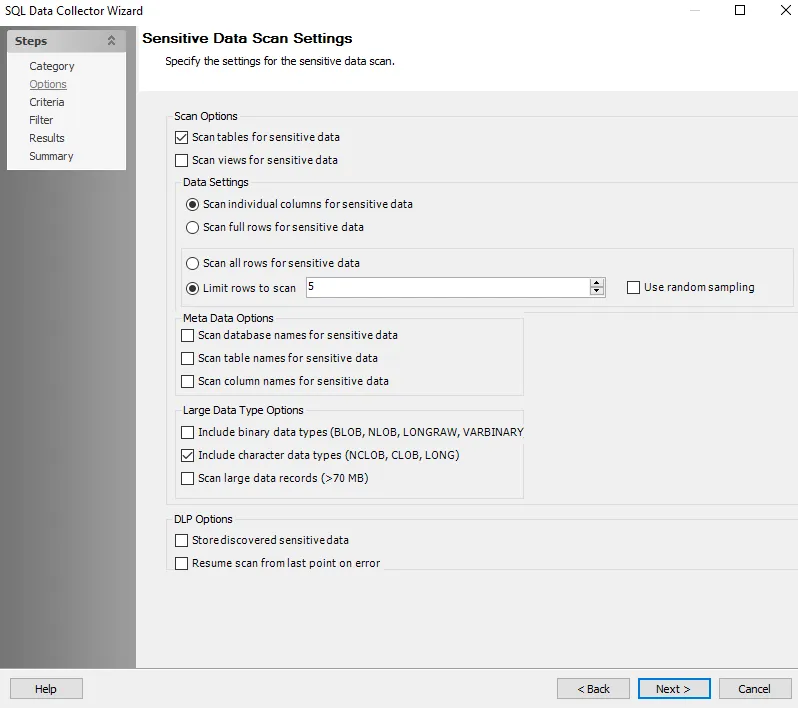
Step 4 – Navigate to the Options page. Enable or disable configuration options as needed. Click Next to continue.
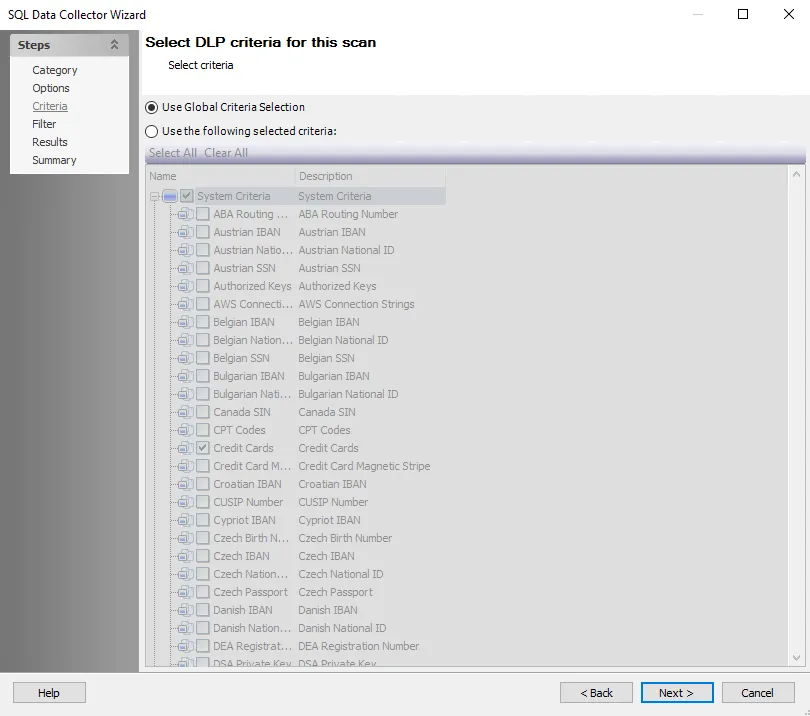
Step 5 – Navigate to the Criteria page. Select or deselect criteria used to define sensitive data. Click Next to continue.
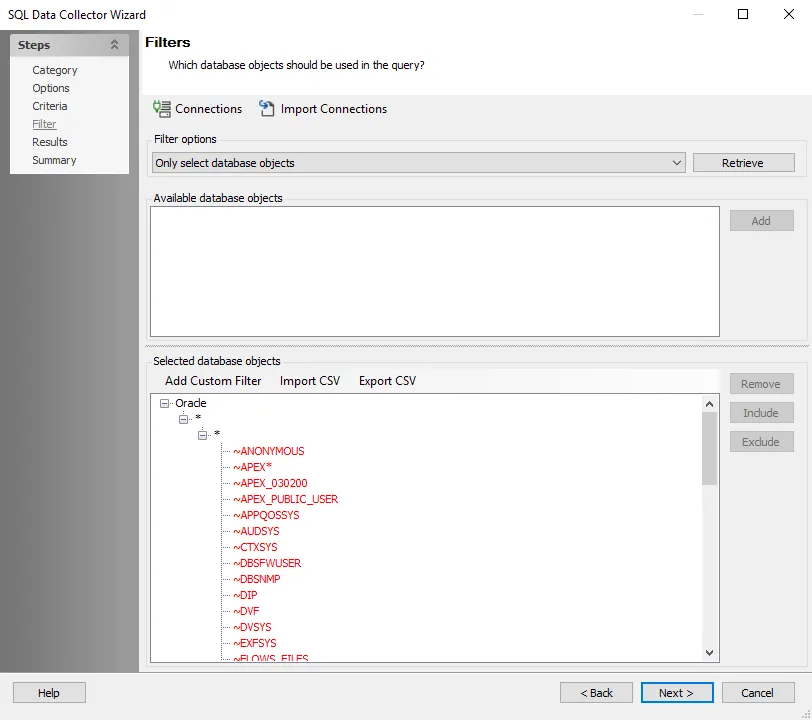
Step 6 – To query for specific databases/instances, navigate to the Filter page. The default query target is All Databases. The default query scope is Only select database objects. Click Retrieve. The Available database objects section will be populated. Databases and instances can be added in the following ways:
- Select the desired database objects and click Add
- Use the Import CSV button to import a list from a CSV file, if desired
- Optionally, use the Add Custom Filter button to create and apply a custom filter
Step 7 – Navigate to the Summary page, click Finish to save any setting modifications or click Cancel if no changes were made. Then click OK to close the Query Properties window.
The 2-Oracle_SensitiveDataScan job is now ready to run with the customized settings.
Analysis Tasks for the 2-Oracle_SensitiveDataScan Job
Navigate to the Databases > 0.Collection > Oracle > 2-Oracle_SensitiveDataScan > Configure node and select Analysis to view the analysis tasks.
CAUTION: Do not modify or deselect the selected analysis tasks. The analysis tasks are preconfigured for this job.
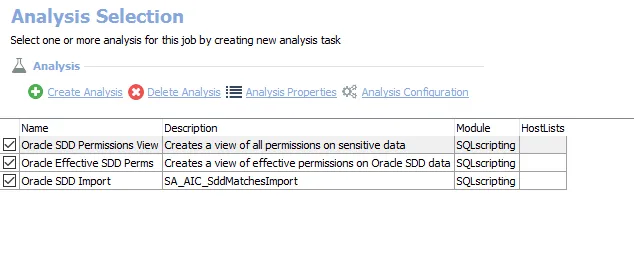
The default analysis tasks are:
- Oracle SDD Permission View – Creates a view of all permissions on sensitive data
- Oracle Effective SDD Perms – Creates a view of effective permissions on Oracle SDD data
- Oracle SDD Import – Creates the SA_AIC_SddMatchesImport table accessible under the job’s Results node