1-AD_Scan Job
The 1-AD_Scan Job collects data from Active Directory. In most environments, this job requires no additional customizations before running it. Optionally, the job can be configured to scope scan options and to collect custom attributes. For enable SSL encryption for communication with Active Directory, see the Enable SSL Option topic for additional information.
Queries for the 1-AD Scan Job
The 1-AD_Scan Job uses the ADInventory Data Collector for the following query:
-
AD Inventory – Targets a domain controller to collect inventory data for user, group, and computer objects
- This query can be modified. See the Customize the 1-AD_Scan Query topic for additional information.
Customize the 1-AD_Scan Query
The 1-AD_Scan Job has been preconfigured to run with the default settings with the category of Scan Active Directory. Follow the steps to set any desired customizations to scan options or to collect custom attributes.
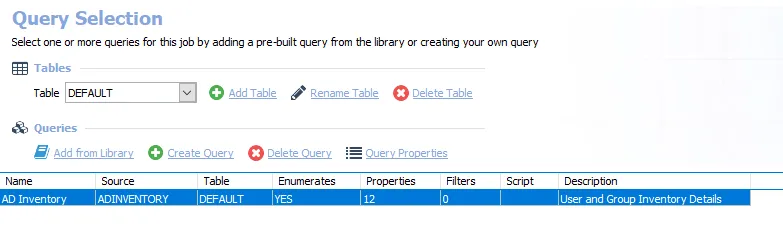
Step 1 – Navigate to the .Active Directory Inventory > 1-AD_Scan > Configure node and select Queries.
Step 2 – In the Query Selection view, click Query Properties. The Query Properties window opens.
Step 3 – Select the Data Source tab, and click Configure. The Active Directory Inventory DC Wizard opens.
CAUTION: Do not make changes to other wizard pages as they have been pre-configured for the purpose of this job.
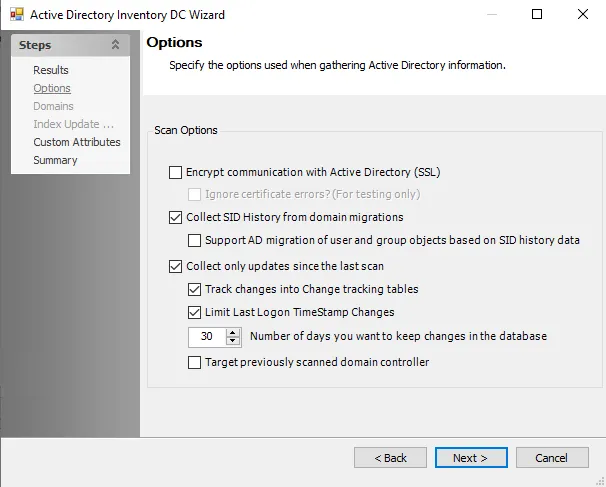
Step 4 – (Optional) On the Options page, you can:
- Enable encrypted communication with Active Directory (SSL)
- Configure the differential scan settings using the Collect only updates since last scan settings
See the ADInventory: Options topic for more information.
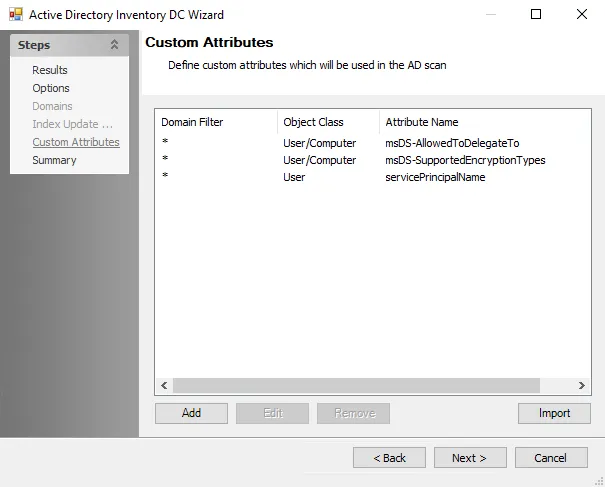
Step 5 – (Optional) On the Custom Attributes page, add any desired custom attributes to be used in the Active Directory scan. See the ADInventory: Custom Attributes topic for additional information.
Step 6 – Navigate to the Summary page. Click Finish to save any setting modifications or click Cancel if no changes were made. Then click OK to close the Query Properties window.
NOTE: In order for the Access Information Center to populate NFS permissions within File System reports, the .Active Directory Inventory Job Group must be configured to collect the uid and uidNumber attributes for Users. See the NFS Permissions for the AIC topic for additional information.
The 1-AD_Scan Job is now ready to run with the customized settings. If any custom attributes are added to the data collection, the Create Extended Attributes View analysis task can be enabled in order to have visibility into the collected data.
Analysis Tasks for the 1-AD_Scan Job
View the analysis tasks by navigating to the .Active Directory Inventory > 1-AD_Scan > Configure node and select Analysis.
CAUTION: Do not modify or deselect the selected analysis tasks. The analysis tasks are preconfigured for this job.
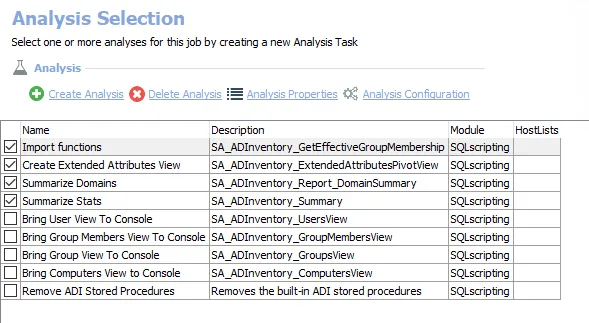
The following analysis tasks are selected by default:
- Import functions – Imports effective group membership function into the database
- Create Extended Attributes View – Creates the SA_ADInventory_ExtendedAttributesView for Custom Attributes that have been added to the query
- Summarize Domains – Creates the SA_ADInventory_Report_DomainSummary table
- Summarize Stats – Creates the SA_ADInventory_Summary table
The following analysis tasks never need to be selected as they are only needed to restore views that have been accidentally hidden:
- Bring User View To Console – Restores the SA_ADInventory_UsersView to be visible within the Access Analyzer Console if it is hidden
- Bring Group Members View To Console – Restores the SA_ADInventory_GroupMembersView to be visible within the Access Analyzer Console if it is hidden
- Bring Group View To Console – Restores the SA_ADInventory_GroupsView to be visible within the Access Analyzer Console if it is hidden
- Bring Computers View to Console – Restores the SA_ADInventory_ComputersView to be visible within the Access Analyzer Console if it is hidden
- Remove ADI Stored Procedures – Removes the built-in ADI stored procedures
In addition to the tables and views explained in the Standard Reference Tables & Views for the ADInventory Data Collector topic, the 1-AD_Scan Job produces the following pre-configured report:
| Report | Description | Default Tags | Report Elements |
|---|---|---|---|
| Active Directory Summary | This report provides a summary of all audited domains and objects. | None | This report is comprised of four elements: - Table – Displays general statistics in the Users, Groups, and Computers in All Audited Domains - Pie Chart – Displays Principals by Object Class - Pie Chart – Displays Principals by Audited Domain - Table – Displays detailed statistical information for each of the AD objects |
NFS Permissions for the AIC
In order for the Access Information Center to populate NFS resources within all File System permissions and resource audit reports, the .Active Directory Inventory Job Group must be configured to collect the following custom attributes for Users:
- uid
- uidNumber
Follow the steps to add the custom attributes.
Step 1 – Navigate to the Active Directory Inventory DC Wizard for the AD Inventory Query within the 1-AD_Scan Job.
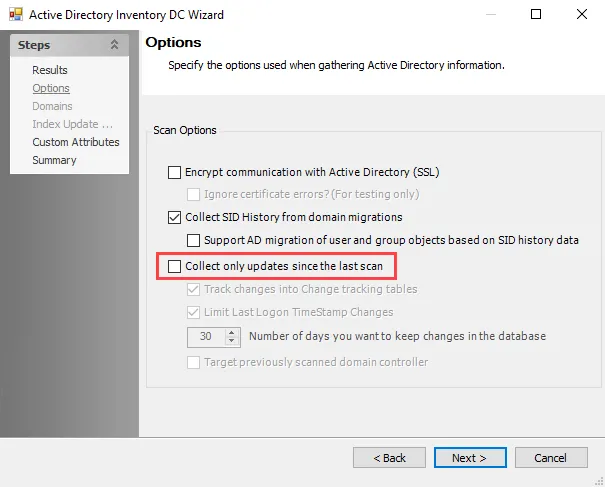
Step 2 – Navigate to the Options page. Ensure the Collect only updates since last scan option is deselected.
NOTE: Whenever query configurations are modified, it is necessary to do a full scan. After the first full scan, differential scanning can be re-enabled.
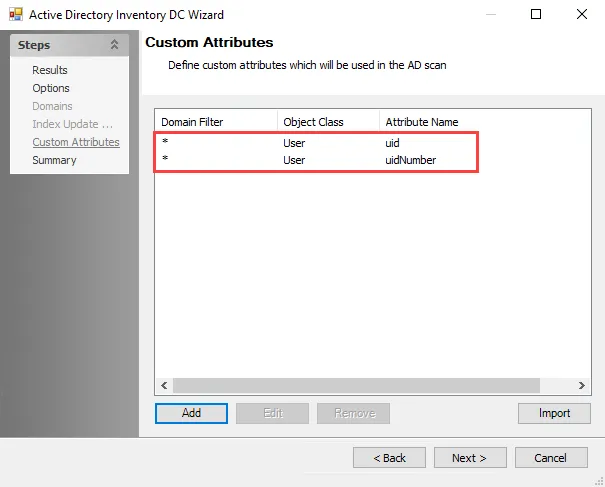
Step 3 – Use the Next button to navigate to the Custom Attributes page. Add both uid and uidNumber attributes to the existing list of custom attributes. See the ADInventory: Custom Attributes topic for additional information.
-
uid attribute:
- Domain Filter – *
- Object Class – User
- Attribute Name – uid
-
uidNumber attribute:
- Domain Filter – *
- Object Class – User
- Attribute Name – uidNumber
Step 4 – Use the Next button to navigate to the Summary page and click Finish. The Active Directory Inventory DC Wizard closes. Click OK to close the Query Properties window.
Step 5 – Run the .Active Directory Inventory Job Group either manually or through a scheduled task.
The .Active Directory Inventory Job Group is now collecting attributes required for NFS data to be visible within the Access Information Center.
Remember, it is necessary to re-enable differential scanning after Step 5 if desired.
See the Resource Audit topics in the Netwrix Access Information Center Documentation for additional information.
Enable SSL Option
Follow the steps to enable SSL encryption for communications with Active Directory:
Step 1 – Navigate to the 1-AD_Scan > Configure node and select Queries.
Step 2 – In the Query Selection view, select the query and click Query Properties. The Query Properties window opens.
Step 3 – Go to the Options page and select the Encrypt communication with Active Directory (SSL) checkbox. Click Next.
Step 4 – Navigate to the Summary page, click Finish to save any setting modifications or click Cancel if no changes were made. Then click OK to close the Query Properties window.
The job will now use SSL encryption to query Active Directory.