1-SPSEEK_SystemScans Job
This job is responsible for building the Tier2 SPDLP database repositories, which contain information regarding sensitive content that exists within SharePoint.
Queries for the 1-SPSEEK_SystemScans Job
The 1-SPSEEK SystemScans Job uses the SharePoint Access Data Collector for the following query:
The query for the 1-SPSEEK SystemScans Job is:
- SharePoint Scan – Scans SharePoint for sensitive content
Configure the Query for the 1-SPSEEK_SystemScans Job
The 1-SPSEEK_SystemScans Job has been preconfigured to run with the default settings using the SPAA Data Collector category of Scan for Sensitive Content, which is not visible within the SharePoint Access Auditor Data Collector Wizard when opened from within this job.
CAUTION: Users should not change scans in a way that would result in less data being returned on a subsequent scan (i.e. scanning fewer web applications, scanning fewer site collections, or a shallower depth scan). Those resources not included in a subsequent scan are marked as deleted in the Tier 2 database and subsequently removed from the Tier 1 database.
Follow the steps to set any desired customizations.
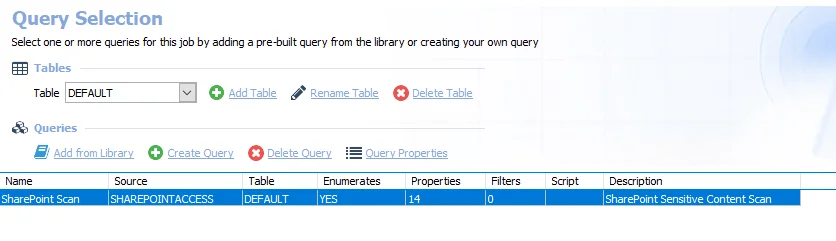
Step 1 – Navigate to the Jobs > SharePoint > 0.Collection > 1-SPSEEK_SystemScans > Configure node and select Queries.
Step 2 – In the Query Selection view, click Query Properties. The Query Properties window displays.
Step 3 – Select the Data Source tab, and click Configure.
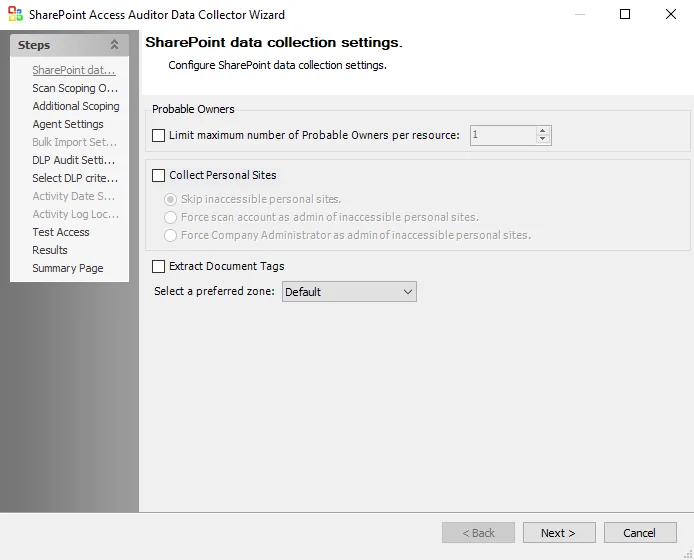
Step 4 – On the SPAA: SharePoint Data Collection Settings page, customize as desired and click Next.
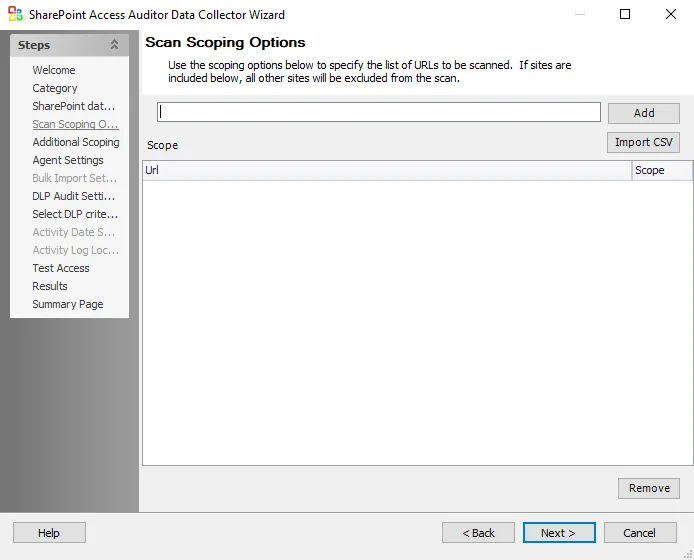
Step 5 – On the SPAA: Scan Scoping Options page, no web applications or site collections have been added. If desired, limit the scope of the scan to specific web applications or site collections. Click Next.

Step 6 – On the SPAA: Additional Scoping page, Limit scanned depth to: is selected with the default set at 2 levels. Customize this setting as desired and click Next.

Step 7 – On the SPAA: Agent Settings page, use the default settings unless an agent scan mode is desired. Click Next.

Step 8 – On the SPAA: DLP Audit Settings page, the default setting is to Don’t process files larger than: 2 MB and to Scan typical documents (recommended, fastest). These settings can be customized to adjust for scan time or database size. Click Next.
NOTE: The typical documents for this setting are files with the following extensions: .doc, .docx, .msg, .odt, .pages, .rtf, .wpd, .wps, .abw, .bib, .dotx, .eml, .fb2, .fdx, .gdoc, .lit, .sig, .sty, .wps, .wpt, .yml, .tex, .pdf, .csv, .xlr, .xls, .xlsx, .gsheet, .nb, .numbers, .ods, .qpw, .sdc, .wks, .xlsb, .xltm, .xltx, .aws, .fods, .ots, .rdf, .sxc, .uos, .xlsm, .txt

Step 9 – On the SPAA: Select DLP Criteria page, add or remove criteria as desired by either manually selecting criteria or using the Select All and Clear All buttons. Click Next. (Optional) To create custom criteria, see the Sensitive Data Criteria Editor topic for additional information.
CAUTION: Do not configure the options on the Results page.
Step 10 – On the Results page, all Available Properties are selected by default. Click Next.
Step 11 – On the Summary page, click Finish to save any setting modifications or click Cancel if no changes were made. Then click OK to close the Query Properties window.
If changes were made, the 1-SPSEEK_SystemScans Job has now been customized.
2-SPAA_SystemScans Job
The job collects information on permissions, users, and groups to determine who has access to each structural level in the SharePoint farm.
Queries for the 2-SPAA_SystemScans Job
The 2-SPAA_SystemScans Job uses the SharePoint Access Data Collector for the following query:

The query for the 2-SPAA_SystemScans Job is:
- Scan SharePoint – Scans SharePoint systems
Configure 2-SPAA_SystemScans Job
The 2-SPAA_SystemScans Job has been preconfigured to run with the default settings using the SPAA Data Collector category of Scan SharePoint Access, which is not visible within the SharePoint Access Auditor Data Collector Wizard when opened from within this job.
CAUTION: Users should not change scans in a way that would result in less data being returned on a subsequent scan (i.e. scanning fewer web applications, scanning fewer site collections, or a shallower depth scan). Those resources not included in a subsequent scan are marked as deleted in the Tier 2 database and subsequently removed from the Tier 1 database.
Follow the steps to set any desired customizations.
Step 1 – Navigate to the Jobs > SharePoint > 0.Collection > 1-SPAA_SystemScans > Configure node and select the Queries node.
Step 2 – In the Query Selection view, click Query Properties. The Query Properties window displays.
Step 3 – Select the Data Source tab, and click Configure.
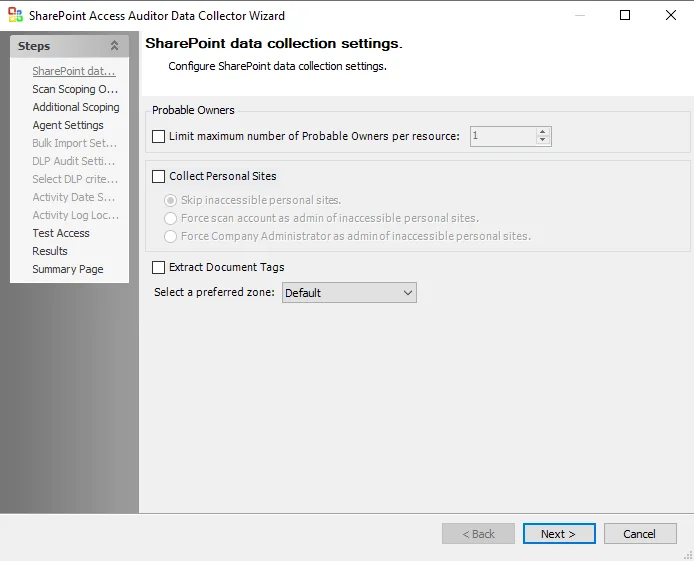
Step 4 – On the SPAA: SharePoint Data Collection Settings page, customize as desired and click Next.
Step 5 – On the SPAA: Scan Scoping Options page, no web applications or site collections have been added. If desired, limit the scope of the scan to specific web applications or site collections. Click Next.
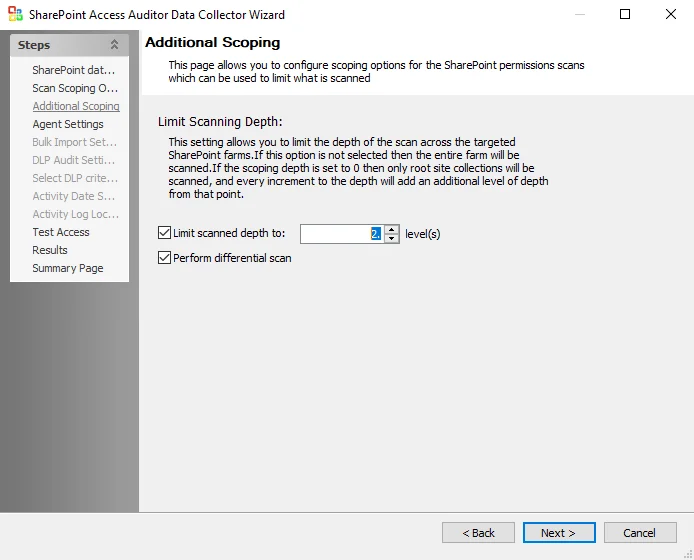
Step 6 – On the SPAA: Additional Scoping page, Limit scanned depth to: is selected with the default set at 2 levels. Customize this setting as desired and click Next.
Step 7 – On the SPAA: Agent Settings page, use the default settings unless an agent scan mode is desired. Click Next.
CAUTION: Do not configure the options on the Results page.
Step 8 – On the Results page, all Available Properties are selected by default. Click Next.
Step 9 – On the Summary page, click Finish to save any setting modifications or click Cancel if no changes were made. Then click OK to close the Query Properties window.
If changes were made, the 1-SPAA_SystemScans Job has now been customized.
3-SPAC_SystemScans Job
The job collects information on activity, users, and groups to determine who has performed activity in each structural level in the SharePoint farm.
Queries for the 3-SPAC_SystemScans Job
The 3-SPAC_SystemScans Job has been preconfigured to run with the default settings using the SPAA Data Collector category of Scan SharePoint Activity, which is not visible within the SharePoint Access Auditor Data Collector Wizard when opened from within this job.
CAUTION: Do not modify the query. The query is preconfigured for this job.
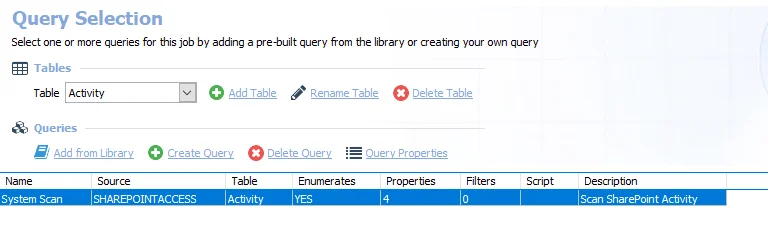
The query for the 3-SPAC_SystemScans Job is:
- System Scan – Scans for SharePoint activity
4-SPSEEK_BulkImport Job
This job is responsible for retrieving the Tier 2 SPDLP database information and importing it to the SQL Server where Enterprise Auditor stores data.
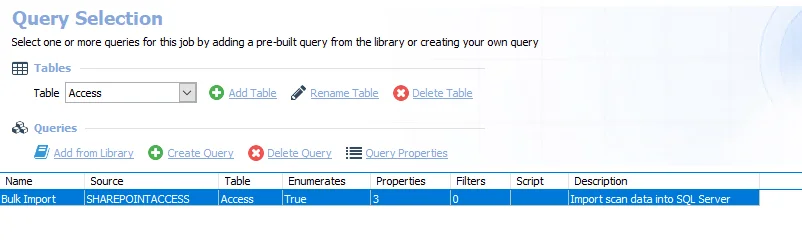
Queries for the 4-SPSEEK_BulkImport Job
The 4-SPSEEK Bulk Import Job uses the SharePoint Access Data Collector for the following query:
The query for the 4-SPSEEK Bulk Import Job is:
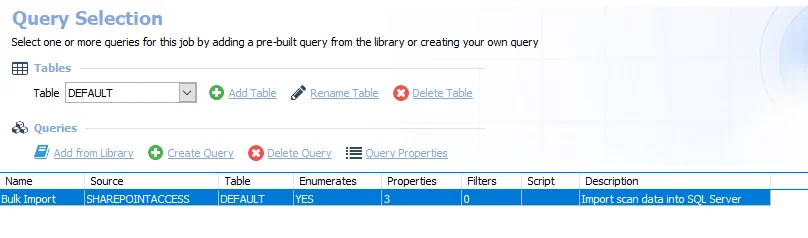
- Bulk Import – Imports scan data into the SQL Server
Configure 4-SPSEEK_BulkImport Job
The 4-SPSEEK_BulkImport Job has been preconfigured to run with the default settings with the SPAA Data Collector category of Bulk Import Sensitive Content Scan Results, which is not visible within the SharePoint Access Auditor Data Collector Wizard when opened from within this job. Follow the steps to set any desired customizations.
Step 1 – Navigate to the Jobs > SharePoint > 0.Collection > 4-SPSEEK_BulkImport > Configure node and select Queries.
Step 2 – In the Query Selection view, click Query Properties. The Query Properties window displays.
Step 3 – Select the Data Source tab, and click Configure.
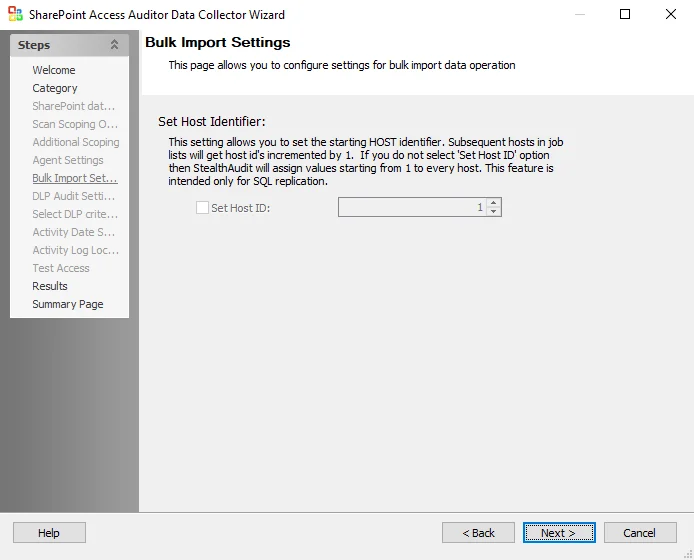
Step 4 – On the SPAA: Bulk Import Settings page, the Set Host Identifier is not configured by default. Click Next.
NOTE: Unless SQL Server Replication is used, it should not be necessary to adjust the Host Identifier seed.
CAUTION: Do not configure the options on the Results page.
Step 5 – On the Results page, all Available Properties are selected by default. Click Next.
Step 6 – On the Summary page, click Finish to save any setting modifications or click Cancel if no changes were made. Then click OK to close the Query Properties window.
If changes were made, the 4-SPSEEK_BulkImport Job has now been customized.
Analysis Tasks for 4-SPSEEK_BulkImport Job
Navigate to the Jobs > SharePoint > 0.Collection > 4-SPSEEK_BulkImport > Configure node and select Analysis to view the analysis tasks.
CAUTION: The analysis tasks are preconfigured for this job. Never modify or deselect the selected analysis tasks.
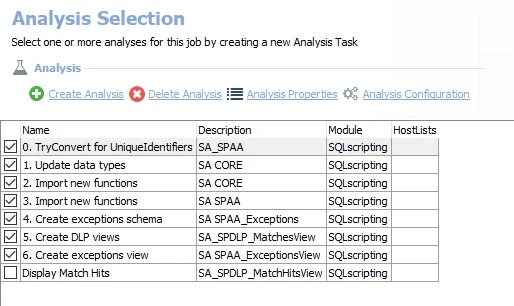
The default analysis tasks are:
-
- Update data types – Enterprise Auditor uses custom SQL data types to render data. This analysis creates updates to those data types.
-
- Import new functions (for SA Core) – Creates functions used in the SharePoint Solution
-
- Import new functions (for SA SPAA) – Creates functions used in the SharePoint Solution
-
- Create exception schema – Creates the SA_SPAA_Exceptions table
-
- Create DLP views – Creates the SA_SPDLP_MatchesView
-
- Create exceptions view – Creates the SA_SPAA_ExceptionsView
The following analysis task is not selected by default, but can be enabled:
- Display Match Hits – Displays the SA_SPDLP_MatchesHitsView within Enterprise Auditor.
5-SPAA_BulkImport Job
This job is responsible for retrieving the SPAA Tier 2 database information and import it to the Enterprise Auditor SQL database.
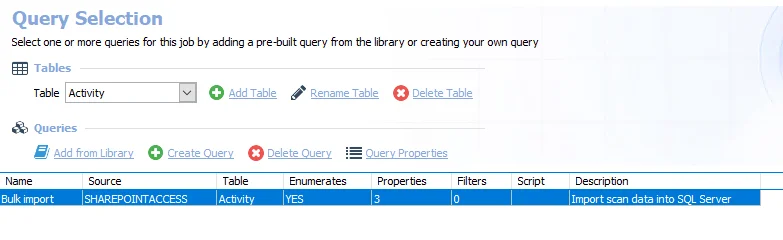
Queries for the 5-SPAA_BulkImport Job
The 5-SPAA_BulkImport Job uses the SharePoint Access Data Collector for the following query:
The query for the 5-SPAA_BulkImport Job is:
- Bulk Import – Imports scan data into the SQL Server
Configure 5-SPAA_BulkImport Job
The 5-SPAA_BulkImport Job has been preconfigured to run with the default settings with the SPAA Data Collector category of Bulk Import Access Scan Results, which is not visible within the SharePoint Access Auditor Data Collector Wizard when opened from within this job. Follow the steps to set any desired customizations.
Step 1 – Navigate to the Jobs > SharePoint > 0.Collection > 2-SPAA_BulkImport > Configure node and select the Queries node.
Step 2 – In the Query Selection view, click Query Properties. The Query Properties window displays.
Step 3 – Select the Data Source tab, and click Configure.
Step 4 – On the SPAA: Bulk Import Settings page, the Set Host Identifier is not configured by default. Click Next.
NOTE: Unless SQL Server Replication is used, it should not be necessary to adjust the Host Identifier seed.
CAUTION: Do not configure the options on the Results page.
Step 5 – On the Results page, all Available Properties are selected by default. Click Next.
Step 6 – On the Summary page, click Finish to save any setting modifications or click Cancel if no changes were made. Then click OK to close the Query Properties window.
If changes were made, the 5-SPAA_BulkImport Job has now been customized.
Analysis Tasks for 5-SPAA_BulkImport Job
Navigate to the Jobs > SharePoint > 0.Collection > 2-SPAA_BulkImport > Configure node and select Analysis to view the analysis tasks.
CAUTION: The analysis tasks are preconfigured for this job. Never modify or deselect the selected analysis tasks.
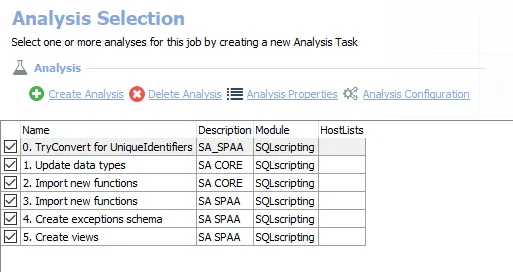
The default analysis tasks are:
-
- TryConvert for UniqueIdentifiers – Simulates Try_Convert functionality for SQL Server 2008 and below
-
- Update data types – Enterprise Auditor uses custom SQL data types to render data. This analysis creates updates to those data types.
-
- Import new functions (for SA Core) – Creates functions used in the SharePoint Solution
-
- Import new functions (for SA SPAA) – Creates functions used in the SharePoint Solution
-
- Create exception schema – Creates the SA_SPAA_Exceptions table
-
- Create views – Creates views visible through the Results node
6-SPAC_BulkImport Job
This job is responsible for retrieving the SPAC Tier 2 database information and import it to the Enterprise Auditor SQL database.
Queries for the 6-SPAC_BulkImport Job
The 6-SPAC_BulkImport Job uses the SharePoint Access Data Collector for the following query:
The query for the 6-SPAC_BulkImport Job is:
- Bulk Import – Imports scan data into the SQL Server
Configure the Query for the 6-SPAC_BulkImport Job
The 6-SPAC_BulkImport Job has been preconfigured to run with the default settings with the category of Bulk Import SharePoint Activity Scan Results, which is not visible within the SharePoint Access Auditor Data Collector Wizard when opened from within this job. Follow the steps to set any desired customizations.
Step 1 – Navigate to the Jobs > SharePoint > 0.Collection > 2-SPAC_BulkImport > Configure node and select Queries.
Step 2 – In the Query Selection view, click Query Properties. The Query Properties window displays.
Step 3 – Select the Data Source tab, and click Configure.
Step 4 – On the SPAA: Bulk Import Settings page, the Set Host Identifier is not configured by default. Click Next.
NOTE: Unless SQL Server Replication is used, it should not be necessary to adjust the Host Identifier seed.
CAUTION: Do not configure the options on the Results page.
Step 5 – On the Results page, all Available Properties are selected by default. Click Next.
Step 6 – On the Summary page, click Finish to save any setting modifications or click Cancel if no changes were made. Then click OK to close the Query Properties window.
If changes were made, the 6-SPAC_BulkImport Job has now been customized.
Analysis Tasks for 2-SPAC_BulkImport Job
Navigate to the Jobs > SharePoint > 0.Collection > 6-SPAC_BulkImport > Configure node and select Analysis to view the analysis tasks.
CAUTION: The analysis tasks are preconfigured for this job. Never modify or deselect the selected analysis tasks.
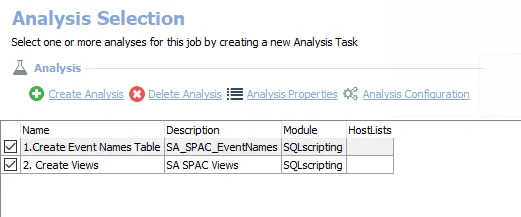
The default analysis tasks are:
-
- Create Event Name Table – Creates the SA_SPAC_EventNames table associated with SPAC
-
- Create Views – Creates the views associated with SPAC
0.Collection Job Group
The SharePoint > 0.Collection Job Group is designed to collect information from SharePoint farms using the SPAA Data Collector. The collected data is then available to other SharePoint Solution sub-job groups and the Access Information Center for analysis.
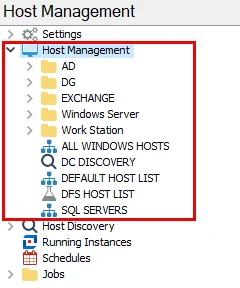
The jobs in the 0.Collection Job Group are:
- 1-SPSEEK_SystemScans Job – Responsible for building the Tier2 SPDLP database repositories, which contain information regarding sensitive content that exists within SharePoint
- 2-SPAA_SystemScans Job – Collects information on permissions, users, and groups to determine who has access to each structural level in the SharePoint farm
- 3-SPAC_SystemScans Job – Collects information on activity, users, and groups to determine who has performed activity in each structural level in the SharePoint farm
- 4-SPSEEK_BulkImport Job – Responsible for retrieving the Tier 2 SPDLP database information and importing it to the SQL Server where Enterprise Auditor stores data
- 5-SPAA_BulkImport Job – Responsible for retrieving the SPAA Tier 2 Database information and importing it to the Enterprise Auditor SQL database
- 6-SPAC_BulkImport Job – Responsible for retrieving the SPAC Tier 2 Database information and importing it to the Enterprise Auditor SQL database
- 7-SPAA_Exceptions Job – Searches scanned data for resources that match high risk conditions, retrieving a summary of SharePoint exceptions per host
Additionally, the jobs in the 0.Collection Job Group are organized into the following collection components:
- SharePoint Access Auditing (SPAA) – The SharePoint Access Auditing (SPAA) component is the primary component of this group and collects SharePoint information with the SPAA Data Collector, such as permissions and content metadata. It employs the 2-SPAA_SystemScans Job, the 5-SPAA_BulkImport Job, and the 7-SPAA_Exceptions Job. See the SharePoint Access Auditing topic for additional information. If using agent-based scanning, this component requires an additional installer package before data collection will occur.
- SharePoint Activity Auditing (SPAC) – The SharePoint Activity Auditing (SPAC) component collects event information from the Enterprise Auditor Activity Monitor log files with the SPAA Data Collector. It employs the 3-SPAC_SystemScans Job and the 6-SPAC_BulkImport Job. See the SharePoint Activity Auditing topic for additional information.
- SharePoint Sensitive Data Discovery Auditing (SEEK) – The SharePoint Sensitive Data Discovery Auditing (SEEK) component searches file content for sensitive data. It also collects permission information; therefore, it does not need to be run with the SPAA component. This component employs the 1-SPSEEK_SystemScans Job, the 5-SPAA_BulkImport Job, the 4-SPSEEK_BulkImport Job, and the 7-SPAA_Exceptions Job. This component requires an additional installer package before data collection will occur. See the SharePoint Sensitive Data Discovery Auditing (SEEK) topic for additional information.
These jobs are numbered to keep them in the necessary run order. Not all jobs need be run. See the appropriate auditing section for specific job relationships and recommended workflows.
The relationship between system scans and bulk import jobs requires the following considerations:
- A system scans job executed from a Enterprise Auditor Console must be followed by the corresponding bulk import job from the same Enterprise Auditor Console with the same version of Enterprise Auditor
- Two system scans processing the same information, for example two 2-SPAA_SystemScans jobs, cannot be executed consecutively against the same target host. The corresponding bulk import job, for example. 5-SPAA_BulkImport, must be executed in between.
The system scans job collects the data and creates a Tier-2 database, or SQLite database, on the local host or the host where the SharePoint Agent was installed (according to the scan method configured). The corresponding bulk import job gathers the information from the Tier-2 database, and pulls it into the Enterprise Auditor SQL backend database, thus completing the collection process.
SharePoint Access Auditing
Access Auditing (SPAA) is the primary component of the 0.Collection Job Group. It collects
information on permissions, users, and groups to determine who has access to each structural level
in the SharePoint farm, on-premises and online, using the SPAA Data Collector. The jobs, tables, and
views specifically incorporated into this component are prefaced with SPAA. See the
SharePointAccess Data Collector
Standard Reference Tables & Views for the SPAA Data Collector
topic for additional information on the data collected.
The 0.Collection jobs that comprise this auditing component are:
- 2-SPAA_SystemScans Job – Collects information on permissions, users, and groups to determine who has access to each structural level in the SharePoint farm
- 5-SPAA_BulkImport Job – Responsible for retrieving the SPAA tier 2 database information and import it to the Enterprise Auditor SQL database
- 7-SPAA_Exceptions Job – Searches scanned data for resources that match high risk conditions, retrieving a summary of SharePoint exceptions per host
The following job groups andSP_Overview Job jobs in the SharePoint Solution depend on data collected by these jobs to generate reports:
- 1.Direct Permissions Job Group
- 2.High Risk Sites > SP_OpenAccess Job
- 3.Broken Inheritance > SP_BrokenInheritance Job
- 4.Content Job Group
- Effective Access Audits Job Group
- 5.Probable Owner > SP_ProbableOwner Job
- SP_Overview Job
The SharePoint Sensitive Data Discovery Reports in the Access Information Center are also populated by this data. See the SharePoint Reports topics in the Netwrix Access Information Center Documentation for additional information.
See the Recommended Configuration for the SharePoint Solution topic for other Runtime Details.
Workflow
Step 1 – Run 2-SPAA_SystemScans Job.
Step 2 – Run 5-SPAA_BulkImport Job.
Step 3 – Run 7-SPAA_Exceptions Job.
Step 4 – Run desired corresponding analysis and reporting sub-job groups.
Please see the Recommended Configuration for the SharePoint Solution topic before continuing with this workflow.
RECOMMENDED: Scope the 0.Collection Job Group to only include the collection components desired by disabling the undesired collection jobs. Disabling them allows the solution to run more efficiently. It is not recommended to delete any jobs. See the Disable or Enable a Job topic for additional information.
SharePoint Activity Auditing
Activity Auditing (SPAC) is the component of the 0.Collection Job Group that collects information on activity, users, and groups to determine who has performed activity in each structural level in the SharePoint on-premises farm, or SharePoint online tenant, using the SPAA Data Collector. The jobs and tables specifically incorporated into this component are prefaced with SPAC. See the Standard Reference Tables & Views for the SPAA Data Collector topic for additional information on the data collected.
The Access Auditing components must be run in order to create the tables in the database for the SPAC component to use. Either the SPAA or SEEK Scan job, run to at least a 0-level scan depth (and the corresponding Bulk Import job) can be used to create these tables. Once an initial 0-level SPAA or SPSEEK scan job and corresponding Bulk Import have been run against a particular SharePoint On Prem farm or SharePoint Online tenant, SPAA or SPSEEK Scan jobs can be run concurrently with SPAC Scan and Bulk Import jobs as needed.
The 0.Collection jobs that comprise this auditing component are:
- 3-SPAC_SystemScans Job – Collects information on activity, users, and groups to determine who has perform activity in each structural level in the SharePoint farm
- 6-SPAC_BulkImport Job – Responsible for retrieving the SPAC tier 2 database information and import it to the Enterprise Auditor SQL data base
The SP_Overview Job and 7.Activity Job Group in the SharePoint Solution uses the data collected by these jobs to generate reports.
The SharePoint Activity Reports in the Access Information Center are also populated by this data. See the SharePoint Reports topics in the Netwrix Access Information Center Documentation for additional information.
Recommended Workflow 1 (for Access & Activity Auditing)
Step 1 – Run 2-SPAA_SystemScans Job.
Step 2 – Run 3-SPAC_SystemScans Job.
Step 3 – Run 5-SPAA_BulkImport Job.
Step 4 – Run 6-SPAC_BulkImport Job.
Step 5 – Run 7-SPAA_Exceptions Job.
Step 6 – Run desired corresponding analysis and reporting sub-job groups.
NOTE: Once an initial 2-SPAA SystemScans job (scoped to at least 0-level depth) and the corresponding 5-SPAA Bulk Import job have been run, then the SPAA Scans can be run concurrently with SPAC Scans and Bulk Import jobs as desired.
Recommended Workflow 2 (for Access, Sensitive Data Discovery & Activity Auditing)
CAUTION: The jobs must be run in the order shown. It is not possible to disable the 1-SPAA_SystemScan and 2-SPAA_BulkImport jobs and run the 0.Collection Job Group because the remaining jobs are in the wrong order. Renaming the jobs is not an option.
Step 1 – Install the Sensitive Data Discovery Add-on on the Enterprise Auditor Console (once only).
Step 2 – Run 1-SPSEEK_SystemScans Job.
Step 3 – Run 3-SPAC_SystemScans Job.
Step 4 – Run 4-SPSEEK_BulkImport Job.
Step 5 – Run 6-SPAC_BulkImport Job.
Step 6 – Run 7-SPAA_Exceptions Job.
Step 7 – Run desired corresponding analysis and reporting sub-job groups.
NOTE: Once an initial 1-SPSEEK SystemScans job (scoped to at least 0-level depth) and the corresponding 4-SPSEEK Bulk Import job have been run, then the SPSEEK Scans jobs can be run concurrently with the SPAC Scans and the Bulk Import jobs as desired.
Optional Workflow (for Activity Auditing Only)
Step 1 – Run 3-SPAC_SystemScans Job.
Step 2 – Run 6-SPAC_BulkImport Job.
Step 3 – Run desired corresponding analysis and reporting sub-job groups.
NOTE: Please see the Recommended Configuration for the SharePoint Solution topic before continuing with this workflow.
RECOMMENDED: Scope the 0.Collection Job Group to only include the collection components desired by disabling the undesired collection jobs. Disabling them allows the solution to run more efficiently. It is not recommended to delete any jobs. See the Disable or Enable a Job topic for additional information.
SharePoint Sensitive Data Discovery Auditing (SEEK)
Sensitive Data Discovery Auditing (SEEK) is the component of the 0.Collection Job Group that
searches file content for sensitive data. It also collects information on permissions, users, and
groups to determine who has access to each structural level in the SharePoint farm, on-premises and
online, using the SPAA Data Collector. The jobs for this component are prefaced with SPSEEK. The
tables and views are prefaced with SPDLP. See the
SharePoint Sensitive Data Discovery Auditing Tables & Views
topic for additional information on the data collected.
NOTE: The Sensitive Data Discovery Auditing (SEEK) component is an add-on to the SharePoint Solution. Though the jobs are visible within the console, it requires an additional installer package before data collection will occur. See the Sensitive Data Discovery Add-On Installation topic for additional information.
Customized search criteria can be created with the Criteria Editor accessible through the SPAA: Select DLP Criteria page of the SharePoint Access Auditor Data Collector Wizard. See the Sensitive Data topic for additional information.
The 0.Collection jobs that comprise this auditing component are:
- 1-SPSEEK_SystemScans Job – Responsible for building the Tier2 SPDLP database repositories, which contain information regarding sensitive content that exists within SharePoint
- 4-SPSEEK_BulkImport Job – Responsible for retrieving the Tier 2 SPDLP database information and importing it to the SQL Server where Enterprise Auditor stores data
- 7-SPAA_Exceptions Job – Searches scanned data for resources that match high risk conditions, retrieving a summary of SharePoint exceptions per host
The following job groups andSP_Overview Job jobs in the SharePoint Solution depend on data collected by these jobs to generate reports:
- 1.Direct Permissions Job Group
- 2.High Risk Sites > SP_OpenAccess Job
- 3.Broken Inheritance > SP_BrokenInheritance Job
- 4.Content Job Group
- Effective Access Audits Job Group
- 5.Probable Owner > SP_ProbableOwner Job
- 6.Sensitive Data > SP_SensitiveData Job
- SP_Overview Job
The SharePoint Sensitive Data Discovery Reports in the Access Information Center are also populated by this data. See the Netwrix Access Information Center Documentation for additional information.
Recommended Workflow 1 (for Access & Sensitive Data Discovery Auditing)
Step 1 – Install the Sensitive Data Discovery Add-on on the Enterprise Auditor Console, and on the SharePoint application server when applicable (once only).
Step 2 – Run 1-SPSEEK_SystemScans Job.
Step 3 – Run 4-SPSEEK_BulkImport Job.
Step 4 – Run 7-SPAA_Exceptions Job.
Step 5 – Run desired corresponding analysis and reporting sub-job groups.
Recommended Workflow 2 (for Access, Sensitive Data Discovery & Activity Auditing)
CAUTION: The jobs must be run in the order shown. It is not possible to disable the 2-SPAA_SystemScan and 5-SPAA_BulkImport jobs and run the 0.Collection Job Group because the remaining jobs are in the wrong order. Renaming the jobs is not an option.
Step 1 – Install the Sensitive Data Discovery Add-on the Enterprise Auditor Console (once only).
Step 2 – Run 1-SPSEEK_SystemScans Job.
Step 3 – Run 3-SPAC_SystemScans Job.
Step 4 – Run 4-SPSEEK_BulkImport Job.
Step 5 – Run 6-SPAC_BulkImport Job.
Step 6 – Run 7-SPAA_Exceptions Job.
Step 7 – Run desired corresponding analysis and reporting sub-job groups.
NOTE: Once an initial 1-SPSEEK SystemScans job (scoped to at least 0-level depth) and the corresponding 4-SPSEEK Bulk Import job have been run, then the SPSEEK Scans can be run concurrently with the SPAC Scans and the Bulk Import jobs as desired.
NOTE: Please see the Recommended Configuration for the SharePoint Solution topic before continuing with this workflow.
RECOMMENDED: Scope the 0.Collection Job Group to only include the collection components desired by disabling the undesired collection jobs. Disabling them allows the solution to run more efficiently. It is not recommended to delete any jobs. See the Disable or Enable a Job topic for additional information.
7-SPAA_Exceptions Job
This job searches scanned data for resources that match high risk conditions and retrieving a summary of SharePoint exceptions per host.
Parameter Configuration
The Configuration section on a Job's overview page allows you to easily modify any customizable parameters used by analysis tasks in the job. See the Parameter Configuration topic for instructions on how to edit parameters on a job overview page.
The 7-SPAA_Exceptions page has the following configurable parameters:
-
#opengroups – High-risk groups such as those known to be sensitive or open can be added
NOTE: Groups must be entered exactly as they are listed in SA_SPAA_Trustees. Copy and paste the Group name as it appears in the Name Column.
See the Customizable Analysis Tasks for the 7-SPAA_Exceptions Job for additional information.
Analysis Tasks 7-SPAA_Exceptions Job
The 3-SPAA_Exceptions Job does not use the SPAA Data Collector. Instead it runs analysis on the data returned by the 2-SPAA_BulkImport Job. View the analysis tasks by navigating to the Jobs > SharePoint > 0.Collection > 3-SPAA_Exceptions > Configure node and select Analysis.
CAUTION: The analysis tasks are preconfigured for this job. Never modify or deselect the selected analysis tasks.
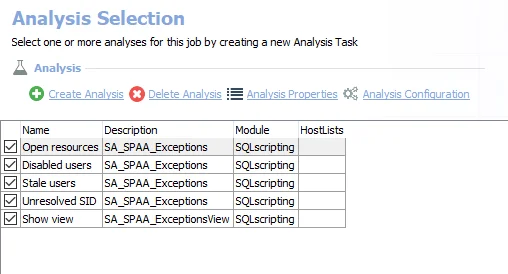
The default analysis tasks are:
-
Open resources – Any site collections, sites, libraries, lists, or folders that are openly accessible. Can be deselected if open resource information is not desired.
- This analysis task contains a configurable parameter:
#opengroups
- This analysis task contains a configurable parameter:
-
Disabled users – Any site collections, sites, libraries, lists, or folders where disabled users have been granted access. Can be deselected if disabled user information is not desired.
-
Stale users – Any site collections, sites, libraries, lists, or folders where stale users have been granted access. Stale users are user who have not logged in for more than 120 days. Can be deselected if stale user information is not desired.
-
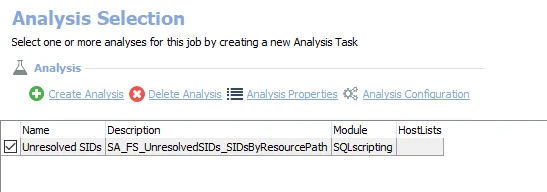
Unresolved SID – Matches SIDs to .Active Directory Inventory Job Group data to resolve for those users using legacy SIDS or deleted users.
-
Show view – Displays views within the Results node of the Enterprise Auditor Console.
Customizable Analysis Tasks for the 7-SPAA_Exceptions Job
The default values for customizable parameters are:
| Analysis Task | Customizable Parameter Name | Default Value | Instruction |
|---|---|---|---|
| Open resources | #opengroups | Empty | Groups must be entered exactly as they are listed in SA_SPAA_Trustees. Copy and paste the Group name as it appears in the Name Column. |
See the Configure the Customizable Parameters in an Analysis Task for additional information.
SPAA_Exceptions Job
This job handles SharePoint exceptions. For information on configuring customizable parameters, see the Configure the Customizable Parameters in an Analysis Task topic.
1.Direct Permissions Job Group
The SharePoint > 1.Direct Permissions Job Group provides insight into how directly applied permissions are configured within the targeted SharePoint environment. It is dependent on data collected by the SharePoint Access Auditing or SharePoint Sensitive Data Discovery Auditing (SEEK) components of the 0.Collection Job Group. The jobs which comprise the 1.Direct Permissions Job Group process analysis tasks and generate reports.
The 1.Direct Permissions Job Group is comprised of:
- SP_DomainUsers Job – Identifies locations where there are domain users directly applied on permissions. Best practices dictate that groups should be used to provide access to resources.
- SP_EmptyDomainGroupPerms Job – Identifies empty security groups with directly assigned permissions to resources, these groups should be deleted from SharePoint farms, where found. Inadvertent changes to group membership may open up unwanted access.
- SP_HighRiskPermissions Job – Identifies where Authenticated Users, Everyone Except External Users, Anonymous Logon, or Domain users have been directly assigned permissions
- SP_SiteCollectionPerms Job – Most content will inherit the permissions configured at the root of the site collection. Having an understanding of how those permissions are assigned is useful for gaining perspective on the overall SharePoint permission configuration.
- SP_StaleUsers Job – Identifies locations where there are stale users directly applied on SharePoint resources. These permissions can be safely removed.
- SP_UnresolvedSIDs Job – Identifies Unresolved SIDs that have permissions to any SharePoint resources. Unresolved SIDs can be safely cleaned up without affecting user access.
SP_DomainUsers Job
The SP_DomainUsers Job identifies locations where there are domain users directly applied on permissions. Best practices dictate that groups should be used to provide access to resources.
Analysis Tasks for the SP_DomainUsers Job
Navigate to the Jobs > SharePoint > 1.Direct Permissions > SP_DomainUsers > Configure node and select Analysis to view the analysis tasks.
CAUTION: Do not modify or deselect the selected analysis tasks. The analysis tasks are preconfigured for this job.
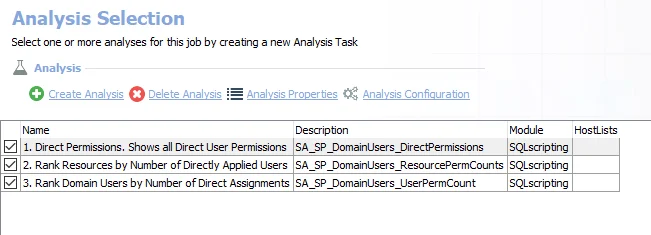
The default analysis tasks are:
-
- Direct Permissions. Shows All Direct User Permissions – Creates the SA_SP_DomainUsers_DirectPermissions table accessible under the job’s Results node
-
- Rank Resources by Number of Directly Applied Users – Creates an interim processing table in the database for use by downstream analysis and report generation
-
- Rank Domain Users by Number of Direct Assignments – Creates an interim processing table in the database for use by downstream analysis and report generation
In addition to the table created by the analysis task which displays all direct user permissions, the SP_DomainUsers Job produces the following pre-configured report:
| Report | Description | Default Tags | Report Elements |
|---|---|---|---|
| Domain User Permissions | This report identifies locations where there are domain users directly applied on permissions. Best practices dictate that groups should be used to provide access to resources. | None | This report is comprised of three elements: - Bar chart – Displays the top 5 resources by directly applied users - Table – Provides details on directly applied users by resource - Table – Provides details on direct permission counts by user |
SP_EmptyDomainGroupPerms Job
The SP_EmptyDomainGroupPerms Job identifies empty security groups with directly assigned permissions to resources, these groups should be deleted from SharePoint farms, where found. Inadvertent changes to group membership may open up unwanted access.
Analysis Tasks for the SP_EmptyDomainGroupPerms Job
Navigate to the Jobs > SharePoint > 1.Direct Permissions > SP_EmptyDomainGroupPerms > Configure node and select Analysis to view the analysis tasks.
CAUTION: Do not modify or deselect the selected analysis tasks. The analysis tasks are preconfigured for this job.
The default analysis tasks are:
-
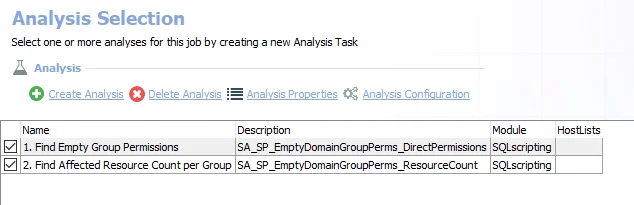
- Find Empty Group Permission – Creates the SA_SP_EmptyDomainGroupPerms_DirectPermissions table accessible under the job’s Results node
-
- Find Affected Resource Count per Group – Creates the SA_SP_EmptyDomainGroupPerms_ResourceCount table accessible under the job’s Results node
In addition to the tables created by the analysis tasks which display direct permissions and resource counts for empty groups, the SP_EmptyDomainGroupPerms Job produces the following pre-configured report:
| Report | Description | Default Tags | Report Elements |
|---|---|---|---|
| Empty Domain Group Permissions | This report identifies empty security groups with directly assigned permissions to resources. These groups add no access, and should be deleted from SharePoint farms, where found. Inadvertent changes to group membership may open up unwanted access. | None | This report is comprised of three elements: - Bar chart – Displays the top 5 groups by affected resources - Table – Provides details on permissions - Table – Provides details on top groups by affected resources |
SP_HighRiskPermissions Job
The SP_HighRiskPermissions Job identifies where Authenticated Users, Everyone Except External Users, Anonymous Logon, or Domain users have been directly assigned permissions
Analysis Tasks for the SP_HighRiskPermissions Job
Navigate to the Jobs > SharePoint > 1.Direct Permissions > SP_HighRiskPermissions > Configure node and select Analysis to view the analysis tasks.
CAUTION: Do not modify or deselect the selected analysis tasks. The analysis tasks are preconfigured for this job.
The default analysis tasks are:
-
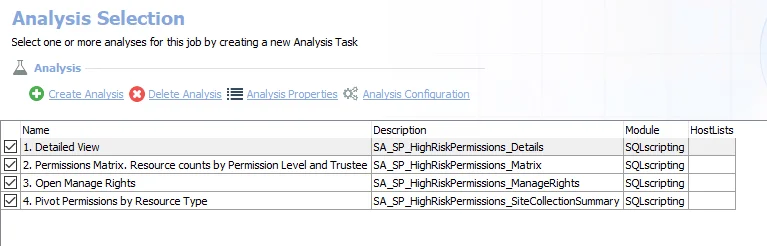
- Detailed View – Creates the SA_SP_HighRiskPermissions_Details table accessible under the job’s Results node
-
- Permissions Matrix. Resource counts by Permission Level and Trustee – Creates the SA_SP_HighRiskPermissions_Details table (SP_HighRiskPermissions_Matrix) accessible under the job’s Results node
- 3.Open Manage Rights – Creates the SA_SP_HighRiskPermissions_ManageRights table accessible under the job’s Results node
-
- Pivot Permissions by Resource Type – Creates the SA_SP_HighRiskPermissions_SiteCollectionSummary table accessible under the job’s Results node
In addition to the tables created by the analysis tasks which display information on open resources from directly applied permissions, the SP_HighRiskPermissions Job produces the following pre-configured report:
| Report | Description | Default Tags | Report Elements |
|---|---|---|---|
| High Risk Permissions | This report shows permissions of Authenticated Users, Anonymous Logon, or Domain users. Applying these trustees to permissions may inadvertently open security holes. | GDPR, SOX, HIPAA, PCI-DSS, GLBA, ITAR, FERPA, FISMA, ISO27001 | This report is comprised of three elements: - Stacked Bar Chart – Displays Open Resources - Table – Provides details on resource counts by permissions and high risk trustees - Table – Provides details top resources with open manage rights |
SP_SiteCollectionPerms Job
Most content will inherit the permissions configured at the root of the site collection. Having an understanding of how those permissions are assigned is useful for gaining perspective on the overall SharePoint permission configuration.
Analysis Tasks for the SP_SiteCollectionPerms Job
Navigate to the Jobs > SharePoint > 1.Direct Permissions > SP_SiteCollectionPerms > Configure node and select Analysis to view the analysis tasks.
CAUTION: Do not modify or deselect the selected analysis tasks. The analysis tasks are preconfigured for this job.
They need to remain in the default order:
-
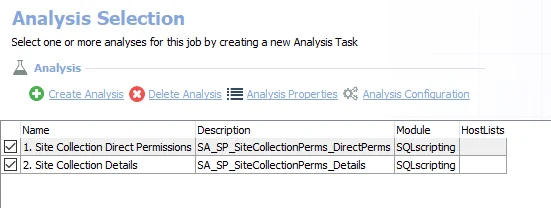
- Site Collection Direct Permissions
- Creates the SA_SP_SiteCollectionPerms_DirectPerms table accessible under the job’s Results node
- Creates an interim processing table in the database for use by downstream analysis and report generation
-
- Site Collection Details – Creates the SA_SP_SiteCollectionPerms_Details table accessible under the job’s Results node
In addition to the tables created by the analysis tasks which display direct permissions at the root of the site collections, the SP_SiteCollectionPerms Job produces the following pre-configured report:
| Report | Description | Default Tags | Report Elements |
|---|---|---|---|
| Direct Site Collection Permissions | Most content will inherit the permissions configured at the root of the site collection. Having an understanding of how those permissions are assigned is useful for gaining perspective on the overall SharePoint permission configuration. | None | This report is comprised of two elements: - Bar Chart – Displays top 5 site collections by direct permissions - Table – Provides details on site collections by direct permissions breakdown |
SP_StaleUsers Job
A stale user is defined as either currently disabled within Active Directory, or has not logged onto the domain for over 90 days. This job will identify locations where there are stale users directly applied on SharePoint resources. These permissions can be safely removed.
Analysis Tasks for the SP_StaleUsers Job
Navigate to the Jobs > SharePoint > 1.Direct Permissions > SP_StaleUsers > Configure node and select Analysis to view the analysis tasks.
CAUTION: Do not modify or deselect the selected analysis tasks. The analysis tasks are preconfigured for this job.
The default analysis tasks are:
-
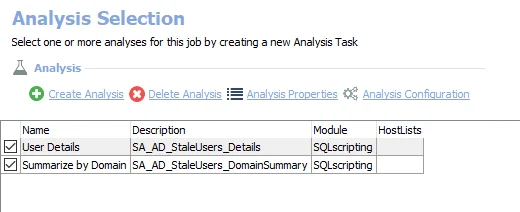
- Direct Permissions. Shows all Direct User Permissions – Creates the SA_SP_StaleUsers_DirectPermissions table accessible under the job’s Results node
-
- Rank Resources by Number of Stale Users – Creates the SA_SP_StaleUsers_ResourcePermCounts table accessible under the job’s Results node
-
- Rank Domain Users by Number of Direct Assignments – Creates the SA_SP_StaleUsers_UserPermCount table accessible under the job’s Results node
In addition to the tables created by the analysis tasks which display direct permissions for stale users, the SP_StaleUsers Job produces the following pre-configured report:
| Report | Description | Default Tags | Report Elements |
|---|---|---|---|
| Stale User Permissions | A stale user is defined as either currently disabled within Active Directory, or has not logged onto the domain for over 90 days. | None | This report is comprised of three elements: - Bar Chart – Displays top 5 users by affected resources - Table – Provides details on top resource by stale user permissions - Table – Provides details on top stale users by affected resources |
SP_UnresolvedSIDs Job
This job identifies Unresolved SIDs that have permissions to any SharePoint resources. Unresolved SIDs can be safely cleaned up without affecting user access.
Analysis Tasks for the SP_UnresolvedSIDs Job
Navigate to the Jobs > SharePoint > 1.Direct Permissions > SP_UnresolvedSIDs > Configure node and select Analysis to view the analysis tasks.
CAUTION: Do not modify or deselect the selected analysis tasks. The analysis tasks are preconfigured for this job.
They need to remain in the default order:
-
- Create Function – Creates an interim processing table in the database for use by downstream analysis and report generation
-
- Find Unresolved SID ACLs – Creates the SA_SP_UnresolvedSIDs_DirectPermissions table accessible under the job’s Results node
-
- Find Affected Resource Count per SID – Creates the SA_SP_UnresolvedSIDs_ResourceCount table accessible under the job’s Results node
-
- Rank Resources by SID Count – Creates the SA_SP_UnresolvedSIDs_DirectPermissions table accessible under the job’s Results node
In addition to the tables created by the analysis tasks which display direct permissions for unresolved SIDs, the SP_UnresolvedSIDs Job produces the following pre-configured report:
| Report | Description | Default Tags | Report Elements |
|---|---|---|---|
| Unresolved SID Permissions | Unresolved SIDs can be safely cleaned up without affecting user access. | None | This report is comprised of three elements: - Bar Chart – Displays top 5 unresolved SIDs by affected resources - Table – Provides details on resources with unresolved SIDs applied - Table – Provides details on unresolved SIDs by affected resources |
Effective Access Audits Job Group
This group returns reports identifying specific trustees’ effective access across the entire SharePoint environment.
The Effective Access Audits Job Group is comprised of:
- Scoping > SP_TrusteeAccess Job – Scopes a list of users to audit their access across the SharePoint environment. This can also be accomplished by looking users up in the Access Information Center. However, it is recommended to use this job in scenarios where a report on multiple users’ effective access at once needs to be generated.
- SP_TrusteeAudit Job – Provides functionality similar to the Access Information Center by allowing scoped audits of users’ access across the environment
For the SP_TrusteeAccess Job, the host list is set to Local host at the Scoping Job Group level. The assigned Connection Profile needs to have rights on the Enterprise Auditor Console server to access the CSV file saved in the job’s directory. The Connection Profile should be set at the Effective Access Audits > Scoping > Settings > Connection node.
Scoping > SP_TrusteeAccess Job
The SP_TrusteeAccess job allows you to scope a list of users to audit their access across the SharePoint environment. You can also accomplish this by looking users up in the Access Information Center, however you want to utilize this job in scenarios where you want to generate a report on multiple users’ effective access at once.
NOTE: Trustees can be specified in the UserScoping.csv file for the SP_TrusteeAccess Job. See
the
Configure CSV File for the Query for the SP_TrusteeAccess Job
topic for additional information.

The SP_TrusteeAccess job is located in the Scoping Job Group.
Queries for the SP_TrusteeAccess Job
The SP_TrusteeAccess Job uses the TextSearch Data Collector for the following query:

The default query is:
- Scoping – Modifies the CSV in the Job Directory. See the Configure CSV File for the Query for the SP_TrusteeAccess Job topic for additional information.
Configure CSV File for the Query for the SP_TrusteeAccess Job
Follow the steps to specify trustees in the UserScoping.csv file.
Step 1 – Navigate to the Jobs > SharePoint > Effective Access Audits > Scoping > SP_TrusteeAccess Job and right-click on the job. Select Explore Folder and the job’s directory opens.
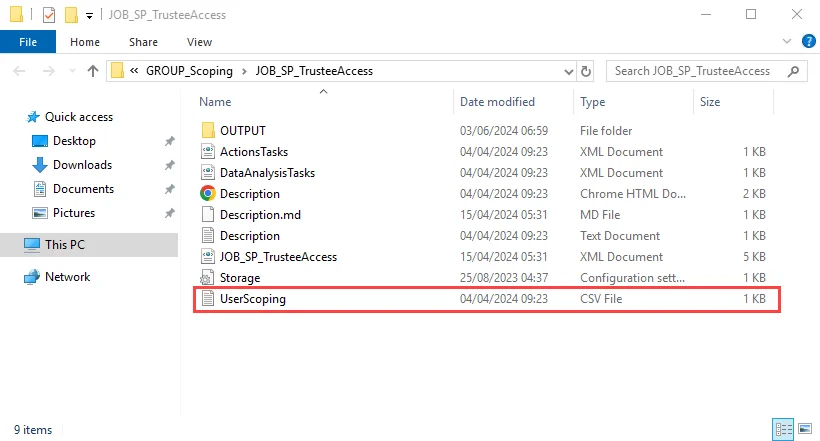
Step 2 – Open the UserScoping.csv file with a text editor, for example Notepad.

Step 3 – Enter the trustees using a Domain\UserName format. Enter one trustee per row.
Step 4 – Save and close the file.
The SP_TrusteeAccess Job is now ready to import this list of trustees to scope the Effective Access Audits Job Group. After job execution, the list of specified trustees will populate the Scope table accessible under the job’s Results node.
SP_TrusteeAudit Job
The SP_TrusteeAudit Job runs analysis tasks and generates a report on effective access of specified trustees. This job provides functionality similar to the Access Information Center by allowing scoped audits of user access across the targeted SharePoint environment.
Analysis Tasks for the SP_TrusteeAudit Job
Navigate to the Jobs > SharePoint > Effective Access Audits > SP_TrusteeAudit > Configure node and select Analysis to view the analysis tasks.
CAUTION: Do not modify or deselect the selected analysis tasks. The analysis tasks are preconfigured for this job.
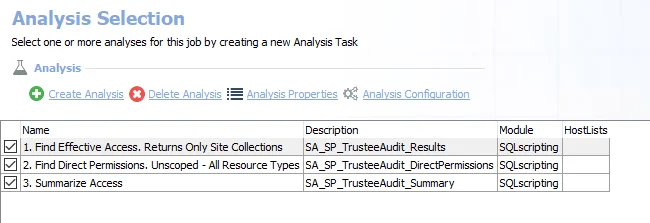
The default analysis tasks are:
-
- Find Effective Access. Returns Only Site Collections – Creates the SA_SP_TrusteeAudit_Results table accessible under the job’s Results node
-
- Find Direct Permissions. Unscoped - All Resource Types – Creates the SA_SP_TrusteeAudit_DirectPermissions table accessible under the job’s Results node
-
- Summarize Access – Creates an interim processing table in the database for use by downstream analysis and report generation
In addition to the tables created by the analysis tasks which display effective access for the specified trustees, the SP_TrusteeAudit Job produces the following pre-configured report:
| Report | Description | Default Tags | Report Elements |
|---|---|---|---|
| Site Collection Access | This report shows what site collections a domain user has effective and direct access to. Audited users are scoped in the SP_TrusteeAccess job. | None | This report is comprised of three elements: - Table – Provides user summary details - Table – Provides details on site collections with effective access - Table – Provides details on direct permissions |
8.M365 Job Group
The 8.M365 Job Group generates summary and detail reports of SharePoint Activity on the specified Teams sites. These reports can be used for identifying file, folder, and user related activity across your SharePoint environment.
The jobs in the 8.M365 Job Group are:
- SP_ExternalUsers Job – Identifies activity of external users on all monitored Sharepoint servers
- SP_OneDrives Job – Collects the activity, sensitive data, summary level information across OneDrives
- SP_SharedLinks Job – Provides an overview of the shared links configured with Sharpoint Online, with visibility into Anonymous Sharing, External User Sharing, and activity pertaining to Shared Links
- SP_StaleTeamSites Job – Identifies Teams that have not had activity for a number of days that can be set in the analysis (Set at 30 Days by Default)
- SP_Teams – Identifies activities, sensitive data and a summary of collected data for SharePoint Teams
- SP_TeamsExternalUserActivity Job – Identifies all activity events performed by external users in Teams, including details on the date/time, resource, and operation
- SP_TeamsSensitiveData Job – Analyzes sensitive data activity within Teams sites
SP_ExternalUsers Job
The SP_TeamsExternalUsers Job identifies activity of external users on all monitored SharePoint servers.
Analysis Tasks for the SP_ExternalUsers Job
Navigate to the Jobs > SharePoint > 8.M365 > SP_OneDrives > Configure node and select Analysis to view the analysis tasks.
CAUTION: Do not modify or deselect the selected analysis tasks. The analysis tasks are preconfigured for this job.
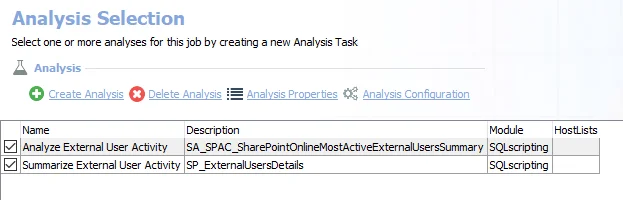
The default analysis task is:
- Analyze External User Activity – Creates the SA_SPAC_SharePointOnlineMostActiveExternalUsersSummary table accessible under the job's Results node
- Summarize External User Activity – Creates the SP_ExternalUsersDetails table accessible under the job's Results node
In addition to the tables created by the analysis tasks, the SP_TeamsExternalUsers Job produces the following preconfigured report:
| Report | Description | Default Tags | Report Elements |
|---|---|---|---|
| External User Activity | This report analyzes activity performed by external users in scanned SharePoint environments. | None | This report is comprised of three elements: - Bar Chart – Provides information on top users by operation count - Table – Provides summary on external users - Table – Provides details on external user activity |
| External User Summary | This report analyzes activity performed by external users in scanned SharePoint environments. | None | This report is comprised of three elements: - Bar Chart – Provides information on top users by operation count - Table – Provides summary on external users - Table – Provides details on external user activity |
SP_OneDrives Job
The SP_OneDrives Job collects the activity, sensitive data, summary level information across OneDrives.
Analysis Tasks for the OneDrives Job
Navigate to the Jobs > SharePoint > 8.M365 > SP_OneDrives > Configure node and select Analysis to view the analysis tasks.
CAUTION: Do not modify or deselect the selected analysis tasks. The analysis tasks are preconfigured for this job.
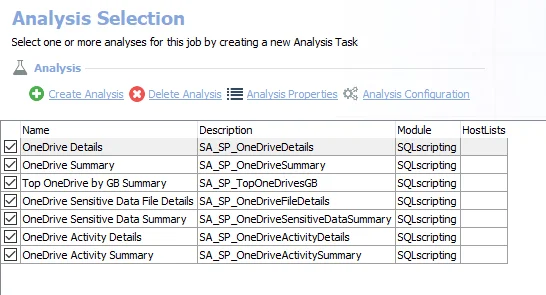
The default analysis tasks are:
- OneDrive Details – Creates the SA_SP_OneDriveDetails table accessible under the job's Results node
- OneDrive Summary – Creates the SA_SP_OneDriveSummary table accessible under the job's Results node
- Top OneDrive by GB Summary – Creates the SA_SP_TopOneDrivesGB table accessible under the job's Results node
- OneDrive Sensitive Data File Details – Creates the SA_SP_OneDriveFileDetails table accessible under the job's Results node
- OneDrive Sensitive Data Summary – Creates the SA_SP_OneDriveSensitiveDataSummary table accessible under the job's Results node
- OneDrive Activity Details – Creates the SA_SP_OneDriveActivityDetails table accessible under the job's Results node
- OneDrive Activity Summary – Creates the SA_SP_OneDriveActivitySummary table accessible under the job's Results node
In addition to the tables created by the analysis tasks, the SP_OneDrives Job produces the following preconfigured reports:
| Report | Description | Default Tags | Report Elements |
|---|---|---|---|
| One Drive Activity | This report displays activity information from OneDrives. | None | This report is comprised of three elements: - Bar Chart – Provides information on top OneDrives by Operation Count - Table – Provides details on OneDriveSummary - Table – Provides details on OneDrive Activity Details |
| One Drive Sensitive Data | This report displays sensitive information from OneDrives. | None | This report is comprised of three elements: - Bar Chart – Provides information on top OneDrives by sensitive files - Table – Provides details on sensitive data summary - Table – Provides details on OneDrive file details |
| One Drive Sensitive Data | This report displays summary level information across all OneDrives. | None | This report is comprised of three elements: - Bar Chart – Provides information on OneDrive summary - Table – Provides details on top OneDrives by GB - Table – Provides details on top OneDrives by GB summary - Table – Provides information on OneDrive details |
SP_SharedLinks Job
The SP_SharedLinks Job provides an overview of the shared links configured with SharePoint Online, with visibility into Anonymous Sharing, External User Sharing, and activity pertaining to Shared Links.
Analysis Tasks for the SharedLinks Job
Navigate to the Jobs > SharePoint > 8.M365 > SP_SharedLinks > Configure node and select Analysis to view the analysis tasks.
CAUTION: Do not modify or deselect the selected analysis tasks. The analysis tasks are preconfigured for this job.
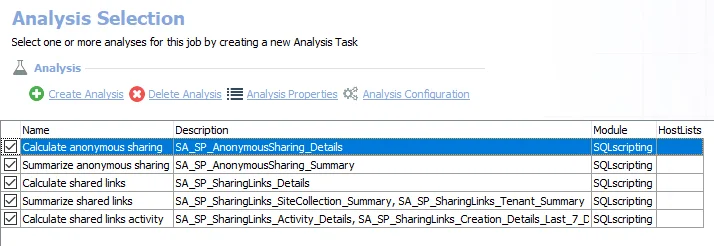
The default analysis tasks are:
- Calculate anonymous sharing – Creates the SA_SP_AnonynomousSharing_Details table accessible under the job's Results node
- Summarize anonymous sharing – Creates the SA_SP_AnonynomousSharing_Summary table accessible under the job's Results node
- Calculate shared links – Creates the SA_SP_SharingLinks_Details table accessible under the job's Results node
- Summarize shared links – Creates the SA_SP_SharingLinks_SiteCollection and SA_SP_SharingLinks_Tenant_Summary tables accessible under the job's Results node
- Calculate Shared Links Activity – Creates the SA_SP_SharingLinks_Activity_Details, SA_SP_SharingLinks_Creation_Detail_Last_7_Days, and SA_SP_SharingLinks_Creation_Summary_Last_7_Days tables accessible under the job's Results node
In addition to the tables created by the analysis tasks, the SP_Shared Links Job produces the following preconfigured reports:
| Report | Description | Default Tags | Report Elements |
|---|---|---|---|
| Anonymous Sharing | This report highlights instances where resources are anonymously shared via a shareable link in SharePoint Online. | None | This report is comprised of three elements: - Bar Chart – Provides information on the top site collections and anonymously shared files - Table – Provides details anonymous sharing summary by site collection - Table – Provides details on anonymously sharing details |
| Shared Link Activity | This report highlights instances of activity via shared links in SharePoint Online. | None | This report is comprised of three elements: - Bar Chart – Provides information on the shared link creation for the last 7 days OneDrive summary - Table – Provides details on shared link creation summary for the last 7 days - Table – Provides details on shared link activity |
| Shared Links | This report highlights instances of shared links in SharePoint Online. | None | This report is comprised of three elements: - Bar Chart Table– Provides information on the shared link summary - Bar Chart– Provides details on top site collections by shared files - Table – Provides details on site collection summary - Table – Provides details on shared links |
SP_StaleTeamSites Job
The SP_StaleTeamSites Job identifies Teams that have not had activity for a number of days that can be set in the analysis (Set as 30 Days by Default).
Parameter Configuration
The Configuration section on a Job's overview page allows you to easily modify any customizable parameters used by analysis tasks in the job. See the Parameter Configuration topic for instructions on how to edit parameters on a job overview page.
The SP_StaleTeamSites page has the following configurable parameters:
- Desired Number of Days Since Last Activity To Determine Staleness
See the Customizable Analysis Tasks for the SP_StaleTeamSites Job for additional information.
Analysis Tasks for the SP_StaleTeamSites Job
Navigate to the Jobs > SharePoint > 8.M365 > SP_StaleTeamSites >Configure node and select Analysis to view the analysis tasks.
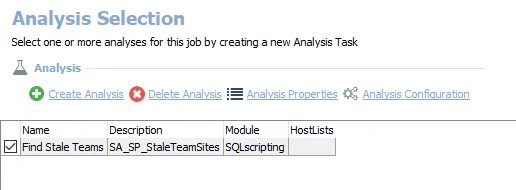
The default analysis task is:
-
Find Stale Teams – Creates the SA_SP_StaleTeamSites table accessible under the job’s Results node
- This task contains a configurable parameter to set the number of days a Team has not had activity for before it's considered stale. See the Customizable Analysis Tasks for the SP_StaleTeamSites Job topic for additional information.
In addition to the table created by the analysis task, the SP_StaleTeamSites Job produces the following preconfigured report:
| Report | Description | Default Tags | Report Elements |
|---|---|---|---|
| Stale Teams | This report identifies Teams that have not had activity for a number of days that can be set in the analysis (Set at 30 Days by Default) | None | This report is comprised of two elements: - Bar Chart – Provides information on the top five least active sites - Table – Provides details on stale Teams sites |
Customizable Analysis Tasks for the SP_StaleTeamSites Job
The default values for customizable parameters are:
| Analysis Task | Customizable Parameter Name | Default Value | Description |
|---|---|---|---|
| Find Stale Teams | @days | 30 | Desired number of days since last activity to determine staleness. |
See the Configure the Customizable Parameters in an Analysis Task topic for instructions on customizing the analysis parameters.
SP_Teams
The SP_Teams Job identifies activities, sensitive data and a summary of collected data for SharePoint Teams.
Analysis Tasks for the SP_Teams Job
Navigate to the Jobs > SharePoint > 8.M365 > SP_Teams > Configure node and select Analysis to view the analysis tasks.
CAUTION: Do not modify or deselect the selected analysis tasks. The analysis tasks are preconfigured for this job.
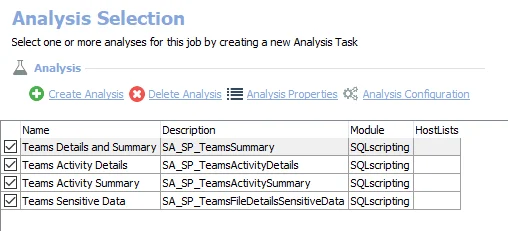
The default analysis task is:
- Teams Details and Summary – Creates the SA_SP_TeamsSummary table to populate the Teams Activity and Teams Summary reports
- Teams Activity Details – Creates the SA_SP_TeamsActivityDetails table to populate the Teams Activity report
- Teams Activity Summary – Creates the SA_SP_TeamsActivitySummary table to populate the Teams Activity report
- Teams Sensitive Data – Creates the SA_SP_TeamsFileDetailsSensitiveData table to populate the Teams Sensitive Data report
In addition to the tables created by the analysis tasks, the SP_Teams Job produces the following preconfigured reports:
| Report | Description | Default Tags | Report Elements |
|---|---|---|---|
| Teams Activity | This report identifies and analyzes activity in SharePoint Teams. | None | This report is comprised of three elements: - Bar Chart – Provides Operation count of the Top Teams - Table – Provides a summary of Teams activity - Table – Provides details about Teams activity |
| Teams Sensitive Data | This report identifies and analyzes sensitive data in SharePoint Teams. | None | This report is comprised of three elements: - Bar Chart – Provides the top Teams containing sensitive files - Table – Provides a sensitive data summary - Table – Provides additional details about sensitive files in Teams |
| Teams Summary | This report summarizes collected data for SharePoint Teams. | None | This report is comprised of four elements: - Table – Provides a summary of permissions in Teams - Bar Chart – Provides information about Top Teams by size (GB) - Pie Chart – Provides a comparison of stale vs active Teams sites - Table – Provides additional details about Teams sites permissions |
SP_TeamsExternalUserActivity Job
The SP_TeamsExternalUserActivity Job identifies all activity events performed by external users in Teams, including details on the date/time, resource, and operation.
Analysis Tasks for the SP_TeamsExternalUserActivity Job
Navigate to the Jobs > SharePoint > 8.M365 > SP_TeamsExternalUserActivity >Configure node and select Analysis to view the analysis tasks.
CAUTION: Do not modify or deselect the selected analysis task. The analysis task is preconfigured for this job.
The default analysis task is:
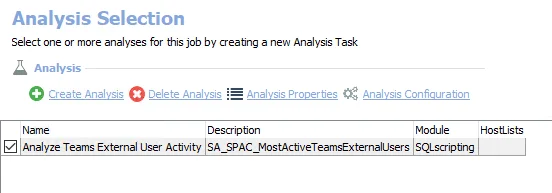
- Analyze Teams External User Activity – Creates the SA_SPAC_MostActiveTeamsExternalUsers table accessible under the job's Results node
In addition to the table created by the analysis task, the SP_TeamsExternalUserActivity Job produces the following preconfigured report:
| Report | Description | Default Tags | Report Elements |
|---|---|---|---|
| Teams External User Activity | This report displays most active external users within Teams, as well as Teams that have the most external users. | None | This report is comprised of three elements: - Bar Chart – Provides information on the most active external team members - Table – Provides details on Teams with the most external users - Table – Provides details on external user activity details |
SP_TeamsSensitiveData Job
The SP_TeamsSensitiveData Job analyzes sensitive data activity within Teams Sites.
Analysis Tasks for the SP_TeamsSensitiveData Job
Navigate to the Jobs > SharePoint > 8.M365 > SP_TeamsSensitiveData >Configure node and select Analysis to view the analysis tasks.
CAUTION: Do not modify or deselect the selected analysis task. The analysis task is preconfigured for this job.
The default analysis task is:
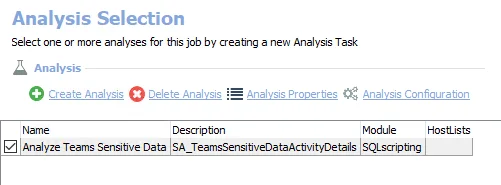
- Analyze Teams Sensitive Data – Creates the SA_TeamsSensitiveDataActivityDetails table accessible under the job's Results node
In addition to the table created by the analysis task, the SP_TeamsSensitiveData Job produces the following preconfigured report:
| Report | Description | Default Tags | Report Elements |
|---|---|---|---|
| Teams Sensitive Data Report | This report analyzes sensitive data activity in Teams sites. | None | This report is comprised of two elements: - Bar Chart – Provides information on the top Teams users by sensitive file interaction count - Table – Provides details on user activity |
SharePoint Solution
The SharePoint Solution is a comprehensive set of audit jobs and reports which provide the information every administrator needs regarding SharePoint on-premises and SharePoint Online infrastructure, configuration, performance, permissions, required ports, and effective rights. The Access Auditing and Sensitive Data Discovery Auditing components of this solution can target both SharePoint on-premises and SharePoint Online. The Activity Auditing components of this solution can only target SharePoint on-premises.
Supported Platforms
-
SharePoint Online® (Agent-less mode scans only)
-
OneDrive® for Business (Access Auditing and/or Sensitive Data Discovery Auditing for Agent-less mode scans only)
-
SharePoint® 2019
-
SharePoint® 2016
-
SharePoint® 2013
Requirements, Permissions, and Ports
-
Permissions vary based on the Scan Mode selected and target environment. See the SharePoint Support topic for additional information.
-
Ports vary based on the Scan Mode selected and target environment. See the SharePoint Scan Options topic for additional information.
NOTE: You can use the SP_RegisterAzureAppAuth instant job to make the configuration for SharePoint Online easier. This job registers the necessary Microsoft Entra ID application and provisions it with the required permissions. See the SP_RegisterAzureAppAuth Job topic for additional information.
Sensitive Data Discovery Considerations
The Sensitive Data Discovery Add-On must be installed on the Enterprise Auditor Console server, which enables Sensitive Data criteria for scans. If running Sensitive Data Discovery (SDD) scans, it will be necessary to increase the minimum amount of RAM. Each thread requires a minimum of 2 additional GB of RAM per host. For example, if the job is configured to scan 8 hosts at a time , then an extra 16 GB of RAM are required (8x2=16).
NOTE: The Sensitive Data Discovery Add-on installation package installs the appropriate JDK (Java) version on the server. The JDK deployed is prepackaged and does not require any configuration; it has been preconfigured to work with Enterprise Auditor and should never be customized through Java. It will not conflict with other JDKs or Java Runtimes in the same environment.
Remember, if employing the Enterprise Auditor SharePoint Agent, it is also necessary for the Sensitive Data Discovery Add-on to be installed on the server where the agent is installed.
Location
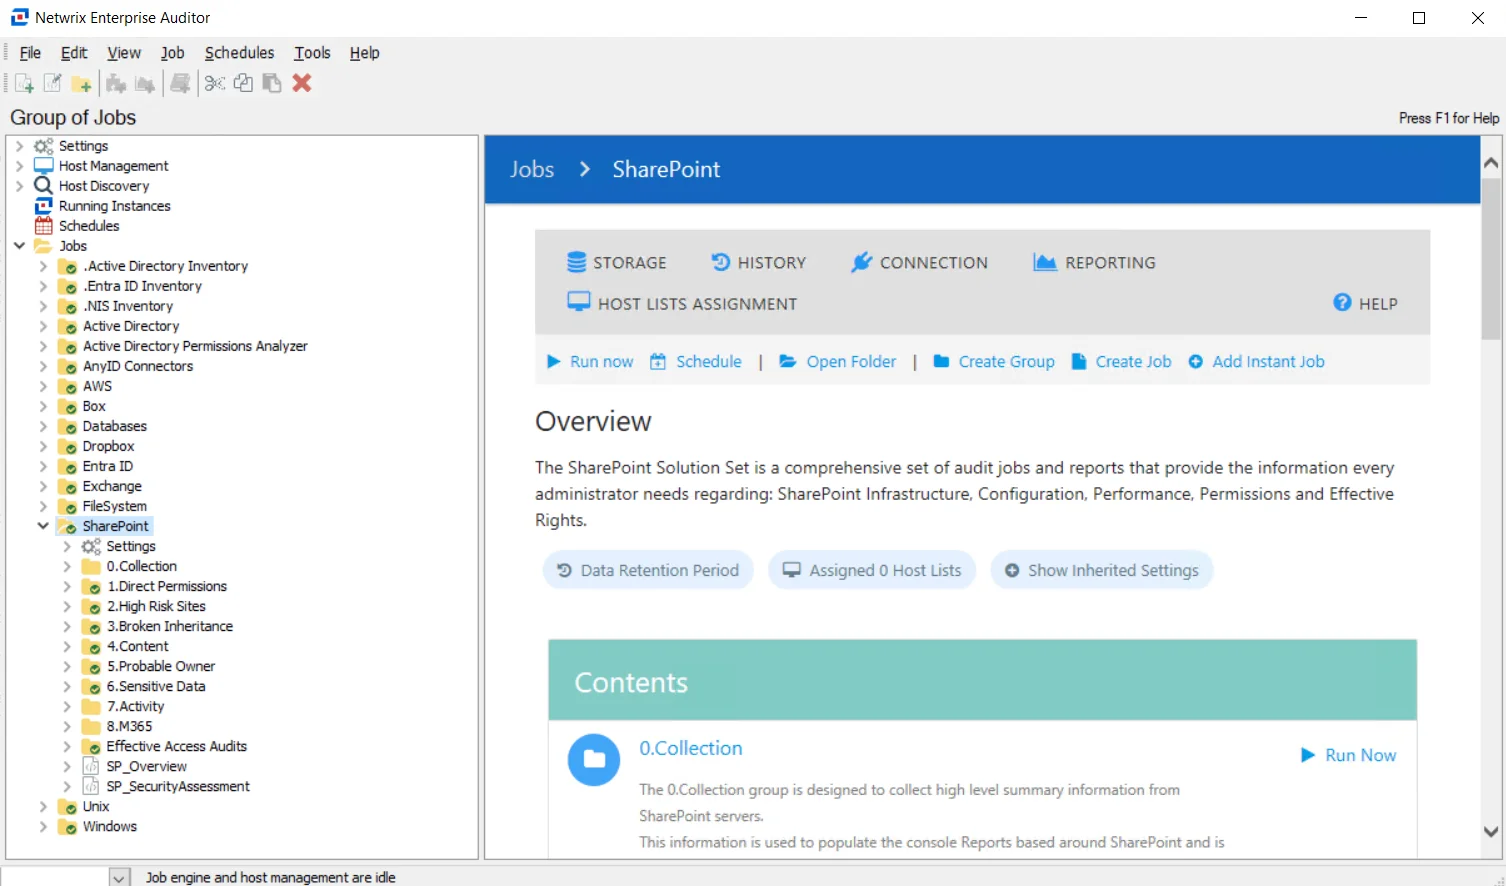
The SharePoint Solution requires a special Enterprise Auditor license. It can be installed from the Enterprise Auditor Instant Job Wizard. Once it has been installed into the Jobs tree, navigate to the solution: Jobs > SharePoint.
The 0.Collection Job Group collects the data. The other job groups and the SP_Overview Job run analysis on the collected data and generate reports.
SharePoint Job Groups
This SharePoint solution offers information on multiple aspects of an organization’s SharePoint on-premises and SharePoint Online environments. This solution is comprised of 10 sub-job groups and an overview job which collect, analyze, and report on data. The data collection is conducted by the SharePointAccess (SPAA) Data Collector. See the corresponding Standard Reference Tables & Views for the SPAA Data Collector topic for database table information.
The following types of auditing can be conducted with the SharePoint Solution:
- SharePoint Access Auditing
- SharePoint Activity Auditing
- SharePoint Sensitive Data Discovery Auditing (SEEK)
Each type of auditing depends on specific jobs within the 0.Collection Job Group to collect the data and its corresponding analysis/reporting job groups. The Access Auditing components represent the core of the SharePoint Solution. However, the Sensitive Data Discovery Auditing components also collect the Access Auditing data; therefore it is not necessary to run both sets of collection jobs. The data collection query options for each type are explained within the 0.Collection Job Group section. Additionally, the corresponding analysis/reporting job groups are listed for each auditing type.
If intending to run two or all auditing types, see each auditing type section within the 0.Collection Job Group section for information on query options and requirements. It is recommended to first run the 0.Collection Job Group components in the default order for the desired auditing types to ensure successful data collection, and then to run the desired sub-groups for reports.
See the Recommended Configuration for the SharePoint Solution topic for additional information on frequency and job group settings.
The SharePoint Solution is available with the SharePoint Reports license feature and is comprised of the following job groups and jobs:
-
0.Collection Job Group – Designed to collect high level summary information from SharePoint servers. This information is used to populate the SMP Reports based around the SharePoint and is a requirement for the Access Information Center – SharePoint reports.
- This job group is available with the SharePoint license feature
-
1.Direct Permissions Job Group – Provides insight into how directly applied permissions are configured within the SharePoint environment. The group contains surface-level configuration settings that can quickly assess the SharePoint permission structure.
-
2.High Risk Sites > SP_OpenAccess Job – Provides insight into any high-risk repositories and high-risk data that may exist within an organization’s SharePoint environment. High risk data is effectively open to the entire organization through modification of SharePoint permissions to apply well known security principles such as NT AUTHORITY\Authenticated Users, Everyone, and Everyone Except External Users. This data must be monitored closely because of its exposure.
-
3.Broken Inheritance > SP_BrokenInheritance Job – Keeping track of directly applied permissions at mass is not realistic, this job is responsible for performing data analysis and generating SharePoint broken inheritance reports at the site level. This includes looking at site broken inheritance and the trustees who are assigned to those sites where inheritance is broken so that you can remove that access in favor of providing access via group membership.
-
4.Content Job Group – Provides insight into content stored across SharePoint farms in order to help more efficiently manage that content. It will provide information on the content taking up the most space, the content that has not been accessed for extended periods of time, and additional data describing SharePoint content and the configuration of the repositories such as lists and libraries which store that content.
-
5.Probable Owner > SP_ProbableOwner Job – Provides reports about probable ownership. The goal of this report is to help you either identify who most likely owns the SharePoint resource or at least someone who can tell you who does.
-
6.Sensitive Data > SP_SensitiveData Job – Highlights sensitive data identified across targeted SharePoint farms
- Requires the Data Governance Sensitive Data Discovery Add-on
-
7.Activity Job Group– Generates summary and detail reports of SharePoint activity on the specified sites. These reports can be used for identifying file, folder, and user related activity across your SharePoint environment.
-
8.M365 Job Group – Generates summary and detail reports of SharePoint Activity on the specified Teams sites. These reports can be used for identifying file, folder, and user related activity across your SharePoint environment.
-
Effective Access Audits Job Group – Returns reports identifying specific trustees’ effective access across the entire SharePoint environment
- Typically, this is run independently from the rest of the solution
-
SP_Overview Job – Provides an overview of the SharePoint environment, providing a high level view into what makes up your SharePoint environment and the types of security risks and toxic permissions found during scans
3.Broken Inheritance > SP_BrokenInheritance Job
Keeping track of directly applied permissions at mass is not realistic, the SP_BrokenInheritance job is responsible for performing data analysis and generating SharePoint broken inheritance reports at the site level. This includes looking at site broken inheritance and the trustees who are assigned to those sites where inheritance is broken so that you can remove that access in favor of providing access via group membership.
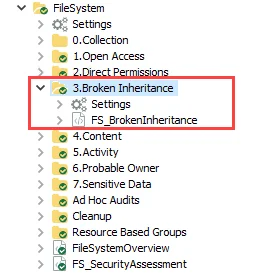
The SP_BrokenInheritance job is located in the 3.Broken Inheritance Job Group.
Analysis Tasks for the SP_BrokenInheritance Job
Navigate to the Jobs > SharePoint > 3.Broken Inheritance > SP_BrokenInheritance > Configure node and select Analysis to view the analysis tasks.
CAUTION: Do not modify or deselect the selected analysis tasks. The analysis tasks are preconfigured for this job.

They need to remain in the default order:
-
- Create Inheritance View – Creates the SA_ENG_SPAA_Inheritance view accessible under the job’s Results node
-
- Unique Trustees Table. Identifies where Trustees have been Added/Removed – Creates the SA_SP_BrokenInheritance_UniqueTrustees table accessible under the job’s Results node
-
- Pivot Unique Trustees Table – Creates the SA_SP_BrokenInheritance_UniqueTrusteesPivot table accessible under the job’s Results node
-
- Summarize by Site Collection – Creates an interim processing table in the database for use by downstream analysis and report generation
In addition to the tables created by the analysis tasks which display resources with broken inheritance, the SP_BrokenInheritance Job produces the following pre-configured report:
| Report | Description | Default Tags | Report Elements |
|---|---|---|---|
| Broken Inheritance | This job is responsible for performing data analysis and generating SharePoint direct permission reports at the site level. This includes looking at site broken inheritance and the trustees who are assigned to those sites where inheritance is broken. | None | This report is comprised of two elements: - Bar Chart – Displays top 5 site collections by resources with permission changes - Table – Provides a site collection summary - Table – Provides broken inheritance details |
2.High Risk Sites > SP_OpenAccess Job
The 2.High Risk Sites Job Group provides insight into any high risk repositories and high risk data that may exist within the targeted SharePoint environment. High risk data is effectively open to the entire organization through modification of SharePoint permissions to apply well known security principals such as NT AUTHORITY\Authenticated Users. The data must be monitored closely because of its exposure.
The job group is comprised of the SP_OpenAccess Job. Minimizing your attack surface is the goal. Open site collections can potentially provide access to privileged data, greatly increasing your vulnerability. The SP_OpenAccess Job will identify places in the environment where data is able to be accessed by a very large amount of employees.
It is dependent on data collected by the SharePoint Access Auditing or SharePoint Sensitive Data Discovery Auditing (SEEK) components of the 0.Collection Job Group.
Analysis Tasks for the SP_OpenAccess Job
Navigate to the Jobs > SharePoint > 2.High Risk Sites > SP_OpenAccess > Configure node and select Analysis to view the analysis tasks.
CAUTION: Do not modify or deselect the selected analysis tasks. The analysis tasks are preconfigured for this job.
The default analysis tasks are:
-
- Determine Access to Resources – Creates the SA_SP_OpenAccess_AccessDetails table accessible under the job’s Results node
-
- Summarize by Site Collection – Creates the SA_SP_OpenAccess_SiteCollectionSummary table accessible under the job’s Results node
In addition to the tables created by the analysis tasks which display resources with open access, the SP_OpenAccess Job produces the following pre-configured report:
| Report | Description | Default Tags | Report Elements |
|---|---|---|---|
| Open Access | This report identifies site collections with open resources. | Open Access | This report is comprised of two elements: - Stacked Bar – Displays top site collections with open access - Table – Provides site collection details - Table – Provides access details |
SP_Overview Job
The SP_Overview job provides an overview of the SharePoint Environment, providing a high level view into what makes up a SharePoint Environment and the types of security risks and toxic permissions found during scans.
It is dependent on data collected by the SharePoint Access Auditing, SharePoint Sensitive Data Discovery Auditing (SEEK), and SharePoint Activity Auditing components of the 0.Collection Job Group. It also depends on the running of the sub-job groups within the solution. If only select sub-job groups have been run, there will be blank sections of this overview report.
Analysis Tasks for the SP_Overview Job
Navigate to the Jobs > SharePoint > SP_Overview > Configure node and select Analysis to view the analysis tasks.
CAUTION: Do not modify or deselect the selected analysis task. The analysis task is preconfigured for this job.
The default analysis tasks is:
- Generate Overview – Creates an interim processing table in the database for use by downstream analysis and report generation
In addition to the table created by the analysis task which displays all direct user permissions, the SP_Overview Job produces the following pre-configured report:
| Report | Description | Default Tags | Report Elements |
|---|---|---|---|
| SharePoint Overview | This report provides an overview of the targeted SharePoint environment. | None | This report is comprised of one element: - Table – Provides details on the targeted SharePoint environment |
5.Probable Owner > SP_ProbableOwner Job
The SP_ProbableOwner Job aids in the identification of probable owners for Site Collections and Sites, which can be used for entitlement reviews. Probably Owner calculation is based on file ownership, management structure, and file activity. The goal of this report is to help you identify who most likely owns the SharePoint resource or at least someone who can tell you who does.

The SP_ProbableOwner Job is located in the 5.Probable Owner Job Group.
Analysis Tasks for the SP_ProbableOwner Job
Navigate to the Jobs > SharePoint > 5.Probable Owner > SP_ProbableOwner >Configure node and select Analysis to view the analysis tasks.
CAUTION: Do not modify or deselect the selected analysis task. The analysis task is preconfigured for this job.
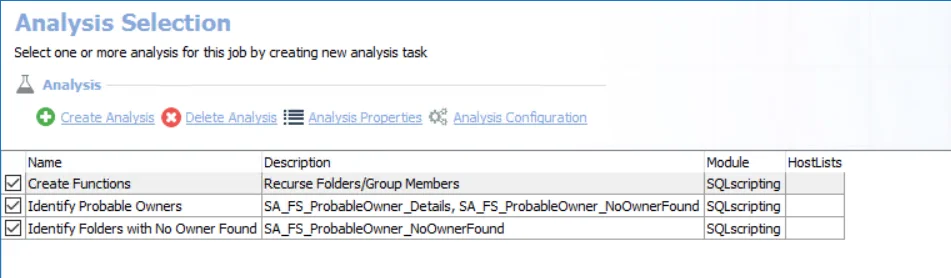
The default analysis tasks are:
- Identify Probable Owners – Creates the SA_SP_SiteProbablyOwners_Details table accessible under the job’s Results node
In addition to the table created by the analysis task which displays probable ownership, the SP_ProbableOwner Job produces the following pre-configured report:
| Report | Description | Default Tags | Report Elements |
|---|---|---|---|
| SharePoint Probable Ownership | This report identifies probable owners based on management structure, file ownership, and activity. | None | This report is comprised of one element: - Table – Provides details on probable owners |
6.Sensitive Data > SP_SensitiveData Job
The SP_SensitiveData Job identifies where sensitive data is located inside SharePoint farms. Special care is paid to access and user activity in these locations.

The SP_SensitiveData Job is located in the 6.Sensitive Data Job Group.
Analysis Tasks for the SP_SensitiveData Job
Navigate to the Jobs > SharePoint > 6.Sensitive Data > SP_SensitiveData > Configure node and select Analysis to view the analysis tasks.
CAUTION: Do not modify or deselect the selected analysis tasks. The analysis tasks are preconfigured for this job.
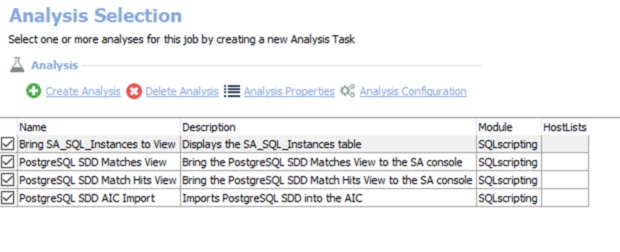
The default analysis tasks are:
- Details – Creates the SA_SP_SensitiveData_Details table accessible under the job’s Results node
- Summarize by Site – Creates the SA_SP_SensitiveData_SiteSummary table accessible under the job’s Results node
- Enterprise Summary – Creates the SA_SP_SensitiveData_Summary table accessible under the job’s Results node
In addition to the tables created by the analysis tasks which display sensitive data, the SP_SensitiveData Job produces the following pre-configured reports:
| Report | Description | Default Tags | Report Elements |
|---|---|---|---|
| Enterprise Summary (A.K.A. Sensitive Data) | This report summarizes the types and amount of sensitive data discovered on targeted SharePoint farms. | Sensitive Data | This report is comprised of two elements: - Pie Chart – Displays sensitive data discovered on SharePoint farms - Table – Provides details on sensitive data |
| Site Collection Details | This report highlights sites with the largest amount of sensitive data found. | Sensitive Data | This report is comprised of three elements: - Bar Chart – Displays top sites by sensitive files - Table – Provides details on the site collection summary - Table – Provides details the files fetched |