AnyID_CSV Job
The AnyID_CSV job imports a list of identities and attributes from a CSV file. Use this when a native integration may not be available, or an export is the best option.
RECOMMENDED: Copy the CSV file to the Enterprise Auditor Console for the best import performance.
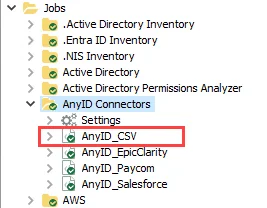
The AnyID_CSV job is located in the Jobs > AnyID Connectors job group.
Recommended Configurations for the AnyID_CSV Job
The following are recommended configurations for the AnyID_CSV job:
Dependencies
None
Targeted Host
Local Host
Connection Profile
The AnyID_CSV job does not require a connection profile.
History Retention
Default Retention Period. See the History topic for additional information.
Multi-Console Support
Not supported
Schedule Frequency
Schedule the job as required.
Query Configuration
This job contains configurable queries. See the Configure the AnyID_CSV Query topic for additional information.
Analysis Configuration
See the Analysis Tasks for the AnyID_CSV Job topic for additional information.
Workflow
Step 1 – Prepare a CSV file for import.
Step 2 – Configure the configurable query parameters.
Step 3 – Run the job.
Step 4 – Review the report generated by the job.
Queries for the AnyID_CSV Job
The AnyID_CSV query uses the PowerShell Data Collector.
The query is:
- CSV Import – Imports identities and attributes from a CSV file. See the Configure the AnyID_CSV Query topic for additional information.
Configure the AnyID_CSV Query
Follow the steps to configure the AnyID_CSV query.
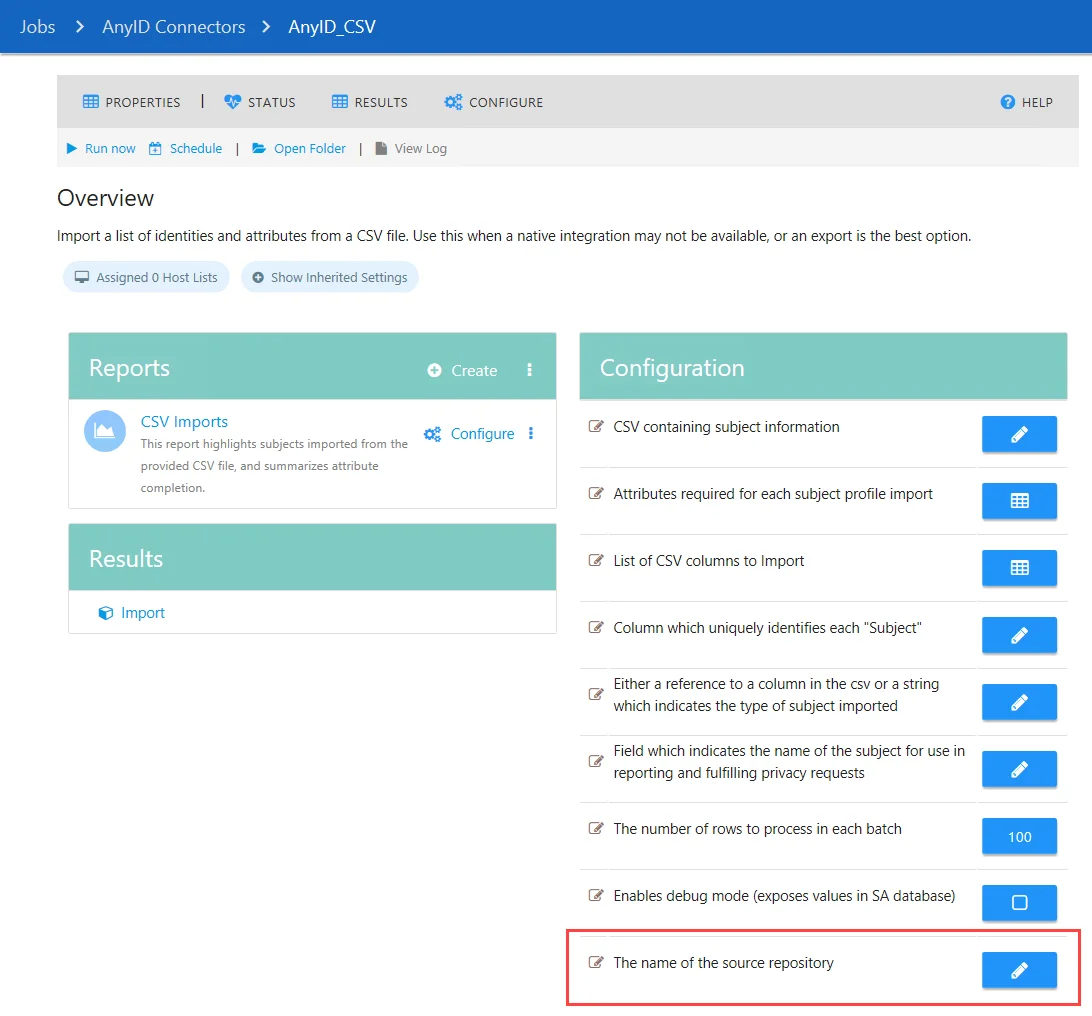
Step 1 – Navigate to and select the AnyID Connectors > AnyID_CSV node. In the Configuration section of the job's Overview page, click the configure button for the The name of the source repository parameter. In the Configure Window, enter the name of the source repository where the list of identities and related attributes were retrieved from.
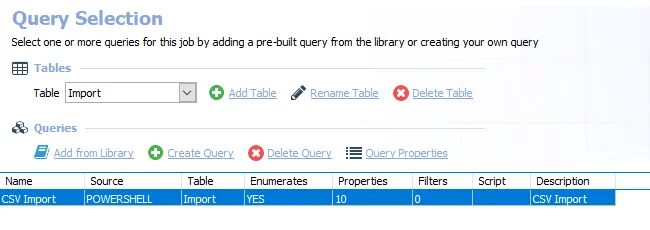
Step 2 – Navigate to the AnyID Connectors > AnyID_CSV > Configure node and select Queries.
Step 3 – In the Query Selection view, select the CSV Import query and click Query Properties. The Query Properties window opens.
Step 4 – Select the Data Source tab, and click Configure. The PowerShell Data Collector Wizard opens.
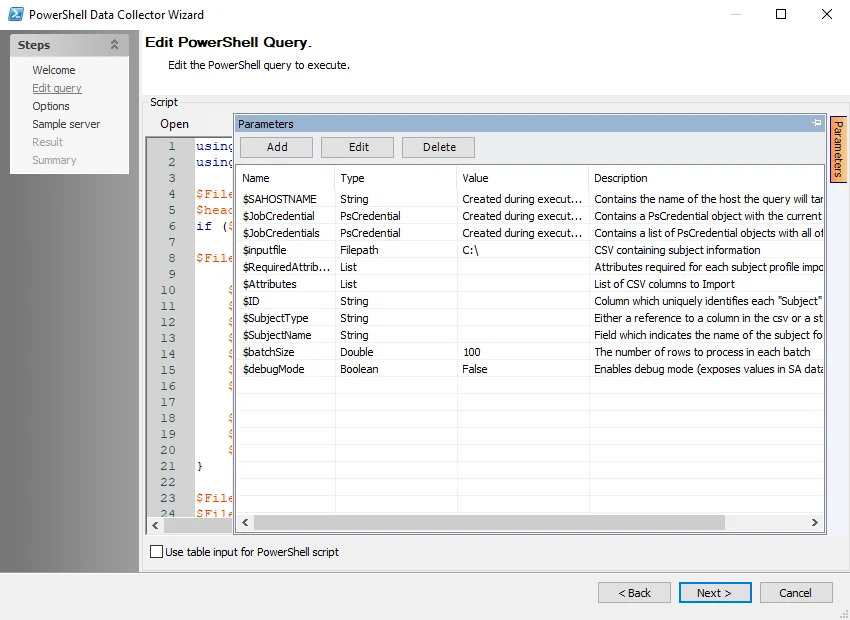
Step 5 – Navigate to the Edit Query page. Click the Parameters tab on the right-hand side of the page to expand the Parameters window. Configure the following attributes:
CAUTION: The following attributes must be configured in order for the job to execute properly.
-
$inputfile – File path to the CSV file which contains the identity and attribute information
-
$RequiredAttributes – The list of attributes that need to be found in the document in order to trigger a match
- An attribute in the Attributes list will not be considered a match (in reporting and AIC) unless an attribute in the RequiredAttributes list is also found in the same file
-
$Attributes – The list of attributes that will be scanned for during sensitive data scanning
- An attribute in the Attributes list will not be considered a match (in reporting and AIC) unless an attribute in the RequiredAttributes list is also found in the same file
-
$ID – Column which uniquely identifies each subject
-
$SubjectType – Either a reference to a column in the CSV file or a string which indicates the type of subjects being imported
-
$batchSize – (Optional) The number of rows to process in a batch. Leave at default unless otherwise required.
-
$debugMode – (Optional) When set to true, stores unhashed attribute values for troubleshooting purposes
Step 6 – Click Next. Continue to the Sample server page and click Finish to save changes. Click Cancel to exit the wizard without saving changes.
The query is now ready to run.
Analysis Tasks for the AnyID_CSV Job
Navigate to the Jobs > AnyID Connectors > AnyID_CSV > Configure node and select Analysis to view the analysis tasks.
CAUTION: Do not modify or deselect the selected analysis tasks. The analysis tasks are preconfigured for this job.
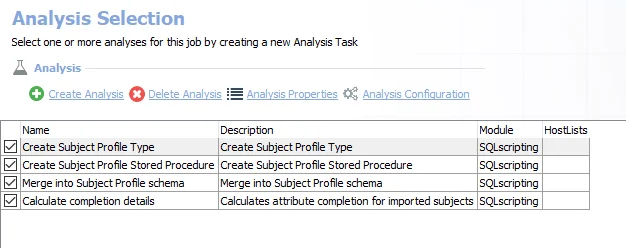
The default analysis tasks are:
- Create Subject Profile Type – Creates subject profile type
- Create Subject Profile Stored Procedure – Creates subject profile stored procedure
- Merge into Subject Profile schema – Merges into subject profile schema
- Calculate completion details – Calculates attribute completion for imported subjects
In addition to the tables created by the analysis tasks, the AnyID_CSV job produces the following preconfigured report:
| Report | Description | Default Tags | Report Elements |
|---|---|---|---|
| CSV Imports | This report highlights subjects imported from the provided CSV file, and summarizes attribute completion. | None | This report is comprised of four elements: - Table – Contains information on imported subjects - Bar Chart – Provides information on subject types - Table – Contains information on the attributes summary - Table – Contains information on subject details |
AnyID_EpicClarity Job
The AnyID_EpicClarity job collects patient information from Epic including MRNs, SSNs, Subscriber IDs, and Account IDs. An account with read access to the underlying Clarity Oracle database is required in order to run queries.
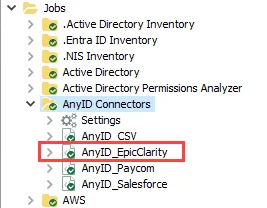
The AnyID_EpicClarity job is located in the Jobs > AnyID Connectors job group.
Recommended Configurations for the AnyID_EpicClarity Job
The following are recommended configurations for the AnyID_EpicClarity job:
Dependencies
The AnyID_EpicClarity job requires a CSV file with a filepath configured in the job's query to collect data. See the Configure the AnyID_EpicClarity Queries topic for additional information.
Targeted Host
Epic Clarity Database Server
Connection Profile
Read Access to the underlying Clarity Oracle database.
History Retention
Default Retention Period. See the History topic for additional information.
Multi-Console Support
Not supported
Schedule Frequency
This job should be run based on the desired frequency of Sensitive Data Scans.
Query Configuration
This job contains configurable queries. See the Configure the Configure the AnyID_EpicClarity Queries topic for additional information.
Analysis Configuration
Run the solution with the default analysis configuration for best results.
Workflow
Step 1 – Configure the configurable query parameters for the job.
Step 2 – Run the job.
Step 3 – Review the report generated by the job.
Queries for the AnyID_EpicClarity Job
The AnyID_EpicClarity job uses the PowerShell Data Collector for queries.
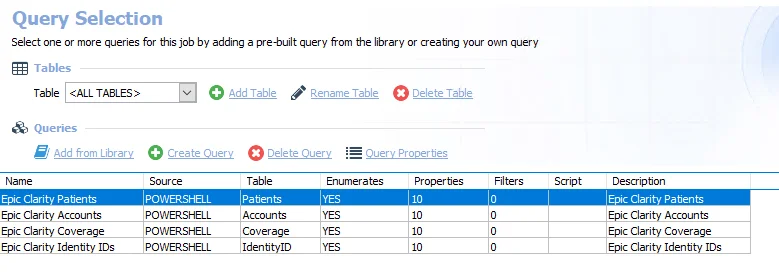
The queries are:
- Epic Clarity Patients – Imports Epic Clarity subject profile information for patients
- Epic Clarity Accounts – Imports Epic Clarity subject profile information on accounts
- Epic Clarity Coverage – Imports Epic Clarity subject profile information on coverage
- Epic Clarity Identity IDs – Imports Epic Clarity subject profile information on identity IDs
The above queries have configurable parameters. See the Configure the AnyID_EpicClarity Queries topic for additional information.
Configure the AnyID_EpicClarity Queries
Follow the steps to configure the AnyID_EpicClarity queries.
Step 1 – Navigate to the AnyID Connectors > AnyID_EpicClarity > Configure node and select Queries.
Step 2 – In the Query Selection view, select a query and click Query Properties. The Query Properties window opens.
Step 3 – Select the Data Source tab, and click Configure. The PowerShell Data Collector Wizard opens.
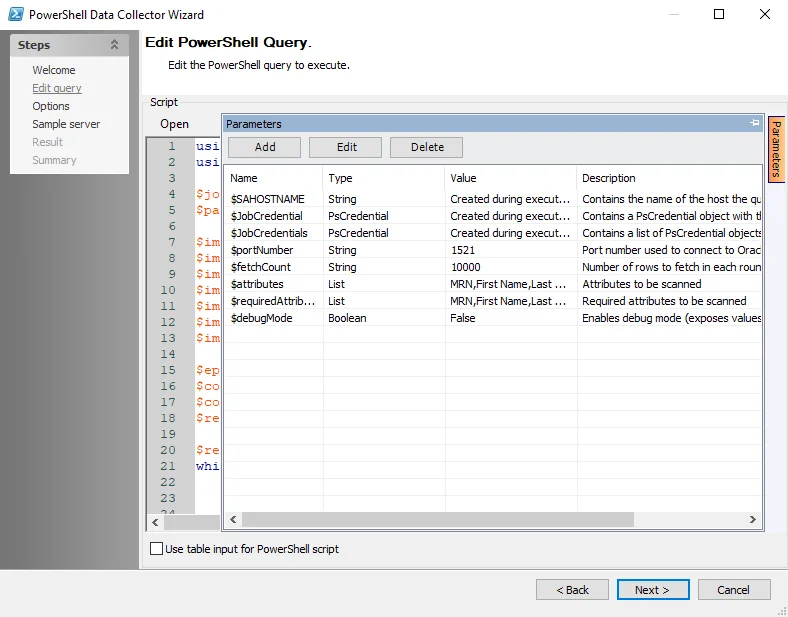
Step 4 – Navigate to the Edit Query page. Click the Parameters tab on the right-hand side of the page to expand the Parameters window. See the PowerShell: Edit Query topic for additional information. Configure the following attributes as needed:
-
$portNumber – The port number used to access the Oracle Database Server
-
$fetchCount – The number of rows to process in a batch. Leave at default unless otherwise required.
-
$Attributes – The list of attributes that will be scanned for during sensitive data scanning. Default values are MRN, SSN, Name, Date of Birth, Subscriber ID, Identity ID, and Account ID.
- An attribute in the Attributes list will not be considered a match (in reporting and AIC) unless an attribute in the RequiredAttributes list is also found in the same file
-
$RequiredAttributes – The list of attributes that need to be found in the document in order to trigger a match. The default values are SSN, MRN, and IdentityID.
- An attribute in the Attributes list will not be considered a match (in reporting and AIC) unless an attribute in the RequiredAttributes list is also found in the same file
-
$debugMode – When set to true, stores unhashed attribute values for troubleshooting purposes
Step 5 – Click Next. Continue to the Sample server page and click Finish to save changes. Click Cancel to exit the wizard without saving changes.
Repeat these steps for each query in the case that a non default port value is required. Once completed, the queries are ready to run.
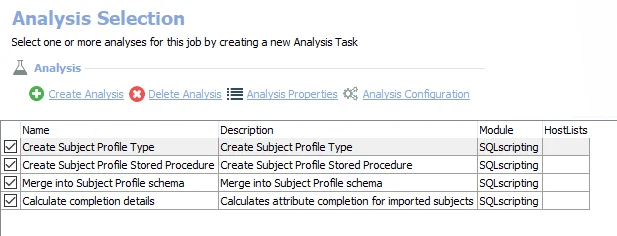
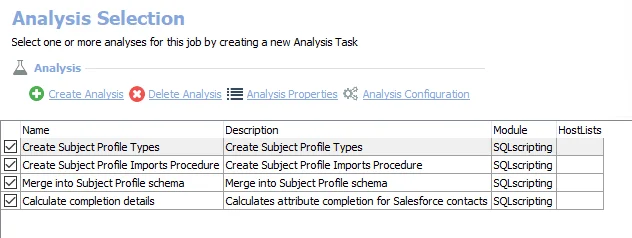
Analysis Tasks for the AnyID_EpicClarity Job
Navigate to the Jobs > AnyID Connectors > AnyID_EpicClarity > Configure node and select Analysis to view the analysis tasks.
CAUTION: Do not modify or deselect the selected analysis tasks. The analysis tasks are preconfigured for this job.
The default analysis tasks are:
- Create Subject Profile Types – Create subject profile types
- Create Subject Profile Imports Procedure – Create subject profile imports procedure
- Merge into Subject Profile schema – Merge into Subject Profile schema
- Calculate completion details – Calculates attribute completion for Epic Clarity patients
In addition to the tables created by the analysis tasks, the AnyID_EpicClarity job produces the following preconfigured report:
| Report | Description | Default Tags | Report Elements |
|---|---|---|---|
| Epic Clarity Patients | This report highlights Epic Clarity Patients and summarizes attribute completion by patient identity and by attribute. | None | This report is comprised of four elements: - Table – Contains information on Epic Clarity patients - Bar Chart – Provides information on subject types - Table – Contains information on the attributes summary - Table – Contains information on subject details |
AnyID_Paycom Job
The AnyID_Paycom job pulls employee information from Paycom including name, address, date of Birth, and SSN. Contact the organization's Paycom administrator in order to generate the CSV export required for this job. The recommended approach is to copy the CSV file to the Enterprise Auditor Console for best import performance.
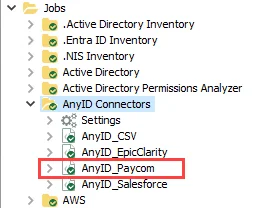
The AnyID_Paycom job is located in the Jobs > AnyID Connectors job group.
Recommended Configurations for the AnyID_Paycom Job
The following are recommended configurations for the AnyID_Paycom job:
Dependencies
None
Targeted Host
Local Host
Connection Profile
The AnyID_Paycom job does not require a connection profile.
History Retention
Default Retention Period. See the History topic for additional information.
Multi-Console Support
Not supported
Schedule Frequency
This job should be run based on the desired frequency of Sensitive Data Scans.
Query Configuration
This job contains configurable queries. See the Configure the AnyID_Paycom Job topic for additional information.
Analysis Configuration
Run the job with the default analysis configuration settings for best results.
Workflow
Step 1 – Prepare a CSV file from Paycom for import.
Step 2 – Configure the configurable query parameters.
Step 3 – Run the job.
Step 4 – Review the report generated by the job.
Queries for the AnyID_Paycom Job
The AnyID_Paycom job uses the PowerShell Data Collector for the query.
The queries are:
- Paycom CSV Import – Imports a CSV file with information from Paycom. This query has configurable parameters. See the Configure the AnyID_Paycom Job topic for additional information.
Configure the AnyID_Paycom Job
Follow the steps to configure the AnyID_Paycom query.
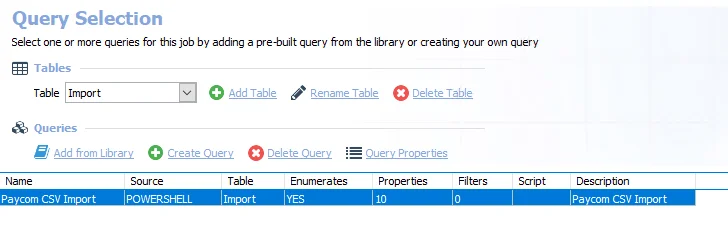
Step 1 – Navigate to the AnyID Connectors > AnyID_Paycom > Configure node and select Queries.
Step 2 – In the Query Selection view, select the Paycom CSV Import query and click Query Properties. The Query Properties window opens.
Step 3 – Select the Data Source tab, and click Configure. The PowerShell Data Collector Wizard opens.
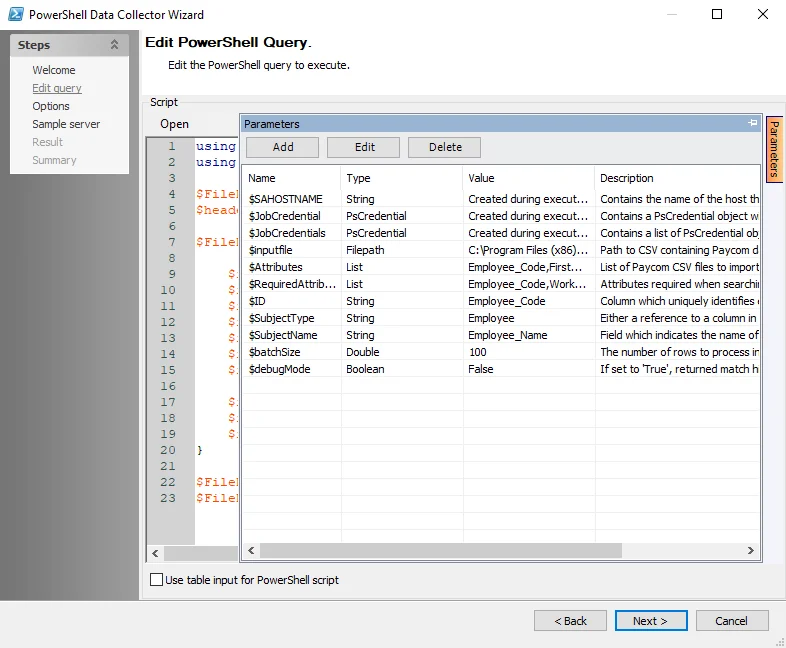
Step 4 – Navigate to the Edit Query page. Click the Parameters tab on the right-hand side of the page to expand the Parameters window. See the PowerShell: Edit Query topic for additional information. Configure the following attributes as needed:
-
$SAHOSTNAME – Created during execution. This parameter cannot be modified.
-
$JobCredential – Created during execution. This parameter cannot be modified.
-
$JobCredentials – Created during execution. This parameter cannot be modified.
-
$inputfile – File path to the CSV file which contains the identity and attribute information
-
$Attributes – The list of attributes that will be scanned for during sensitive data scanning
- An attribute in the Attributes list will not be considered a match (in reporting and AIC) unless an attribute in the RequiredAttributes list is also found in the same file
-
$RequiredAttributes – The list of attributes that need to be found in the document in order to trigger a match
- An attribute in the Attributes list will not be considered a match (in reporting and AIC) unless an attribute in the RequiredAttributes list is also found in the same file
-
$ID – Column which uniquely identifies each subject
-
$SubjectType – Either a reference to a column in the csv file or a string which indicates the type of subjects being imported
-
$SubjectName – Either a reference to a column in the csv file or a string which indicates the name of the subjects being imported
-
$batchSize – The number of rows to process in a batch. Leave at default unless otherwise required.
-
$debugMode – When set to true, stores unhashed attribute values for troubleshooting purposes
Step 5 – Click Next. Continue to the Sample server page and click Finish to save changes. Click Cancel to exit the wizard without saving changes.
The query is now ready to run.
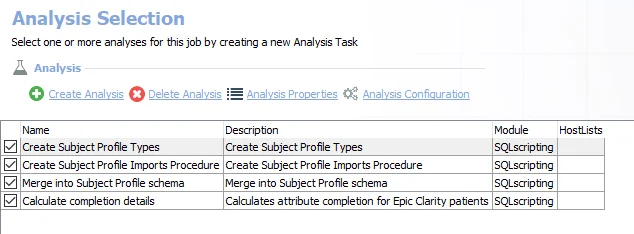
Analysis Tasks for the AnyID_Paycom Job
Navigate to the Jobs > AnyID Connectors > AnyID_Paycom > Configure node and select Analysis to view the analysis tasks.
CAUTION: Do not modify or deselect the selected analysis tasks. The analysis tasks are preconfigured for this job.
The default analysis tasks are:
- Create Subject Profile Types – Creates subject profile types
- Create Subject Profile Stored Procedure – Creates subject profile stored procedure
- Merge into Subject Profile schema – Merges into subject profile schema
- Calculate completion details – Calculates attribute completion for imported subjects
In addition to the tables created by the analysis tasks, the AnyID_Paycom job produces the following preconfigured report:
| Report | Description | Default Tags | Report Elements |
|---|---|---|---|
| Paycom Imports | This report highlights subjects imported from the provided Paycom CSV file, and summarizes attribute completion. | None | This report is comprised of four elements: - Table – Contains information on imported subjects - Bar Chart – Provides information on subject types - Table – Contains information on the attribute summary - Table – Contains information on subject details |
AnyID_Salesforce Job
The AnyID_Salesforce job collects Salesforce contact details including phone, address, email, and date of birth. This job requires API access to Salesforce in order to collect this information. The list of collected attributes can be adjusted as necessary.
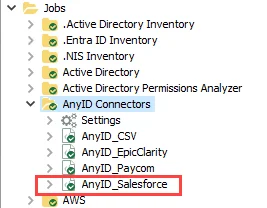
The AnyID_Salesforce job is located in the Jobs > AnyID Connectors job group.
Prerequisites
The following credentials are required to run the AnyID_Salesforce job:
- (TASK - Local) – Stores the Consumer Key and Consumer Secret
- (TASK - Local) – Stores the Salesforce Account Username and password
- (TASK - Local) – Stores the URL for Salesforce site and Security Token for Salesforce site (for
example,
https://company.my.salesforce.com)
Permissions
- API access to Salesforce
Recommended Configurations for the AnyID_Salesforce Job
The following are recommended configurations for the AnyID_Salesforce job:
Targeted Host
Local Host
Connection Profile
Ensure that a connection profile is configured with the required credentials. See the Prerequisites topic for additional information.
History Retention
Default Retention Period. See the History topic for additional information.
Multi-Console Support
Not supported
Schedule Frequency
Schedule the job as required.
Query Configuration
This job contains configurable queries. See the Configure the AnyID_Salesforce Query topic for additional information.
Analysis Configuration
Run the solution with the default analysis configuration for best results.
Workflow
Step 1 – Set up a connection profile with the required credentials.
Step 2 – Configure the configurable query parameters for the job.
Step 3 – Run the job.
Step 4 – Review the report generated by the job.
Queries for the AnyID_Salesforce Job
The AnyID_Salesforce job uses the PowerShell Data Collector for the query.
The query is:
- PS Salesforce Import – Imports Salesforce information for analysis. This query has configurable parameters. See the Configure the AnyID_Salesforce Query topic for additional information.
Configure the AnyID_Salesforce Query
Follow the steps to configure the AnyID_Salesforce query.
Step 1 – Navigate to the AnyID Connectors > AnyID_Salesforce > Configure node and select Queries.
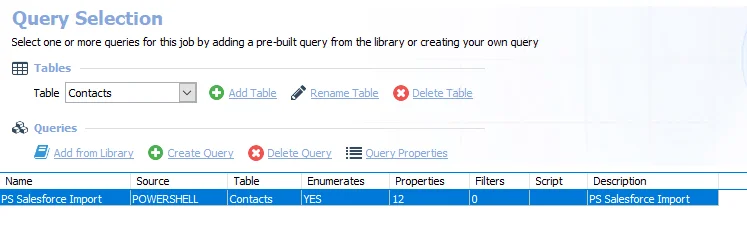
Step 2 – In the Query Selection view, select the PS Salesforce Import query and click Query Properties. The Query Properties window opens.
Step 3 – Select the Data Source tab, and click Configure. The PowerShell Data Collector Wizard opens.
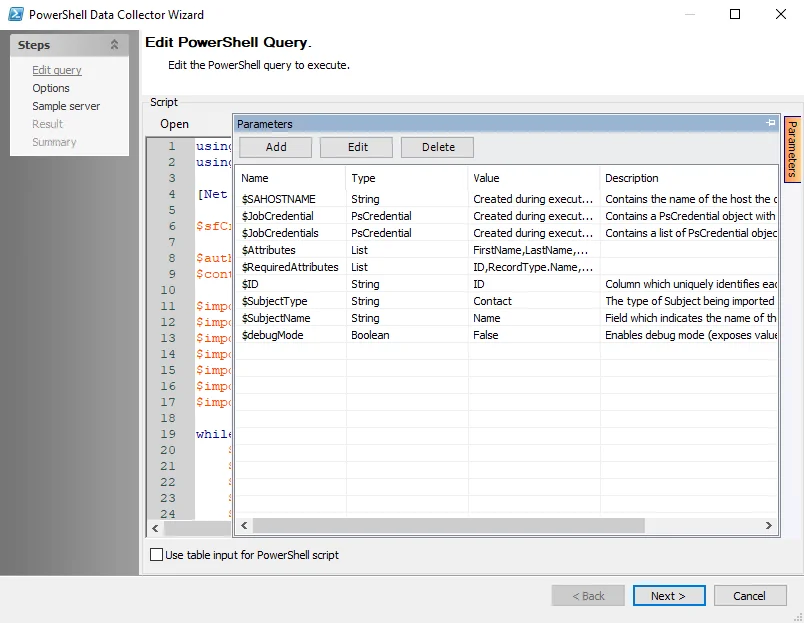
Step 4 – Navigate to the Edit Query page. Click the Parameters tab on the right-hand side of the page to expand the Parameters window. See the PowerShell: Edit Query topic for additional information. Configure the following attributes as needed:
-
$SAHOSTNAME – Created during execution. This parameter cannot be modified.
-
$JobCredential – Created during execution. This parameter cannot be modified.
-
$JobCredentials – Created during execution. This parameter cannot be modified.
-
$Attributes – The list of attributes that will be scanned for during sensitive data scanning
- An attribute in the Attributes list will not be considered a match (in reporting and AIC) unless an attribute in the RequiredAttributes list is also found in the same file
-
$RequiredAttributes – The list of attributes that need to be found in the document in order to trigger a match
- An attribute in the Attributes list will not be considered a match (in reporting and AIC) unless an attribute in the RequiredAttributes list is also found in the same file
-
$ID – Column which uniquely identifies each subject
-
$SubjectType – A string which indicates the type of subjects being imported
-
$SubjectName – A string which indicates the name of the subjects being imported
-
$debugMode – When set to true, stores unhashed attribute values for troubleshooting purposes
Step 5 – Click Next. Continue to the Sample server page and click Finish to save changes. Click Cancel to exit the wizard without saving changes.
The query is now ready to run.
Analysis Tasks for the AnyID_Salesforce Job
Navigate to the Jobs > AnyID Connectors > AnyID_Salesforce > Configure node and select Analysis to view the analysis tasks.
CAUTION: Do not modify or deselect the selected analysis tasks. The analysis tasks are preconfigured for this job.
The default analysis tasks are:
- Create Subject Profile Types – Creates subject profile types
- Create Subject Profile Imports Procedure – Creates subject profile imports procedure
- Merge into Subject Profile schema – Merges into subject profile schema
- Calculate completion details – Calculates attribute completion for Salesforce contacts
In addition to the tables created by the analysis tasks, the AnyID_Salesforce job produces the following preconfigured report:
| Report | Description | Default Tags | Report Elements |
|---|---|---|---|
| Salesforce Contacts | This report highlights Salesforce Contacts and summarizes attribute completion by contact and by attribute. | None | This report is comprised of four elements: - Table – Contains information on Salesforce contacts - Bar Chart – Provides information on contact types - Table – Contains information on the attributes completion - Table – Contains information on subject details |
AnyID Connectors Solution
The AnyID Connectors Solution allows you to quickly find where data for identities are stored, reducing the response time to Data Subject Access Requests (DSARs). Integration with third party repositories allows you to perform exact data matching for profiles such as employees, customers, students, or patients across any data repository.
Data Privacy Engine works in conjunction with Enterprise Auditor Sensitive Data Discovery scans to create an efficient, secure IdentityIndex™ that privacy, security, and legal professionals can leverage to quickly and easily map the location of subject information. Through a series of preconfigured Identity Connectors,you can easily extract identity-related attributes about customers and other potential subjects from verified systems of record like Salesforce, Epic, Peoplesoft, and Paycom, as well as homegrown or alternative platforms.
Through the creation of a Subject Profile for each individual, Enterprise Auditor’s broad-reaching Sensitive Data Discovery engine accurately identifies the specific location of a subject’s data across virtually any cloud or on-premises data repository. With this context in tow, organizations can now easily perform Data Subject Access Requests (DSARs), zero-in on where the implementation of Privacy by Design principles are needed most urgently, and know for certain when breach attempts and activities involve consumer, patient, resident, and other subject data.
Supported Platforms
- CSV
- EpicClarity
- Paycom
- Salesforce
Location
The AnyID Connectors Solution requires a special Enterprise Auditor license. It can be installed from the Instant Job Wizard. See the Instant Job Wizard topic for additional information.
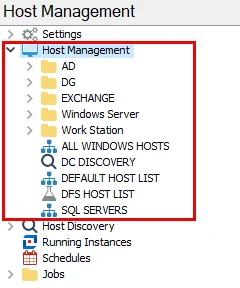
Once installed into the Jobs tree, navigate to the solution: Jobs > AnyID Connectors.
Jobs
The AnyID Connectors Solution provides a series of preconfigured jobs which allow end-users to integrate with third-party systems of record such as Paycom or Salesforce, to extract a list of potential data subjects along with relevant bits of PII such as Social Security Number, Address, or Phone Number.
The jobs within this group create and add to the secure IdentityIndex™ containing identity-related attributes about potential subjects which are then used by Enterprise Auditor’s Sensitive Data Discovery engine to perform exact data matching against virtually any cloud or on-premises data repository.
The jobs in the AnyID Connectors Solution are:
- AnyID_CSV Job – Imports a list of identities and attributes from a CSV file. Use this when a native integration may not be available, or an export is the best option.
- AnyID_EpicClarity Job – Collects patient information from Epic including MRNs, SSNs, Subscriber IDs, and Account IDs. An account with read access to the underlying Clarity Oracle database is required in order to run queries.
- AnyID_Paycom Job – Pulls employee information from Paycom including Name, Address, Date of Birth, and SSN. Contact your Paycom administrator in order to generate the CSV export required for this job.
- AnyID_Salesforce Job – Collects Salesforce Contact details including Phone, Address, Email, and Date of birth. This job requires API access to Salesforce in order to collect this information.
NOTE: See the individual job topics for information on recommended configurations.