Configuring the Web Console to use ADFS
The Enterprise Auditor Webserver and Access Information Center are able to support Single-Sign-On (SSO) leveraging WSFederation with SAML tokens. This guide contains steps for implementing SSO using Active Directory Federation Services (ADFS).
Follow the steps to configure the Web Console to use ADFS authentication:
NOTE: A certificate from the ADFS server is required. Confer with a PKI administrator to determine which certificate method will conform to the organization's security policies.
Step 1 – Import the certificate for the ADFS server onto the hosting server using the Certificate Management MMC snap-in.
- If used, self-signed certificates will also need to be imported
Step 2 – On the ADFS server, open AD FS Management.
Step 3 – Navigate to Relying Party Trusts and click Add Relying Part Trust.... Use the Add Relying Party Trust Wizard to configure the relying party trust:
-
On the Welcome page, select Claims aware and click Start.
-
On the Select Data Source page, select Enter data about the relying party manually and click Next.
-
On the Specify Display Name page, enter a display name for the relying party trust. Click Next.
-
On the Configure URL page, do not select any options and click Next.
-
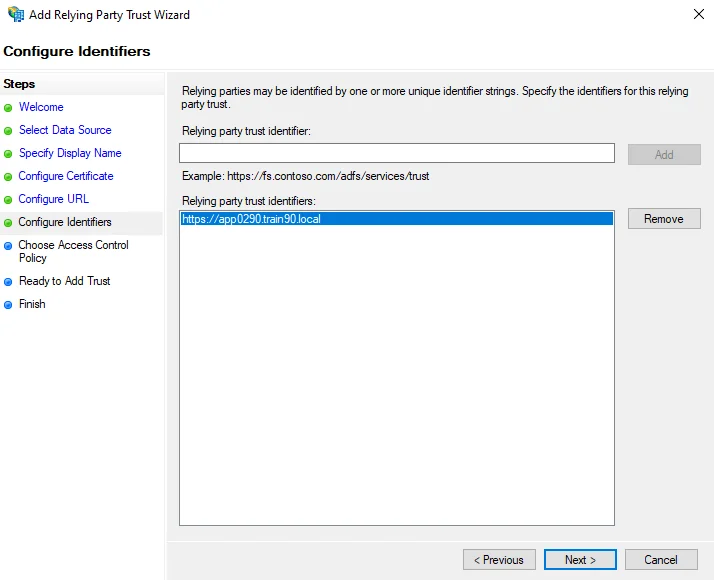
On the Configure Identifiers page, add an identifier of
https://followed by the fully qualified domain name (FQDN) of your ADFS server.- For example,
https://app0290.train90.local
- For example,
-
Click Next to proceed through the remaining wizard pages and complete the wizard.

Step 4 – Double-click on the newly added relying party trust to open it's Properties window.
Navigate to the Endpoints tab and click Add WS-Federation. On the Add an Endpoint window, add
https://<FQDN of the web server>:<port number>/federation as the Trusted URL, then click OK.
- For example,
https://app0190.train90.local:8082/federation
Click OK to save the changes and close the properties window.
Step 5 – Select the relying party trust, and click Edit Claim Issuance Policy on the right-hand panel.
-
On the Edit Claim Issuance Policy window, click Add Rule.
-
On the Choose Rule Type page of the Add Transform Claim Rule Wizard, select Send LDAP Attributes as Claims as the Claim rule template. Click Next.

-
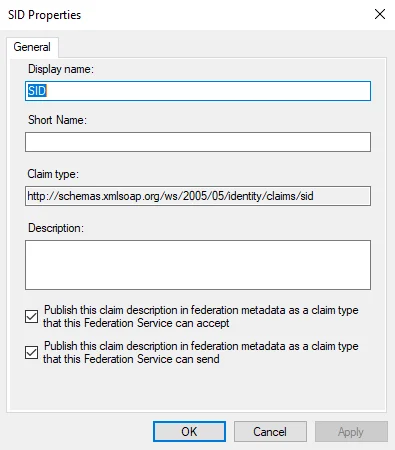
On the Configure Claim Rule page, enter a name in the Claim rule name field.
If the SID claim is not configured by default, add it to the Claim Description as follows:
Step 6 – Navigate to the Enterprise Auditor installation directory and open the
WebServer.exe.config file in a text editor.
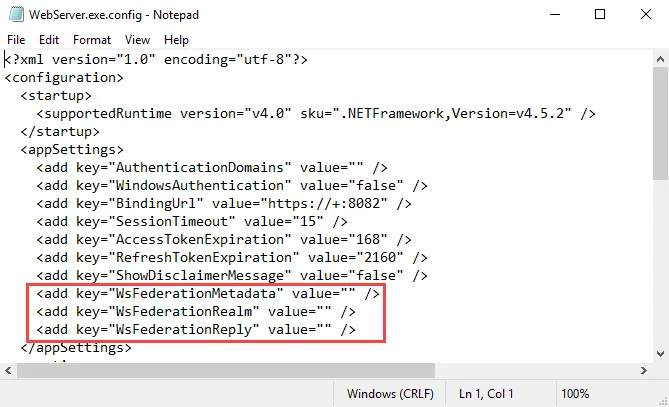
Step 7 – In the WebServer.exe.config file, change the following parameters:
-
WsFederationMetadata– Change the value to the following:<add key="WsFederationMetadata" value="https://ADFSServer.domain.com/FederationMetadata/2007-06/FederationMetadata.xml" /> -
WsFederationRealm– Replace the value text with the URL entered for the Relying Party Trust in Step 3:<add key="WsFederationRealm" value="INSERT VALUE HERE" />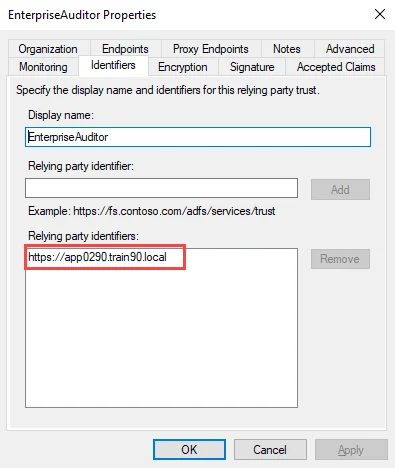
You can retrieve the URL value from the Identifiers tab of the relying party trust properties window.
-
WsFederationReply– Replace the value text with the Trusted URL entered for the Endpoint in Step 4:<add key="WsFederationReply" value="INSERT VALUE HERE" />
You can obtain the URL required for this parameter from the Endpoints tab of the relying party trust properties window. Select the endpoint and click Edit to open the Edit Endpoint window.
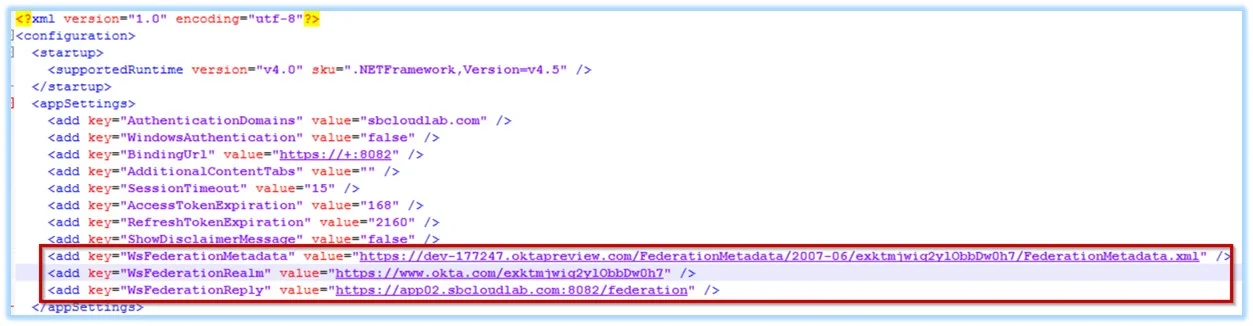
The following is an example of how the parameters should look when configured in the config file:
<add key="WsFederationMetadata" value="https://app0290.train90.local/FederationMetadata/2007-06/FederationMetadata.xml" />
<add key="WsFederationRealm" value="https://app0290.train90.local" />
<add key="WsFederationReply" value="https://app0190.train90.local:8082/federation" />
Step 8 – Save the changes in the WebServer.exe.config file.
Step 9 – Navigate to Services (services.msc). Restart the Enterprise Auditor Web Server
service.
ADFS authentication is now enabled for Enterprise Auditor.
Update the Published Reports URL for ADFS
If ADFS does not accept http://localhost:8082/ as an acceptable path, the path will need to be
updated in the Published Reports properties window. Follow the steps to configure the Published
Reports URL for ADFS:
Step 1 – Right-click the Published Reports shortcut on the desktop and select Properties.

Step 2 – Replace the URL with https://SAWebConsole.domain.com:8082.
Step 3 – Click Apply. Exit the window.
The Published Reports URL is now configured for ADFS.
Microsoft Entra ID Single Sign-On
Microsoft Entra ID Single Sign-On (SSO) can be configured for logging in to the Web Console to view reports. When configured, users accessing the Web Console are directed to the Microsoft Entra ID login page, and can log in using their existing Entra credentials.
The following is required to use Microsoft Entra ID SSO:
- SSL must be enabled
- The on-premise Active Directory must be synced with Microsoft Entra ID
To enable Microsoft Entra ID SSO, you must first create a registered application in Microsoft Entra ID, and then configure the Web Console to use it.
Configure an Application in Microsoft Entra ID
An application must be registered for the Web Console with your Microsoft Entra ID tenant and be configured with the necessary single sign-on settings. Follow the steps to create and configure the application.
Step 1 – Sign into the Microsoft Entra admin center.
Step 2 – On the left navigation menu, navigate to Identity > Applications > Enterprise Applications. On the top toolbar, click App registrations and then Create your own application.
Step 3 – On the Create your own application page, enter a name for your application and select the Integrate any other application you don't find in the gallery option. Click Create to finish creating the application.
Step 4 – In your application, go to Manage > Single sign-on. Select SAML as the single sign-on method.
Step 5 – On the Set up Single Sign-On with SAML page, click Edit on the Basic SAML Configuration section. Add your Identifier and Reply URL, and then click Save.
-
As the Identifier, enter
https://<FQDN of web server>:<port number>, for example:https://app0190.train90.local:8082 -
As the Reply URL, enter
https://<FQDN of web server>:<port number>/federation, for example:https://app0190.train90.local:8082/federation
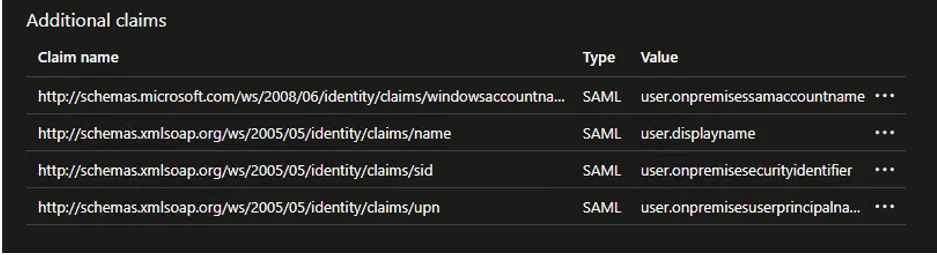
Step 6 – Next, click Edit on the Attributes & Claims section. The four claims in the table below are required. For each of these, click Add new claim, enter the information from the table, and then click Save.
| Name | Namespace | Source attribute |
|---|---|---|
| windowsaccountname | http://schemas.microsoft.com/ws/2008/06/identity/claims | user.onpremisessamaccountname |
| name | http://schemas.xmlsoap.org/ws/2005/05/identity/claims | user.displayname |
| sid | http://schemas.xmlsoap.org/ws/2005/05/identity/claims | user.onpremisessecurityidentifier |
| upn | http://schemas.xmlsoap.org/ws/2005/05/identity/claims | user.onpremisesuserprincipalname |
Once configured they should show under Additional claims as below:
Step 7 – In the Manage > Users and groups section for your application, add any required users or groups to give permission to access the application.
The application is now configured with the necessary settings. The next step is to enable the use of Microsoft Entra ID SSO in the web server config file.
Enable in the Web Server Config File
To enable Microsoft Entra ID SSO for the Web Console, the web server config file needs to be updated with values from Microsoft Entra ID. Follow the steps to enable the SSO.
Remember, Enabling Entra ID SSO requires SSL to already have been enabled for the web server. See the Securing the Web Console topic for additional information.
Step 1 – Open the WebServer.exe.config file with a text editor, for example Notepad. It is located within the Web folder of the Enterprise Auditor installation directory.
Step 2 – Locate the WsFederationMetaData, WsFederationRealm, and WsFederationReply Parameters in the config file, and add the required values from your Microsoft Entra ID application:
-
WsFederationMetaData – Metadata markup for describing the services provided
- This value can be retrieved from your application in Microsoft Entra ID: Manage > Single sign-on > SAML Certificates > App Federation Metadata Url
-
WsFederationRealm – Maps to the application identifier to Microsoft Entra ID
- This value can be retrieved from your application in Microsoft Entra ID: Manage > Single sign-on > Basic SAML Configuration > Identifier
-
WsFederationReply – This is the endpoint for the configured relying party trust
- This value can be retrieved from your application in Microsoft Entra ID: Manage > Single sign-on > Basic SAML Configuration > Reply URL
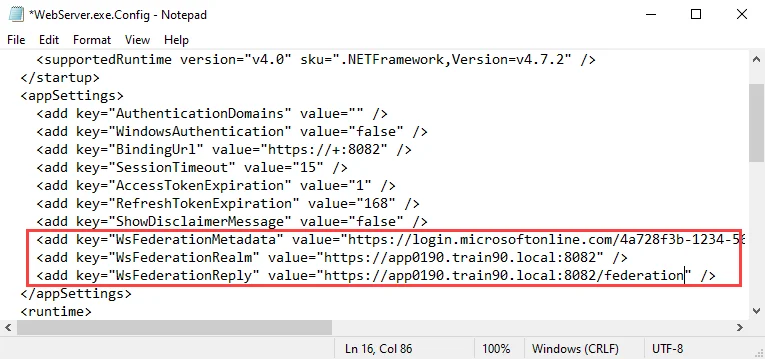
For example:
    <add key="WsFederationMetadata" value="https://login.microsoftonline.com/4a728f3b-1234-5678-90ab-cdef13246789/federationmetadata/2007-06/federationmetadata.xml?appid=5d3f1a2e-9876-5432-10ba-fedcba098765" />
    <add key="WsFederationRealm" value="https://app0190.train90.local:8082" />
    <add key="WsFederationReply" value="https://app0190.train90.local:8082/federation" />
Step 3 – Save and close the file.
Step 4 – Navigate to Services (services.msc). Restart the Netwrix Enterprise Auditor Web
Server service.
The Web Console has been enabled for Microsoft Entra ID single sign-on.
Creating an Application and Attributes in Okta
Create an Enterprise Auditor Application in Okta Using the WS-Fed Template
Follow the steps to create an Enterprise Auditor Application in Okta Using the WS-Fed Template:
Step 1 – Log in to Okta.
Step 2 – In the left-pane menu, expand Applications and then click Applications.
Step 3 – Click Create App Integration.
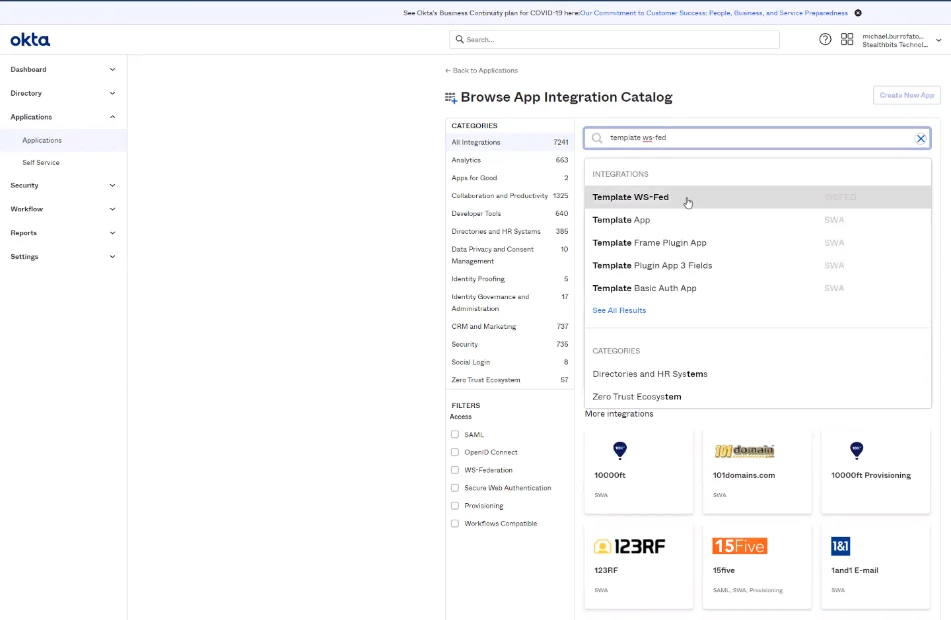
Step 4 – Browse the App Integration Catalog and select Template WS-Fed.
Step 5 – Click Create. Name the application Enterprise Auditor.
Retrieve the Values to Paste into the Enterprise Auditor WebServer.exe.config File
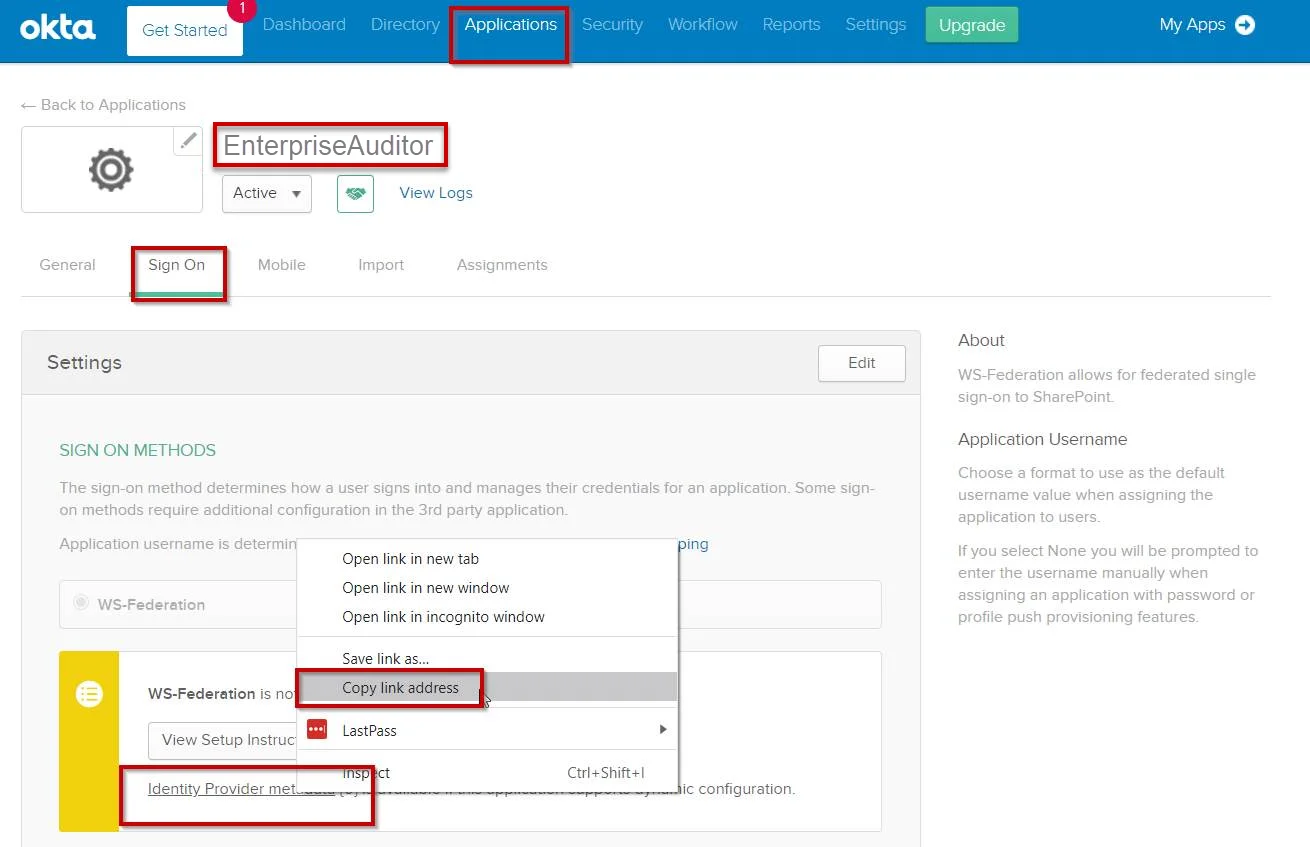
Step 1 – In the Enterprise Auditor application, click the Sign On tab.
Step 2 – Right click on the Identity Provider metadata link and select Copy Link Address to get the value for the WSFederationMetadata URL.
Step 3 – Click on the General tab to copy the value for the Realm. This value will be unique per tenant.
https://www.okta.com/<YOURVALUEHERE>
Step 4 – Construct the ReplytoURL using the FQDN of your Enterprise Auditor server:
https://FQDNofaccessanalyzerserver.com:8082/federation
Edit the WebServer.exe.config File
Follow the steps to edit the WebServer.exe.config file:
Step 1 – Open the WebServer.exe.config file with a text editor, such as Notepad++. It is located in the Web folder within the Enterprise Auditor installation.
Step 2 – Change the value for the BindingUrl parameter from http to https:
<add key="BindingUrl" value="https://+:8082" />
Step 3 – Update the following values in the WebServer.exe.config file with the values retrieved from the Enterprise Auditor Okta application.
CAUTION: These values are case sensitive. The values used here must match the values in the Enterprise Auditor Okta application.
-
WSFederationMetadata– Paste the copied link address into the WebServer.exe.config file as:<add key="WsFederationMetadata" value="INSERT URL HERE" /> -
WSFederationRealm– Paste the value for the Realm into the WebServer.exe.config file as:<add key="WsFederationRealm" value="INSERT URL HERE" /> -
WSFederationReply– Enter the value for the WSFederationReply based on the FQDN of the Enterprise Auditor server and port into the Webserver.exe.config file as:<add key="WsFederationMetadata" value="INSERT URL HERE" />
Step 4 – Restart the Enterprise Auditor Web Server.
Configure the App Settings for the StealthAUDIT Application
Step 1 – In the Enterprise Auditor application, navigate to the General Tab and click Edit to populate the following fields.
-
Web Application URL – This value should follow this format:
https://<FQDNofaccessanalyzerserver.com>:8082/ -
Realm – This value is unique per tenant and should follow this format:
https://www.okta.com/<YOURVALUEHERE> -
Audience Restriction – This value should match the value for the Realm
-
ReplyToURL – Enter the value from the WSFederationReply setting from the Webserver.exe.config file
https://FQDNofaccessanalyzerserver.com:8082/federation
-
Custom Attribute Statement – This value must match the following format, including case and bold areas:
http://schemas.microsoft.com/ws/2008/06/identity/claims/windowsaccountname|${user.__samaccountname__}|, http://schemas.xmlsoap.org/ws/2005/05/identity/claims/sid|${user.__SID__}|,http://schemas.xmlsoap.org/ws/2005/05/identity/claims/upn|${user.__upn__}|
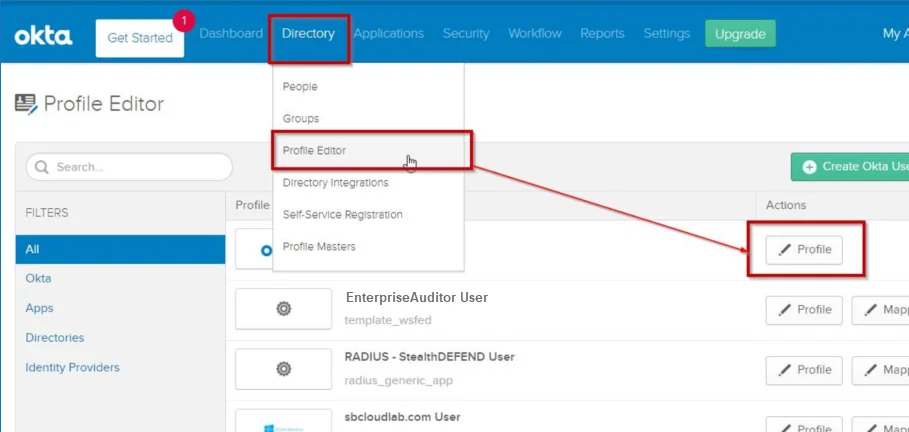
Step 2 – Navigate to the Directory menu and select Profile Editor from the drop-down menu. Click the Edit Profile button for the Enterprise Auditor application.

Step 3 – Click Add Attribute to open the Add Attribute window.
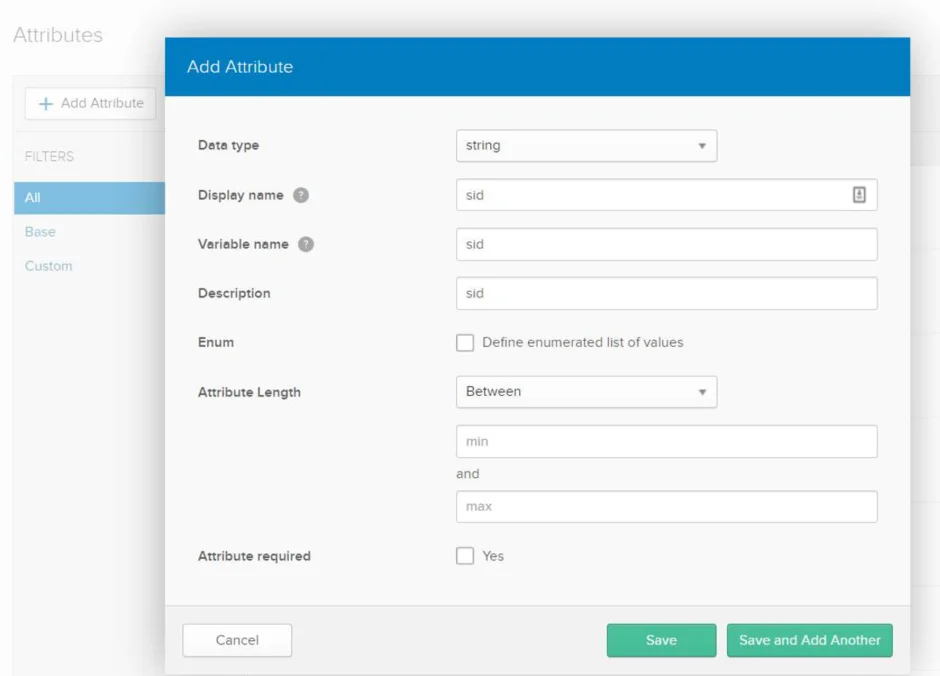
Step 4 – In the Add Attribute window, add the following attributes:
- Username
- SID
- samaccountname
- upn
- department
NOTE: The case of the attributes in bold must match the case used in the custom attribute.
Click Save to save the attribute details and close the Add Attribute window. To add another attribute, click Save and Add Another.
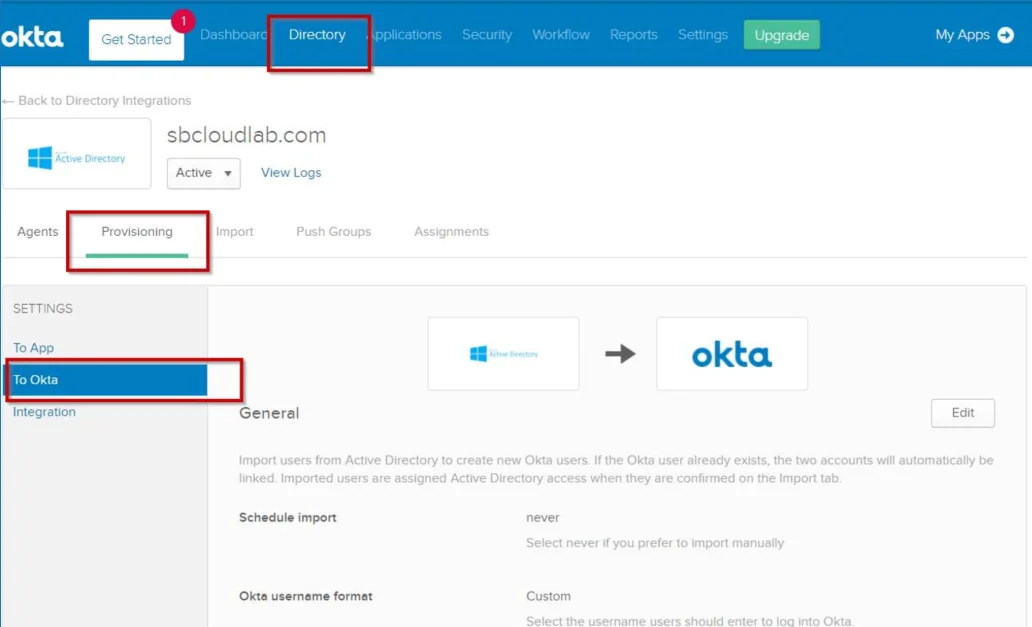
Step 5 – Navigate to the Directory menu and click on the Provisioning tab. Click To Okta.
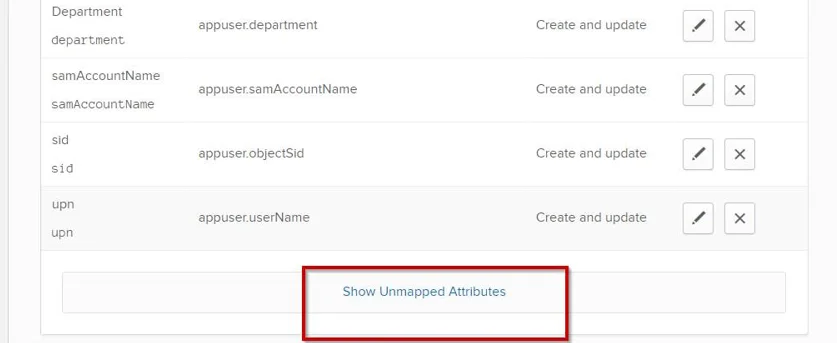
Step 6 – Locate and map the attributes that were added for the profile by clicking the Pencil icon to edit attributes. To locate the attributes, scroll down and select Show Unmapped Attributes.

Step 7 – Click the pencil icon for SID, upn, and samAccountName to map the attributes. They will display in the mapped section.
Step 8 – Click Save and return to the Okta Attribute Mappings page.
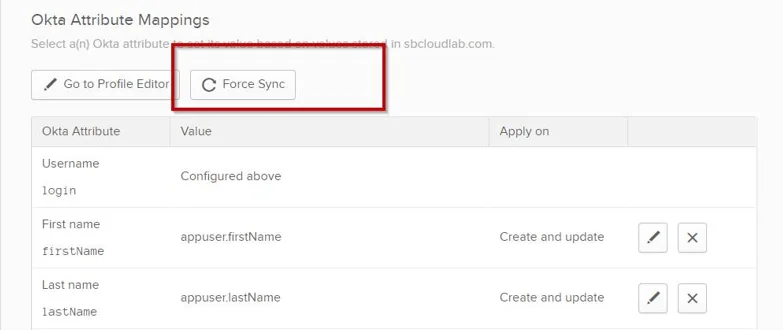
Step 9 – On the Okta Attribute Mappings page, click Force Sync. The new attributes will display for any user under the profile.
To configure Okta Multi-Factor Authentication, see the Setting Up Multi-Factor Authentication topic for additional information.
Setting Up Multi-Factor Authentication
Follow the steps to configure multi-factor-authentication for Enterprise Auditor:
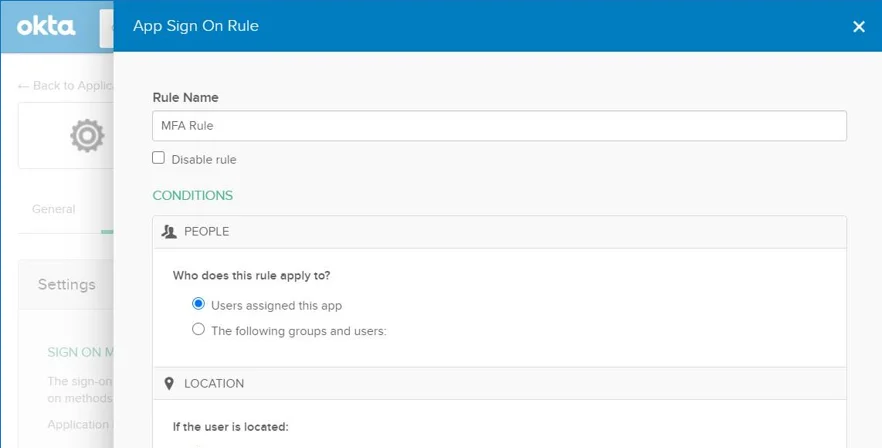
Step 1 – Navigate to the Sign On Policy page and click Add Rule. The App Sign On Rule opens. Configure the following options:
- Rule Name – Name of the rule
- Conditions – Select whether the rule applies to either the Users assigned to this app or The following groups and users.

Step 2 – Scroll down to the Access section. Check the Prompt for factor box and select Every Sign On. Click Save.
Multi-Factor Authentication is now configured for Enterprise Auditor.
Enable Single Sign-On
Single sign-on using Windows authentication allows users to be automatically log into the Web Console according to the user’s current login session. When opening a session from a different domain, the user will be prompted for credentials from a pop-up windows. After authenticating, the user will be automatically logged in the Web Console.
NOTE: The Web Console also supports using Microsoft Entra ID single sign-on. See the Microsoft Entra ID Single Sign-On topic for additional information.
Follow the steps to enable single sign-on for the Web Console.
Step 1 – Open the WebServer.exe.config file with a text editor, for example Notepad. It is located within the Web folder of the Enterprise Auditor installation directory.
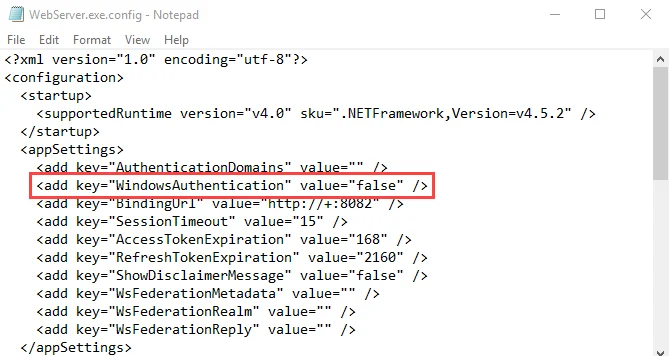
Step 2 – Change the value for the WindowsAuthentication parameter to:
<add key="WindowsAuthentication" value="true" />
Step 3 – Save and close the file.
Step 4 – Navigate to Services (services.msc). Restart the Netwrix Enterprise Auditor Web
Server service.
The Web Console has been enabled for single sign-on.
Local Intranet Settings
Next, configure local intranet settings to enable SSO. This enables users to have authentication pass through Windows Authentication and bypass SSO configuration Prompts for credentials via Browser pop-up.
Follow the steps to configure local intranet settings.
Step 1 – Open Windows Internet Properties (Control Panel > Network and Internet > Internet Options).
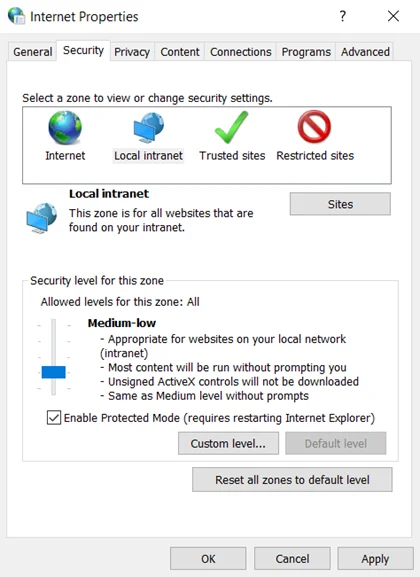
Step 2 – Go to the Security tab, and select the Local Intranet option. Then, click the Sites button.
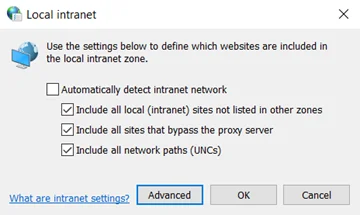
Step 3 – Click the Advanced button.
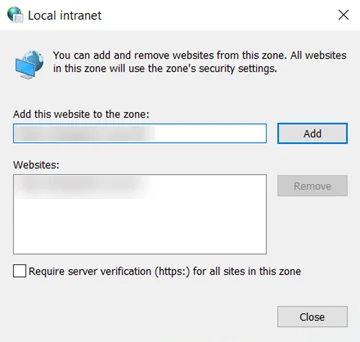
Step 4 – Enter a domain in the Add this website in the zone field. Ensure the fully
qualified domain name is in the following format: https://<server>.<domain>.com
Step 5 – Click the Add button. Close the Local intranet window.
Step 6 – On the Internet Properties window, click the Apply button.
Authentication will now pass through Windows Authentication and bypass SSO configuration Prompts for credentials via Browser pop-up
NOTE: A list of allowed authentication servers can also be configured using the AuthServerAllowList policy.