AzureADInventory: Category
The Category page identifies which Inventory task to perform.
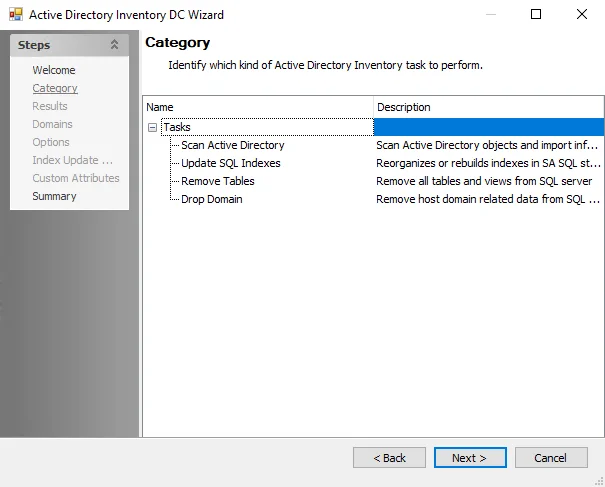
The two categories are:
- Scan Entra ID – Scans Microsoft Entra ID objects and imports the information into the SQL Server database, creating the standard reference tables. This task also maintains the schema for tables and views. This is the standard option for this data collector.
- Remove Tables – Removes all tables and views from SQL Server database. This option is designed for troubleshooting. When this option is selected, the next wizard page is the Summary page. See the Troubleshooting AzureADInventory Data Collector topic for more information.
The Scan Entra ID category is the pre-configured setting for the .Entra ID Inventory Job Group. Therefore, accessing the Entra ID Inventory DC Wizard from the query within that job group does not display the Category wizard page.
Microsoft Entra ID Connection Profile & Host List
The AzureADInventory Data Collector requires a custom Connection Profile and host list to be created and assigned to the job or job group conducting the data collection. The host inventory option during host list creation makes it necessary to configure the Connection Profile first.
Connection Profile
Creating the Connection Profile requires having the Client ID and Key that was generated when Enterprise Auditor was registered as a web application with Microsoft Entra ID. See the Microsoft Entra ID Auditing Configuration for additional information.
Create a Connection Profile and set the following information on the User Credentials window:
- Select Account Type – Azure Active Directory
- Client ID – Application (client) ID of the Enterprise Auditor application registered with Microsoft Entra ID. See the Identify the Client ID topic for additional information.
- Password Storage – Application (Uses the configured Profile Security setting as selected at the Settings > Application node. See the Application topic for additional information.)
- Key – Client secret value for the Enterprise Auditor application registered with Microsoft Entra ID. See the Generate the Client Secret Key topic for additional information.
Once the Connection Profile is created, it is time to create the custom host list. See the Connection topic for additional information.
Custom Host List
The custom host list should include:
- All Microsoft Entra ID tenants to be targeted. If there are multiple tenants, the Connection Profile should contain a credential for each.
- The host name must be the domain name of the tenant, for example
company.onmicrosoft.com. See the Identify the Client ID topic for additional information.
See the Add Hosts topic for instructions on creating a custom static host list.
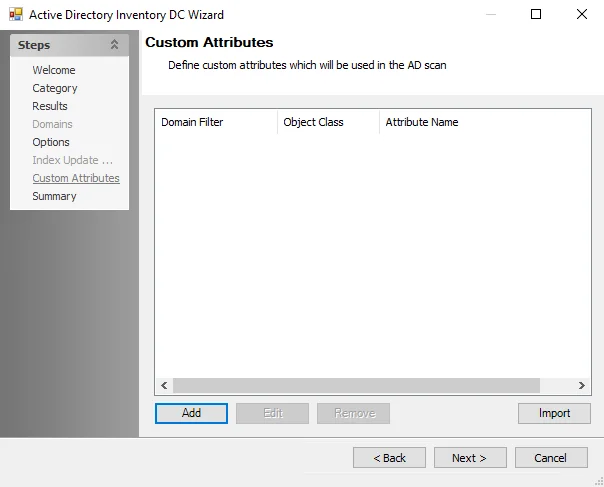
AzureADInventory: Custom Attributes
Use the Custom Attributes wizard page to define custom attributes that will be used in the Microsoft Entra ID scan.
Configuration options for Custom Attributes include:
-
Collect Open Extensions – If enabled, data collector will perform a full scan and collect all extension attributes for Microsoft Entra ID objects
- Enabling this option will increase the time it takes for the data collector to complete the scan. Disabling this option will configure the data collector run a differential scan, which will only scan changes since the last scan was performed.
CAUTION: A full scan is required when new attributes are added or removed.
-
Add – Adds a manually entered attribute that is included in the scan. This option opens the Custom Attribute window.
-
Edit – Make changes to a previously added attribute. This option opens the Custom Attribute window.
-
Remove – Deletes the attribute from the table and therefore the scan
-
Import – Use the Azure Connection Profile credentials or manually inputted credentials to import custom attributes for the scan using a valid tenant name. This option opens up the Custom Attributes Import Wizard.
Use the Add, Edit, and Remove buttons at the bottom of the window to configure the custom attributes to be gathered by the scan. Use the Add button to open the Custom Attribute Window. The Import button opens the Custom Attributes Import Wizard.
Custom Attribute Window
Input custom attributes from Microsoft Entra ID environments using the Custom Attribute pop-up window.

The options on the Custom Attributes window are:
- Tenant Filter – Use a Tenant Name or wildcard to target the desired environment. Wildcards (*) can be used.
- Object Class – One or more object class for the attribute can be selected:
- User
- Group
- Contact
- Attribute Name – Microsoft Entra ID attribute name
- Collect all sub-attributes – Allows the collection of sub-attributes
- Sub-Attribute Name – Define the sub-attribute name. Wildcards (*) can be used.
Repeat this process until all desired Custom Attributes have been included. Click OK to save the attribute.
Custom Attributes Import Wizard
The Custom Attributes Import wizard adds a list of custom schema and application attributes from the targeted tenant environment into the AzureADInventory Data Collector configurations. Follow the steps to use this window:
Step 1 – On the Custom Attributes page of the Entra Inventory DC wizard, click Import. The Custom Attributes Import Wizard opens.
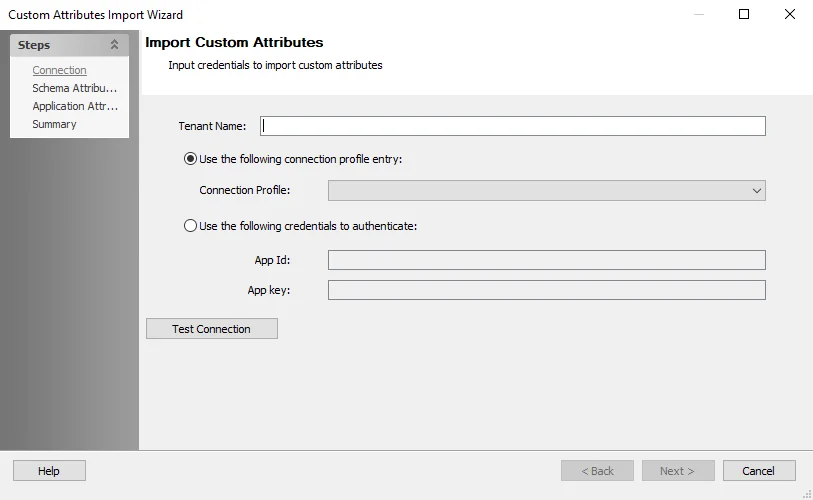
Step 2 – On the Connection page, enter the Tenant Name of the instance of Microsoft Entra ID to be targeted, and then select the method of supplying credentials for the specified tenant instance:
- Use the following connection profile entry – Select an Azure Connection Profile from the dropdown list
- Use the following credentials to authenticate – Enter the credentials to use
- App Id –Client ID
- App key – Client Secret Key
RECOMMENDED: Add a valid Azure Connection Profile to the Jobs > .Entra ID Inventory > Settings > Connection settings as a user defined profile. This ensures the connection profile displays in the dropdown menu.
See the Microsoft Entra ID Auditing Configuration or the Microsoft Entra ID Connection Profile & Host List topics for additional information.
Step 3 – Click Test Connection in order to connect to the tenant with the supplied credentials. If they are correct, the Schema Attributes and Application Attributes pages become available. Click Next to navigate to them.
 |  |
| Schema Extended Attributes page | Application Extended Attributes page |
Step 4 – On the Schema and Application Attributes pages, the wizard populates with the available attributes from the Azure tenant. Expand the object classes and select the checkboxes next to the required attributes to import the custom attributes. Click Next to continue.
- Load More – Adds additional object classes from the Microsoft Entra ID tenant environment that are not located in the current list
- Refresh Nodes – Wipes selections from all object class folders
Step 5 – On the Summary page, review your selections and click Finish.
The selected attributes display on the Custom Attributes page of the Entra ID Inventory DC wizard.
AzureADInventory: Options
The Options page provides scan options to use when gathering Microsoft Entra ID information. It is a wizard page for the Scan Entra ID category.
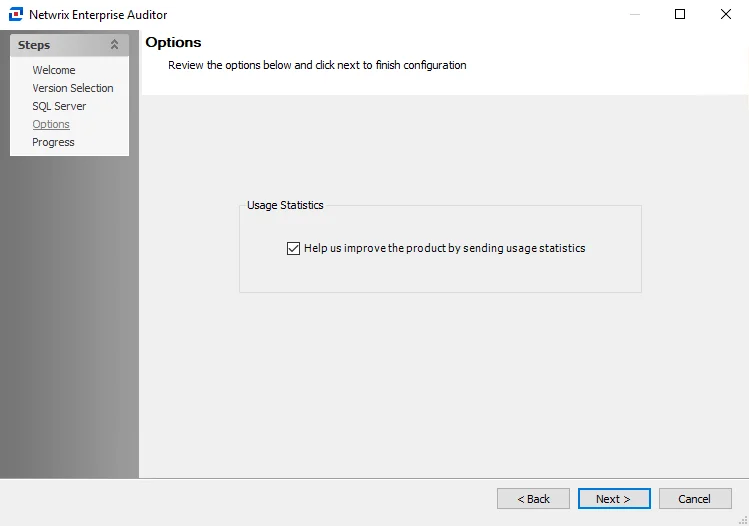
Scan options for collecting Microsoft Entra ID information include:
- Collect only updates since the last scan
- Collect sign-in activity with scan
- This option is required to collect the LastLogonTimestamp attribute of user objects
- Collect directory audit events
AzureADInventory Data Collector
The AzureADInventory Data Collector catalogs user and group object information from Microsoft Entra ID, formerly Azure Active Directory. This data collector is a core component of Enterprise Auditor and is preconfigured in the .Entra ID Inventory Solution.
Both this data collector and the solution are available with all Enterprise Auditor license options. See the .Entra ID Inventory Solution topic for additional information.
Protocols
- HTTP
- HTTPS
- REST
Ports
- TCP 80 and 443
Permissions
-
Microsoft Graph API
-
Application Permissions:
- AuditLog.Read.All – Read all audit log data
- Directory.Read.All – Read directory data
-
Delegated Permissions:
- Group.Read.All – Read all groups
- User.Read.All – Read all users' full profiles
-
-
Access URLs
-
- All sub-directories of the access URLs listed
AzureADInventory Query Configuration
The AzureADInventory Data Collector is configured through the Entra ID Inventory DC Wizard, which contains the following wizard pages:
- Welcome
- AzureADInventory: Category
- AzureADInventory: Options
- AzureADInventory: Custom Attributes
- AzureADInventory: Results
- AzureADInventory: Summary
Hide the Welcome page the next time this data collected is accessed by selecting the Do not display this page the next time checkbox.
AzureADInventory: Results
The Results page is where the properties from Microsoft Entra ID to be gathered are selected. It is a wizard page for the category of Scan Entra ID.
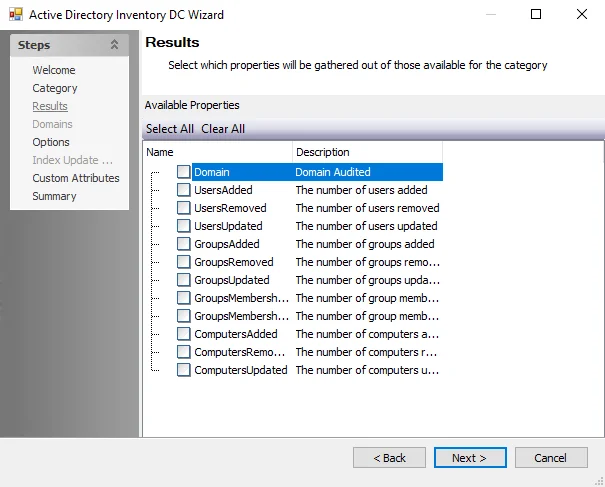
Properties can be checked individually or the Select All and Clear All buttons can be used. All checked properties are collected. This information is not available within the standard reference tables and views. Instead, this information can be viewed in the SA_AzureADInventory_DEFAULT table, which is created when any of these properties are selected.
Standard Reference Tables & Views for the AzureADInventory Data Collector
The AzureADInventory Data Collector collects essential user and group inventory information into standard reference tables. Unlike other Enterprise Auditor data collectors, the AzureADInventory Data Collector writes data to these tables regardless of the job executing the query.
These tables and their associated views are outlined below:
| Table | Details |
|---|---|
| SA_AzureADInventory_Contacts | Contains a list of principal identifiers and their corresponding Department and Job Title |
| SA_AzureADInventory_Domains | Contains information about the domain such as last updated date and time |
| SA_AzureADInventory_EffectiveGroupMembers | Contains expanded group membership which includes a flattened representation of members and nesting levels |
| SA_AzureADInventory_Exceptions | Contains information about security issues and concerns See the AzureADInventory Exception Types Translated section for an explanation of Exception Types |
| SA_AzureADInventory_ExceptionTypes | Contains more detailed information about each security issues and concerns See the AzureADInventory Exception Types Translated section for an explanation of Exception Types |
| SA_AzureADInventory_ExtendedAttributes | Contains information gathered by the custom attributes component of the query configuration |
| SA_AzureADInventory_GroupMembers | Contains a map of groups to member Identifiers |
| SA_AzureADInventory_GroupOwners | Contains a map of groups to owner Identifiers |
| SA_AzureADInventory_Groups | Contains extended information about groups, mail enabled, security enabled, and so on |
| SA_AzureADInventory_Principals | Contains common attributes for users, groups, and computers as well as references to their primary display name and mail addresses |
| SA_AzureADInventory_Users | Contains extended information about users, department, title, and so on |
Views are the recommended way for you to obtain the information gathered by the AzureADInventory Data Collector. They contain additional information for building queries easily. The following is an explanation of the corresponding views created for some of the tables generated by the AzureADInventory Data Collector:
| Views | Details |
|---|---|
| SA_AzureADInventory_EffectiveGroupMembersView | Contains effective group membership information |
| SA_AzureADInventory_ExceptionsView | Contains principals that are identified to have security concerns as well as detailed security concern information |
| SA_AzureADInventory_GroupMembersView | Contains group membership information |
| SA_AzureADInventory_GroupOwnersView | Contains group owner information |
| SA_AzureADInventory_GroupsView | Contains group level information |
| SA_AzureADInventory_PrincipalsView | Contains common attributes from the principals table including additional domain details |
| SA_AzureADInventory_UsersView | Contains user information |
AzureADInventory Exception Types Translated
The following table translates the Type of Exceptions that can found.
| Type | Exception | Description |
|---|---|---|
| 1 | Large Groups | Groups with a large amount of effective members |
| 2 | Deeply Nested | Groups with deep levels of membership nesting |
| 3 | Circular Nesting | Groups with circular references in their effective membership |
| 4 | Empty Groups | Groups with no membership |
| 5 | Single Member Groups | Groups with a single direct member |
| 6 | Stale Users | Users that have not logged onto the domain for an extended period of time |
| 7 | Stale Membership | Groups with a high percentage of effective members that are stale users |
| 8 | Large Token | Users with a large amount of authorization groups in their token |
AzureADInventory: Summary
The Summary page is where configuration settings are summarized. It is a wizard page for both of the categories.
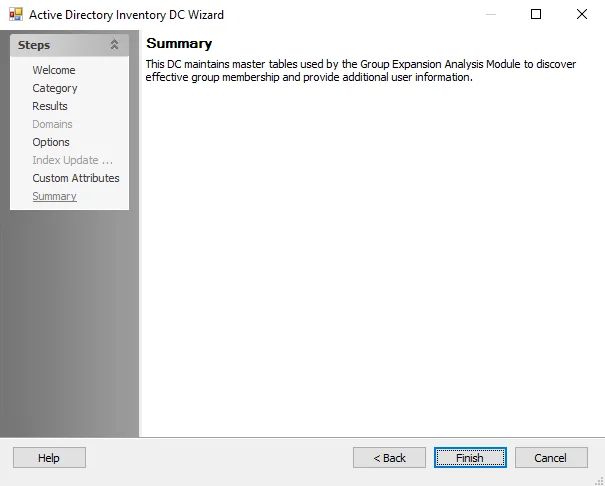
Click Finish to save configuration changes. If no changes were made, it is a best practice to click Cancel to close the Entra ID Inventory DC Wizard to ensure that no accidental clicks are saved.
Troubleshooting AzureADInventory Data Collector
Clear AzureADInventory Tables
Sometimes when troubleshooting an AzureADInventory issue, it becomes necessary to clear the standard reference tables. Follow the steps.
Step 1 – Create a new job and assign a query using the AZUREADINVENTORY Data Collector.
Step 2 – In the Entra ID Inventory DC Wizard on the Category page, select the Remove Tables category task.
Step 3 – Click Next and then Finish to close the Entra ID Inventory DC Wizard. Click OK to close the Query Properties window.
When the job is run, all of the AzureADInventory standard reference tables are removed from the database.
Troubleshooting Error Messages
Change the XML parameters to address the following errors:
Error: Microsoft.Graph.ServiceException: Code: timeout Message: The request timed out
Update the <MaximumNumberOfRetries> parameter to update the number of retries to run the query.
The default is 3.
Error: An existing connection was forcible closed by the remote host
Update the <MaxDeltaTokenAgeInDays> parameter to update the max delta token age. The default is 6.
See the View Job XML File topic for additional information.