Web Request: Destination
Use the Destination page to specify all settings for the destination of the web request.
Use the following categories to establish the location of the web request:
-
Insert field – Select a field using the drop-down menu
NOTE: The fields available varies based on the source table columns.
Destination Information
-
Method – Use the dropdown to select a method from the following:
- GET
- POST
- PUT
- DELETE
- HEAD
- OPTIONS
- PATCH
- MERGE
- COPY
-
Follow Redirects – Enables the web request to follow redirects
-
Combine SQL rows into single request – Enables bulk insertion of the number of rows specified into a single web request
- Rows – Select the number of rows to combine. The default is 50.
-
Resource – URL destination to send the data via the web request
- Select a field using the drop-down menu, place the cursor in the Resource textbox, and click the blue down-arrow to add it to the Resource box
- Manually enter a resource in the textbox
NOTE: A red circle with an x indicates that the Resource field cannot be empty.
-
Authentication – Select an authentication method from the following:
- None – No authentication
- Basic – Basic authentication
- JWT – JSON Web Token, a URL-safe authentication method
Basic and JWT authentications are pulled from the credential profile set in the job. It inserts that data into the authentication header of the web request with the proper format expected (for example, Basic [Base64 encoded credentials] or Bearer [JWT token] for Basic and JWT authentication respectively).
Test Connection
-
Drop-down menu – Select a method to test. Currently locked to GET.
-
URI textbox – Input the resource to receive the test message
-
Select a field using the drop-down menu, place the cursor in text area, and click the blue down-arrow to add it to the URI textbox
-
Manually enter a resource in the field
NOTE: Red circle with x indicates
Invalid URI: The format of the URI could not be determined.
-
-
Test – Tests the connection for the request using the first row of the source table
-
Text box – Shows log messages from the connection test
Web Request: Header
Use the Header page to enter the header values for the request.
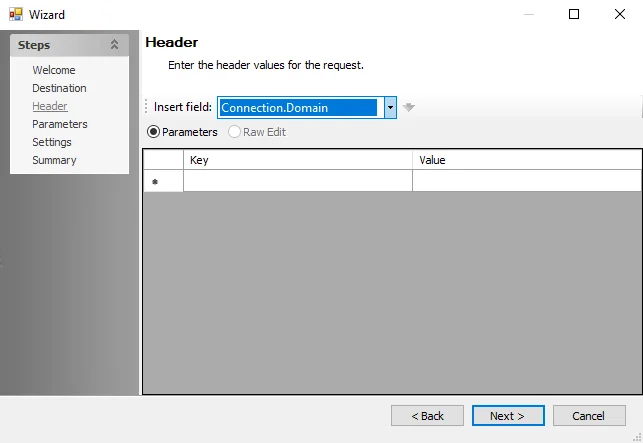
Use the following options to enter header values:
-
Insert field – Select a field to include in the request using the drop-down menu
NOTE: The fields available varies based on the source table columns.
-
Use the radio buttons to indicate:
- Parameters – Key value pairs to insert in the headers field of the web request
- Raw edit – Disabled for headers
-
Key / Value fields – The name or value of the attribute
- Select a field using the drop-down menu, place the cursor in the cell of the desired Key or Value, and click the blue down-arrow to add it to the selected cell
- Manually enter a field in the cell
WebRequest Action Module
The Web Request action module provides methods of applying bulk changes to REST endpoints. At this stage, target endpoints should be identified to invoke web requests against. This wizard allows the definition of requests to perform.
CAUTION: Ensure that only the changes required are applied and only those target systems desired when using this action module.
Configuration
The Web Request action module is configured through the Web Request Action Module Wizard, which contains the following wizard pages:
- Welcome
- Web Request: Destination
- Web Request: Header
- Web Request: Parameters
- Web Request: Settings
- Web Request: Summary
The Welcome page gives an overview of the action module. The navigation pane contains links to the pages in the wizard.
To proceed, click Next or use the Steps navigation pane to open another page in the wizard.
Web Request: Parameters
Use the Parameters page to enter the parameter values.
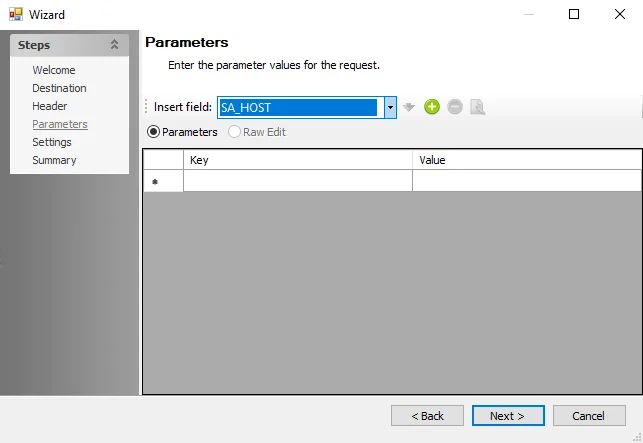
Enter parameter values using the following options:
-
Insert Field – Select a field to include in the request from the drop-down menu.
NOTE: The fields available varies based on the source table.
-
Green circle with plus sign – Add a custom attribute. This opens the Custom Attribute Editor Window. See the Custom Attribute Editor Window topic for additional information.
-
Red circle with minus sign – Remove a custom attribute
- Select a cell or row to remove the custom attributes
-
Paper and pencil – Edit a custom attribute. This opens the Custom Attribute Editor Window. See the Custom Attribute Editor Window topic for additional information.
-
Use the radio buttons to indicate:
- Parameters – Key value pairs to insert in the headers field of the web request
- Raw edit – Disabled for Parameters
-
Key / Value Fields – The name or value of the attribute
- Select a field using the drop-down menu, place the cursor in the cell of the desired Key or Value, and click the blue down-arrow to add it to the selected cell
- Select a cell and click the green circle with plus sign to open the Custom Attribute Editor window and add the attribute to the cell
- Manually enter a field in the cell
Custom Attribute Editor Window
Use the Custom Attribute Editor window to create a custom attribute using the existing attributes and advanced functions.
Create custom attributes using the following options:
-
Insert field – Select a field to insert using the drop-down menu
-
Unique name – Name of the custom attribute that will be created
- Select a field using the drop-down menu, place the cursor in the Unique name textbox, and click the blue down-arrow to add it to the Unique name textbox
- Manually enter the name
-
Data – The actual value of the custom attribute (can be database value or manually specified)
- Select a field using the drop-down menu, place the cursor in the Data textbox, and click the blue down-arrow to add it to the Data textbox
- Manually enter the data
-
Advanced Functions
- Split on – Split the data on the character specified in the text box. The default is comma
,.
- Split on – Split the data on the character specified in the text box. The default is comma
Web Request: Settings
Use the settings page to specify the settings for the web request.
Establish the settings using the following options:
-
Insert field – not applicable on this page
-
Input Table Rowkey – Select the column to use as the Enterprise Auditor key for reporting and built-in Enterprise Auditor functions
-
Include response in output table – When enabled, it records the body of the server’s response message in the actions output table
-
Execute multiple requests asynchronously – use a thread pool to manage requests
- Request count – Select the number of asynchronous requests to run simultaneously
Web Request: Summary
The Summary page displays a summary of the configured action.
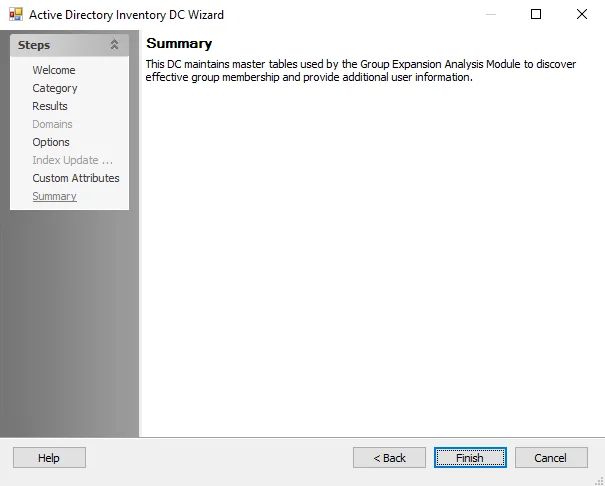
Click Finish to save configuration changes. If no changes were made, it is a best practice to click Cancel to close the Web Request Action Module Wizard to ensure that no accidental clicks are saved.