Add a Storage Profile
Follow the steps to create a Storage Profile.
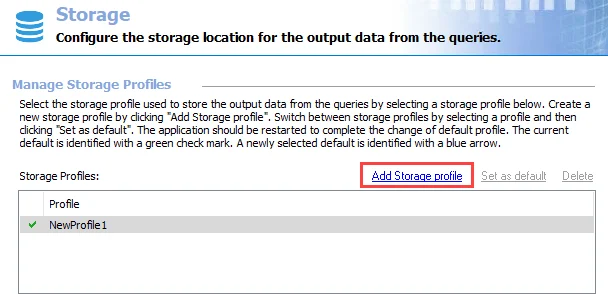
Step 1 – Click Add Storage profile at the top of the Storage view.

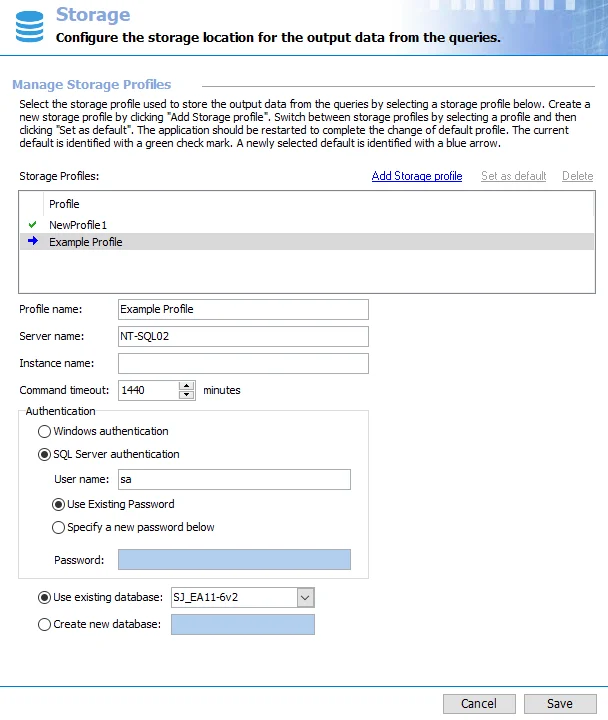
Step 2 – A new profile line appears in the Storage Profiles list with a generic name. Change the Profile name to a unique and descriptive name.

Step 3 – Type the SQL Server name in the textbox provided. This can be a NetBIOS name, a fully qualified domain name, or an IP Address. If the SQL Server specified is configured to use a named instance, provide the Instance name in the next textbox.

Step 4 – Specify the time in minutes that must expire before Enterprise Auditor halts any SQL queries running for that amount of time.

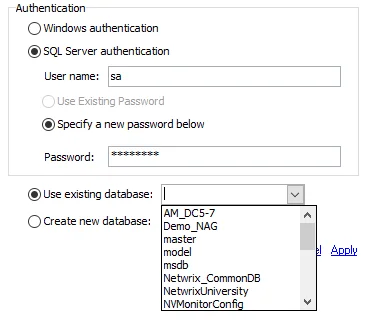
Step 5 – Select the radio button for the appropriate authentication mode. If using SQL Server authentication , provide a User name and Password in the textboxes.
RECOMMENDED: When possible, use Windows Authentication. Windows Authentication is more secure than SQL Server Authentication. See the Microsoft Choose an authentication mode article for additional information.
 |  |
|---|---|
| Good Connection Test | Bad Connection Test |
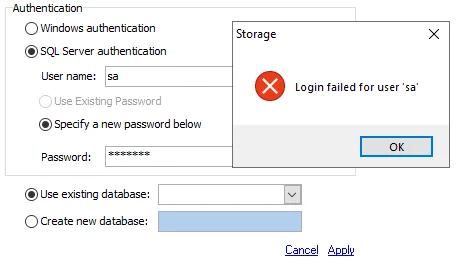
Step 6 – It is recommended to test the credentials provided at this point. The radio button for Use existing database should be selected by default. Test the SQL Server connection by clicking the drop-down arrow for an existing database. If the connection is established, a listing of databases appears. If the connection cannot be established, an error warning displays.

Step 7 – Set the database through one of the following options:
- Use existing database – Click this radio button and select a database from this list provided in the drop-down menu
- Create new database – Click this radio button and provide a unique, descriptive name in the textbox
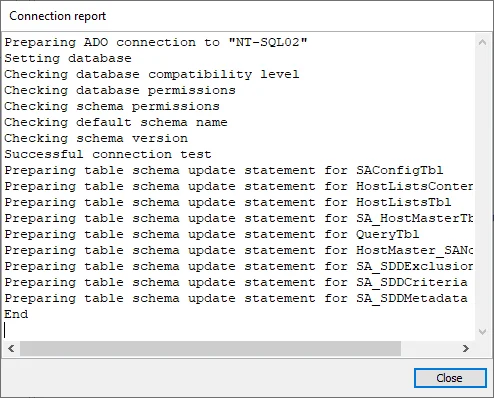
Step 8 – Click Apply and a Connection report window opens. The Connection report checks for
the appropriate permissions and lists any that are missing. If no permissions are present, an error
message appears in the Connection report window. When there is a Successful connection test, click
Close.
Step 9 – If Create new database was selected, the new database now exists. If Use existing database was selected, the Storage Profile is now linked to the database. Click Save and then OK to complete the creation of the new Storage Profile.
The new Storage Profile is available to be used by Enterprise Auditor.
Set a Default Storage Profile
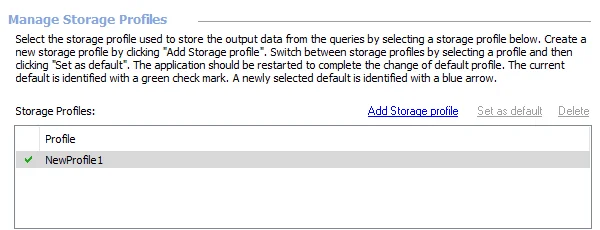
While multiple Storage Profiles can exist, only one profile can be set as the default. A green checkmark next to the profile name indicates the default Storage Profile. Follow the steps to change the default Storage Profile at the global level.

Step 1 – Select the profile to be the new default, and click Set as default. The Change storage profile window opens.
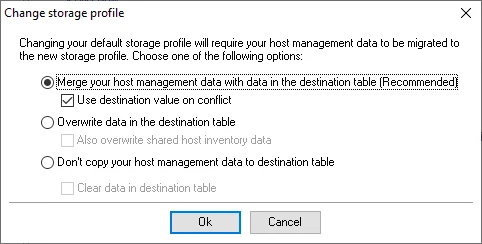
Step 2 – There are three options for host management data migration. Select the desired option, choose whether or not to apply the secondary option, and click OK.
-
Merge your host management data with data in the destination table (Recommended) – This option keeps existing hosts and host discovery tasks in the destination and updates the tasks based on the information found in the source database
- Use destination value on conflict – If selected, any conflicting information between the destination table and the source database is resolved in favor of the destination table
-
Overwrite data in the destination table – This option replaces existing hosts and host discovery tasks with ones found in the source database
- Also overwrite shared host inventory data – If selected, host inventory data is also replaced with data found in the source database
-
Don’t copy your host management data to destination table – This option does not copy, update, or overwrite information between databases
- Clear data in destination table – If selected, all host management data in the destination table is deleted

Step 3 – When the host management data migration has completed, click Finish.
Step 4 – A blue arrow now points to the new default Storage Profile. However, the arrow is also an indication that the new default is not fully recognized by Enterprise Auditor. Click Save and then OK to confirm the changes.
Step 5 – Finally, to ensure these changes take effect, exit the Enterprise Auditor application and relaunch it.
The blue arrow is replaced by the green checkmark, indicating the new default Storage Profile is recognized.
Delete a Storage Profile
Follow the steps to delete a Storage Profile.
NOTE: This procedure does not delete databases from the SQL Server. It only removes the selected Storage Profile from this Enterprise Auditor Console.

Step 1 – Select the Storage Profile to be removed, and click Delete.

Step 2 – Confirm the operation by clicking OK.
Step 3 – The profile disappears from the Storage Profiles list. Click Save and then OK to confirm the changes.
The Storage Profile has now been deleted.
Storage
The Storage node contains objects known as Storage Profiles. Storage Profiles house the information Enterprise Auditor uses to connect to a SQL Server database within your environment.

Each Storage Profile consists of the following parts:
-
Profile name – Unique, descriptive name which distinguishes the profile from others in cases where multiple profiles exist
-
Server name – Name of the SQL Server serving the database to be used for the Enterprise Auditor database. The value format can be either a NetBIOS name, a fully qualified domain name, or an IP Address.
-
Instance name – Value of the named instance, if the SQL Server being connected to is configured to use a named instance
- To change the instance port number, provide the instance name in the format
<Instance name>,<Port>. For example, if using the default MSSQLSERVER instance and port 12345, the instance name should be entered asMSSQLSERVER,12345.
- To change the instance port number, provide the instance name in the format
-
Command Timeout – Number of minutes before Enterprise Auditor halts any SQL queries running for that amount of time. This prevents SQL queries from running excessively long. The default is 1440 minutes.
-
Authentication – Mode of authentication to the SQL Server. In general, it is recommended to connect with an account configured with the DBO role (database owner rights) and provisioned to use DBO Schema.
RECOMMENDED: When possible, use Windows Authentication. Windows Authentication is more secure than SQL Server Authentication. See the Microsoft Choose an authentication mode article for additional information.
-
Windows authentication – Leverages the account used to run the Enterprise Auditor Console
NOTE: This option affects the credentials used for Schedule Service Accounts. See the Schedule topic for additional information.
-
SQL Server authentication – Leverages the account provided in the User name and Password textboxes
-
Use existing password – Use the password configured for the Storage Profile account
-
Specify a new password below – Enter a new password for the selected Storage Profile account
-
-
Database name – Name of the Enterprise Auditor database to use in this storage profile
- Use existing database – Drop-down menu provides a list of databases on the named SQL Server, provided the connection information supplied is correct. If the menu is empty, then a connection to the SQL Server was not established.
- Create new database – Enterprise Auditor automatically creates a new database using the name provided in the textbox. This value should be a unique, descriptive name.
At the Storage view, the following operations are available:
- Add Storage profile – Create a new Storage Profile. See the Add a Storage Profile topic for additional information.
- Set as default – Change the default Storage Profile. See the Set a Default Storage Profile topic for additional information.
- Delete – Remove a Storage Profile. See the Delete a Storage Profile topic for additional information.
NOTE: A green checkmark in the Storage Profiles list indicates the default Storage Profile.
The Cancel and Save buttons are in the lower-right corner of the Storage view. These buttons become enabled when modifications are made to the Storage global setting. Whenever changes are made at the global level, click Save and then OK to confirm the changes. Otherwise, click Cancel if no changes were intended.
The vault provides enhanced security through enhanced encryption to various credentials stored by the Enterprise Auditor application. See the Vault topic for additional information.
Update Authentication Credentials in a Storage Profile
Follow the steps to update authentication credentials for a Storage Profile in the Enterprise Auditor Console.
Step 1 – Navigate to the Settings > Storage page.
Step 2 – Locate and select a Storage Profile to update.
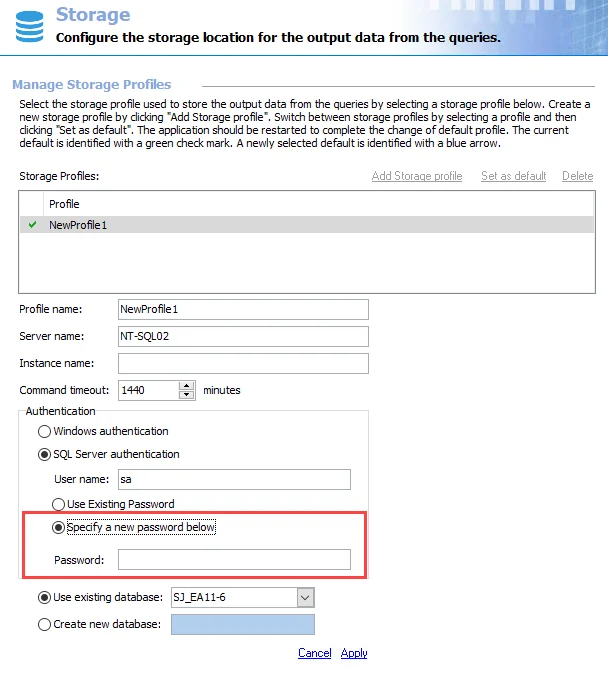
Step 3 – In the Authentication section, click the Specify a new password below radio button.
Step 4 – Enter a new Password.
Step 5 – Click Apply.
A new password has been added to a Storage profile.