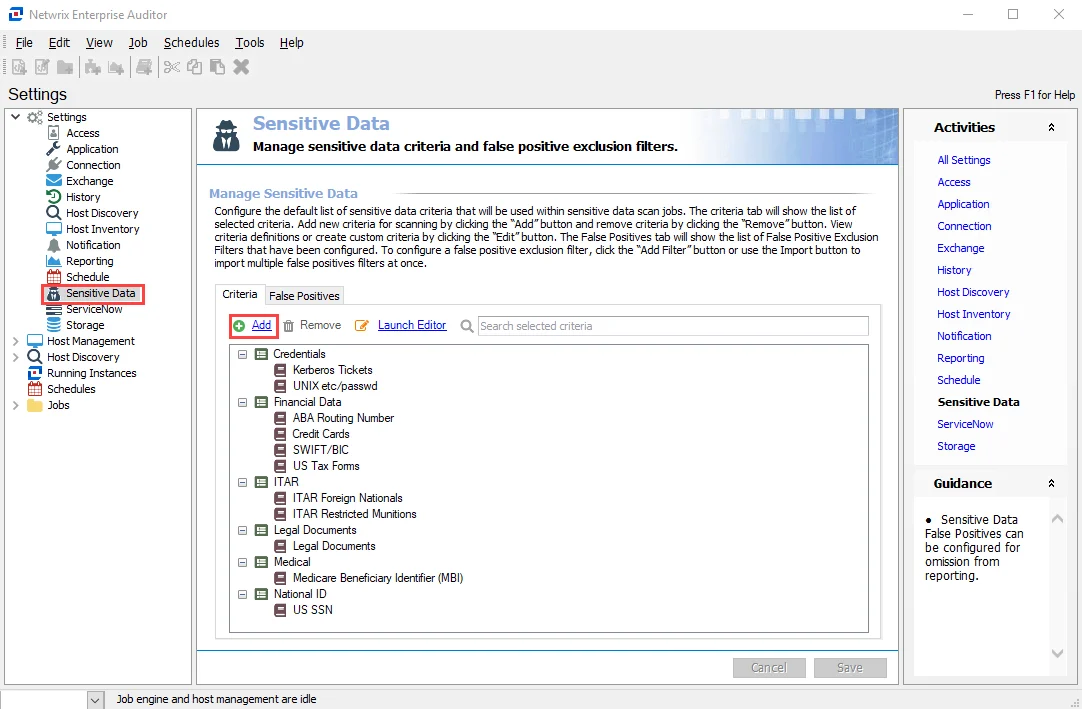
Criteria Tab
Configure the list of selected sensitive data criteria that will be used within sensitive data scan jobs using the Criteria Tab.

The options on the Criteria Tab are:
- Add – Opens the Select Criteria window to add search criteria that will be inherited by Sensitive Data scan jobs. See the Select Criteria Window topic for additional information.
- Remove – Removes the selected criteria from being inherited by Sensitive Data scan jobs
- Launch Editor – Opens the Sensitive Data Criteria Editor. See the Sensitive Data Discovery Add-On for additional information.
- Search selected criteria – Filter the criteria listed in the Criteria tab
The Cancel and Save buttons are in the lower-right corner of the Sensitive Data view. These buttons become enabled when modifications are made to the Sensitive Data global settings. Whenever changes are made at the global level, click Save and then OK to confirm the changes. Otherwise, click Cancel if no changes were intended.
Select Criteria Window
Follow the steps to add Search Criteria for Sensitive Data scan jobs.

Step 1 – Click Add to open the Select Criteria window.
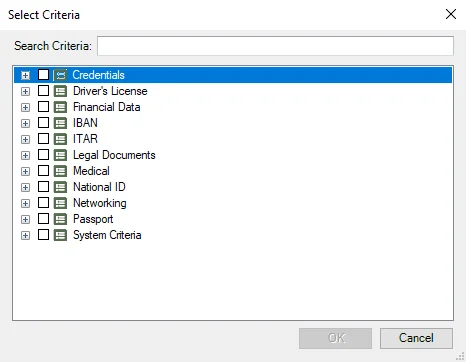
Step 2 – Select the checkbox to select the criteria. Use the Search Criteria text field to filter the list using keywords or expand each category to view and select individual Sensitive Data search criteria.
Step 3 – Click OK to confirm changes. The Select Criteria window closes.
Step 4 – Click Save on the Sensitive Data view to save changes.
The selected Search Criteria are now inherited by Sensitive Data scan jobs that are set to use global sensitive data criteria settings.
Adding False Positive Exclusion Filters
Follow the steps to add a False Positive Exclusion Filter.

Step 1 – Click Add Filter to open the Add False Positive Exclusion Filter window.

Step 2 – Enter the File Path according to the type of format for the repository.
Step 3 – Indicate the type of repository by selecting either File System or SharePoint from the Source drop-down menu.
Step 4 – Select the required criteria from the list by selecting the relevant checkboxes. You can use the Search Criteria textbox to filter the list by keywords.
Step 5 – Click OK to add the filter to the False Criteria list. The Add False Positive Exclusion Filter window closes.
Step 6 – Click Save on the Sensitive Data view to save changes.
The false positive exclusion filter is now applied to Sensitive Data reports.
Deleting False Positive Exclusion Filters
Follow the steps to delete a False Positive Exclusion Filter.
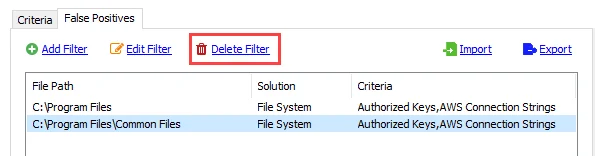
Step 1 – Select a filter from the list and click Delete Filter.
Step 2 – Click Save on the Sensitive Data view to save changes.
The false positive exclusion filter has been successfully deleted.
Editing False Positive Exclusion Filters
Follow the steps to edit a False Positive Exclusion Filter.
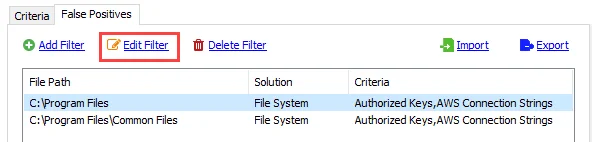
Step 1 – Click Edit Filter to open the Edit False Positive Exclusion Filter window.
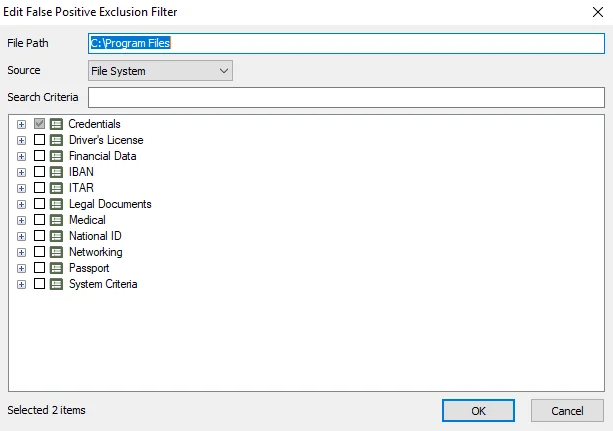
Step 2 – Make modifications to the File Path, Source type, and Search Criteria.
Step 3 – Click OK to confirm changes. The Edit False Positive Exclusion Filter window closes.
Step 4 – Click Save on the Sensitive Data view to save changes.
The false positive exclusion filter has been successfully edited.
Exporting False Positive Exclusion Filters
Follow the steps to export selected False Positive Exclusion Filters into a TXT file.
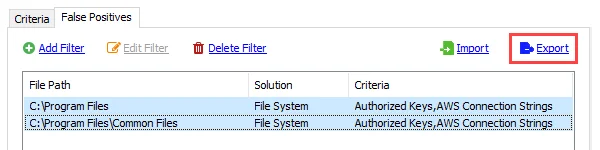
Step 1 – Select the false positive exclusion filters to export and click Export. The File Explorer opens.
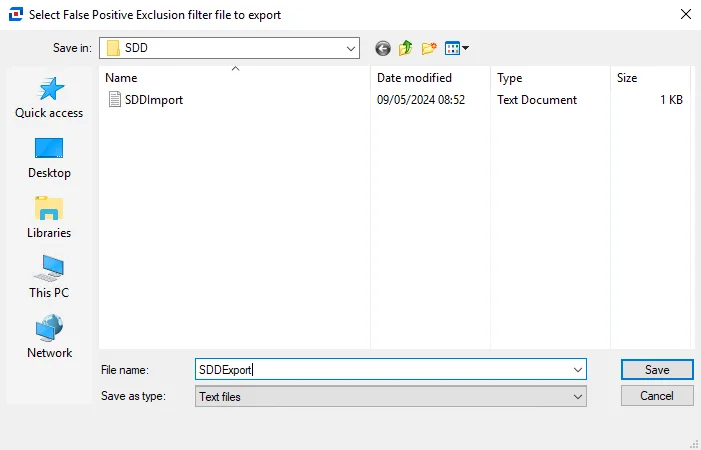
Step 2 – Enter a File name for the TXT file that the exported false positive exclusion filters will be contained in. Click Save.
The False Positive Exclusion Filters are now exported.
Importing False Positive Exclusion Filters
Create an import (TXT) file containing a list of file paths for the files to be excluded from Sensitive Data reports. The text file should have one file path per row. The import file needs to be scoped to a single solution and a criteria set.
Follow the steps to import a list of False Positive Exclusion Filter.
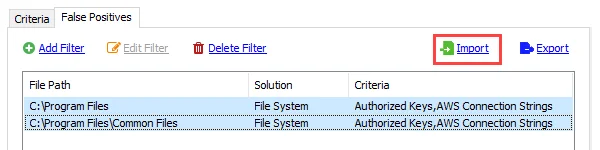
Step 1 – Click Import to open the Select False Positive Exclusion Filter file to import window.
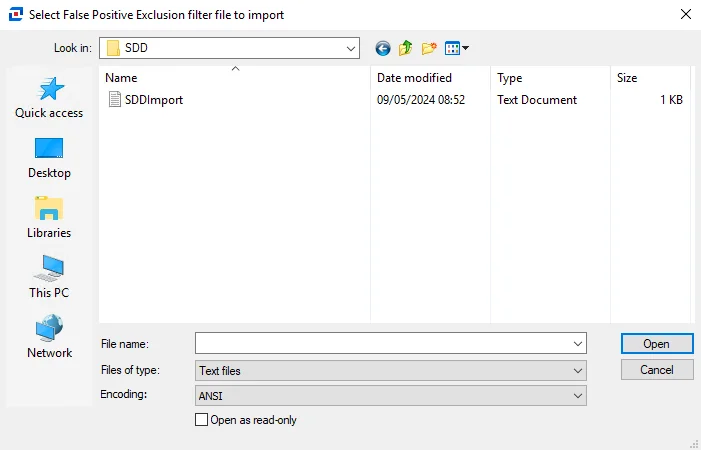
Step 2 – Navigate to the file that will be imported. Select the file and click Open. The Configure Imported False Positive Exclusion Filters window opens.
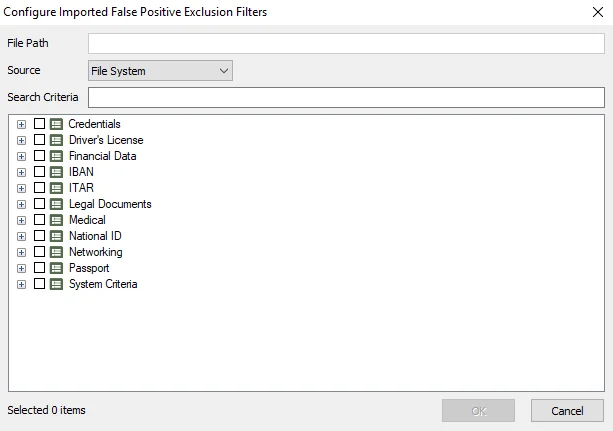
Step 3 – Select the repository type from the Source drop-down menu.
Step 4 – Select the required criteria from the list. You can use the Search Criteria textbox to filter the list by keywords.
Step 5 – Click OK to confirm configurations. The Configure Imported False Positive Exclusion Filters window closes.
Step 6 – Click Save on the Sensitive Data view to save changes.
The imported list of False Positive Exclusion Filters are now applied to Sensitive Data reports. If all of the files in the import were not meant to have the same Source and Criteria set, see the Editing False Positive Exclusion Filters topic for additional information.
False Positives Tab
Configure False Positive exclusion filters using the options in the False Positives tab. False Positives Filters listed here as False Positives results in the corresponding matches being removed from Enterprise Auditor and Access Information Center reports.

The options under the False Positives Tab are:
- Add Filter – Opens the Add False Positive Exclusion Filter window to add False Positive Exclusion Filters. See the Adding False Positive Exclusion Filters topic for additional information.
- Edit Filter – Opens the Edit False Positive Exclusion Filter window to edit the selected filters in the list. See the Editing False Positive Exclusion Filters topic for additional information.
- Delete Filter – Deletes the selected false positive exclusion filter. See the Deleting False Positive Exclusion Filters topic for additional information.
- Import – Imports a text file to populate the False Positives tab with False Positive Exclusion Filters. See the Importing False Positive Exclusion Filters topic for additional information.
- Export – Exports selected false positive exclusion filters in a text file. See the Exporting False Positive Exclusion Filters topic for additional information.
The False Positives view displays the following information for the False Positive Exclusion Filters:
-
File Path – Path of the file to be excluded from Sensitive Data reports
-
Solution – Solution source of the exclusion filter. The two solution sources are:
- File System
- SharePoint
-
Criteria – Sensitive Data criteria where the exclusion filter is applied
The Cancel and Save buttons are in the lower-right corner of the Sensitive Data view. These buttons become enabled when modifications are made to the Sensitive Data global settings. Whenever changes are made at the global level, click Save and then OK to confirm the changes. Otherwise, click Cancel if no changes were intended.
Sensitive Data
The Sensitive Data node provides configuration options to manage sensitive data criteria and false positive exclusion filters. These settings require the Sensitive Data Discovery Add-on. See the Sensitive Data Discovery Add-On topic for additional information.
NOTE: Sensitive data exclusion filters can only be applied to the File System Solution and the SharePoint Solution.
The tabs in the Sensitive Data node are:
- Criteria – Configure Search Criteria to be used in Sensitive Data scan jobs. See the Criteria Tab topic for additional information.
- False Positives – Configure False Positive exclusion filters. See the False Positives Tab topic for additional information.