Custom Reports
You can define a filter set and create a custom report based on the filter so that you will not have to set it up next time.
Create a Custom Report
Follow the steps to create a custom report.
Step 1 – Click Reports in the top bar to navigate to the Reports page. By default, the page opens to the Activity tab with New Investigation selected in the left pane.
Step 2 – Select an organization from the drop-down menu at the top of the left pane to create a custom report for it. An organization is selected by default, but you can choose a different one if needed.
Step 3 – Define a filter criteria. See the Apply Filters topic for additional information.
Step 4 – Click Save as in the upper right corner of the page. The Create Report pane is displayed.
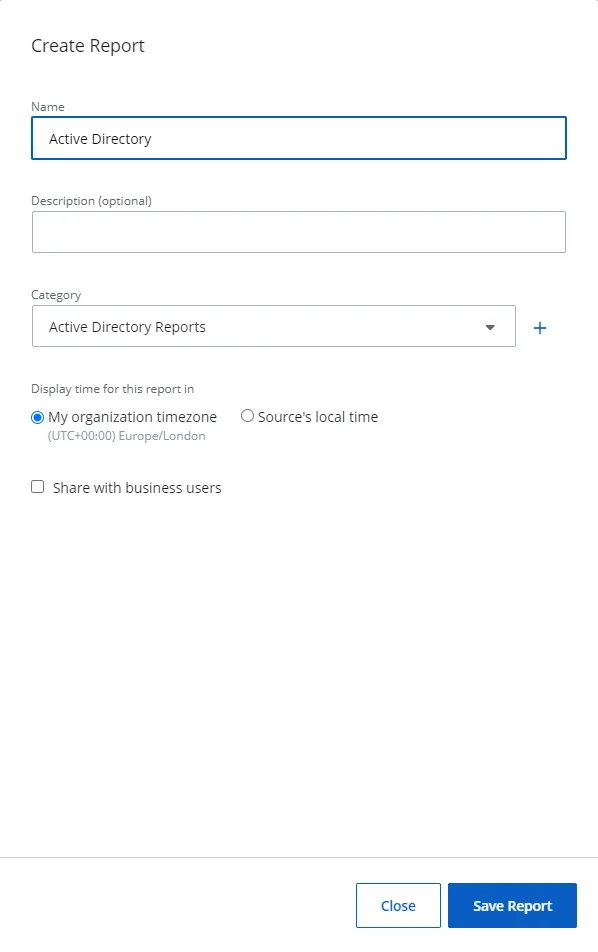
Step 5 – In the Create Report pane, specify a name and description for the report in the Name and Description fields.
Step 6 – From the Category drop-down menu, select an existing category or add a new one for the
report. The category is used to group related reports together.
To add a new category, click the Add icon, specify a name, and click the Save icon. The new category
is added.
Step 7 – For Display time for this report in, select an option to display the time the report is generated.
- My Organization timezone – The timezone set for your organization
- Source's local time – Local time for your source obtained from the agent server. (Recommended when applying the Time of Day filter)
Step 8 – Optionally, select the Share with business users check box to share the report with business users. See the Add the Business Viewer Role topic for additional information on shared reports.
NOTE: This check box is not available for End Customer Organizations.
Step 9 – Click Save Report.
Your custom report is created under the respective category.
NOTE: You may link this report to an alert. See the Add a Custom Alert topic for additional information.
Modify a Custom Report
Follow the steps to modify a custom report.
Step 1 – Click Reports in the top bar to navigate to the Reports page. By default, the page opens to the Activity tab with New Investigation selected in the left pane.
Step 2 – Select an organization from the drop-down menu at the top of the left pane to access its reports. An organization is selected by default, but you can choose a different one if needed.
Step 3 – In the left pane, click a category to view its reports.
Step 4 – Click a custom report to open it. Predefined reports and custom reports are represented by different icons, enabling you to distinguish between them.
Step 5 – Click Edit to modify the report. The Edit Report pane is displayed.
Step 6 – Modify the required information. See Step 5 through 8 in the Create a Custom Report topic for additional information.
Step 7 – Click Save Report.
Delete a Custom Report
Follow the steps to delete a custom report.
Step 1 – Click Reports in the top bar to navigate to the Reports page. By default, the page opens to the Activity tab with New Investigation selected in the left pane.
Step 2 – Select an organization from the drop-down menu at the top of the left pane to access its reports. An organization is selected by default, but you can choose a different one if needed.
Step 3 – In the left pane, click a category to view its reports.
Step 4 – Click a custom report to open it. Predefined reports and custom reports are represented by different icons, enabling you to distinguish between them.
Step 5 – Click Delete. A dialog box is displayed, prompting you to confirm the action. Click Delete.
The custom report is deleted from the system.