Add a Source and Connectors for SQL Server
Follow the steps to add a SQL Server data source and connector to your organization.
Step 1 – Click Configuration in the top bar. The Managed organizations page is displayed, that lists the managed organizations defined in 1Secure.
Step 2 – Click an organization to define a data source and connector(s) for it. The properties page for the organization is displayed with the Sources tab selected by default.
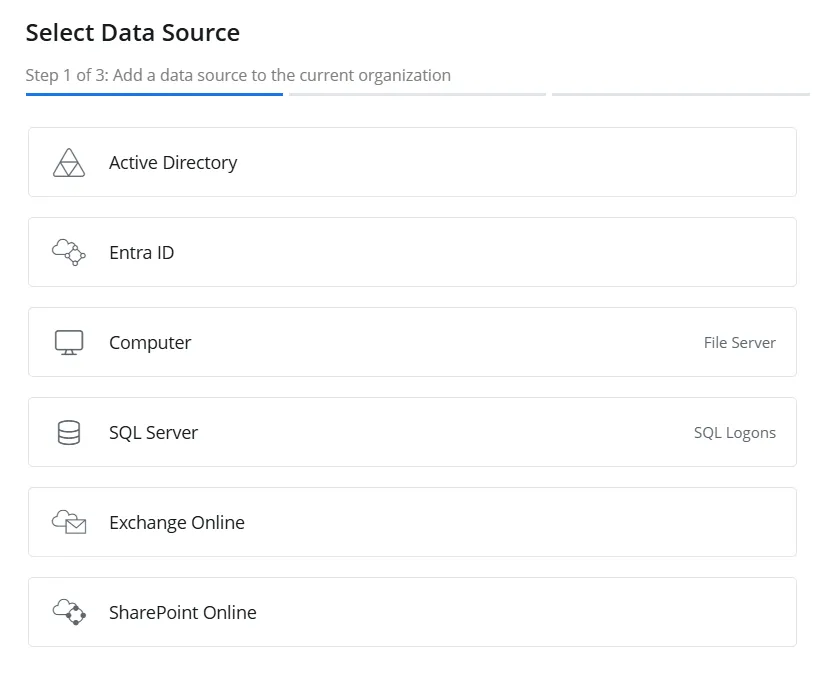
Step 3 – On the Sources tab, click Add to add a source. The Select Data Source (Step 1 of 3) pane is displayed.

Step 4 – Select SQL Server and click Next.
-b84259838060e232016683a6318df57d.webp)
Step 5 – On the Configure source details (Step 2 of 3) pane, use the Site drop-down menu to select an existing site or add a new one. To add a new site, select the Add new site option from the drop-down menu or click the Add icon.
-
When you choose to add a new site, you have to provide a name for it in the New site name field. Then click Next to proceed with configuring the agent for the site. See the Install Agent topic for details on configuring the agent, starting at Step 6.
-
When you select an existing site from the drop-down menu, one of the following happens:
- If the agent has not been configured for the site, the system will proceed with the agent configuration when you click Next. See the Install Agent topic for details on configuring the agent, starting at Step 6.
- If the agent has already been configured for the site, the system will proceed with the SQL Server source and connector settings when you click Next.
Step 6 – Click Next.
a-25fd279e2de9eb8f2b9642ce8dc40e38.webp)
Step 7 – Specify the following settings:
-
Source Group – Specify a name for the group to which the data source will belong. Grouping sources, such as computers, allows them to share a common configuration and makes it easier to manage related sources together.
-
SQL Server Name – Specify the name of the SQL Server instance, for example, StationDB\SQLExpress or StationSQL
-
Crawl Source – Toggle this option to ON to enable data collection for the source
-
Credentials – Displays the crdentials that have already been added, while also providing the option to add new credentials. Netwrix 1Secure uses these credentials to connect to the data source. You can select existing credentials or add new ones. To add new credentials, select Add new Credentials from the drop-down menu or click the Add icon, then specify the following:
-
Username – The username of the SQL Server account
-
Password – The password of the account
The newly added credentials are also displayed in the drop-down menu.
-
Step 8 – Click Next.
-90235de0a38f433700591e69846732eb.webp)
Step 9 – The Choose new connector (Step 3 of 3) pane lists one connector for SQL Server. Toggle the SQL Logons switch to ON to collect and monitor data for this connector. With this, you can generate logon reports on SQL Server data. See the SQL Database topic for additional information.
Step 10 – Choose one option from the following:
-
Audit all accounts – Select this option to audit all accounts within the connector
-
Audit specific accounts – Select this option to audit only the specific account(s) within the connector. After selecting this option, specify the account(s) to be audited in the field below.
To specify an account, enter its name and click the Add icon. To audit multiple accounts, add them one by one.NOTE: To include all accounts in a domain, use the format: MYDOMAIN\*.
-
Audit all accounts except – Select this option to audit all accounts within the connector, except for specific ones you want to exclude. After selecting this option, specify the accounts to be excluded in the field below.
To specify an account, enter its name and click the Add icon. To exclude multiple accounts, add them one by one.NOTE: To exclude all accounts in a domain, use the format: MYDOMAIN\*.
Step 11 – Click Finish.
The SQL Server data source and connector have been configured.