Microsoft Entra ID Auditing
The product supports Microsoft Entra ID (formerly Azure AD) provided within Microsoft Office 365.
Netwrix 1Secure allows you to audit Office 365 organizations that have established modern authentication as their identity management approach, including support for multi-factor authentication (MFA).
In this scenario, Netwrix 1Secure will access the cloud-based infrastructure via Microsoft Graph and other modern APIs, being authenticated through a pre-configured Microsoft Entra ID application with appropriate access permissions. So, you should register a Microsoft Entra ID app and provide its settings to Netwrix 1Secure when configuring a monitored item.
Multi-factor Authentication
Support for modern authentication will allow you to audit the organizations where MFA is enabled for all users, including service accounts. See the App Registration and Configuration in Microsoft Entra ID topic for additional information.
Add a Source and Connectors for Microsoft Entra ID
Follow the steps to add a Microsoft Entra ID data source and connector(s) to your organization.
Step 1 – Click Configuration in the top bar. The Managed organizations page is displayed, that lists the managed organizations defined in 1Secure.
Step 2 – Click an organization to define a data source and connector(s) for it. The properties page for the organization is displayed with the Sources tab selected by default.
Step 3 – On the Sources tab, click Add to add a source. The Select Data Source (Step 1 of 3) pane is displayed.
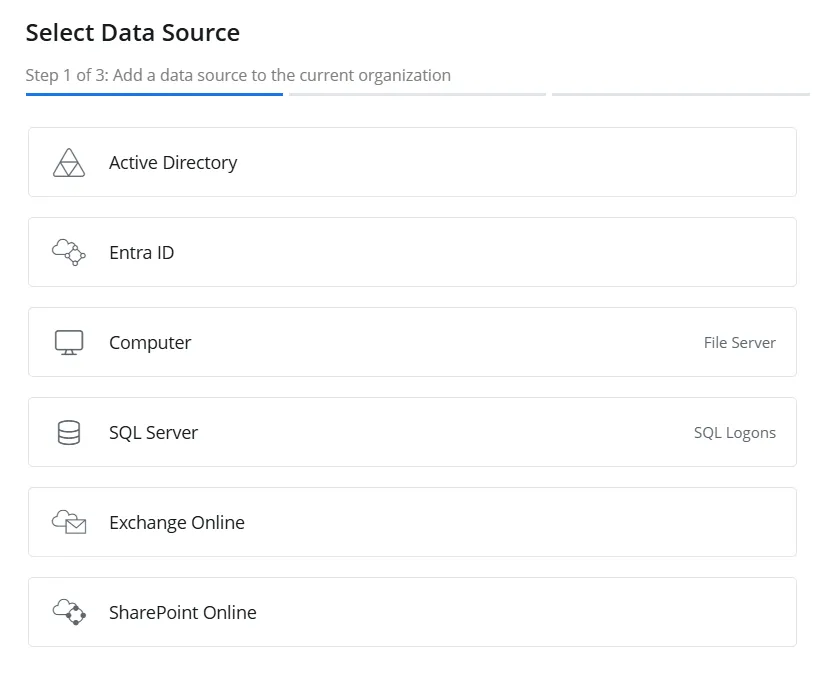
Step 4 – Select Entra ID and click Next.
-e4df83c309a8671515daa0d806a0dbbb.webp)
Step 5 – On the Configure source details (Step 2 of 3) pane, specify the following settings:
-
Source Group – Specify a name for the group to which the data source will belong. Grouping sources, such as computers, allows them to share a common configuration and makes it easier to manage related sources together.
-
Tenant ID – The tenant ID of the app registered in Microsoft Entra ID. See the App Registration and Configuration in Microsoft Entra ID topic for additional information.
-
Crawl Source – Toggle this option to ON to enable data collection for the source
-
Service Account Entra ID Groups – Specify Microsoft Entra ID groups to exclude their service accounts from billable domain accounts so that they are not audited. To specify a Microsoft Entra ID group, enter its name and click the Add icon. To specify multiple Microsoft Entra ID groups, add them one by one.
-
Credentials – Displays the crdentials that have already been added, while also providing the option to add new credentials. Netwrix 1Secure uses these credentials to connect to the data source. You can select existing credentials or add new ones. To add new credentials, select Add new Credentials from the drop-down menu or click the Add icon, then specify the following:
- Client ID – The client ID of the app registered in Microsoft Entra ID. See the App Registration and Configuration in Microsoft Entra ID topic for additional information.
- Client Secret – The client secret of the app registered in Microsoft Entra ID. See the App Registration and Configuration in Microsoft Entra ID topic for additional information.
- Download Certificate – For certain connectors, such as SharePoint Online State, authentication requires a certificate instead of a client secret. Download this certificate and then upload it to the app registered in Microsoft Entra ID. See the Upload a Certificate topic for additional information.
- Display Name – Specify a name you want to show for your credentials. It will be displayed on the Credentials tab of the Managed Organizations page.
Step 6 – Click Next.
-27a91662fbab51abe7ec5ddc87e9e452.webp)
Step 7 – The Choose new connector (Step 3 of 3) pane lists three connectors for Microsoft Entra ID. Specify the following:
-
Entra ID Activity – Toggle the Entra ID Activity switch to ON to collect and monitor data for this connector. With this, you can generate activity reports on Microsoft Entra ID data. See the Microsoft Entra ID topic for additional information.
-
Entra ID Logons – Toggle the Entra ID Logons switch to ON to collect and monitor data for this connector. With this, you can generate logon reports on Microsoft Entra ID data. See the Microsoft Entra ID topic for additional information.
- Collect Failed Logons – Select this checkbox to collect the failed logon data for Microsoft Entra ID logon reports.
- Collect Successful Logons – Select this checkbox to collect the successful logon data for Microsoft Entra ID logon reports.
-
Entra ID State – Toggle the Entra ID State switch to ON to collect and monitor data for this connector. With this, you can generate state-in-time reports on Microsoft Entra ID data. See the State In Time Risks Reports topic for additional information.
Step 8 – Click Finish.
The Microsoft Entra ID data source and connector(s) have been configured.